Previous releases
Please find information about the 8x8 Admin Console previous releases here:
Administrators can now allow users of 8x8 Work apps to log in or log out of their assigned ring groups, giving teams greater flexibility and improving call-handling efficiency. This new capability is controlled directly in the Ring Group settings within the 8x8 Admin Console.
Previously, all ring group members were always active, even if they were busy or unavailable, which often resulted in unnecessary call alerts. With this enhancement, admins can enable selective availability, allowing users to control when they receive Ring Group calls.
Benefits
- Flexible user availability: Users can manually log in or out of their ring groups from 8x8 Work for Desktop or supported IP phones.
- Better call routing: Prevents ringing users who are unavailable, improving customer experience and reducing missed calls.
- Administrative control: Admins can adjust a member’s availability at any time from the 8x8 Admin Console.
- Ideal for busy environments: Retail, reception, or shared-duty teams can avoid being alerted when occupied with other tasks.
How it works
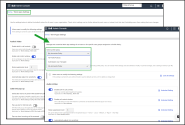
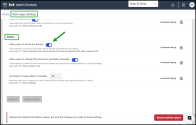
A new Allow members to log in and out from this ring group setting is now available in the Ring Groups configuration.
- When enabled: Users can manually toggle their availability in 8x8 Work apps, logging in or out of the group as needed.
- When disabled (default): Users are automatically logged in and always receive ring group calls.
How to enable login/logout for a Ring Group
- Log in to 8x8 Admin Console.
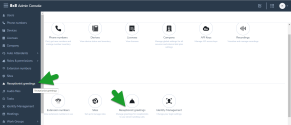
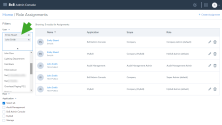
- Go to Home > Ring Groups.
- Click Edit
 next to the desired ring group.
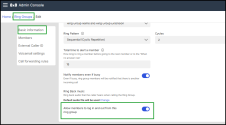
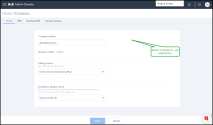
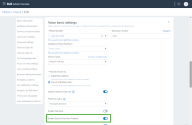
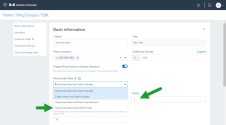
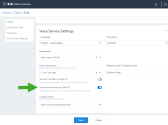
 - Under Basic information, locate Allow members to log in and out from this ring group.
- Toggle On this option to allow user-controlled login/logout. Otherwise, toggle Off.
- Click Save.
How to adjust member availability (Admin-Controlled)
Admins can update a user’s login status at any time.
- Go to Home > Ring Groups.
- Click Edit
 next to the desired ring group.
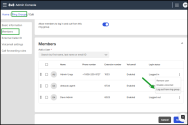
 - Open the Members section.
- In the user row, click More
 .
. - Select Log in to ring group or Log out from ring group.
- You can quickly check login status for each user in the Members table under Login Status column.
To learn more, see Set up Ring Groups.
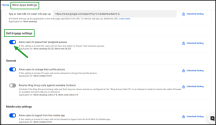
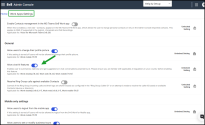
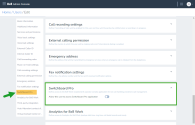
Administrators can now use the new Display ring groups without login/logout control setting in Work Apps Settings to control the visibility of non-interactive ring groups in 8x8 Work for Desktop and Web. This helps reduce clutter and makes the Ring Groups tab in 8x8 Work for Desktop and Web easier to navigate by allowing admins to hide ring groups that users cannot log into or out of.
Visibility behavior for non-interactive ring groups
Admins can manage visibility through the Display ring groups without login/logout control setting in the Work Apps Settings section:
- When enabled: Users see all assigned ring groups, including those without login/logout permissions.
- When disabled: Users see only ring groups that support manual login/logout.
- Default setting Disabled (OFF): Non-interactive Ring Groups are hidden by default
Benefits
- Cleaner interface: Users see only ring groups they can actively manage.
- Reduced confusion: Hides backend routing groups not meant for direct user interaction.
- Simplified layout: Automatically removes the Ring Groups tab when no interactive groups are available.
- Improved clarity: Users have a more focused workspace with fewer distractions.
How to configure the setting
- Log in to the 8x8 Admin Console.
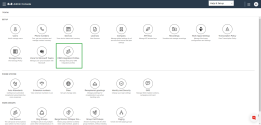
- Go to Home > Work Apps Settings.
- Select a Profile Policy apply the change to All Profile Policies.
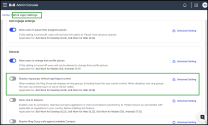
- Under the General, locate Display ring groups without login/logout control.
-
Choose one of the following:
- Toggle ON – Show all ring groups, including non-interactive ones.
- Toggle OFF – Show only ring groups that support login/logout.
- Click Save to apply your changes.
To learn about how to manage settings for 8x8 Work applications, see Configure Work Apps Settings.
With this release, administrators have the ability to configure multiple Single Sign-On (SSO) identity providers in the 8x8 Admin Console.
This new feature adds support for multiple SSO integrations, including Okta, Azure AD, Google, and other SAML-compliant providers, offering greater flexibility during mergers, migrations, and across distinct business units.
Benefits
- Support multiple SSO identity providers within the same 8x8 tenant.
- Easily switch or add new providers without interrupting login flows.
- Enable different SSO setups for distinct user groups or acquired companies.
- Simplify transitions during migrations or organizational changes.
- Simplifies identity management across complex organizations, enabling smooth, secure transitions and unified access control.
Note: A user can only be assigned to one active SSO provider at a time.
Example of use cases
-
Post-Acquisition Onboarding
When Company A acquires Company B, and each uses a different SSO provider, both configurations can remain active during the transition period.
Before fully migrating Company B’s users to Company A’s SSO infrastructure, Company A can move Company B’s users to 8x8 communication tools using their existing SSO provider.
With Multiple SSO Providers, Company A can temporarily assign users to their original authentication system, ensuring immediate access to 8x8 applications without waiting for the full SSO migration to complete.
This enables a smooth, secure, and uninterrupted transition between systems.
-
Independent Business Units
Organizations with multiple divisions or subsidiaries—each using separate Identity Provider (IdP) instances, such as Azure AD—can assign a different SSO provider to each group.
This allows independent teams to maintain their own authentication systems while still accessing shared 8x8 apps and services across the organization.
How It Works
Configuring multiple SSO providers in the 8x8 Admin Console allows admins to support different identity systems across teams or subsidiaries.
- Set up a SAML 2.0 integration in your organization’s IdP (such as Okta, Azure AD, Google). This enables the IdP to pass authorization credentials to 8x8.
Note: The process varies among the identity and security service providers. Check with your company administrator to determine which service provider your company has adopted. The process is typically managed by your administrator.
To learn more about Multiple Single Sign-On providers, see Set up multiple Single Sign-On integrations.
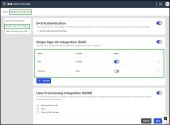
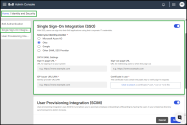
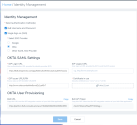
Set up Single Sign-On (SSO) and specify your organization’s identity provider in 8x8 Admin Console.
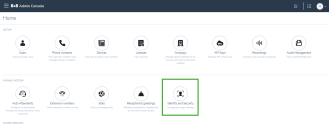
- Go to Home > Identity and Security.
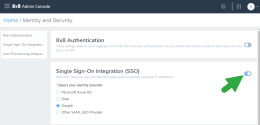
- Switch on the Single Sign-On (SSO) toggle to enable the integration.
- Choose the provider, such as Azure AD, Okta, Google, or other SAML-compliant provider.
- Enter the required SAML 2.0 settings and upload the security certificate obtained from your provider.
- Click Save.
For detailed configuration steps, see Set up Single Sign-On for 8x8 Admin Console.
User provisioning using SCIM 2.0 is optional, but recommended. It automates user onboarding and offboarding by synchronizing user data from your identity provider to the 8x8 Admin Console. Without SCIM, administrators must manually create and manage users in both systems.
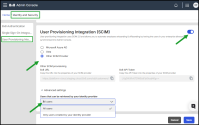
- Go to Home > Identity and Security.
-
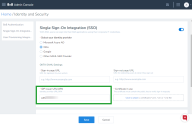
Switch on the User Provisioning Integration (SCIM) toggle to enable automatic synchronization of user data between your identity provider and 8x8 Admin Console.
Note: Turning off the toggle stops synchronization from your identity provider and clears the SCIM authentication token.
-
Under User Provisioning Integration (SCIM), select your provider:
- Microsoft Azure AD – Enables user synchronization via Azure AD.
- Okta – Enables user synchronization via Okta.
- SAML SSO provider – Enables user synchronization through another SAML-compliant provider.
-
In the configuration section, add the required information for your selected provider:
-
8x8 URL: Copy and paste this URL into your SCIM provider’s configuration page.
-
8x8 API Token: Copy and paste the API token from 8x8 into your SCIM provider’s configuration.
-
-
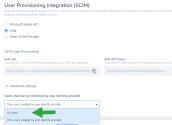
Under Advanced Settings, choose how users should be retrieved:
- All Users (Default) – Retrieves users created in both the 8x8 Admin Console and the identity provider. If a user exists in both systems and their login IDs match, the identity provider takes control of that profile.
- Only Users Created by Your Identity Provider – Retrieves only users created and synced from your identity provider.
- Click Save Settings.
For detailed configuration steps, see Set up user provisioning integration.
Helpful Notes
- Each user can be assigned to only one active provider.
- The login experience does not change for users.
- This configuration supports federated identity management with SAML 2.0–compliant providers.
Learn More
The 8x8 Work SMS support has been extended to Australian mobile numbers. With this update, Australian users can now send and receive SMS messages directly from 8x8 Work, using local mobile numbers.
License eligibility and requirements
- License tiers: Available for X1–X8 licenses.
- Mobile numbers: Supported only for Australian mobile numbers in the format +61 4XXXXXXXX
Features
- Admin control: Enable or disable SMS on a per-number basis in 8x8 Admin Console.
- Consistent workflow: Uses the same enable/disable process as US/Canada SMS.
- Phone number types: No changes required for phone number types in 8x8 Admin Console.
Limitations
- SMS can be sent and received only between Australian mobile numbers.
- New Zealand numbers are currently not supported (carrier limitations).
- RCS/MMS and group messaging are not supported.
- Only one SMS-enabled number can be active per user at a time.
Benefits
- Flexible licensing: Available from entry-level X1 license, making SMS accessible to more users.
- Efficiency: Familiar workflow for admins across regions, enabling changing and applying within minutes.
How to enable Australian SMS numbers
Administrators can enable Australian SMS mobile numbers using the same process used for the US or Canada. Users must already have an Australian mobile number in the 8x8 Work service.
To enable SMS for a new or existing user with Australian mobile numbers:
- Go to Home > Users,
- Click Edit
 in the desired user row.
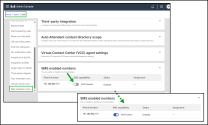
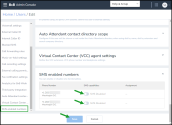
 - Under SMS enabled numbers, toggle SMS Disabled On for the desired phone number(s).
- Click Save.
The status changes to Pending while provisioning occurs. Status will update to:
- Enabled (success)
- Enabling Failed (error)
Notes:
-You can only enable SMS for one phone number at a time, even if a user has multiple numbers assigned.
- To switch the enabled SMS number, click SMS Disabled next to the desired number. This action will automatically disable SMS for the previously enabled number.
To find more about enabling SMS numbers for 8x8 Work, see Add 8x8 Work users - How do I enable or disable users SMS capability.
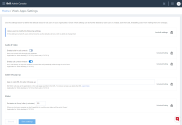
The Work Apps Settings section in the 8x8 Admin Console provides centralized management of 8x8 Work for Desktop, Web, Mobile, and Engage.
Admins can now configure settings based on Profile Policies, allowing different configurations for specific user groups while keeping organization-wide defaults for everyone else.
Before vs After
| Before (Previous Versions) | After (New Release) | |
|---|---|---|
| Configuration Scope | One global configuration applied to all users organization-wide. | Separate configurations can be applied to specific user groups via Profile Policies. |
| Granularity Control | Granularity Control All features are enabled with the same default values. No group-specific differentiation is applied. | All features are enabled with the same default values. No group-specific differentiation is applied. Different feature settings can be applied to specific user groups by selecting a Profile Policy. This allows for tailored behavior across user groups. |
| Flexibility | Changing a setting affected everyone. | Customize settings per policy while maintaining global defaults. |
| Override Behavior | Override Behavior Only one configuration level existed. | Profile Policy settings override global defaults for that group. |
| Use Case | Could not separate user group or departmental behaviors. | Admins can, for example, set different call or notification behaviors for Sales vs Support. |
Why it matters
- Flexibility: Apply different default settings for Desktop, Web, Mobile, or Engage users.
- Granular control: Assign settings to departments or specific groups.
- Efficiency: Maintain organization-wide defaults while fine-tuning exceptions for subsets of users.
How it works
In Work Apps Settings within 8x8 Admin Console, a new Select Profile Policy option allows you to choose where settings apply:
All Profile Policies (default)
- Behaviour: Applies settings organization-wide.
- Typical use: Set global defaults.
Specific Profile Policy
- Behaviour: Applies settings only to users in that policy, overriding global defaults.
- Typical use: Customize configurations for departments or user groups.
Important! Settings applied to a specific Profile Policy override the All Profile Policies defaults for users in that group.
Example Use Cases
- Apply different app behaviour for mobile vs desktop users.
- Configure separate defaults for departments (such as Sales vs Support).
- Create targeted policies for distinct user groups or regions.
How to configure the Work Apps Settings
- Log in to the 8x8 Admin Console.
- Go to Home > Work Apps Settings.
-
From Select Profile Policy, choose one of the following:
- All Profile Policies – apply settings globally.
- Specific Profile Policy – apply settings to the selected user group.
- Configure the default feature settings as needed.
- Click Save Settings to apply changes.
Notes:
- To manage settings for another group, select a different Profile Policy.
- When no Profile Policy is selected, settings apply to all users without specific policy configurations.
For more details, see Work Apps Settings
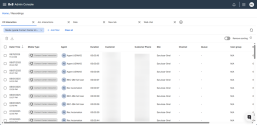
We’ve upgraded the tool for managing Recordings. The new interface allows you to view all recorded 8x8 Contact Center interactions from a pre-configured template. The interface displays agent interactions with key details such as the timestamp, the source, the agent’s name, the duration, and other related information. To learn more, see Manage recordings.
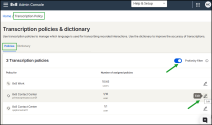
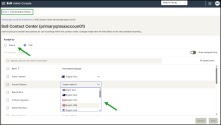
The Transcription Policy interface now offers a more modern and intuitive experience, making it easier to configure, assign, and manage transcription settings across your organization.
Key Enhancements:
- Assign transcription policies to 8x8 Contact Center queues or users, as well as 8x8 Work users.
- Apply policies in bulk to simplify management.
- Use the profanity filter (currently English only) to mask inappropriate language.
- Changes apply to future recorded interactions.
- Log in to 8x8 Admin Console.
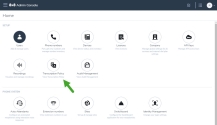
- Navigate to Home > Transcription Policy.
- Open the Policies tab.
- Optional: Enable the Profanity Filter to auto-mask offensive language (English only).
-
Click Edit
 next to a policy to update it.
 -
Under Assign by, select either Queue or User.
Note: You can assign by only one method at a time. Switching will reset the current settings.
- Optional: Switch on Show Assigned Only to filter the list.
- In the Transcription Language column, click the dropdown to choose a language.
- Click Save.
You may assign or unassign transcription policies whenever necessary.
To learn about multilingual transcription setup, see Set up transcription policies.
Improve transcription accuracy with a custom dictionary
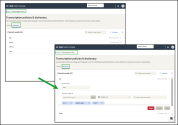
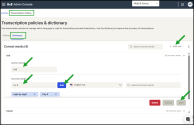
The Custom Dictionary new feature allows administrators to define terms, brand names, jargon, acronyms or phrases that the default transcription service may misinterpret. Our transcription system incorporates the specified words or phrases, improving the accuracy of call transcriptions across both 8x8 Contact Center and 8x8 Work.
For example, You can define "8x8" as the correct term to ensure future transcripts automatically reflect this preference, especially if it's often incorrectly transcribed as "eight by eight" or "8 x 8".
- Log in to 8x8 Admin Console.
- Go to Home > Transcription Policy.
- Open the Dictionary tab.
- Click + Add New in the upper-right corner.
- In the Correct word box, enter the accurate term.
- In the Incorrect words, add any misheard versions, and click Add.
- Select the Transcription Language.
- Click Save.
You may add, modify, or delete dictionary terms at any time. Additionally, you can export or import an existing dictionary using CSV format.
To learn how to improve transcription accuracy with a custom dictionary, see Manage the custom dictionary.
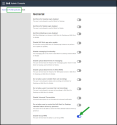
Admins can now prevent 8x8 Engage users from pausing their assigned queues by hiding the Pause button in the My Assigned Queues panel on both desktop and web. This option is managed directly in the 8x8 Admin Console under Work Apps Settings.
Default Behavior
The Allow user to pause their assigned queues setting is enabled by default.
- If enabled: Users can see and use the Pause button in their My Active Queues panel to temporarily stop receiving queued calls (for example, during breaks or offline work).
- If disabled: The Pause option is hidden, preventing users from pausing assigned queues.
To enable or restrict pausing for their assigned queues for all 8x8 Engage users:
- Go to Home > Work Apps Settings in 8x8 Admin Console.
- Scroll to the 8x8 Engage settings section.
-
Toggle Allow user to pause their assigned queues on or off.
- Enabled: The Pause button is visible in the user’s My Active Queues panel.
- Disabled: The Pause button is hidden for all users.
Note: This setting is enabled by default. Adjust as needed to align with your organization’s compliance and queue availability policies.
For more details on managing the 8x8 Work Apps settings, see Configure Work Apps Settings.
With version 8.23 of 8x8 Work for Desktop and web, administrators can now manage Do not Disturb (DND) status and calendar-based presence visibility directly in the Work Apps Settings, in 8x8 Admin Console. This provides administrators greater control over user availability settings across the organization.
Default Behavior
By default, the Allow user to set Do not Disturb setting is enabled.
When enabled:
- The Do not Disturb status is visible in user’s Profile page, and the 8x8 Work preview in visible the system taskbar.
- The calendar-based presence in visible in Settings > Calendar & Settings.
When disabled:
- The Do not Disturb status is removed from the user’s Profile page and from the 8x8 Work preview in the system taskbar.
- The calendar-based presence feature is hidden from Settings > Calendar & Settings.
To manage this setting for all users:
- Go to Home > Work Apps Settings in 8x8 Admin Console.
- Scroll to the Status section.
-
Toggle Allow user to set Do not Disturb on or off, depending on your preference.
Note: This setting is enabled by default.
To full details on managing 8x8 Work application settings, see Configure Work Apps Settings.
We have updated the default settings for 8x8 Work in the Work Apps Settings to align with the 8x8 Work for Desktop and 8x8 Work for Web version 8.22, and the 8x8 Work for Mobile version 11.12 release. Administrators have the option to enable users to summarize, rephrase, and receive suggestions in chat conversations using AI.
Note: Before activating this feature, please ensure you are familiar with the relevant AI regulations in your country.
To allow users to benefit from AI capabilities in chat conversations:
- Log in to 8x8 Admin Console.
- Go to Home > Work Apps Settings.
- On the Work Apps Settings page, go to General and enable Allow chat AI features option to enable users to summarize, rephrase, and receive suggestions in chat conversations using AI. Otherwise, disable this option.
- Click Save settings.
To learn about how to manage settings for 8x8 Work applications, see Configure Work Apps Settings.
As an admin, you can now access CRM Integration Profiles from the 8x8 Admin ConsoleHome screen. CRM Integration Profiles are a powerful tool that enables you to easily personalize and fine-tune your 8x8 Work and 8x8 Contact Center CRM integration. With CRM Integration Profiles, you gain full control over your integration workflows and experiences, allowing you to seamlessly adapt the 8x8 integration to meet your unique business requirements. Customize and configure your 8x8 integration with ease, making it a perfect fit for your organization's needs.
Features
- Edit default CRM profiles.
- Create custom CRM profiles.
- Assign users to a profile.
- Change the settings to customize a CRM profile.
Requirements
- Admin access to 8x8 Admin Console.
Limitations
- CRM Integration Profiles is currently not supported for customers with an 8x8 professional service remix or shareable remix.
- The CRM Integration Profiles settings do not impact users handling email interactions. Voice, SMS, Live Chat, and WhatsApp are supported for all applicable CRMs. WhatsApp and SMS are only available for the integrations with Salesforce and Microsoft Dynamics.
- When enabled, no existing user settings will change state. The introduction of new settings will be in the default state.
Supported CRMs in CRM Integration Profiles
The CRM Integration Profiles supports the following CRMs:
- 8x8 Contact Center for Salesforce
- 8x8 Work for Salesforce
- 8x8 Contact Center for Microsoft Dynamics
- 8x8 Work for Microsoft Dynamics
- 8x8 Contact Center for Zendesk
- 8x8 Work for Zendesk
- 8x8 Contact Center for NetSuite
- 8x8 Work for NetSuite
- 8x8 Contact Center for Zoho
- 8x8 Work for Zoho
For more information, refer to set up CRM Integration Profiles.
8x8 Work allows users to communicate simultaneously with colleagues or external contacts, whether individually or in groups, using 8x8 Work on desktop, web, or mobile. Users can send either 1:1 SMS or MMS group messages with up to 10 internal and external numbers.
Administrators can control user access to this feature by toggling the Disable Group MMS option on the Profile Policies page. This feature is enabled by default for all customers on usage-based billing.
To disable the Group MMS messaging feature:
- From the 8x8 Admin Console menu, go to Profile Policy.
- In the profile policies list, click Edit in the relevant profile policy row.
- Under General, activate the Disable Group MMS toggle to disable this feature. Users will no longer be able to use the Group MMS messaging feature in 8x8 Work on desktop, web, or mobile.
To learn about how to manage profile policies, see Review profile policies.
We have introduced new default settings for 8x8 Work within the Work Apps Settings to align with the 8x8 Work for Mobile 11.11 release. Administrators can configure default settings for 8x8 Work apps across the organization by locking configurations, thus preventing users from changing them separately.
Edit the Work apps settings to align with the 8x8 Work for Mobile 11.11 release
With a single click, you can lock or unlock all settings to prevent 8x8 Work users from making individual changes or adjusting each setting separately.
To adjust the settings for 8x8 Work applications:
- Log in to 8x8 Admin Console.
- Go to Home > Work Apps Settings.
-
On the Work Apps Settings page, set the default values for all users in your organization.
- Under General:
-
Disable the Allow users to change their profile picture option to prevent users from changing it from the 8x8 Work for Mobile app. Otherwise, enable this option.
-
Under Mobile-only settings:
- Disable the Allow users to log out from the mobile app option to prevent users from logging out from the 8x8 Work for Mobile app. Otherwise, enable this option.
- Disable the Allow users to set or modify business hours option to prevent users from setting or modifying business hours schedules from the 8x8 Work for Mobile app. Otherwise, enable this option.
-
Disable the Allow users to rate the mobile app option to prevent users from rating the app from the 8x8 Work for Mobile app. Otherwise, enable this option.
-
Under Notifications:
-
Disable the Allow users to change their notifications option to adjust their notification settings from the 8x8 Work for Mobile app. Otherwise, enable this option.
-
-
Under Status:
- Disable the Alllow users to set Do not Disturb option to prevent users activating the Do not Disturb (DND) status on the mobile devices. Otherwise, enable this option.
- Disable the Unlocked Setting option to prevent users from changing their presence and status message from the 8x8 Work for Mobile app. Otherwise, enable this option
- Click Save settings.
To learn about how to manage settings for 8x8 Work applications, see Configure Work Apps Settings.
In this release, we have introduced the following feature and enhancements in 8x8 Admin Console:
Admins now have a better experience when adding or modifying users by consistently viewing the Single Sign-On (SSO) settings section on the Users page, regardless of license assignment.
To learn more about how to set up 8x8 Work users, see Set up 8x8 Work users.
Note: The Single Sign-On (SSO) section is visible on the Users page as long as the Single Sign-On integration and the company's identity provider are set up in the Identity and Security page.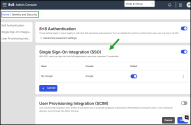
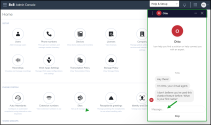
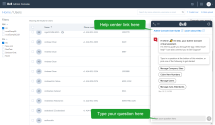
Discover the new look of our 8x8 chatbot, Otto, which now offers a fresh look and feel, enhancing the overall user experience within the 8x8 Admin Console app. The chatbot's icon and window have been updated with a new colour that aligns with the company's modern visual identity.
To learn more about our Otto chatbot, see Get support.
8x8 Work allows users to communicate simultaneously with colleagues or external contacts, whether individually or in groups, using 8x8 Work on desktop, web, or mobile. Users can send either 1:1 SMS or MMS group messages with up to 10 internal and external numbers.
Administrators can control user access to this feature by toggling the Disable Group MMS option on the Profile Policies page. This feature is enabled by default for all customers on usage-based billing.
To disable the Group MMS messaging feature:
- From the 8x8 Admin Console menu, go to Profile Policy.
- In the profile policies list, click Edit in the relevant profile policy row.
- Under General, activate the Disable Group MMS toggle to disable this feature. Users will no longer be able to use the Group MMS messaging feature in 8x8 Work on desktop, web, or mobile.
To learn about how to manage profile policies, see Review profile policies.
We have introduced new default settings for 8x8 Work within the Work Apps Settings to align with the 8x8 Work for Mobile 11.11 release. Administrators can configure default settings for 8x8 Work apps across the organization by locking configurations, thus preventing users from changing them separately.
Edit the Work apps settings to align with the 8x8 Work for Mobile 11.11 release
With a single click, you can lock or unlock all settings to prevent 8x8 Work users from making individual changes or adjusting each setting separately.
To adjust the settings for 8x8 Work applications:
- Log in to 8x8 Admin Console.
- Go to Home > Work Apps Settings.
-
On the Work Apps Settings page, set the default values for all users in your organization.
- Under General:
-
Disable the Allow users to change their profile picture option to prevent users from changing it from the 8x8 Work for Mobile app. Otherwise, enable this option.
-
Under Mobile-only settings:
- Disable the Allow users to log out from the mobile app option to prevent users from logging out from the 8x8 Work for Mobile app. Otherwise, enable this option.
- Disable the Allow users to set or modify business hours option to prevent users from setting or modifying business hours schedules from the 8x8 Work for Mobile app. Otherwise, enable this option.
-
Disable the Allow users to rate the mobile app option to prevent users from rating the app from the 8x8 Work for Mobile app. Otherwise, enable this option.
-
Under Notifications:
-
Disable the Allow users to change their notifications option to adjust their notification settings from the 8x8 Work for Mobile app. Otherwise, enable this option.
-
-
Under Status:
- Disable the Alllow users to set Do not Disturb option to prevent users activating the Do not Disturb (DND) status on the mobile devices. Otherwise, enable this option.
- Disable the Unlocked Setting option to prevent users from changing their presence and status message from the 8x8 Work for Mobile app. Otherwise, enable this option
- Click Save settings.
To learn about how to manage settings for 8x8 Work applications, see Configure Work Apps Settings.
In this release, we have introduced the following feature in 8x8 Admin Console:
Ability to access Self Service
We have introduced quick links to our 8x8 Support Portal self service capabilities, allowing eligible customers to easily purchase licenses and devices, manage cases, review orders, and manage billing information. Access to these 8x8 Support Portal links is based on roles and permissions. Contact 8x8 Support if you have any questions regarding eligibility.
To access the Self Service features:
- Log into the 8x8 Admin Console.
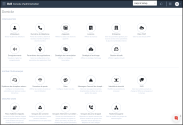
- From the Home page, scroll down to the Self Service section and select:
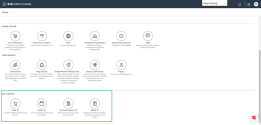
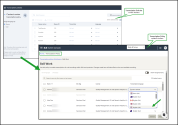
- Shop: Opens the 8x8 Support Portal shopping cart in a separate browser window. From this page, you can purchase additional licenses and devices with a few simple clicks. Alternatively, you can also buy devices or licenses directly from the Devices or Licenses page by clicking the button in the upper right corner. For additional information on completing your purchase, see this video.
- Cases: Opens the 8x8 Support Portal case list in a separate browser window. From this page, you can create a new case, search for a specific case, or view your case history.
- Purchase History: Opens the 8x8 Support Portal order page in a separate browser window. From this page, you can review your 8x8 products and services history.
- Billing: Opens the 8x8 Support Portal billing statements page in a separate browser window. From this page, you can access your billing history, pay 8x8 invoices, view an estimate of your upcoming 8x8 invoice, and more.
In this release, we have introduced the following feature in 8x8 Admin Console:
Ability to add Yealink and Algo devices to your group paging
In this release, we have introduced the ability to add Yealink and Algo devices to your group paging. This enhancement brings more flexibility to customers by expanding the support for more diverse hardware to the unique communication needs of diverse organizations.
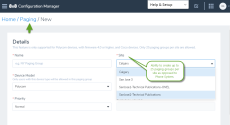
To set the device model for a new or an existing paging group:
- Log into 8x8 Admin Console.
- From the Home page, select Paging.
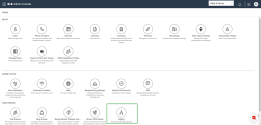
- Click to edit an existing paging group.
-OR-
Click Create Paging Group. - If creating a new group, fill in the required fields.
- From the Device Model dropdown, select:
- Click Save.
Note: The members of this paging group will only be allowed to use the selected device models. If the members added do not have the selected device model assigned or activated, the user will be displayed in red in the members' list.
For more information, see Set up paging.
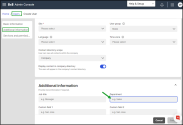
In this release, we have fixed the issue preventing bulk deletion of data from the User’s Additional information fields: Job title and Department.
For instance, while bulk-editing selected users, you can remove the data from the Job title and Department fields under the user's Additional information.
Once you save the changes, the Job title and Department fields will be left empty.
To learn more about editing users in bulk, see Edit users in bulk.
In this release, we are introducing the following new features:
- Focused home page Operator Connect customers
- Enhanced suggestion for the list of addresses on the Port phone numbers page
-
Ability to reactivate users who were deactivated via User Provisioning Integration
- Other enhancements and fixes
Focused home page for Operator Connect customers
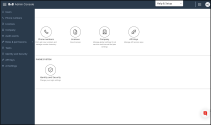
The 8x8 Admin Console allows admins to configure Operator Connect customers without a PBX to see only the relevant elements for setting up these accounts. Customer created with only Operator Connect licenses do not need a PBX or an initial site. PBX-specific items are no longer displayed on the 8x8 Admin Console Home page or in the left-side Navigation menu, making it easier for customers to focus on what's relevant.
To learn more about Operator Connect for Microsoft Teams, see 8x8 Operator Connect for Microsoft Teams. or Configure the Operator Connect.
Enhanced suggestion for the list of addresses on the Port phone numbers page
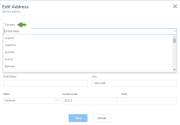
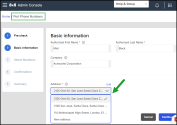
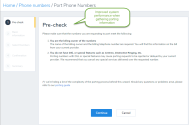
Starting with this release, the Addresses list also shows your US Site address when creating a new port number.
To view address suggestion while porting phone numbers:
- Go to Home > Phone Numbers
- Click Port Phone Numbers at the top-right corner.
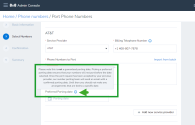
- After reviewing the pre-check requirements, view all address suggestions, including the newly created US addresses, in the Basic Information section.
To learn more about how to transfer a phone number from one phone service provider to another, see 8x8 Admin Console—Porting phone numbers.
Ability to reactivate users who were deactivated via User Provisioning Integration
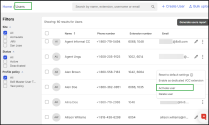
8x8 Admin Console allows admins to reactivate deactivated users via User Provisioning Integration (SCIM).
To reactivate a user deactivated via SCIM:
- Go to Home > Users
- Click
 next to the desired user.
 - Select Activate User from the menu.
The user can log in to any 8x8 apps or make or receive calls again. To learn more about configuring users, sees Add 8x8 Work users.
Other enhancements and fixes
-
The Audit Event list no longer displays the untranslated audit events. to learn more about audit events, see Audit events.What's new in the 8x8 Admin Console 1.46 release?
In this release, we are introducing the following new features:
- Focused home page Operator Connect customers
- Enhanced suggestion for the list of addresses on the Port phone numbers page
-
Ability to reactivate users who were deactivated via User Provisioning Integration
- Other enhancements and fixes
Focused home page for Operator Connect customers
The 8x8 Admin Console allows admins to configure Operator Connect customers without a PBX to see only the relevant elements for setting up these accounts. Customer created with only Operator Connect licenses do not need a PBX or an initial site. PBX-specific items are no longer displayed on the 8x8 Admin Console Home page or in the left-side Navigation menu, making it easier for customers to focus on what's relevant.
To learn more about Operator Connect for Microsoft Teams, see 8x8 Operator Connect for Microsoft Teams. or Configure the Operator Connect.
Enhanced suggestion for the list of addresses on the Port phone numbers page
Starting with this release, the Addresses list also shows your US Site address when creating a new port number.
To view address suggestion while porting phone numbers:
- Go to Home > Phone Numbers
- Click Port Phone Numbers at the top-right corner.
- After reviewing the pre-check requirements, view all address suggestions, including the newly created US addresses, in the Basic Information section.
To learn more about how to transfer a phone number from one phone service provider to another, see 8x8 Admin Console—Porting phone numbers.
Ability to reactivate users who were deactivated via User Provisioning Integration
8x8 Admin Console allows admins to reactivate deactivated users via User Provisioning Integration (SCIM).
To reactivate a user deactivated via SCIM:
- Go to Home > Users
- Click
 next to the desired user.
 - Select Activate User from the menu.
The user can log in to any 8x8 apps or make or receive calls again. To learn more about configuring users, sees Add 8x8 Work users.
Other enhancements and fixes
-
The Audit Event list no longer displays the untranslated audit events. to learn more about audit events, see Audit events.
In this release, we are introducing the following new improvements:
In this release, we offer multiple PBX support for XF Workspace and Engage users, enhancing your ability to manage users across multiple PBX and tenant configurations.
Key enhancements:
-
Single PBX linked to a single contact center tenant (existing support):
Users assigned to a site on a PBX linked to a contact center tenant have always been able to seamlessly receive either a contact center license or an XF Workspace license
-
Two PBXs with a single tenant (new support):
Previously, users assigned to a site on a second PBX that was not linked to a contact center tenant could not be assigned a contact center or XF Workspace license. With this release, we now support assigning an XF Workspace/Engage license to users on PBXs not linked to a contact center tenant.
Note: Users cannot be assigned a contact center license if they are on a PBX that is not linked to a contact center tenant.
-
Multiple PBX and multiple tenant scenario (new support):
- This update offers enhanced flexibility in a more complex scenario involving multiple contact center tenants and multiple PBXs. For example, if you have two contact center tenants (Tenant A and Tenant B) and only Tenant A has XF Workspace/Engage licenses, you can now assign an XF Workspace/Engage license from Tenant A.
-
If a user is on a PBX linked to a tenant without XF Workspace/Engage licenses (e.g., Tenant B), the XF Workspace/Engage license cannot be assigned. However, if multiple tenants have XF Workspace/Engage licenses, the user is automatically assigned to the tenant associated with their PBX, with the option to choose a different tenant that also has XF Workspace/Engage licenses if needed.
To learn more about enabling VCC-enabled PBX and sites, see Know about 8x8 Contact Center-enabled PBX and sites.
Selecting a Contact Center tenant
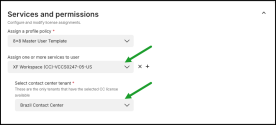
In a multiple contact center scenario, you can choose any tenant to assign an XF Workspace/Engage license from. By default, the user is assigned to the tenant which is linked to the PBX they are on.
-
While defining a user profile, once you select the desired service, such as XF Workspace, you will see an option to select a tenant.
Note: This option is enabled if you have more than one tenant with XF Workspace licenses.
- From the dropdown menu, select the desired tenant.
- Save your preferences.
To learn more about how to assign services and permissions to users, see 8x8 Admin Console—Assign services and permissions to the user.
Note: This feature only applies to the XF Workspace and Engage licenses but does not apply to the X6/X7/X8 ones.
While uploading users in bulk, you can now explicitly select tenants with the XFW and Engage licenses assigned to them.
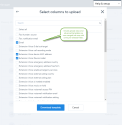
The User.Vcc.Tenant column is not mandatory. You can remove it if you do not want to use it. To include this column in the download .CSV template, select the checkbox while creating users in bulk.
If omitted, the upload tries first the tenant linked to the user’s PBX and then looks across all other tenets to see if there is just one with that base license. It will fail if the upload cannot find a suitable candidate tenant.
To learn more about creating users in bulk, see 8x8 Admin Console—Create users in bulk.
In this release, we have introduced the following new features:
Ability to manage user groups in recordings application
This release introduces the new User Groups feature in recording app.
The new User Groups feature allows admins to limit the scope of access in specific role assignments by giving customers more segmented access to data, such as call recordings access.
For example, supervisors can only see recordings related to those groups they are responsible for and the members who belong to them.
Note: Each user can belong to only one user group at a time.
Based on the user groups, admins can scope role assignments for recordings to a limited group of users:
- Create user groups
- Assign members to a specific user group
- Download the user groups report
- Create new permissions and role assignments based on user groups
- Create permissions and role assignments to access the Recordings app screen
- Limit users access to recordings
Features
-
Create role assignments for accessing call recordings that are scoped to recordings from specific groups of users:
- View groups and their members - allows members only to view groups and their members.
- Manage membership only - allows users to view and edit groups and only to add members to groups.
- Manage groups and their members - allows users to view, edit or delete groups and to add or remove members from groups.
-
Provide data access control to call recordings for a specific group of users.
User groups overview
Admins can now create role assignments for accessing call recordings that are scoped to recordings from particular groups of users:
-
Manage user groups - Through the new Work Groups > User Groups section, admins can:
- Create, edit, and delete user groups in Admin Console
- Search user groups by group name
- Download the user groups report in a CSV format
- Add, delete or move members to another group
- Edit members in bulk - move users to another group or remove users from this group
-
Assign a user to a user group from the Users page - As an admin, you can assign a user to a specific group while creating or editing a user.
- Manage new permissions and role assignments based on user groups - Through the Roles & permissions page, you can create roles based on the following new permissions:
- View groups and their members - allows users to view groups and their member permissions.
- Manage membership only - allows users to view groups and add or remove members to/from a group.
- Manage groups and their members - allows users to view, add, edit or delete groups and to add or remove members to/from groups.
- Provide limited data access control for the Storage application - As an admin with permissions granted for the Storage app, which gives access to call recordings, you can now provide a limited data access control for the Storage Admin and Storage API roles. The Storage filter is visible on the Role Assignments page only if the user has the appropriate permissions for the Storage app.
-
Handle user access to recordings - You can now assign limited access to recordings based on specific user groups.
Depending on the permissions and scope(s) granted, users can see:
- Only the recordings for users belonging to a specific group
- The recordings for users belonging to all groups.
- The recordings for users belonging to that particular site (cluj) and all groups.
To learn more about user groups, see User groups feature.
8x8 Operator Connect for Microsoft Teams
8x8 Operator Connect for Microsoft Teams is a voice solution for customers looking for easy deployment in their Teams environment by having the ability to manage the DID/phone number configurations and assignments, directly within the Teams Admin Center. 8x8 Operator Connect offers enhanced communication capabilities.
8x8 Operator Connect provides functions like Session Initiation Protocol (SIP) trunk and exclusively delivers the Public Service Telephone Network (PSTN) in Microsoft Teams.
8x8 Operator Connect allows customers who use Microsoft Teams to select 8x8 as their phone service carrier and number provider from within the Microsoft Teams Admin Center. They can then assign phone numbers directly to their Teams users within their Teams Admin Center.
Unlike Voice for Microsoft Teams, 8x8 Operator Connect only includes a DID and contains no user level privileges. 8x8 Admin Console can be used to assign these DIDs directly into Teams Admin Center, where the Teams Admin has the freedom to assign these DIDs as per their requirements.
Note: 8x8 Operator Connect for Microsoft Teams differs from 8x8 Voice for Microsoft Teams and the 8x8 Phone App for Microsoft Teams.
Benefits
- Fast to deploy and fully compliant with the 8x8 Operator Connect Program.
- Reliable, directly peering through Microsoft Azure to meet program architecture, support, network, and share Software License Agreement (SLA) requirements.
- Complete, as part of the 8x8 for Microsoft Teams portfolio, offers global reach, flexible calling plans, and a Microsoft Teams-certified contact center solution with free on-net calling.
Availability and Requirements
- It requires a Teams Phone Standard license from Microsoft.
-
Two new DID license types are available for 8x8 Operator Connect:
- Operator Connect - Metered is dedicated to customers headquartered in (and for DIDs registered in) the following countries: Australia, Austria, Belgium, Canada, Denmark, Finland, France, Germany, Ireland, Luxembourg, Mexico, Netherlands, New Zealand, Poland, Singapore, Spain, Sweden, Switzerland, United Kingdom, United States.
- Operator Connect - Nationwide is dedicated to customers headquartered in (and for DIDs registered in) the following countries: Australia, Canada, France, Germany, Ireland, New Zealand, Spain, United Kingdom and United States.
Limitations
- Each Operator Connect license allows customers to get a single DID and assign it to Microsoft Teams
-
8x8 Operator Connect is designed only for Microsoft Teams. Customers cannot access 8x8 Work or X series features.
Note: Admins cannot apply Operator Connect to an X series user, but these can be used side by side with an X series license.
- Through the Operator Connect - Metered and Operator Connect - Nationwide licenses, customers get a single DID and the ability to assign it to Microsoft Teams.
Configure 8x8 Operator Connect
To configure the 8x8 Operator Connect, customers must follow the next steps:
- Add 8x8 as an operator in the Microsoft Teams Admin Center.
- Manage 8x8 Operator Connect licenses in 8x8 Admin Console
- Claim phone numbers in 8x8 Admin Console.
- Assign phone numbers to 8x8 Operator Connect in 8x8 Admin Console.
- Assign DIDs to users in the Microsoft Teams Admin Center.
Important! To assign numbers to 8x8 Operator Connect, 8x8 admins must create first the emergency addresses in Microsoft Teams Admin Center. To learn how to create an emergency address, see Manage emergency calling policies in Microsoft Team.
To learn how to configure 8x8 Operator Connect for Microsoft Teams, see Configure 8x8 Operator Connect.
In this release, we have introduced the following enhancement:
Retrieve device passwords
Customers can now access device admin passwords and see and copy them for future use.
Admins can retrieve the device admin passwords via:
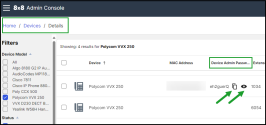
- Devices Details page
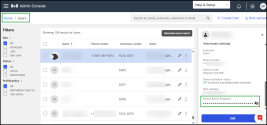
- Users page
- Edit user only for unsupported devices
- Log in to 8x8 Admin Console.
- Go to Home > Devices.
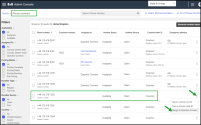
- In the row of the device type that interests you, click View Device Report.
-
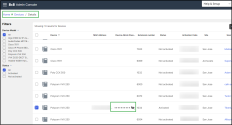
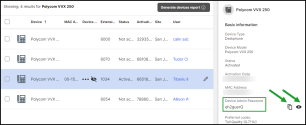
On the View Device Report page, find and select the device that interests you:
- The password is displayed as hidden (dotted) in the Device Admin Password column.
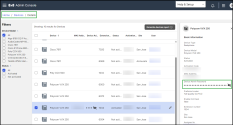
- The password is displayed as hidden under Device Admin Password in the device side panel.
-
Click Show
 next to the password to see it.
 -
Optionally, click Copy to clipboard
 to save it for future use, or click Hide
  to hide the password.
To learn more about how to manage devices and assign devices to users, see Manage your devices topic.
- Log in to 8x8 Admin Console.
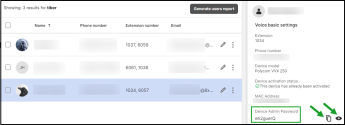
- Go to Home > Users.
- Find and click the row of the user that interests.
- Scroll down to the Voice basic settings section in the side panel at the right of the page. The password is displayed as hidden under Device Admin Password.
-
Click Show
 next to the password to see it.
 -
Optionally, click Copy to clipboard
 to save it for future use, or click Hide
  to hide the password.
To learn how to configure, activate, or remove a device associated with a user, see Set up voice basic settings.
- Log in to 8x8 Admin Console.
- Go to Home > Users.
- Click Edit
 in the user’s row that interests you.
 -
Go to the Voice basic settings section and click Remove Device. All the controls under this section are disabled except Remove Device.
- Click Show
 next to the password to see it.
 - Optionally, click Copy to clipboard
 to save it for future use, or click Hide
  to hide the password.
To learn how to configure, activate, or remove a device associated with a user, see Set up voice basic settings.
Ability to store the OpenAI credentials within 8x8 Admin Console
8x8 Meet now allows you to select OpenAI models for generating meeting summaries, offering an alternative to the default summarization engine. This integration enables the use of advanced OpenAI models within 8x8 Meet, all without the need for coding. Customers have the option to utilize OpenAI to produce enhanced meeting transcripts using their account credentials. instead of using our internal Large Language Model, Meta AI (LLAMA).
Note: Only the OpenAI provider is currently available, but other potential providers could be available in the future.
Admins can upload the AI solution credentials at the organizational level and edit or remove them if necessary.
To set up the OpenAI API key:
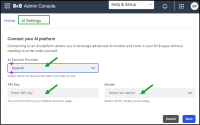
- In the Admin Console Navigation menu, click AI Settings.
-
In the AI Settings page, connect to your AI platform:
- In the AI Server Provider list, click OpenAI to connect to the OpenAI service provider.
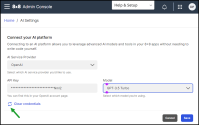
- In the API Key box, add the API key for the selected AI platform.
- In the Model list, choose the AI model you want.
Note: Only the last four characters are visible for recognition. The API key can be viewed on the OpenAI account page.
- Click Save.
-
Optional: Click Clear credentials and confirm to remove the stored API key if you want to upload a new API key
To learn more about storing the OpenAI credentials, see Set up the AI platform.
8x8 Admin Console UI French-Canadian translation capability
The 8x8 Admin Console interface is now available in French-Canadian (fr-CA). To have the 8x8 Admin Console UI translated to French, you must set the browser language to French-Canadian (fr-CA).
Note: The content of the Licenses page is displayed in English because a third entity provides the content via the license service.
XF Workspace updates - Limited availability
Important! This feature is currently available only for limited availability.
Starting with this release, 8x8 admins can create 8x8 Admin Console user accounts for both the 8x8 XF Workspace users and supervisors.
8x8 XF Workspace users can use collaborative functions available in 8x8 Work apps while engaging with users through queued calls from the 8x8 Contact Center, all within the comfort of 8x8 Work apps. In addition, 8x8 XF Workspace users support other 8x8 Work features such as ring groups, UC barge monitor whisper, or group call pickups. To learn more about 8x8 XF Workspace, see About 8x8 XF Workspace.
As an 8x8 admin, you can create a user account for an 8x8 XF Workspace user similar to formal 8x8 Contact Center agents. Still, you have to assign to your user a dedicated 8x8 XF Workspace pair of licenses, one for the VCC platform provisioning and another for the 8x8 Work provisioning.
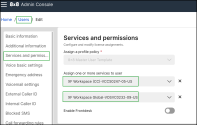
To create user accounts for the 8x8 XF Workspace users, while creating or editing users, in the Services and permissions section, choose the XF Workspace (CC) license for the 8x8 Contact Center part. For 8x8 Work apps, select one of the available licenses (describing the calling plan), such as the XF Workspace Global, XF Workspace International, XF Workspace Pro, XF Workspace, XF Workspace Pro, and XF Workspace Metered. To learn more about configuring an XF Workspace user account, see Create 8x8 XF Workspace user accounts.
Ability to change the unsupported device models to the supported ones- Limited availability
Important! This feature is currently available only for limited availability.
8x8 Admins can now directly change unsupported device models to supported ones for the user's account.
Previously, removing a device that was not a supported model was impossible. To remove an associated device, admins had to remove the UC or CC license, which also removed most of the user's history and settings.
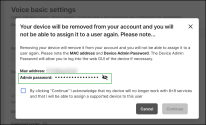
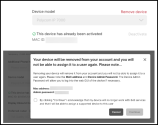
Starting with this release, admins can remove the unsupported devices directly from the user’s account by clicking Remove device next to the device model under Voice Basic Settings. In the prompted dialog box, admins must confirm the removal of the unsupported device by selecting the acknowledgment checkbox. Once a device is removed, adding it again to the 8x8 Admin Console will be impossible.
Note: 8x8 admins can remove the standard UC device models and the VCC Dedicated Extension ones.
To learn more about how to directly change unsupported device models to supported ones for the user's account, see Set up Voice Basic Settings.
Other enhancements - Reskinning confirmation dialog components
The new 8x8 Admin Console UI elements are available to align with all our 8x8 applications. The confirmation dialog boxes are now more compact, smaller, and display-centered. As an 8x8 Admin Console user, you can enjoy a more pleasant and intuitive experience through 8x8 Admin Console. The app interface better matches your experience of configuring and managing your users and enables more intuitive use.
Enhanced port order lead time
Starting with this release, for all non-automated ports (Bandwidth Port Orders), the lead time may vary based on the number of phone numbers included in a port order request. The new values result in a shorter lead time for port orders, which means that orders can now be processed and delivered more quickly and efficiently.
The new values provide an improved lead time for port orders, and they are as follows:
- 1 number -> 11 business days
- 2-50 numbers -> 16 business days
- 51+ numbers -> 20 business days
To learn more about porting phone numbers, see Port your phone numbers.
Improved user department length
When creating or editing users/bulk users via UI or CSV, the Department attribute under Additional Information now allows up to 100 characters.
To learn more about configuring a user profile, see Set up 8x8 Work contacts.
In this release, we are introducing the following features and enhancements:
Ability to export audit events in a CSV format
Customer admins with appropriate permissions can generate a CSV report of Audit Events. The capability of the audit log export enables customer admins to self-manage their audit data according to their data governance and retention requirements and to process 8x8 audit events in external audit tools.
The report includes all the columns viewable to the user, as you selected, without making any additional column selections.
This capability is helpful for long-term storage and offline analysis.
Notes:
- The report contains a maximum of 50.000 rows.
- The output contains identifiers and details in JSON format.
For details about the data the Audit events report displays, click here.
To generate an audit events report:
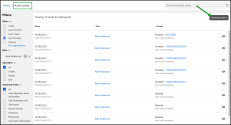
- Go to Home > Audit events.
-
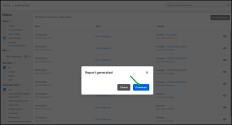
On the Audit events page, in the upper-right corner, click Generate report. A CSV format report is generated.
-
Click Download and and save the .CSV report locally.
Ability to enable group voicemail notifications from Ring Groups and Call Queues
Starting with this release, you can configure group notifications to a separate email address to receive voicemail notifications instead of emailing the members who signed up for voicemail on the group. Until now, you could enable voicemail notifications from non-user entities such as ring groups (RG) and call queues (CQ), but you had to get certain professional services involved.
Note: Only one email address is supported. It may be a distribution list too.
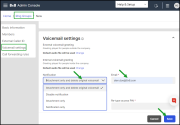
You can choose one of the following notifications options:
- Attachment only and delete original voicemail - Set up a group email address to receive voicemails, and then delete it from the service. You don’t have to enable the access of any group member to voicemail (group members no longer receive voicemails in their email boxes, these always will be empty).
- Disable Notification - Set up a group member to receive voicemail notifications. At least one group member should have voicemail access enabled (voicemails are built up in the box).
- Attachment only - Set up a group member to receive voicemail notifications. At least one group member should have voicemail access enabled (voicemails are built up in the box).
- Notification only - Set up a group member to receive voicemail notifications. At least one group member should have voicemail access enabled (voicemails are built up in the box).
Note: When trying to disable all the group members and you choose the Attachment only and delete original voicemail option, you don’t have to enable the access of any group member to voicemail. For other options, a warning notification displays, and you have to enable at least one member to have voicemail access.
To enable group voicemail notifications to be sent to a separate email address:
- In the 8x8 Admin Console Home page, under Phone System, click Ring Groups or Call Queues.
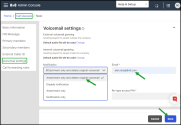
- In the Ring Groups or Call Queues page, while creating or editing a new ring group or call queue, under Voicemail settings, select the Attachment only and delete original voicemail option from the Notification list.
- Attach a group email address where the notification to be sent.
- Click Save.
Notes:
- This new functionality requires a new Cloud Voicemail Notification Service.
- When you receive a voicemail, a new email template is available .
To learn how to set up a ring group, click here. To learn how to set up a call queue, click here.
Ability to stop recording a conversation
This release introduces a new call recording mode: Record all calls with user control. This new option allows users to record a call and stop the recording covering topics that should not be recorded, or if there is no need to record the conversation.
For example, if the agents have permission from their employer to make personal calls, they can turn off recording for those personal calls.
Important! This new Record all calls with user control option is not intended for credit card handling. If customers want to handle credit card data, they should use the SecurePay Agent for Contact Center.
To find out how to set up call recordings, click here.
Enforce a valid site address while creating a user
While creating a user, if you set the emergency address as a user's Site address, which cannot be validated, a warning message displays, and you cannot save the user. First, you must go to the Sites page and re-enter a valid address for the site whose address you want to use as the user's emergency address. After that, you can use that site address as the user's emergency address.
While editing a user and the user is saved with an invalid address, a warning displays, and you can continue saving the user.
To learn how to set up an emergency address for users, click here, and for sites, click here.
Enhanced Port order request
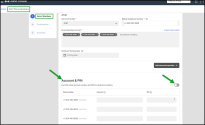
While submitting a port order request in 8x8 Admin Console, users can now provide the account number and the PIN for both landline and wireless-type phone numbers. Previously, this was only available and required by carriers for mobile-type phone number.
The new Account & PIN feature allows users to provide the account number and PIN for both landline and wireless numbers. However, it is only mandatory for wireless and optional for landline-type phone numbers.
To learn about how to port numbers, click here.
New notification about configuring storage policies for 8x8 Work
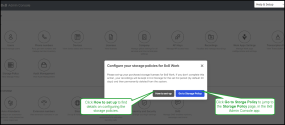
The Admin Console Dashboard now notifies the customers who have purchased 8x8 Work Storage add-ons and still need to configure them. The notification guides the admins on how they can configure the Storage licenses and where they can set up the storage policies.
Customers need to set up their purchased storage licenses for 8x8 Work to have access to their recordings. Otherwise, the recordings are kept in Hot Storage only for the set hot period (by default, 30 days) and then permanently deleted from the system.
Other improvements
- The Port list now displays the port numbers numerically ordered while creating or editing a user under Voice basic settings.
- The instruction lines are removed from the bulk upload CSV template for users and contacts. You can gather the guidelines from Create user and contacts in Bulk User Upload Template Field while creating users in bulk or Bulk contact Upload Template Filed while importing external contacts in bulk.
- The Users edit page now displays the Voice basic settings section expanded by default, and admins can now see all the voice basic settings at a glance.
In this release, we are introducing a new updated 8x8 Admin Console UI, which now aligns to all our 8x8 applications. The new interface comes with new elements, such as icons, buttons, modal windows, fonts, etc.
As an 8x8 Admin Console user, you can enjoy a more pleasant and intuitive experience through 8x8 Admin Console. The app interface better matches your experience of configuring and managing your users and enables a more intuitive use.
Enhanced experience when creating and editing emergency addresses of Sites and Users
A new enhanced form now is available when entering the address emergency for sites and users. It brings additional features that make it easy to create or edit the address.
In addition, the new form allows you to:
- Use Add auto-complete (search as you type)
- Enter addresses manually where auto-complete is not found
- Override an address (with acknowledgement or warning notifications)
- US&CA addresses validated with 911 provider at entry point.
Note: Applies also to user profiles accessed from 8x8 Work apps.
Add a site emergency address
Important! Emergency address and the user’s primary phone number must be located in the same country. Otherwise, you cannot use that address as an emergency address.
To add a site emergency address:
- In the 8x8 Admin Console Home page, under Phone System, click Sites.
-
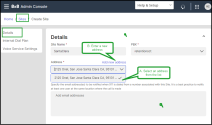
In the Sites page, while creating or editing an existing site, when configuring the site address, under Details, you can choose to use an existing address or to enter a new addresss:
A. If you select an existing address from the list
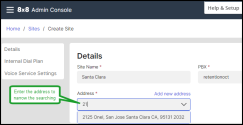
- Select the site address you want to add from the list under Address.
Note: You can enter the address in the Select... box to narrow the searching.
- Click Add new address.
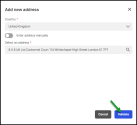
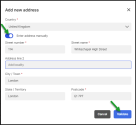
- In the Add new address window, select the country where the site is located.
- Select the address you want to add from the list below, and click Validate.
- If you don't find the address in the list, select Enter address manually toggle On and enter the site address manually.
-
Click Validate.
- If the new address is not recognized as being valid, you can choose an address that is closest to your current location or , you can use the address as entered.
-
Once the address is confirmed as validate and eligible for the Emergency Services, click Save.
Notes:
- In the US only, a third-party entity (Emergency Validation provider) checks the address from the emergency registration perspective.
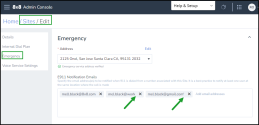
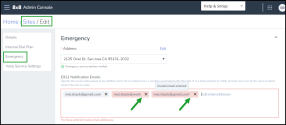
- You can override an existing address, but it might not be registered for Emergency Services if it’s not validated. - Under E911 Notification Emails, add the email address(es) to be notified when 911 is dialed from a number associated with this Site. It is a best practice to notify at least one user at the same location where the call is made.
-
Click to save the site.
Add a user emergency address
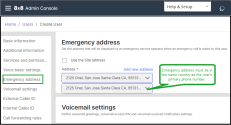
Important! Emergency address and the user’s primary phone number must be located in the same country. Otherwise, you cannot use that address as an emergency address.
You can choose to add as an existing address either the site address or an existing address from the available ones.
To add a new user emergency address:
- In the 8x8 Admin Console Home page, under Setup, click Users.
- While creating or editing an existing user profile, scroll down to see Emergency address
-
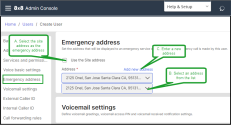
Under Emergency address, you can choose to use as emergency address the is the same as the site address or enter a new emergency address.
-
A. If you use the site address as emergency address:
- Select the Use the Site address checkbox and use the site address as an emergency address.
B. If the user is not physically located in the country of their primary phone number:
-
Clear the Use the Site address checkbox.
Note: You can enter the address in the Select... box to narrow the searching.
-
Optionally: If the emergency address and the user's primary phone number are not located in the same country, that number cannot be validated. Choose another address or override it.
-
C. If you enter manually a new address as emergency address:
- Click Add address manually.
- In the Add new address window, select the country where the site is located.
-
Search for the address you want to add in the list below, and click Validate.
- If you don't find the address in the list, select Enter address manually toggle On and enter the site address manually.
-
Click Validate.
-
If the new address is not recognized as being valid, you can choose the option that fits you better:
- Click Use existing.
- Click Use the address as entered.
Once the address is confirmed as validate and eligible for the Emergency Services, click Save.
Notes:
- In the US only, a third-party entity (Emergency Validation provider) checks the address from the emergency registration perspective.
- You can override an existing address, but it might not be registered for Emergency Services if it’s not validated.
Help & Setup assistance returns to AC
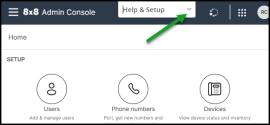
If you're more comfortable with the Help & Setup feature than the Otto ![]() chatbot, you now can use it from any page of the 8x8 Admin Console. The Help & Setup help assistance was enabled again and it's ready to assist you.
chatbot, you now can use it from any page of the 8x8 Admin Console. The Help & Setup help assistance was enabled again and it's ready to assist you.
For details about how to use the Help & Setup support, click here.
In this release of 8x8 Admin Console, we are introducing the following features and enhancements:
Enhanced Otto chatbot feature
You now are able to use the Otto ![]() chatbot again in 8x8 Admin Console. In addition, you can you can swipe the slider
chatbot again in 8x8 Admin Console. In addition, you can you can swipe the slider ![]() on the side of the page if it covers anything on your page.
on the side of the page if it covers anything on your page.
The new Otto![]() version allows you to perform new actions, by clicking Settings
version allows you to perform new actions, by clicking Settings ![]() on the upper left or the chatbot:
on the upper left or the chatbot:
- Turn on sound
 - Turn on/off sound.
 - Change language
 - Click the preferred language you want to use in the conversation with Otto in the list that opens, and click to return to the Settings panel.
 - Email transcript
 - Enter the email address where you want to send the transcript.
 - Download Transcript
 -Download the transcript on your computer.
To find more about getting support, click here.
8x8 Admin Console UI French translation capability
The 8x8 Admin Console interface now is available in French. To get the 8x8 Admin Console UI translated to French, you have to set up the browser language to French.
Note: The content of the Licenses page displays in English, because the content is provided by a third-entity via the licenses service.
Capability to configure MFA challenge frequency
As an admin, you now have the ability to configure the Multi-Factor Authentication (MFA) challenge frequency for all users, by checking MFA on a user device every selectable x days, up to 90 days.
You can recheck the multi-factor on a user device every selectable x days between:
- Minimum value - Always (check MFA at every login).
- Maximum value - 90 days (default value).
To check the multi-factor on a certain user device:
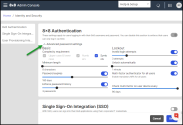
- In the 8x8 Admin Console Home page, under Phone System, click Identity & Security.
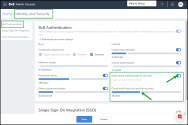
- In the Identity & Security page, under 8x8 Authentication, click Advanced password settings and select Multi-factor authenticator for all users toggle On to enable mandatory MFA for all users.
- Slide the cursor to set up the wanted frequency.
- Click Save.
For details about MFA for admins, read Multi-Factor Authentication (MFA).
Enforcing Multi-Factor Authentication (MFA) for all 8x8 administrator accounts
To ensure security standards, 8x8 apps now enforce multi-factor authentication (MFA) for all 8x8 administrator accounts.
Starting with this release, to be able to log in to an 8x8 admin account, an 8x8 Admin Console admin must enable Multi-Factor Authentication (MFA) first, and only then an 8x8 admin will be able to:
- Log into 8x8 admin accounts by using Multi-Factor Authentication (MFA)
- Change the multi-factor authentication method and get backup codes
Enable Multi-Factor Authentication (MFA)
Multi-factor authentication adds an extra layer of security to protect your 8x8 user accounts.
8x8 supports different second authentication factors:
- Authenticator apps, such as Google Authenticator, Authy, Okta Verify
- SMS
- Backup codes
Note: Once the customer administrators opt to make MFA mandatory for their users, they will enable MFA for all users, company wide. It is not possible to enable it for individual users.
To enable MFA:
- In the 8x8 Admin Console go Home > Identity & Security.
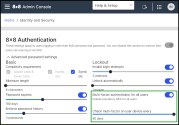
- In the Identity & Security page, under 8x8 Authentication, expand Advanced password settings and select Multi-factor authentication for all users toggle On to enable mandatory MFA for all users.
- Slide the cursor to set up the wanted frequency.
- Click Save.
All users will now be required to configure a second factor during the next login.
Note: This configuration only applies to logins using the 8x8 Authentication. Users logging in with organizational credentials via Single Sign-on Integration (e.g, Okta, AzureAD) are not prompted for 8x8 multi-factor.
To find more details and how this configuration works, read here.
Log into 8x8 admin accounts by using Multi-Factor Authentication (MFA)
After the MFA was enabled, during the first login, admins have to configure their second factor before logging into their 8x8 admin accounts.
To log in to your 8x8 admin account:
- Navigate to the login page and enter your 8x8 admin credentials and click Login.
-
After the MFA is enabled, during the first login, configure the two-factor authentication for your admin account. Choose one of the available option: Authenticator apps, SMS, E-mail, Backup codes, and click Continue.
- Enter the verification code and click Verify. Once configured, users are logged in as normal.
- Optionally: During the subsequent login, users can choose to not be prompted for the second factor on the same device for 90 days.
Notes:
- If you are using a different browser, clearing browser cookies, or using incognito mode you have to authenticate by MFA even if the box was checked.
- If you choose to use the Authenticator app, during the subsequent login, a QR code displays and you can install Google Authenticator on your mobile device to generate the time-based one-time password protocol.
In this release of 8x8 Admin Console, we are introducing the following enhancements:
Ability to search external contacts
External contacts are contacts created or imported to make them available via the directory. When an external contact record is deemed necessary to be available via the directory for all users, a contact record is created or imported via a CSV file. Note that this contact is not assigned with any 8x8 services. Learn more about contacts.
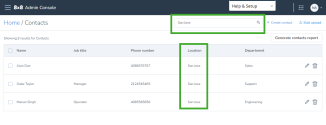
In this release, we are introducing the ability to search external contacts by name, email, job title, department, phone number etc. This comes in handy especially if you are searching through a long list of contacts.
- Go to Home > Contacts to view the list of existing contacts.
-
In the search box, enter a keyword and press Enter to search and filter the contact list based on the keyword.
A resulting contact list displays.
Introducing the Audit Events Viewer
In this release, we have introduced the Audit events viewer feature to all 8x8 customers. The Audit events feature in 8x8 Admin Console allows administrators to review configuration changes made to their 8x8 services over a period of up to 90 days, in 30-day increments. Use this feature to see who made a change, when the change was made, what type of change was made, and the details of the change. Currently, you can select to view the changes made to:
- Users
- Auto attendants
- Call forwarding
- Call queues
- Phone numbers
- Extensions
- Ring groups
To learn more about how to access audit events and available filters, click here.
Introducing access to Voice for Teams portal
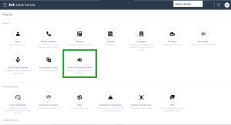
Administrators with an 8x8 Voice for Teams license are now able to log into Voice for Teams portal easily and quickly using the UI button in the 8x8 Admin Console home page. This button is accessible to customers who have purchased an 8x8 Voice for Teams license.
- In the home page of 8x8 Admin Console, click Voice for Microsoft Teams to be navigated to the 8x8 Voice for Teams portal, from where you can manage the sync between MS Teams users and the 8x8 Voice for Teams profiles.
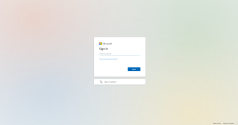
- The authentication to the Voice for Teams portal is done via the Microsoft 365 SSO. At the prompt, enter your Microsoft login credentials.
- The Voice for Teams portal launches.
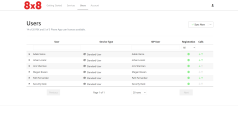
In this release, we have introduced the following new enhancements:
-
New SMS registration feature (brand and campaign registration)
- Enhanced inbound SMS blocking spam at the company level
- Enhanced inbound SMS spam blocking at the user level
- Improved audio selector searching experience
- Site E911 Notification Email address validation
New SMS registration feature (brand and campaign registration)
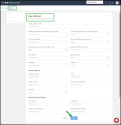
Starting with this release, a new SMS registration feature is available to you. The SMS registration feature allows customers to manage both their registration brand and campaign processes and SMS assignment, which is necessary to ensure that customers' SMS are not blocked by the SMS traffic operators.
The SMS registration process contains three sections:
- Brand - Manage campaigns registration, by providing basic information about your brand.
- Campaign - Define your campaign.
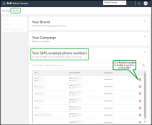
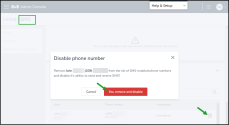
- SMS enabled phone numbers - View and disable enabled SMS numbers. (Assign or enable a user to SMS through the User page).
The SMS registration configuration tab is an online web form through which you self-register the SMS traffic to comply with what carriers expect in terms of SMS traffic. Moreover, you can manage the SMS numbers assignment process.
To SMS register your brand and campaign and assign SMS numbers:
- In the Admin Console Home page, under Phone System, click SMS.
- In the SMS page, register your company and assign phone numbers for SMS traffic.
-
Under Your Brand, provide all the basic information about your brand and click Save.
A call is sent by the app to the Campaign Registry (a third-party entity), and the registration happens asynchronously. The validation might take about one minute.
- Under Campaign, define your campaigns as you need.
-
Under Your SMS enabled phone numbers, from the list the user you want to disable from sending SMS, and click Remove
 number in the related row. Confirm.
Notes:
- We only enable SMS numbers only for the US or Canada.
- A user might have assigned more than one number, and if more than one is SMS capable, you can enable only one at a time.
- First number is the enabled SMS number.To assign or enable a user to SMS, navigate to Home > Users page.
Enable or disable users SMS capability
The new SMS enabled numbers option now is available in each user profile, where you can enable or disable SMS functionality. In addition, you can see if the user’s number is assigned to the campaign.
To manage SMS capability:
Note: Make sure you have completed your SMS registration before enabling an SMS .
- In the Admin Console Home page, under Setup, click Users.
- In the Users page, search for the user you want to manage the SMS enabled capability, and click Edit
 in the respective row.
 - In the Edit page, click SMS enabled numbers in the left menu, and under SMS enabled numbers, enable or disable the SMS capability by selecting the toggle on/off.
- Click Save.
Note: If users have more than one phone number assigned, you can only enable SMS for one number at a time.
SMS registration UI improvements
New UI improvements are made to the SMS Registration section. The following fields under Your Brand, now are mandatory to complete and validate the registration process:
- Website - Enter the SMS Registration Web URL, which is required for the campaign registration.
- Vertical - Displays a list of domains from which you can choose the appropriate one.
Enhanced inbound SMS blocking spam at the company level
If you have admin rights, you now have the ability to block inbound SMS from shortcodes, beside the phone numbers.
As an admin user, you can block inbound SMS for numbers specified in the Home > Company > Blocked SMS tab.
To learn more about how to block SMS , click here.
Both shortcodes and phone numbers you enter must has a valid format:
-
Provide phone numbers in the E.164 format, including the + or 00 prefix:
- +14088001500 or 0014088001500
-
Remove any spaces from the phone number of shortcode:
- 0014088001500 instead of 001408 800 1500
- Provide shortcodes, regardless of their length.
Note: The validation passes as there is no validation around the shortcode length. This long digit sequence passes validation and it is listed in the Blocked SMS list, but blocking the shortcode will fail.
Validation fails for input such as:
-
It does not meet the phone number formatting (E.164 numeric format) and it is not a shortcode:
-
If it contains minus sign (-) and does not follow the E.164 numeric format:
- 123-123
- +1407-460-1005 is not the correct phone number format ( E.164 [+][country code][subscriber number including area code]).
-
If it contains plus sign(+) and it is not E.164 number format:
- +568
-
A series of digits starting with the 00 digits:
- 0032 - numbers that start with the 00 digits are considered a country prefix and are transformed into plus sign (+), so the input will be +32, which is not a phone number or a shortcode.
-
A mix of letters and digits:
- 568abc
-
Any series of numbers combined with special characters:
- !@#$%
-
Important! Validation passes for any sequence of digits regardless of the length, such as 10001, 1, 123456, 123456789000. For the US and Canada, by default shortcodes are 6 digits long. Only these shortcodes will be actually blocked, even all the validated shortcodes are displayed in the Blocked SMS list.
To see more details about block SMS supported formats, click here.
Enhanced inbound SMS spam blocking at the user level
As an 8x8 Work user, you now can manage your blocked inbound SMS numbers from Account Settings > Blocked SMS.
In the user Account Settings > Blocked SMS numbers list, the numbers blocked by users display first. At the end of the list, numbers blocked by admins display after numbers blocked by the user. However, the numbers blocked by admins cannot be removed or edited by the user.
Important!
- Numbers blocked by a user block the inbound SMSs only for that user extension, on UC only or 8x8 Work apps.
- Numbers blocked by admins block the inbound SMSs for all their users/extensions, in CC and UC.
- If both the user and the admin block the same phone number, only the admin record will be displayed on the users’ list, without any editing permissions.
Improved searching for user capability
In the Blocked SMS page, you now have the ability to search for a user number whose format includes the + [country code] prefix, the Search capability now considering the (+) character.
To learn more about how to block SMS as an end-user, click here.
Improved audio file searching experience
You now have the ability to narrow a list of selectable audio files by searching them by name (Voicemail, Auto Attendants, Music on Hold, Call Queues etc.), wherever audio files are selectable.
Let’s say you want to look for a specific audio file from a long list of audio files. You now can simply search it by name:
- In the Admin Console Home > Audio Files page, enter the entire name or part of the file name in the Search box. The audio file displays.
Yealink device line key configuration improvements
Note: These capabilities are applicable only for Yealink devices.
With 8x8 Line Appearance Keys (LAK), you can handle multiple concurrent calls. You can add or remove the Line Appearance Keys from the 8x8 Admin Console and push them to the phone device. We are introducing new line key setting capabilities for the Yealink devices:
- Ability to enable additional BLF Call Ring Notifications
- Enhanced settings for Line Key configuration (Shared Line Appearance)
- Speed dial ringtone enhancement for Yealink devices
Ability to enable additional BLF Call Ring Notifications
For the users who have Yealink devices, while you are configure phone keys plan, you now have the ability to enable one of the additional BLF Call Ring Notifications options:
- Call screen notifications
- Call audio tone for incoming calls
To enable one of the additional BLF Call Ring Notifications options:
- From the main 8x8 Admin Console, go to Users.
- Click to edit an existing user and expand Voice basic settings, and make sure the user has a Yealink device.
- Click Line key configurations next to Device model.
-
In the Edit device settings window, under Additional BLF Call Ringing Notifications:
- Select to toggle on/off Enable call screen notifications.
- Select to toggle on/off Enable call audio tone for incoming calls.
- Click Save.
Note: This capability is only applicable to busy lamp field (BLF) keys.
Enhanced settings for Line Key configuration (Shared Line Appearance)
For users who have Yealink devices,, while you are configuring the line appearance keys via the Users > Voice basic settings section, in addition to the Line Appearance - User line key type already available for the Yealink devices, the Line Appearance -Shared line option now is available, as well.
To learn more about how to configure line appearance keys, click here.
Speed dial ring tone enhancement for Yealink devices
For the users that have Yealink devices, while you are configuring the Speed dial key via the Users > Voice basic settings section, when you select one of the available ringtone types, it is enabled, and the guest will hear this ringtone when the call comes from this extension speed dial.
Notes:
-This improvement only affects the device whose ringtone configuration you change.
- For users who have Yealink devices, you cannot go back to any previous configuration.
To learn more about how to set up speed dial keys, click here.
Site E911 Notification Email address validation
This enhancement makes a minor change to emergency email address validation for sites.
You have the ability to associate an emergency email address to sites from the US and Canada. If any user from that site makes an emergency call, a notification is sent to the associated emergency email address.
Starting with this release, any email addresses having no dot (.) in the domain part and email addresses with an suffix apostrophe (') do not pass the validation.
-
Before invalid email flagged - Previously, you could register an invalid email address for emergencies. The email addresses having no dot (.) in the domain part and email addresses with a suffix apostrophe (') passed the validation.
-
After invalid email flagged - You now cannot register an invalid email address for emergencies. The email addresses having no dot (.) in the domain part and email addresses with a suffix apostrophe (') do not passed the validation anymore.
In this release, we have introduced the following new enhancement:
Ability to block spam SMS
A majority of incoming calls aren't from your customers, instead, they're from scammers and telemarketers. More recently, these attacks have moved over to SMS, disrupting teams’ activity.
In this release, 8x8 offers phone system administrators the ability to block inbound spam SMS by blacklisting phone numbers. This blocks inbound spam SMS from the specified numbers for all user extensions on the PBX including 8x8 Work and 8x8 Contact Center users. End-users can view the list of blocked numbers on 8x8 Work for Desktop without any editing permissions. This feature addresses any security concerns related to SMS scams, such as a user tapping a link, opening an attachment, calling a number, likely to cause some issue.
Note: All admins with the ‘Company’ permission can access this capability.
Features
- The numbers blocked by admin apply to all user extensions on 8x8 Work and 8x8 Contact Center.
- Users can add multiple numbers by entering them manually or copying and pasting from a CSV file or another document.
- Numbers must be formatted in E. 164 format. e.g. +1 (408) 876 6543.
- An error message is displayed when:
- A number already blocked is added.
- A number is entered in an invalid number format.
-
A number is duplicated in the modal window.
Note: The error message is not displayed if the number is already blocked and there is no validation around duplication overall per the entire list.
Supported formats
- Shortcodes will be supported in a future iteration.
- Phone numbers ranges are not currently supported.
- There are no restrictions around which phone numbers can be blocked. They are not checked against the Company Directory or Personal Contacts.
To block spam SMS:
- Log into 8x8 Admin Console.
- Go to Home > Company.
- Select Blocked SMS.
- On the top right corner, click Add new numbers.
-
Enter the phone numbers to block SMS from. Make sure to enter it in the E.164 format (e.g. +1 (408) 876 6543)
Note: As you finish entering a phone number, press Enter/Space to begin entering the next number.
- If you entered an incorrect number, you must delete the number and reenter the correct number. You are not allowed to edit.
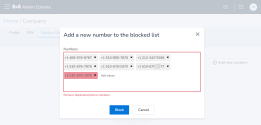
-
If you entered a duplicate number within this entry, you are alerted to remove the duplicates before saving.
Note: This does not check for duplicates against the existing list.
- Once you complete entering the list of phone numbers, click Block.
- Verify the list of blocked numbers that appear.
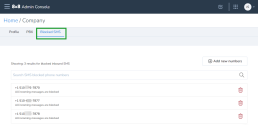
Access the list of blocked SMS numbers as an end-user
Alert: Ability to access the list of SMS numbers blocked by admin is available on 8x8 Work for Desktop 7.26 release which will be released in Beta during mid December and generally available to all in early January 2023.
As an 8x8 Work for Desktop user, you can now access the list of SMS numbers blocked by your admin. Additionally, if you are experiencing spam SMS from unknown numbers, you can block SMS from those numbers on your end. The numbers you add are blocked from sending inbound SMS to your extension only. Other extension users in your company are not impacted.
To access the blocked inbound SMS numbers:
- Log in to 8x8 Work for Desktop.
- From the menu, click Settings
 > Account Settings.
 - From the list of Account Settings, select Blocked SMS.
- You can view the list of numbers blocked by your admin. Note that they are not editable.
- To add more numbers, click Add new numbers.
- Enter the numbers in the E. 164 format.
- Once you complete the list, click Block.
- Verify that the list now displays the numbers you added. They appear on top of the admin list. You can delete these numbers at any time.
Important:
- Numbers blocked by users block inbound SMS only for that user extension on 8x8 Work apps.
- Numbers blocked by admins block inbound SMS for all their users/extensions, in 8x8 Work and 8x8 Contact Center.
- If both user and admin block the same phone number, only the admin record will be displayed on the users’ list, without any editing permissions.
In this release of 8x8 Admin Console, we have introduced the following enhancements:
Ability to reassign users from one site to another
An 8x8 user without a license can now have their site updated individually from one PBX to another PBX. In this release, you can move a user who is not yet assigned with a license, from one site to a site in another PBX. This gives you the convenience of redistributing users before assigning licenses.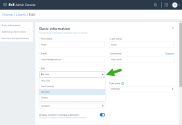
Note: Moving users with licenses are currently only supported within the same PBX through bulk edit only.
Bug fix
We have also fixed a bug for users who want to use PBX system extensions on Line keys. You can now retrieve device line key configuration when a system extension such as call park extension is configured.
In this release of 8x8 Admin Console, we have introduced the following enhancements:
Relaxed validation logic for Identity and Security information
While setting up Single Sign-On for a SAML provider such as Okta, we have relaxed the validation logic for IDP Issuer field value in the Identity and Security page. Let's say you select Okta as your Identity Provider, you can now enter a value for the IDP Issuer field without any restriction.
Enhanced tool tip for porting phone numbers
We have introduced a more helpful tool tip for the preferred porting date field. While submitting a request for porting phone numbers, the tool tip message alerts you that your preferred date of porting is not a guaranteed date for porting and that once the request is submitted, our porting team will communicate a confirmed porting date allowing you to make any further arrangements. After selecting the porting numbers, you are alerted once more before proceeding to the next step in porting
Updated validation message for BMW group admin
While selecting a user as a Barge-Monitor-Whisper (BMW) group admin, the system validates the license eligibility of the user to be a BMW group admin and displays a message when the validation fails. This message is now updated for brevity and better user experience.
Translation support for Estonia and Ecuador dial plans
We have now added translation support for Estonia and Ecuador global dial plans.
In addition to the above enhancements, we have released bugs fixed in this release.
In this release of 8x8 Admin Console, we have introduced the following enhancements:
Multi-Contact Center enhancements (Limited Availability)
8x8 is introducing support for multiple contact centers in this release. As an 8x8 Contact Center customer, you can now have more than one tenant each with different license types. As a multi-contact center customer, you will notice the following changes in 8x8 Admin Console:
- Channel rerouting and logins page is now moved under the Company page: To access this page, from Home, go to Company and select the Contact Centers tab. You will see a list of contact centers with name, region, and the routing plan. To learn more about the routing plans, click here.
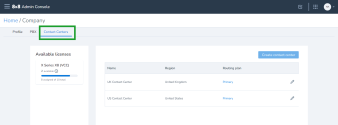
- The VCC Channels page is now nested in the Phone numbers page: To access the list of contact center voice channels, from Home, go to Phone Number page and select Contact Center Voice for filtering.
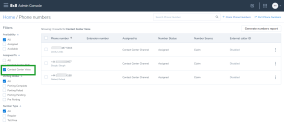
With support for multiple contact centers, we are introducing the following enhancements:
When you select to view Contact Center details, the side panel shows the following enhancements:
- Contact Center ID (i.e. Tenant ID) is shown
- PBX name is shown in the region field
- Extra voice ports section clarified and only shown if customer has voice ports licenses
- License count warnings clarified
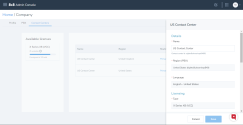
Contact Center name is shown in more places:
- On assigned licenses in the Licenses page
- On the Site selector in the User create page
RBAC scoping for Storage roles allows restriction to both Sites and Contact Centers (Which sites and which contact center does the admin need access?)
- Existing “Storage Admin” scopes will be converted to the new scopes
Introducing Work apps settings for IT admins
In this release, we are introducing options to IT admins to allow or prevent access to certain settings for end-users. For example, end-users can enable built-in call controls. Beginning this release, IT-admins can control this setting from Admin Console for all end-users. If required, they can disable end-users from making changes to this setting. This offers admins granular control to define default values for some settings for all end-users in your organization, check which settings can be further altered by each user, or prevent them from making any changes.
Admins can now manage the following Work app default settings:
- Enable built-in call controls: Allows integrated call control settings for specific headsets.
- Enable call control window: Allows you to access the floating call control window when the app is not in focus.
- Call info pop-up: Allows you to quickly view details about the caller and prepare for the caller for a better customer experience.
- Set status away: Allows you to set your status to automatically display as Away after a period of time.
Additionally, with the ability to lock these settings, admins can prevent end-users from changing these settings.
In the RBAC roles, the Super Admin and Company Admin role permissions now include Work app settings.
EOL warning message for SWB Pro
With the scheduled end of support and end of life of Switchboard Pro, we are making some changes to the related admin settings. In this release, we will add alerts to admins about the upcoming end of support in the screens relevant to the Switchboard Pro settings.
Nomadic 911 enhancements
- Removal of “None” address option for Service Location when ERS enabled
- Prevent enable of ERS when “None” is set as the Emergency Address
- Nomadic 911 home page icon/menu item visibility restricted to company settings permission
- User report includes column for ERS Enabled
Other Enhancements
- Number claiming for Puerto Rico now allows for both area codes (939 & 787)
- Modified approach to selecting BMW group administrators: Prior to this release, while adding BMW group admins, they had to be a member of the BMW group. Now, we have removed the limitation allowing you to simply search for any user and add them to the BMW group admin. If the user selected does not have the right permissions, you will be warned about it so you can resolve the permissions before saving the group admin role.
- SRTP toggle is shown for ATA devices that support it in User create/edit page.
- Label change for Quality Management and Speech Analytics for UC to Conversation IQ to align with marketing terminology
In this release of 8x8 Admin Console, we have introduced the following enhancements:
- Adding configuration changes related to Switchboard Pro EoL
- Enhanced settings for SRTP support
- Enhanced Company page
- Introducing new options for Yealink W70B based DECT devices
- Resolving a functionality issue in Auto Attendants
Adding configuration changes related to Switchboard Pro EoL
As you are aware, 8x8 is preparing to EoL Switchboard Pro and replace it with 8x8 . To facilitate this effort, we are making some changes in the 8x8 Admin Console.
- For new 8x8 customers, the Switchboard Pro section in user settings will be hidden completely.
- Existing Switchboard Pro customers will continue to be able to provision new Switchboard users until Switchboard EoL.
Enhanced settings for Secure Real-time Protocol support
Secure Real-time Transfer Protocol (SRTP) is a standard protocol for securing VoIP traffic. SRTP which is intended to provide encryption, message authentication and integrity, and protection, is enabled by default for all devices. Disabling TLS/SRTP switches the endpoints over to User Datagram Protocol (UDP) and Real-time Transport Protocol (RTP).
Prior to this release, the setting to enable or disable SRTP for a device was available for all devices even when the devices did not support SRTP. In this release, we have enhanced this setting to show only for devices that support SRTP.
To enable SRTP for an endpoint:
- While creating or editing a user, go to Home > Users > Voice Basic Settings.
- In the Device model option, select a device such as Polycom VVX 450.
- Toggle on Enable Secure Real-time Protocol and save the changes.
Note: If you select a device that does not support SRTP, this setting will be hidden.
Enhanced Company page
In this release, we have enhanced the Company page by grouping the PBX details in a separate tab. The Company page now has two tabs:
- Profile: View a summary of the phone system including information about the number of sites, number of PBXs, dial plan, and more.
- PBX: Review the list of PBXs assigned. Select a PBX to view the details such as the country it is assigned to, dial plan, language for prompts and email notifications, and time zone.
Introducing new options for Yealink W70B based DECT devices
We are introducing a new set of DECT devices based around the Yealink W70B base station. This base station supports RT30 repeaters which help improve call reception. We support two models of handset:
- Yealink W56H is a regular handset for the W70B DECT base station; available as a bundle W56P.
- Yealink W59R is a ruggedized handset for theW70B DECT base station, available as a bundle W59P.
In 8x8 Admin Console, under user voice basic settings, select the handset and then the base while assigning a device to users.
Resolving a functionality issue in Auto Attendants
While setting up a menu in an auto attendant, where customers can dial DTMF keystrokes to select a menu item, some of the additional settings for the menu were ignored unless the option to allow callers to dial an extension at any point was enabled. Prior to this release, the option to set a duration the system should wait before taking next action and the option to replay the menu if the user fails to input a key were ignored. This dependency has been removed in this release and the settings are honored even when callers are not allowed to dial an extension at any point.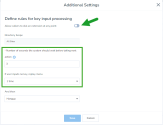
We have introduced the following feature enhancements and changes to the product in this release:
- Improvements to license management
- Revised labelling of Identity Management
- Ability to configure User Provisioning independent of SSO
Improvements to license management
To facilitate better experience with 8x8 billing, we are introducing improvements to the license management page in 8x8 Admin Console. We have reorganized the license list from a flat list to a three-level structure. Licenses are grouped by:
- License type
- License country
- Detailed side panel
The details side panel displays:
- License IDs
- Who or what each license is assigned to
- The service address associated with each license
Additionally, we allow:
- Filtering by country
- Searching by license ID
- Filtering by license status (assigned/unassigned/suspended)
Ability to update the service address of unassigned licenses
Each license is associated with a service address based on the sales order location. Let’s say your company orders licenses in bulk from the headquarters (NewYork) location, but then distributes it to your branch offices in Seattle, Delaware, and Washington. The service address of the assigned licenses get updated while the unassigned licenses remain bound to New York. With the varying state taxes in the US, the amount billed for unassigned licenses may not be accurate. To resolve this issue, in this release, we are introducing the ability to manually update service addresses for unassigned licenses as well.
To manually updated the service address of unassigned licenses:
- Go to Licenses.
- Select a license type and expand the countries the license is available to.
- Select a country to view the license details panel.
-
Unselect the filters Assigned and Suspended to view just the unassigned licenses.
Note: By default, you can view licenses that are assigned, unassigned, and suspended.
- From this list, in the service address column, select the site address to associate the license to.
- To update the service address for multiple licenses, simply select the desired licenses and choose a service address from the available service address options.
- Notice the unsaved changes link at the top of the list. Click to view a summary of the address changes including the previous address and the newly opted address for each license.
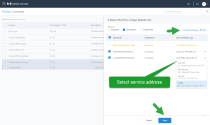
- Click Save to save all the address changes.
These service address changes will reflect immediately in the licenses list in 8x8 Admin Console, while it takes around 15 minutes to cascade to the 8x8 Billing portal.
Learn more about license management.
Revised labelling
The Identity Management icon in the home page is now relabelled as Identity and Security to accurately represent the functionality changes.
Ability to configure user provisioning independent of SSO
User provisioning integration allows you to automate employee onboarding & offboarding by having the users in your enterprise directory synchronised into 8x8 Admin Console. Until now, configuration of User Provisioning (aka SCIM) Integration used to be tied into configuration of SSO integration. This worked well if the same identity provider was used for both SSO and user provisioning. This was not ideal for customers wanting different Identity providers for the two integrations or simply wanting to disable SCIM without interrupting SSO. We have now decoupled the two and introduced the ability to configure user provisioning independently.
To configure:
- Go to Identity and Security.
- Under User Provisioning Integration settings, select the desired Identity Provider and add the relevant information.
- Further, under Advanced settings, select to retrieve only the users created by your Identity Provider or retrieve all users.
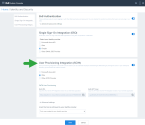
Additionally, we have reorganized the information as follows:
- 8x8 authentication and SSO authentication are now grouped separately
- Advanced password settings are grouped under the 8x8 authentication box
Inability to disable authentication settings
To prevent any unintended disabling of both 8x8 authentication and SSO settings, we now disable the option to toggle off the remaining option. Let’s say you have enabled both authentication options, you disable the 8x8 authentication option. Now if you try to disable the SSO settings, the toggle is greyed out preventing you from turning off this option thereby retaining the settings for at least one mode of authentication.
User retrieval in user provisioning
Previously, for user provisioning, you were limited to retrieving users created in the Identity Provider such as Okta. If you created users in 8x8 Admin Console, you could not retrieve them in Okta. We have now introduced the ability to retrieve:
- All users
- Only users created by the identity provider
If you select All users, you can retrieve users created in the 8x8 Admin Console along with users created in the Identity Provider thereby allowing the Identity Provider to take control of the user profile if the login IDs map.
We have introduced the following feature enhancements and changes to the product in this release:
Introducing 8x8 Frontdesk
In this release, we are introducing settings to enable 8x8 Frontdesk, a flexible and easy-to-use desktop based application for 8x8 Work users. 8x8 Frontdesk offers better call management capabilities to front desk receptionists and improves their experience in handling a large volume of calls and needing to frequently transfer calls.
8x8 Frontdesk can be configured to suit varying business needs. Follow these instructions to enable 8x8 Frontdesk to a single user.
To enable 8x8 Frontdesk to a user:
- Log into the 8x8 Admin Console.
- Go to Users.
- Select to edit the desired user.
- In the user settings, under Services and permissions, if the user is assigned with an X4 or higher license, toggle the Enable Frontdesk on.
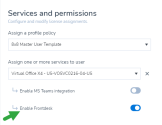
- Proceed to assign a phone number to the user.
As a next step, assign the receptionist phone number as the site main line number.
- Go to Sites.
- Select to edit the site to which the user belongs.
- Under Voice Service Settings, select the phone number of the user enabled with Frontdesk in the previous step as the site Main line number. Users calling the site main line number reach the receptionist.
With this setup complete, the user enabled with 8x8 Frontdesk can now log into 8x8 Work for Desktop and access the Frontdesk functionality. For more information about 8x8 Frontdesk end user experience, check out the user guide. 8x8 Frontdesk can be configured to suit varying business needs. Learn more about the use cases.
Revised UI labels for an enhanced user experience
We have revised the following UI labels:
In the individual site edit, the field previously labeled as Receptionist is now revised to Default voicemail 0 out destination to correctly represent the intent of the field. Callers reaching the voicemail of a site member can dial 0 during the greeting and be redirected to the destination you specify. This default setting can be overridden by users.
Switchboard greetings is now labelled as Receptionist greetings.
We have introduced the following feature enhancements, bug fixes, and changes to the product in this release:
- Introducing enhancements to custom dial plans
- Preparing for multiple PBX support
- Limiting transcription policy to Speech Analytics customers
- Switchboard label changes
- Introducing 8x8 Contact Center SMS channel provisioning improvements
- Bug fixes
Introducing enhancements to custom dial plans
To meet the dialing needs of our X Series customers, we have now introduced the ability to customize rule sets in custom dial plans.
- Previously, the custom dial plans allowed users to access emergency number dialing, domestic, and international dialing. In this release, we allow adding up to three custom rule sets to meet specific business needs.
-
Prior to this release, custom dial plans created by 8x8 were available to all 8x8 X Series customers. With this release 8x8 can create private custom dial plans for specific customers who need them.
- Standard dial plans such as the North American Numbering plan can be duplicated and customized with additional custom rule sets to meet the individual business needs. These customized standard plans replace the predefined standard dial plans.
Preparing for multiple PBX support
For 8x8 customers migrating to X Series, our efforts are in full swing to support duplicate extension numbers on multiple PBXs. Duplicate extension numbers across multiple PBXs must be prefixed with PBX codes to become unique. For example, if your offices in Seattle and San Francisco use identical short digit codes, then you must use PBX codes while dialing to reach the desired destination. To reach the extension 1001 in the Seattle office with the PBX code 11, you need to dial 111001. To reach the extension 1001 in the San Francisco office with the PBX code 21, you need to dial 211001. In this release, if you have auto attendants and call forwarding destinations set to local extension numbers for ring groups, call queues, and users, they will route to the correct destination. In a future release, we will add support for PBX codes for remote auto attendant and call forwarding destinations. Until then, you will need to add remote destinations as custom numbers.
Limiting transcription policy to Speech Analytics customers
The transcription policy icon in the home page of 8x8 Admin Console is now displayed to only 8x8 Speech Analytics customers.
Switchboard label changes
The label for Switchboard in the Home page is now revised to Switchboard Greetings to clearly indicate the functionality offered via 8x8 Admin Console. When you navigate using this icon, you can set up switchboard greetings for receptionists. Additionally, we have added helpful tool tips on the screen while defining switchboard greetings.
8x8 Contact Center SMS channel provisioning improvements
When a phone number is provisioned to an SMS channel in 8x8 Contact Center, it will now be marked as assigned to Virtual Contact Center SMS. This eliminates any possibilities of reassigning this phone number to another user or service accidentally. Previously, the phone number showed up as available in the list of phone numbers or reports in 8x8 Admin Console.
Go to Home > Channels to view the list of 8x8 Contact Center voice and SMS channels. When you generate the VCC Channels report, the report lists them as assigned.
Bug fixes
|
Bug description |
Resolution |
|---|---|
| Unable to add more than 25 members to a paging group | Fixed |
| Bulk editing a large number of users results in errors. | You can edit up to 120 users at a time. |
We have introduced a new feature and a few feature enhancements in this release:
- Introducing 8x8 Password Policy
- Enhanced filtering of user reports
- Enhancements in Ring Groups
- Setting up a voicemail pin for users in bulk
Introducing 8x8 Password Policy
8x8 Password Policy 8x8 Authentication defines a mechanism for securing user accounts. Administrators can define a set of password rules for enhanced security. The rules, set by administrators, encourage users (administrators, end-users, agents, and supervisors) to employ strong passwords, and ensure proper usage and account protection.
Notes:
- The 8x8 Authentication applies to authentication via 8x8 login credentials only.
- They do not apply to Single Sign-On integration with Identity providers such as Okta or Microsoft Azure AD.
- 8x8 Authentication can be disabled only for users who are not admin accounts.
Features
- Timed password expiration forcing a periodic password change.
- Password history to remember a specified number of previously used passwords which prevents re-use.
- Minimum password length of 8-25 characters.
- Password complexity requirements, such as a mix of alphanumeric characters or a mix of upper and lowercase alpha with numeric characters. Special characters can be optional.
- Invalid login attempts locking users out temporarily.
- Account lockout for a specific time or until reset by the administrator in case of invalid login attempts.
-
Configure Multi-Factor Authentication challenge frequency for all users. As an admin, you can set up to check MFA on a user device every selectable x days, up to 90 days.
Learn more about how to access and set 8x8 Password Policy.
Enhanced filtering of user reports
With new filters for user status, you can now filter deactivated users and view only the active users in the user report or vice versa.
- From the menu, go to Users.
- From the filters on the left, select Deactivated to view the list of deactivated users.
- Click Generate User Report to download the filtered report.
- To check if the user is active or deactivated, select User.Deactivated field to access the data in the report. In the report, the field indicates Y for deactivated or N for active.
Enhancements in ring groups
You can now set the number of cycles for ring groups from 1 to 20 times. This means calls directed to a ring group cycles N times before being forwarded to voicemail where N=1-20. Previously, you could set the number of cycles to 0 which forwarded the call to a selected destination such as voicemail without even cycling once. As this is not the intended behavior, we now allow a minimum value of 1 for Cycles.
Note: If you have ring groups set to cycle 0 times, they will skip the cycle and forward calls to the desired destination. After this release, if you reset the value, you will be prevented from setting it back to 0.
We have fixed a label and enhanced the user experience while defining or editing ring groups. One of the External caller ID options - Ring Group Name and Dialed Number, is now correctly labeled to show the ring group name (Sales team) and the number dialed by the caller (1-888-334-3222) which may or may not be the ring group number. This contrasts with the option - Ring Group Name and Ring Group Extension, which always displays the ring group extension and not the originally dialed number.
Setting up a voicemail pin for users in bulk
While editing user settings in bulk, you are allowed to set a voicemail pin for multiple users at once. The voicemail pin authenticates users to listen to their voicemails. This setting had an erroneous behavior previously which is now fixed.
We have introduced the following feature enhancements in this release:
Ability to link Switchboard Pro greetings to phone numbers
In this release, you can link Switchboard Pro greetings to phone numbers rather than users. Greetings are short text messages that are associated with a destination phone number. When a call comes in to that number, the greeting text pops up on Switchboard Pro so that the Receptionist can greet the caller appropriately before directing the call to the intended user or department. We have also introduced the option to associate the greeting with a site so that the directory listing seen by the Receptionist can be auto-filtered to entries from that site when a call comes in to that number. This helps in navigating the list quickly and identifying the contact.
To add a greeting to be accessed in Switchboard Pro:
- Log in to 8x8 Admin Console.
- Go to Home > Switchboard.
- Click + Add greeting.
- Select a phone number from the list of available numbers. The greeting will be linked to this phone number. When a call comes into this number, the receptionist can view this message and greet the caller appropriately.
- Select a site to auto-filter the phone numbers in the contact directory to entries from that site so that the receptionist can quickly navigate through the filtered list and direct an incoming call. This is optional.
- Add the greeting text. Click Save.
When an incoming call is received by a receptionist on the Switchboard Pro for this number, the greeting message pops allowing the receptionist to greet the caller appropriately.
Click Generate greetings report to get a consolidated report of all greeting messages associated with phone numbers and corresponding users.
Known Issues
Switchboard Pro greetings do not automatically move from a temp number to ported number on post-port activation; The suggested workaround is to manually recreate greetings as required.
Enhancements to User Report
We have introduced two new fields to the user report.
- Additional voice numbers: Displays additional voice numbers assigned to a user apart from the primary number.
- User: external identity provider: Displays if the user was created from an external identity provider such as Okta or Azure. The value is empty if the user is created in 8x8 Admin Console.
To access the user report, go to Home > Users. Click Generate Users report.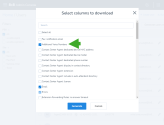
Other improvements
In the user record, the label for personal contact address is now labelled as Personal Address to clarify that this is not the emergency address.
The user interface for filtering role assignments by user name is now updated allowing you to search and find the role assignments by user name. You can search by multiple names.
We are introducing the following enhancements and changes in the 8x8 Admin Console 1.26.2 release.
Enabling users to select shared numbers in caller IDs
In this release, we are enabling users to select Call Queues, Ring Groups, and Sites as caller ID if they belong to the site and are a member of those groups.
Previously, you could share the site main number as the caller ID for all users across all sites. In this release, we have fine tuned it to be available to only users assigned to that site. If John is assigned to the New York site, the site main number for New York is available to be shared as the external caller ID for John. For each site, you can share the site main number as the caller ID.
To share the site main number as the caller ID:
- Log into 8x8 Admin Console.
- Go to Sites. Select to edit a site from the list.
-
Under the Voice Service Settings, enable Share Main Number as Caller ID.
The site main number is shared for caller ID with all users belonging to the site. - Save the settings.
In this release, we have added the capability to share the call queue and ring group phone numbers as external caller ID. This is available to only the members of the call queues or ring groups. If John is a member of Tier 1 Support call queue, the call queue number is shared as a caller ID for John. In responding to callers on this queue, John can set the call queue phone number to be his caller ID and further customize the display name in the caller ID. This helps customers in identifying the call source.
To share a call queue number for caller ID:
- Log into 8x8 Admin Console.
- From the menu, go to Work Groups > Call Queues.
- Select to edit a call queue from the list.
- In the External Caller ID section, enable the option to Use Caller ID.
-
Edit the display name as needed and save the settings.
The shared number of work groups appear in the users’ caller ID choices. - Follow a similar procedure for ring groups.
Change notification
The Call Recordings page title is now changed from Call Recordings to Recordings. This change is introduced in anticipation of the extended support to access chat recordings in a later release.
We are introducing the following enhancements and changes in the 8x8 Admin Console 1.25.5 release.
- Introducing Otto
- Ability to upload VCC users in bulk
- Ability to change phone and extension number of a VCC dedicated extension user
- Display current release of AC in the application
- Bug fixes
Otto, the chatbot for 8x8 Admin Console is here!
We have now introduced Otto ![]() , a chatbot designed to guide you through the 8x8 Admin Console setup and navigation. Whether you are setting up sites, adding users, or claiming phone numbers, if you need help, simply type your question, and Otto offers to walk you through the setup process or provides you with instructions to set up at your convenience. Otto is available at the bottom right corner of the page. Click
, a chatbot designed to guide you through the 8x8 Admin Console setup and navigation. Whether you are setting up sites, adding users, or claiming phone numbers, if you need help, simply type your question, and Otto offers to walk you through the setup process or provides you with instructions to set up at your convenience. Otto is available at the bottom right corner of the page. Click ![]() to launch a session.
to launch a session.
Note: The Help Center links available on the Home page previously are now embedded within the Otto launch interface. Click the 8x8 Admin Console user guide link to navigate to the help center links for a deep-dive.
Ability to upload VCC users in bulk
If you are an 8x8 Contact Center customer on X Series, you will now be able to upload VCC users in bulk. In the user report you download or the template you upload, we have now added eight new columns to enable adding VCC users in bulk. Previously, you were limited to assigning a VCC license and defining the corresponding settings via the user interface per user. Now, you can add VCC licenses to users, set an extension number, add dedicated devices, select the agent to be included in the auto attendant, and more via the bulk upload template.
- The bulk upload settings mimic the settings available in the user interface
- The template does not offer a column to indicate the VCC dedicated extension. It is assumed automatically when a phone number and device are chosen.
- Extension numbers for agents are auto-generated if not provided.
To add VCC users in bulk:
- Log into 8x8 Admin Console.
- In the Bulk upload window, click Download .CSV template.
- At the prompt, select the columns to download from the list.
-
To add VCC users, ensure to select the following columns:
- Contact Center Agent: license
- Contact Center Agent: extension
- Contact Center Agent: dedicated device model
-
Contact Center Agent: dedicated device MAC address
-
Contact Center Agent: dedicated phone number
-
Contact Center Agent: display in contact directory
-
Contact Center Agent: include in auto-attendant directory
- Contact Center Agent: send agent welcome email
- Click Download template. The template file is automatically downloaded to your local disk.
- Open the template using Microsoft Excel. Click here for template field descriptions.
- Add valid data and save.
- Go back to 8x8 Admin Console and in the bulk upload window, drag and drop your .csv or click to browse.
-
Upload the CSV file you just saved and click Validate.
The rows are validated top to bottom. A green bar flashes in the header bar if the validation process goes well.
- After validation, click Bulk upload again, upload your validated CSV file and click Validate and Process. The uploading process starts and the rows are processed. The new users appear in the Users page. You can check out the list of activities by clicking on the top header or by going to the Tasks page from the main menu.
Note: Bulk edit via CSV continues to be limited availability.
Caution: Do not edit a user’s existing assignment of dedicated VCC extension.
Ability to change phone and extension number of users with VCC dedicated extension
In the previous release, selected X Series users using 8x8 Contact Centerservices were given the option to enable their 8x8 Work extension to be dedicated to 8x8 Contact Center. After enabling a dedicated VCC extension for a user, the phone number and extension were locked and could not be changed. In this release, we have resolved this issue. You can now edit the phone number and extension number associated with the user.
Check out the 8x8 Admin Console version
Wondering which version of the 8x8 Admin Console application you are accessing? Simply click to open the main menu and find the version number at the bottom of the menu.
Bug Fixes
The role assignment page did not retain user name changes previously. The issue is now fixed.
We are introducing the following enhancements and changes in the 8x8 Admin Console 1.25.5 release.
- Ability to dedicate an extension to contact center
- Ability to handle variable length of a phone extension
Ability to dedicate an 8x8 Work extension to Contact Center
Selected X Series users using 8x8 Contact Center services can now enable their 8x8 Work extension to be dedicated to 8x8 Contact Center. This feature is currently in limited availability. Previously, you had to limit a user to a dedicated VCC extension using a locked down desk phone or by assigning two separate extensions—one for 8x8 Work and another extension dedicated to VCC. In this release, we are introducing the ability to dedicate an8x8 Work extension to 8x8 Contact Center calls. Agents who are dedicated to handling call traffic pertaining to the contact center will not be interrupted by any other call traffic. This dedicated VCC extension only offers inbound queued calls or direct agent calls from the contact center. Agents can use the 8x8 Work for Desktopapp or a desk phone to handle these calls.
Limited Availability
This enhancement is currently available to a limited number of X series customers. An enhanced version of this feature will be available to the broader audience in a future release.
Features
- Ability to dedicate an 8x8 Work extension to process call traffic from 8x8 Contact Center
- Agents can use 8x8 Work for Desktopor a desk phone which are locked down to handle inbound contact center call traffic
- The phone number assigned to the user functions as the agent channel DID
Enable a user with a dedicated VCC extension
- Log into 8x8 Admin Console.
- Select Users from the menu.
-
From the list of the users, select a user assigned with an 8x8 Work extension.
Note: You must select a user assigned to a VCC-enabled site.
- Click
 and select Enable as dedicated VCC extension from the available options.
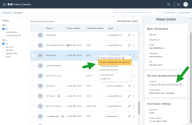
-
At the prompt that alerts you about the implications of this action, click Continue.
The selected user will be enabled with a dedicated VCC extension. The user can then use the extension to handle 8x8 Contact Centercalls with a desk phone or the 8x8 Work for Desktop app.
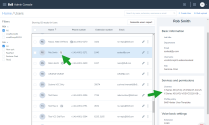
Note: In the users list, users assigned with dedicated VCC extensions are marked with
 icon.
icon. - From the application panel, navigate to 8x8 Configuration Manager.
- Go to Users from the menu and notice that enabling a user with a VCC dedicated extension has created a new user in 8x8 Contact Center. You are now ready to configure the agent.
- From the menu, go to Channels, and notice a new channel now appears on the list. This is the phone number assigned to the user in 8x8 Admin Console.
Limitations and known issues
- After enabling a dedicated VCC extension for a user, the following setting is locked and cannot be changed:
- Licenses
To change the above setting, the admin must first disable the dedicated VCC extension, make the changes, then re-enable. This results in the agent being deleted and re-created in 8x8 Configuration Manager, they would then need to have their settings re-configured, be re-added to agent groups/ queues and their agent script re-linked.
- The action to enable a dedicated VCC extension is enabled even if a user is in a site that is not VCC-enabled. The attempt fails but shows an error message prompting you to retry. Please note that the user must be assigned to a site that is VCC enabled to complete the action successfully.
Handling length of variable extension
To ensure the length of an extension number complies with the extension length allowed by the chosen site dial plan, we now display a text alert when the extension exceeds the maximum allowed length. The text message alerts and allows you to resolve the issue instantly.
To view the text alert:
- Log into 8x8 Admin Console. Go to Users.
- Select to edit a user.
- While creating or editing a user, under Voice Basic Settings, enter an extension number. If it exceeds the maximum length allowed by the site dial plan, a text message alerts you.
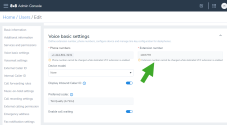
- Edit the extension length to fit the maximum allowed by the site dial plan.
We are introducing the following enhancements and changes in the 8x8 Admin Console 1.25 release:
Removal of cost center assignment in 8x8 Admin Console
We have now removed the ability to assign users to cost centers in the user profile. This is now managed via 8x8 Community Portal. Learn more about cost center management.
Introducing the Audit Management Admin role
In the previous release, we introduced the Super Admin role which supersedes the permissions of the Company Admin role. This role extends privileges to manage sensitive data to other users. By default, this role is assigned to the primary admin of the PBX.
In this release, we are introducing a new admin role for audit management which allows you to audit chat conversations of all users. You can filter audit data by users, date range, keyword, attachments, and rooms. As a super admin, you can assign this role to users as needed.
Note: Due to the sensitive nature of this role, exercise caution while assigning the role to users.
To view the permissions of the Audit Management Admin role:
- Log into 8x8 Admin Console.
- From the menu, go to Roles and Permissions > Roles.
- In the list, notice the role for Audit Management Admin.
- Click
 to view the permissions assigned to this role. This role is assigned with audit management privileges only.

To assign the Audit Management Admin role to a user:
- From the menu, go to Roles and Permissions > Assignments.
- Click Create Assignment and select a user to assign the Audit Management Admin role. Select the scope and click Save.
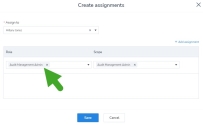
Access Audit Management
As an Audit Management Admin, you can audit chat conversations of users in your PBX. Let’s say you wish to perform an audit for two of your users this past month, simply select the date range as Last Month and select Author is, and select the users from the list.
To perform audit management:
- Log into 8x8 Admin Console.
- From the menu, select Audit Management.
-
Select the desired filters from the following choices:
Filter Description Attachments Select to audit chats based on attachments exchanged during the conversation. Author Select to audit all users or specific users from the list. Date range Select the time period for audit. You can choose from predetermined date ranges or enter a custom date range. Keyword Select to filter the conversations based on specific keywords.
Room Select to filter the conversations of specific rooms.
- Click Generate Archive to begin retrieving.
- Based on the volume of the data retrieved, it takes up to 24 hours.
- Once complete, you will notice the status changes from In progress to Completed.
- Click
 to download the file from the archive.
Note: These files are in JSON format. Use an approved e-discovery
Manage Call Recording Enhancement
The Call Recording feature has been enhanced to let you delete call recordings by filter and by bulk. You can delete as many recordings that you want to at once. You can also stop a deletion while it is in process for whatever reason. See the topic Manage Call Recording for details.
Bug Fix
We have now resolved an issue with 8x8 Auto Attendants. Previously, if the user failed to select a main menu option, the setting to route the call to a ring group or a call queue would automatically reset to direct the caller to the voicemail. We have now resolved this issue.
We have introduced the following enhancements in the 8x8 Admin Console 1.24 release.
Ability to display external caller ID during emergency dialing
During emergency dialing, let’s say your company wants to display the company name rather than the individual extension name, you now have the ability to set your external caller ID preferences company-wide.
Limited availability
This features is currently in limited availability. It is available in the US only.
To set up external caller ID to display during emergency dialling:
- In the 8x8 Admin Console, go to Company from the menu.
-
In the Emergency Display Name, select External Caller ID from the available choices.
Note: By default the Emergency Display Name is set to internal caller ID.
- Save the preferences. The external caller ID display name set for each user is displayed during emergency dialing.
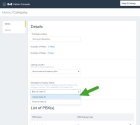
Ability to remove failed porting requests
Let’s say your number porting request gets rejected. You may resubmit the request excluding a few numbers that you longer wish to port. Previously you could not remove those excluded numbers from your porting log. Now we have introduced an option to remove the failed porting requests.
To remove a failed porting request:
- Go to Phone numbers from the menu.
- In the filter, select to view the numbers which have failed to port.
- From the list of number which have failed porting, select a number you no longer wish to port.
- Click
 and select Remove porting request.
 - At the prompt, confirm to remove the porting request. You are informed that the temporary number will be retained in your inventory as a claimed number.

Grouping compatible phone numbers during porting
When you submit a request to port a batch of phone numbers belonging to more than one service provider, the porting request will likely be rejected. To prevent porting failures, we now detect upfront if the phone numbers belong to different service providers and split them into compatible groups. Further, with your input, we will split the porting request into multiple requests based on the service provider. This allows you to avoid porting rejections as well as track the requests easily.
Let’s say you submit phone numbers belonging to two different providers in the same porting request, you will be alerted that the porting request is not compatible and the phone numbers need to be split into compatible groups. With your permission and input, the phone numbers will then be split into compatible groups and submitted as two separate requests.
Introducing a new Super Admin role
In this release, we have introduced a new Super Admin role which supersedes the permissions of the Company Admin role. This new role is intended to extend privileges to manage sensitive data to other users. By default, this role is assigned to the primary admin of the PBX. In addition to the permissions assigned to the Company Admin role, this role has the key permission to access and manage sensitive data:
- Cloud storage API: Access recordings of calls, meetings, and voicemails of all users in the company.
- Messaging audit: Access chat conversations of all users via the product interface and the API.
As a Super Admin, you can extend permissions to manage sensitive data to other users in the company. To access sensitive data, you must grant the relevant permissions through a custom role.
Note: The permission to manage sensitive data does not allow access to sensitive data unless specifically authorised.
To view the permissions of the Super Admin role:
- Log into 8x8 Admin Console.
- From the menu, go to Roles and Permissions > Roles.
- In the list, notice the new role for Super Admin.
- Click
 to view all the permissions assigned to this role.
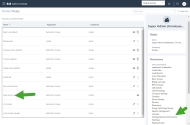
Note: You are not allowed to duplicate this role.
To create a custom role to access sensitive data:
- Click Create Role.
- Add an appropriate name.
- Enable permissions to Messaging audit and Cloud storage API.
- Save the role. Please make sure you assign this role to a user who is qualified to access sensitive data.
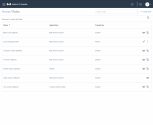
Introducing global API authentication
8x8 is introducing a mechanism to generate an API key and use it to authenticate into the 8x8 API gateway. This allows you to access many of the developer-facing 8x8 APIs. As a developer, you may want to create one or multiple applications interacting with one or more 8x8 APIs. In the 8x8 Admin Console, you can now create an app which in turn generates an API key and a secret code. Use this key to further authenticate into the specific APIs selected.
Note: We currently support authentication for Cloud Storage API and Chat API.
To create an app for the API:
- From the menu, go to API Keys.
- Click Create app.
- Enter a name for the app.
- Select the API/s from the list of available APIs.
- Save the app. This automatically generates the API key.

To fetch the API key for the app:
- Go to the list of apps listed under the API Keys.
- Select to edit the app you just created.
- Note that the API key and the secret code are now visible in the protective mode.
- Click
 to view the key and the code.
 - Copy and store the key for authentication.

To revoke access to any of the supported 8x8 API:
You can simply delete the app to remove access to the API. Deleting the app revokes the API key and blocks access to the APIs selected in the app.
Next step
After fetching the API key, go to https://developer.8x8.com, select the API you wish to use, and use the key to authenticate the API calls.
We have introduced the following enhancements in the 8x8 Admin Console 1.23 release. These enhancements are directed to 8x8 classic customers who are migrating to the X Series platform:
Support for custom fields for migrated customers
Classic 8x8 customers who are being migrated to the X series platform are now able to access the custom fields in the contact directory. Let's say you have previously defined custom fields such as Employee ID or Company Division in Account Manager, they are now visible as Custom Field 1 and Custom Field 2 in your new 8x8 Admin Console.
Limited availability
As an 8x8 customer, you will have custom fields enabled if:
- You are being migrated from Classic to X Series (i.e. not available for native X Series customers)
- You have used custom fields for the user profiles in Account Manager (i.e. have data already)
Features
- All customers see a refined layout of the User details page.
- The Basic information section is split into Basic information and Additional information.
- Basic information holds mandatory fields and key functional fields.
- Additional information holds contact info such as address, job title, department and, if enabled, custom fields.
- Three custom fields are shown in the Additional information section.
Limitations
- Custom fields cannot be turned on or off individually
- Custom field names and types cannot be modified
- Existing names are retained during migration
- Custom field names are not shown in 8x8 Admin Console
- Custom field names are visible in Switchboard Pro
- Custom fields cannot be set or modified via bulk file upload
To access the custom fields:
- Log into 8x8 Admin Console.
- From the menu, go to Users.
- Select to edit a user record.
- In the Additional information section, access the custom fields.
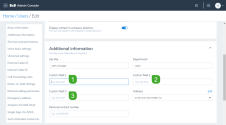
Ability to auto divert incoming calls to external phone numbers
When you define a speed dial on a user's deskphone, you can also specify a destination to automatically divert inbound calls from them. Auto divert can come in handy when you need to divert a call automatically from a frequented contact. This destination can be an internal contact or an external phone number. In this release, you can enter any valid external phone number to divert an incoming call. Let's say, you have set up a speed dial to reach your Supervisor. You are traveling and you want to receive the calls from your supervisor on your mobile phone number; you can now key in this number to automatically divert the calls from your supervisor to your mobile number.
To set up the auto-divert:
We have introduced the following new features in the 1.22 release:
Say hello to 8x8 Admin Console!
8x8 Configuration Manager is now 8x8 Admin Console. Please note that we have adopted this change in the documentation.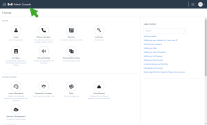
In recognition of the increased importance of digital tools and changes to how we all work, the 8x8 products and services you work with are getting new names as part of their transformation:
- Virtual Office -> 8x8 Work
- Virtual Office desktop app -> 8x8 Work for Desktop
- 8x8 Video Meetings -> 8x8 Meet
- 8x8 Meeting Rooms -> 8x8 Spaces
And more!
Introducing Role-based access control
In the previous release, we released 8x8 Role-based access control (RBAC) in limited availability. This feature is now available to all users with some enhancements.
8x8 RBAC is a mechanism around roles and privileges to manage 8x8 Work administration. It allows you to assign permissions to users based on their role within an organization. RBAC lets users have access rights only to the information they need to do their jobs and prevents them from accessing information that doesn't pertain to them. Roles can be used to address multiple needs of your business, from security and compliance, over efficiency and cost control.
Let’s say your business needs a role with permissions to configure the entire phone system, a role with permissions to just create sites and users, or a role to manage work groups such as call queues and paging groups. 8x8 RBAC now offers predefined roles and the ability to create custom roles with site specific scope to meet the varying business needs.
Learn more about how to create and assign roles.
Multi-language transcription policies
Note: Multi-language transcription is currently only available to Contact Center Speech Analytics customers on X Series.
With multi-language transcription policies, administrators in 8x8 Virtual Office - Configuration Manager can set policies for which calls are transcribed and in what language those calls are transcribed. This let’s you perform speech analytics on non-English phrases.
For example, if you have a Contact Center with queues in English and Spanish, and you can now transcribe the calls in the Spanish queue so your transcriptions are accurate to the language spoken on the call. This is a major benefit as your calls in non-English are transcribed correctly.
The administrator can set a policy at the agent or queue level, assign and unassign the transcriber and language individually or in bulk. Languages include: French (CA) , Spanish (US), and several flavors of English.
Learn more here: Multi-language transcription policies
We have introduced the following new feature in the Configuration Manager 1.21 release:
Introducing Role-based access control
8x8 Role-based access control (RBAC) is a mechanism around roles and privileges to manage Virtual Office administration. It allows you to assign permissions to users based on their role within an organization. RBAC lets users have access rights only to the information they need to do their jobs and prevents them from accessing information that doesn't pertain to them. Roles can be used to address multiple needs of your business, from security and compliance, over efficiency and cost control.
Let’s say your business needs a role with permissions to configure the entire phone system, a role with permissions to just create sites and users, or a role to manage work groups such as call queues and paging groups. 8x8 RBAC now offers predefined roles and the ability to create custom roles with site specific scope to meet the varying business needs.
Learn more about how to create and assign roles.
Limited Availability
This feature is currently in limited availability. It is available to select 8x8 customers only.
Support for multiple fax DIDs per user
You can now assign multiple fax DIDs per user. Let's say your company employee, Rob manages communication with clients in San Franciso and New York. He receives faxes from his clients daily and has a difficult time sorting them. You can now assign Rob with two or more fax DIDs to manage his business needs. Rob can share separate numbers with his clients in the two cities and receive faxes on separate numbers for convenient sorting.
To assign fax DIDs to a user:
- Go to Users from the menu.
- Select to edit a user from the list.
- From the navigation menu, select Fax notification settings to scroll down.
-
Select fax numbers from the list of available numbers.
- Add the relevant fax notification settings.
- Click Save.
Once the fax numbers are assigned to users, they can simply log into the 8x8 Work for Desktop, go to the fax tab, and send and receive faxes.
We have introduced the following new feature in the Configuration Manager 1.20.1 release:
8x8 integration with Microsoft Azure Active Directory (AD) which allows users to log in to any 8x8 application using their corporate Azure AD credentials.
To select Microsoft Azure AD as your SSO provider:
- Go to Home > Identity Management.
- Select Single Sign on (SSO) as your authentication method.
-
Select Microsoft Azure AD as your SSO provider and click Save.
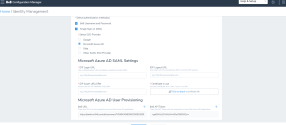
To enable user provisioning via the 8x8 integration with Azure AD:
Optionally (if you want to enable user provisioning via this integration), in the Microsoft Azure AD User Provisioning, click Show user provisioning information to display the 8x8 URL and 8x8 API Token fields: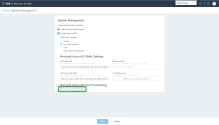
Click here and learn more about setting up single sign-on for 8x8 Admin Console using the 8x8 integration with Microsoft Azure AD.
We have introduced the following new features and enhancements in the Configuration Manager 1.20 release:
- Ability to add external contacts
- Enhanced number porting
Ability to add external contacts
Virtual Office administrators on X Series can now centrally maintain a directory of contacts that are external to their organization. These contacts are accessible to end-users in the contact directory of the following apps:
- Virtual Office desktop app
- Virtual Office mobile app
- Switchboard Pro
- 8x8 Contact Center Agent Console
Limitations
- External contacts are not visible on the deskphone directory.
- During bulk upload of contacts, file size is limited to 10 MB (~ 40000 contacts) per upload.
- Custom labels on custom fields are not supported.
How to create an external contact
You can create an external contact one at a time or import them in bulk.
To create an external contact:
- Log into Configuration Manager.
- From the menu, select Contacts.
- In the following screen, click Create contact.
- Enter the basic contact information such as first name, last name, and phone number.
- Enter additional information as necessary.
- Click Save. An external contact is now successfully created. Go back to the Contacts page to view the newly added contact.

Click here and learn more about adding external contacts in bulk and accessing them in the 8x8 apps.
Enhanced number porting process
We have introduced some improvements to the Number porting process. The Number Porting wizard now allows:
- Collecting information about the preferred porting dates
- Controlling email distribution of notifications received
During the number porting process, you can now select a preferred porting date. Simply select from one of the available porting dates and we will try to agree this date with your previous provider.
Note: It may not be possible to port on the requested date, but we will not port any earlier.
The porting wizard also allows you to enter valid email addresses to send porting status emails. Learn more about porting phone numbers.
We have introduced the following new feature in the Configuration Manager 1.18 release:
Introducing disaster recovery for 8x8 Contact Center
Availability: Available to 8x8 Contact Center customers on X Series
In this release, 8x8 Contact Center introduces disaster recovery to X Series customers. 8x8 Disaster Recovery Companion Service provides business continuity if the data center hosting your primary tenant suffers a disaster or a site failure. 8x8 Contact Center Disaster Recovery (DR) companion tenant is a scheduled replica of your primary contact center tenant in the standby mode. This instance of your Contact Center tenant is hosted in a geographically diverse data center and synchronizes periodically with the primary tenant. Contact Center admins configure disaster recovery in the 8x8 Configuration Manager. Should a critical outage occur, Contact Center admins can enable and switch over to a DR tenant with a click. On-demand administration is available using the 8x8 Configuration Manager application, whether you just want more flexibility in everyday call routing, or plan ahead for business continuity during a disaster. You can divert your contact center inbound telephony traffic to your companion tenant or alternate phone numbers.
In this release, we have introduced the following feature enhancements:
Ability to View the Number of Suspended Licenses
You can now view the number of suspended licenses in the Licenses page. Suspended licenses are not usable and cannot be assigned to users. A license may be placed in suspended status if the license was removed from your system by 8x8 team or is associated with a user who is deactivated. For details, see our content on review licenses. Click the info ![]() icon next to a license to see the report. To see the number of suspended licenses, go to Licenses page and click on the info
icon next to a license to see the report. To see the number of suspended licenses, go to Licenses page and click on the info ![]() icon in the Quantity column.
icon in the Quantity column.
Note: Only those license types with a suspended license appear with the info ![]() icon.
icon.
Renamed Bulk User Report Columns for Voice
Renamed the following columns for bulk user report:
| Column Head (before) | Changed to: | Description |
|---|---|---|
| ExternalCallerID.DisplayName | User.Voice.ExternalCallerName | The name used for the external calling number (15 characters long). If the external calling number is a shared number such as a mainline number, then this is not needed. |
| User.Voice.ANINumberType | User.Voice.ANI | A telephone number including the country code used as the user's external caller ID. |
To access the bulk user report, go to Home > Bulk upload and click to Download .CSV template. For the list of columns, see our content on the bulk user upload template.
Enhanced Group Call Pickups to Search by Extension Number
You can now search group call pickups by an extension number. Prior to this release, you could only search the pickup groups with a group name. To search for a group call pickup by an extension number, go to Home > Group Call Pickups and enter the extension number you are looking for. For more information, see our content on group call pickups.
Enhanced Info Panel to View Device Model Information
You can now find the device model in the Info Panel which specially helps when selecting a DECT base or an ATA terminal. Prior to this release, you could only see the device type. To check the device model at a quick glance, go to Home > Devices and click View device report. Click on a device to open the Info Panel and view the details. For details, see our content on view devices.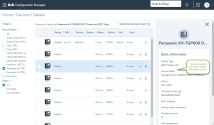
Improved Phone Number Search
You can now search the international phone numbers by entering plus sign + and the country code. For example, to easily locate +1 408 334 4564, enter +1 408 and to locate +44 121 704 4455, enter +44. Prior to this release, entering 44 presented all numbers containing 44 such as 1 901 344 4589.
To search for a number, go to Home > Phone numbers and enter the + country code in the Search box and press Enter on your keyboard. The results appear in the page. For details, see our content on searching phone numbers. This enhancement can also help find phone numbers when working with other features such as automatic call handling.
Corrected Behavior: Ability to Change the Order of Members in Ring Groups (Firefox users)
Firefox users can now change the order of users in the ring group. Prior to this release, this feature was working for Chrome and Microsoft Edge browsers. To change the order of a ring group, go to Home > Ring Groups and click edit to see the Members. Move the members by dragging and dropping it to the right order using![]() . For details, see our content on setting up a ring group.
. For details, see our content on setting up a ring group.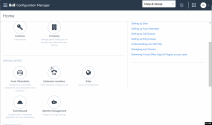
Bug Fixed: Returns Correct Results when Searching Help Center
The search box under Help Center now returns the right results from the Knowledgebase. To enter a new search, go to Home > Help Center, enter a search phrase and press Enter on your keyboard. The results from the 8x8 Knowledgebase show up. For detail, see our content on how to get support.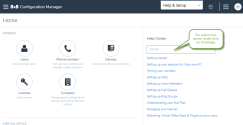
In this release, we have introduced the following feature enhancements:
Ability to Edit Names of Multi-port Devices
Naming the base unit of a multi-port device such as a DECT base or an ATA device, helps you in locating the device quickly. Let’s say your sales and support teams use separate DECT devices, naming the base units appropriately allows you to assign or remove the right devices to the group members.
In the 8x8 Admin Console, go to Devices. From the list, select the desired multi-port device, go to the device report, select the specific base unit, and edit the name. You do not have to go to the user record to change the base name any more.
Improved Usability in Line Number Porting
During number porting process, the phone numbers requested for porting are assigned with temporary numbers to facilitate business continuity. You are not allowed to change these numbers once assigned. Previously, while selecting temporary numbers manually, the drop down menu gave you an impression that you could select from a menu of choices, which was not the case. The behavior is now resolved. You do not see the drop down menu anymore.
Improved Usability While Selecting Drop-down Menu Choices
In Configuration Manager, the drop down menu choices for all settings now show the choices in proximity to the selected choice. Let’s say you have previously assigned US-Pacific as the timezone for a user and you need to change it to US-Eastern. When you click the drop down menu for timezone, the choices close to the selected choice such as US-Central, US-Eastern are shown minimizing the scrolls in a long menu and improving the usability.
Bug fixed
In systems where you had VCC licenses from multiple regions (e.g. US and UK), while assigning a VCC license to a user, even if a US license is selected, after saving the user it showed the license from another region such as UK. This was a cosmetic issue that is resolved with the first alphabetical license name being shown, instead of the correct license name.
In this release, we have introduced new features and enhancements to improve overall productivity.
Ability to change sites in bulk
You can now change the sites via bulk edit as long as the new site is located within the same phone system or PBX. When you change sites, the system does not allow you to change other values in the same bulk edit session. Save the new site before you can change other fields such as time zone or department.
To change a user’s site, go to the Users page, select one or more users, click Bulk Edit, then select to change the site. For details, see our content on changing user sites.
Note: The site change is only possible through Bulk Edit. To change the site of a single user, go to Home > Users, select the user you want to update his/her site and click Bulk Edit, then change the user’s site.
Note: If you have to move a user across phone systems, you must delete the user then create the user again in a site that belongs to the new phone system.
Ability to change music-on-hold in bulk
You can now change Music-on-hold for multiple users via Bulk Edit. Prior to this release, you could change the Music-on-hold for users individually. To change the Music-on-hold in bulk, go to the Users page, select one or more users, click Bulk Edit, then select to change the Music-on-hold. For details, see our content on changing Music-on-hold.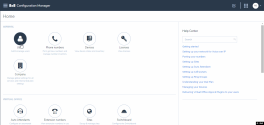
Ability to Change Multiple Profile Policies in Bulk
You can now create multiple profile policies in a company, change the profile policies in bulk, or select a profile policy as default. If no profile policy is selected when creating a user, the default policy will be assigned to the user. Prior to this release, you could only access the 8x8 Master User Template policy profile.
To create a new profile policy, go to Home > Profile Policies and click + Create new profile policy. To change profile policies in bulk, go to the Users page, select the users you would like to update, then click Bulk Edit. For details, see our content on creating new profile policies and changing profile policies in bulk.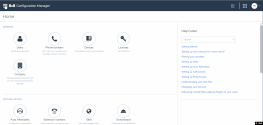
Profile policy is now available through bulk upload and via CSV template download.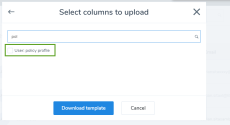
Note: You cannot delete a profile policy if users are assigned to it. To delete a profile policy, you must remove the users first.
Ability to Disable Messaging via Profile Policy
A new profile policy allows you to disable messaging functionality in both 8x8 Work for Desktop and 8x8 Work for Mobile. This new profile policy disables the Chat tab in Virtual Office and prevents users from using messaging.
To disable the messaging option in Profile Policies, go to Home > Profile Policies and while editing a profile policy, click to turn on Disable messaging functionality. For details, see our content on editing master profile policy.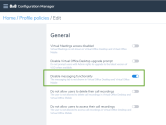
Note: The chat messaging only applies to VOD version 6.1 and newer, or VOM version 7.7 and newer.
Ability to Swap Licenses for all Virtual Office Users
You can now easily upgrade or downgrade licenses for all Virtual Office users (VO and VCC) without the need to remove the license. Prior to this release you could only swap the Virtual Office licenses for VO users.
To upgrade or downgrade the user license, go to Home > Users, and click Services and permissions while editing a user. You can then select another license from the list. For details, see our content on upgrade or downgrade users licenses.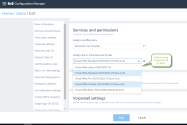
Note: You cannot change the user license in bulk.
Increased Number of Paging Groups per Site
We can now have up to 25 paging groups per site: one emergency, one priority, and 23 normal paging groups. Prior to this release, we had up to 25 paging groups per company. Within a site, the same restrictions for paging groups apply. You must have users with the right device such as Cisco or Polycom phones activated for paging groups.
To create paging groups, go to Home > Work Groups > Paging, then click + Create Paging Group. For details, see our content on paging features and setup.
Ability to Forward Calls to a Custom Target in Call Queues
The calls coming to a call queue can now be forwarded to a custom target. The custom number can be an extension number or a telephone number. For example, you can enter a short number, such as 7878, without the dial plan in the target selector and save. The custom number appears in the call forwarding rules.
To enter the custom target in call queues, go to Call Queues > Call forwarding rules, then click ![]() to select a target. For details, see our content on set up call forwarding rules.
to select a target. For details, see our content on set up call forwarding rules.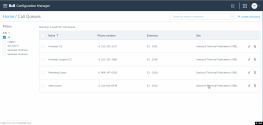
Change of Behavior: Reduced Fax Notifications to Email Attachment Only
Email attachment is now the only available option for fax notification. Prior to this release, fax notifications were sent as a link in an email, or an email attachment. To set up fax notification, go to Home > Users and while creating or editing a user, scroll down to see Fax notification settings. For details, see our content on setting up fax notification.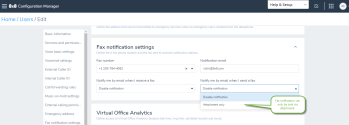
Corrected behavior: VCC Dedicated Extension Gets Properly Locked Down
For VCC users, if the dedicated extension is enabled, it locks down the agent’s phone to handle the call center calls only and prevents them from dialing out. With a dedicated extension, the extension and Direct-in-Dial (DID) numbers are permanently redirected to Virtual Contact Center agent channels. Prior to this release and during a user profile edit, the agent's dedicated extension was not correctly locked down and the agent could still dial out using his dedicated extension.
To enable the dedicated extension, go to Users and while editing a VCC user, click to enable VCC Dedicated Extension. For details, see our content on setting up VCC agents with dedicated extensions.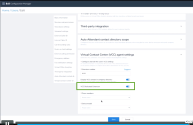
In this release, we have introduced new features and enhancements to improve overall productivity.
Ability to Swap Licenses for Virtual Office Users
You can now easily swap licenses for 8x8 Work users without the need to remove the license. Prior to this release, upgrading or downgrading a user license required you to remove the license, or remove the user and create another user with the upgraded or downgraded license. In the new behavior, however, you can upgrade or downgrade the licenses by simply selecting another license from the list. This new capability only applies to 8x8 Work users.
Depending on the license type, different capabilities appear in the user profile. For example, a user with a Lobby license type does not have Single Sign-On settings, whereas a user with X4 license appears with Single Sign-On settings in the user profile. When you upgrade or downgrade a license, historical information such as voicemails, messages, and extension numbers are retained. Since the extension numbers do not change, user groups such as ring groups and call queues are not affected. For details, see our content on upgrade or downgrade user licenses.
Notes:
-You cannot swap licenses for VCC or VO-VCC users.
-There is no restrictions specific to regions (UK or US).
Ability to Hide the 8x8 Contact Center Extensions in Contact Directory
You can now hide the name and number of the 8x8 Contact Center users in the company contact directory. Prior to this release, you could only control the visibility of the 8x8 Work users. For example, if Robin is a VO-VCC user, he has both 8x8 Work and 8x8 Contact Center licenses, therefore he appears twice in the contact directory: once with 8x8 Work extension 1002 and once with 8x8 Contact Center extension 6001. You may show both 8x8 Work and 8x8 Contact Center extension numbers, just one, or no extension numbers for the VO-VCC user.
The display VCC contact in the contact directory is enabled by default. If you disable the option, the name and number are no longer visible in contacts. To hide a 8x8 Contact Center user from the company directory, go to Home > Users and while editing a user, click to disable the option under Basic information > display VCC contact in company directory. For details, see our content on 8x8 Contact Centercontact directory.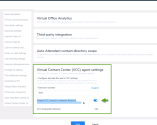
Ability to Select Barge Monitor Whisper Admins from All Sites
The Barge Monitor Whisper (BMW) group admin is a user with privileges to barge and monitor the phone conversations of the members of a group. Previously, a BMW group admin was restricted to monitor a BMW group belonging to a site that they were part of. In this release, we allow BMW admins to monitor BMW groups belonging to any site. The new enhancement removes the site restriction for BMW group admins.
To find a new BMW admin from any site, go to Barge Monitor Whisper Groups > Group Admins and while editing a group, select any admin from the list. For details, see our content on how to set up Barge Monitor Whisper.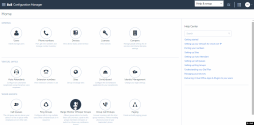
Modified the Default Value for Ring Group Total Alert Time
We have now increased the default duration to alert a ring group member to 15 seconds. This value defines how long an incoming call should ring before moving to the next member. With the new enhancement, each member gets 15 seconds by default instead of ten seconds, which increases the number of rings to about three rings. The maximum alert time is 180 seconds.
To modify the total time, go to Ring Groups > Total time to alert a member while editing a ring group. For details, see our content on how to set up a ring group.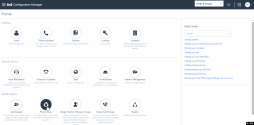
In this release, we have introduced new features and enhancements to improve overall productivity.
Updated Profile Policy
8x8 Work for Desktop end users can set their preferences via Account settings, for features such as voicemail, music on hold, caller ID, call forwarding, and more. These settings are available to users by default. We have introduced new profile policies that can limit access to these settings. As an admin, set these permissions in the 8x8 Admin Console's Profile Policies page. As an extension user, you can invoke the account settings via the 8x8 Work for Desktop to view the settings you are allowed to define. For example, if you want to prevent extension users to edit their fax settings, from the main menu, open Profile policies and enable this control. For details, see our content on how to Edit the Master Profile Policy.
As an Admin:
As an Agent:
Introduced Users Bulk Edit via User Interface
Do you need to change user information such as language, address, or call recording settings in bulk? You can now modify the same property for many users at once via the 8x8 Admin Console interface. Using bulk edit, you can change the user information for multiple selected users, review the changes before performing the bulk edit, and cancel the bulk user edit operation at any time.
From the Users page, select the desired users, then select Bulk Edit. Choose the properties you want to edit and review the edited properties before committing them. For details, see our content on how to Edit Users in Bulk.
You can undo edits to the properties by going back in the review page. Review the summary of chosen edits and proceed to commit.
After committing the desired edits, you can access a report detailing the task completion. To download and view the report, go to the Tasks page.
The uploaded tasks are processed and listed on the Tasks page. You can access the list of tasks in progress with the ability to download the error report. Download the reports for more information and decipher the process updates.
To cancel an upload request that is in progress, simply cancel the request. The report indicates the number of rows processed and provides details.
Enhanced Bulk Uploading Process
In bulk upload, the basic and advanced templates are now merged into one. We offer a single template which includes all supported fields (nearly 50). When you click to download the template, you can simply select the desired columns. We pre-select a few columns. To learn more about bulk upload, see Create Users in Bulk.
During bulk upload of users, you can now validate the data in your file beforehand, fix the errors, and then continue to process. If you have a large number of users to upload, this feature comes in handy. The options to validate, and validate and process are available in the Bulk upload screen.
In the Process user report that you download from the Tasks page, the UserValidateDetails column provides guidance regarding the encountered error on the row and how to fix it.
Best practice: While preparing data for bulk upload, we recommend you to verify the information in the CSV file with the information in our Bulk User Upload Template Fields.
Ability to Set the Ring Timer for Ring Groups
As an admin, you can specify a timer for how long to alert a member before moving the call to the next member or to the ring no answer rule. For details, see our content on Set up Ring Groups and Add Members.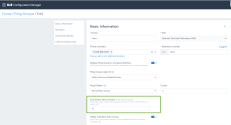
Ability to Clone Auto Attendants
Do you have a lengthy auto attendant menu that must be replicated for multiple offices or in multiple languages? You do not have to build these auto attendants all over again. You can now clone an existing auto attendant and edit the site or language information, select a phone number, and get them going quickly. For details, see our content on how to Clone Auto Attendants.
Improved the Start-up Performance for Configuration Manager
We have introduced performance improvements for loading up 8x8 Admin Console, cutting the start-up time in half.
Data presented in the information panel such as user information is now cached allowing you to view the previously accessed information quicker than ever before.
Renamed Voicemail Password to Voicemail Access PIN
To eliminate any confusion between user account password and voicemail password, we have renamed the voicemail password to voicemail access PIN. For details, see our content on set up Voicemail Access PIN.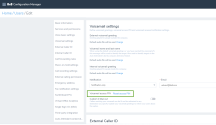
Support for Partial Matches in Call Forwarding Rules
When creating or editing a call forwarding rule, you can now search for selected callers with partial matching phone numbers. For example, you specify that all calls coming from a particular area code must be blocked. Enter the country code as well like in 1 408, for a better experience. To create a new call forwarding rule, go to Home > Users and click to edit a user, and add a new call forwarding rule. For details, see our content on Set up Call Forwarding Rules.
Speed Dial Target is Correctly Shown for Call Park Extensions
When creating a speed dial to an existing call park extension, the Dial to field now shows the target correctly in the speed dial. For details on how to create call park extensions, see our content on Set up Call Park Extension. For details on how to create speed dials, see our content on Add speed dial keys.
Now:
Device Activation Code Now Appears After Saving Users
The device activation code no longer appears under Voice Basic Settings before the user is saved. Once the user profile is saved and ready, the device activation code appears. The user can then activate the device using that code. Prior to this release, the device activation code was available while creating a user. For details, see our content on Activate a device.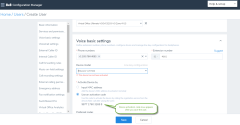
In this release, we have introduced new features and enhancements to improve overall productivity.
Improved User Experience in Identity Management
We have introduced a better user experience while configuring your company’s Single Sign-On preferences via 8x8, SAML, or Google. In the Identity Management page, find the supported authentication options right at the top of the page. 8x8 Username and Password is selected by default. Select a provider and the relevant information is presented to you for further configuration. For details, see our content on Identity Management. For details, see our content on setting up Single Sign-On.
Editing List Items is Now Simpler!
Wish to edit a user, queue, ring group, and more? Simply navigate to the desired page from the main menu. Click the ![]() next to the desired item to view the individual record in edit mode.
next to the desired item to view the individual record in edit mode.
Enhanced Line Key Configuration Usability in Cisco Devices
While configuring line keys for Cisco devices that support a single line key, we have introduced minor usability enhancements.
- By default, you have only one line appearance key supporting four concurrent calls.
- The + line appearance button is hidden for Cisco devices, you cannot add or delete any line appearance keys.
For details, see our content on Set up Line Appearance Keys.
Visibility of Personal Phone Number
Adding personal phone numbers to company contacts now supports numbers entered in any format. This number shows up as the mobile number for end users in the 8x8 Work for Desktop. To add the personal number in VO-8x8 Admin Console, while editing a user profile, enter your phone number in Personal contact number field and save. For details, see our FAQ content on how to add a mobile number.
Improved Data Loading Time
With the improved performance, you can now access data in 8x8 Admin Console quickly.
Account Settings Page Now Supports IE 11
Prior to this release, while accessing the individual account settings from Virtual Office Desktop, users encountered errors on IE11. It is now resolved.
In this release, we have introduced new features and enhancements to improve overall productivity.
Ability to Remember Your Search
You can now search and filter different entities such as users, phone numbers, and sites, for easy and quick access. The search results will be saved even if you navigate away from the search screen. Let’s say you searched users with first name ‘John’, the resulted list will be saved until you clear the search entry.
To search users, go to Home > Users and enter a search entry. Press Enter on your keyboard to see the results. To go back to the complete list, clear the search entry and press Enter again on your keyboard. For details, see our content on searching users.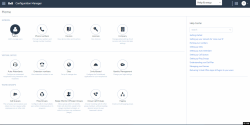
Improved Experience in Finding Incorrect Fields in User Profiles
You can now find the incorrect fields quickly while editing a user's properties. Before you save a user, you are navigated to the section that requires a valid value. Enter the correct value and save. This feature helps you save time searching for the properties that need to be corrected.
To create a new user, go to Home > Users , and click Create User. Make the necessary changes and Save. If there is any incorrect data, you are taken to the field. For details, see our content on set up 8x8 Work users.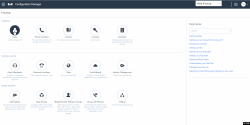
Zero Dial out Now Defaults to Site Receptionist
Zero dial out now defaults to site receptionist if you have set up one. When setting up voicemail settings for a user, site receptionist option becomes the default for custom zero dial out. To access custom zero dial out, open a user profile and go to Voicemail settings. Click to enable custom 0 Dial out.
For details, see our content on how to redirect callers from voicemail by dialing zero. For details on how to set up a site and site receptionist, see our content on Set up Sites.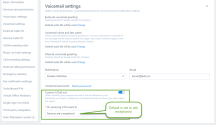
Ability to View and Manage Audio Files Context
You can now view more context, such as file names and notes, in audio files and manage them better. Let’s say you have audio files in multiple languages, you can leave a note to indicate the language. To access audio files, go to Home > Audio files and see the notes column. You can sort audio files by notes or file names. For details, see our content on audio files library
Enriched User Report
You can now view user's contact address, and external caller ID name, when you generate a user report. You can quickly find users information, audit, and verify them. To generate the report, go to Home > Users and click Generate users report. For details, see our content on how to generate user reports.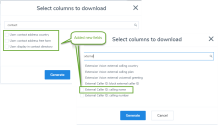
Improved System Performance During Porting Process
We have now improved system performance when gathering the porting request information. For details, see our content on how to port your phone numbers.
In this release, we have introduced new features and enhancements to improve overall productivity.
Improved Navigation in User, Ring Group, and Call Queue Pages
Improved left-side navigation menu in the User's page allowing easier navigation to all features. The navigation menu allows you to jump to the desired section quickly without having to scroll multiple screens. The navigation menu is available while creating and editing users, call queues, and ring groups. For details, see our content on set up users, call queues, and ring groups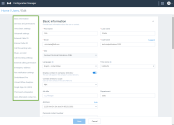
Note: The 8x8 Work for Desktop users can also benefit from the improved navigation on the Account Settings page.
Introducing Dedicated Audio Files Management Page
Whether you want to update a voicemail greeting for a user or upload a new audio file for hold music, you can manage all the audio files from a centralized location. From the main menu, go to Audio Files, then view the list of uploaded audio files, search, play, delete, and more. For details, see our content on Manage audio files library.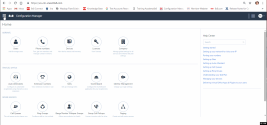
Ability to Set Up Voicemail Greetings for Ring Groups and Call Queues
You can now set up separate voicemail greetings for external and internal callers in ring groups and call queues. Simply edit an existing ring group or call queue and change the voicemail settings for external and internal voicemail greetings. To access ring group's voicemail greetings, go to Home > Ring Groups > Edit > Voicemail settings. For details, see our content on ring groups voicemail settings. To access call queue's voicemail greetings, go to Home > Call Queues > Edit > Voicemail settings. For details, see our content on call queues voicemail settings.
Quicker Access to the User Device Information
With improved access to the user device information, you can now select a user record from the user list and view the device model that the user is assigned to along with the activation status, Mac ID, and device admin password. For details, see our content on Select a device.
Minor Enhancements in Call Forwarding Rules Information
While defining call forwarding rules, we now specify the duration for forwarding calls. When a user does not answer a call for 15 seconds (approximately three rings), the rule triggers the call to be forwarded. You can set this duration as desired. For details, see our content on define call forwarding rules.
Improved Auto Attendant Summary Setting Information
Improved description in the Auto Attendant menu settings guides admins about the behavior when callers fail to select an option from the menu. By default the auto attendant menu replays once and further failure of action from callers results in a dropped call. These settings allow you to edit the number of menu replays and call routing when there is no action by callers. For details, see our content on Auto Attendant's edit settings.
User Policy Renamed to Profile Policy
In the previous release 1.6, we introduced policies which allow administrators to disable Virtual Office Meetings, access to call recordings, and the ability to update 8x8 Work for Desktop at the user level. These policies are now renamed from User Policies to Profile Policies. To access this feature, click Profile policies from the main menu. For details, see our content on Profile policies.
In this release, we have introduced new features and enhancements to improve overall productivity:
- Support for VCC user configuration in a Multi-PBX environment: Phone system admins can now view the VCC tenant name and the PBX it is linked to in the Company page. This information helps them in handling the site assignments of users smoothly. When you create a site that includes VCC users, make sure the site belongs to a VCC-enabled PBX. Before assigning VCC services to a user, assign the user to a site that is VCC enabled.
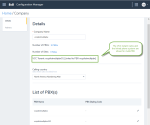
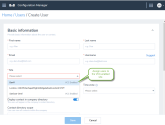
- Introducing 8x8 Profile Policy: The 8x8 Profile Policy offers the ability to restrict users from using meetings or upgrading to a recent version of the 8x8 Work for Desktop, accessing and deleting call recordings. With this service, you can now disable these features company wide by using a master user policy. Let's say companies with existing solutions for meetings want to disable the Virtual Office meetings app. They can edit the master user policy to disable meetings.
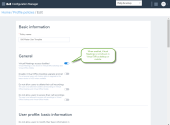
-
Ability to upgrade or downgrade user license (temporarily reverted): Due to billing irregularities experienced with upgrading and downgrading user license from the Users page, this feature has been temporarily reverted. You can still work around by deleting the current license and assigning a new license.
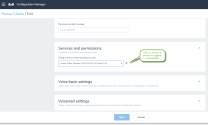
The users Info Panel now displays Services and permissions (licenses) for the user as well as the basic information and voice basic settings related to the user.
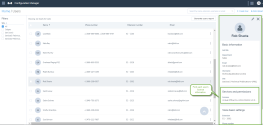
- Support for bulk removal of porting requests: To help with larger deployments, you can now select multiple porting requests in pre-porting and porting failed status and remove them at once. To remove pre porting or porting failed numbers, go to Home > Phone numbers, filter the numbers and click Remove porting request.
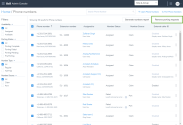
- Enhanced user report: User report now includes more fields such as device model, device MAC address, and switchboard access level, dial plan name, voicemail, notification email and more. To generate the users report, go to Home > Users and click Generate users report.
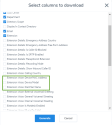
- Improved access to line key configuration: You can now access information about which users have Line Keys configured on their phone from the Device inventory page. For a quick and easy access to the Line Key configuration page, go to Home > Devices, and click View device report next to an activated device that supports Line Keys. You can edit the Line Keys from the Devices inventory page.
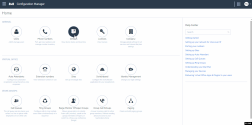
-
Improved Auto Attendants:
- Consolidated call routing key options in target: While selecting a call routing target for an auto attendant key, the individual transfer options for extensions, call queues, auto attendants, external numbers, and ring groups are now consolidated into a single option. Go to Home > Auto Attendants > Call Handling Menus and select user, service, or external number for the call routing target.
- Ability to point to Auto Attendants in a different language: Within an auto attendant, you can now select to route calls to auto attendants in another language. For example, you can write: "Welcome to AcmeJets Inc. For English, press 1. For Italian, press 2." The call routing option for key 2 can now point to an Auto Attendant in Italian. Modify your prompt to inform your callers about the language choices. Go to Home > Auto Attendants > Call Handling Menus and search for your Auto Attendant in the target box.
- Consolidated call routing key options in target: While selecting a call routing target for an auto attendant key, the individual transfer options for extensions, call queues, auto attendants, external numbers, and ring groups are now consolidated into a single option. Go to Home > Auto Attendants > Call Handling Menus and select user, service, or external number for the call routing target.
-
Introducing call forwarding for analog fax devices: You can now forward your faxes from an analog fax machine to another user when the fax machine is broken or not responding. To forward your faxes, you need to set up call forwarding rules for the analog fax machine. Create and save a user with the proper services and permissions for the analog fax machine and assign the analog fax device before you set up the call forwarding rules. See how to set up an analog fax machine.
- Improved pagination of call queues page: Call Queues data is now structured in collapsible sections, facilitating navigation and usability from desktop and mobile devices. To see our new look go to Home > Call Queues > Create Call Queue and scroll down to see the collapsible sections.
- Pagination support for audio files: You can now navigate easier and have better visibility of the audio files. To access the audio files repository, while editing a user, go to Music-On-Hold and click Change next to the default audio file. The audio file repository can be accessed from multiple places: Users Edit page, Auto Attendants, Ring Groups, and Call Queues. See how to make changes to your audio files.
- Automatic notification to new admins: When you promote a user to an admin, the user receives an automatic email notification informing the granting of administrator privileges.
In this release, we have introduced new features and enhancements to improve overall productivity:
- Support for lunch hours in Auto Attendant schedules: You can now define lunch intervals during your workdays, exceptions, and holidays, and design dedicated call flows for the lunch intervals. Let's say your business observes a lunch break for all employees at a specified time and would like to direct the call traffic to voicemail during that time, define a lunch break in your daily schedule and set up a call flow in the auto attendant for the lunch break. Whether your business observes multiple open hours, or multiple lunch breaks in a day, you can manage it all with 8x8 auto attendants. To define lunch hour for your business, go to Auto Attendants > Schedules and edit Weekday schedule. Repeat the procedure for weekday exceptions and holidays. See how to add a lunch hour to your auto attendant schedule.
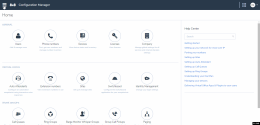
To define a dedicated call flow for the lunch interval, go to Auto Attendants > Call Handling Menus, and click to configure Lunch hours menu by defining a prompt for the callers and a key to route the calls during lunch hours.
- Ability to downgrade users licenses: In this release, you can downgrade a user license or change it to a license with lower capabilities. When you downgrade a user license, the shared settings among licenses, such as phone number, extension number, and call forwarding rules will be preserved. The system automatically changes the features that are not shared between the licenses such as Switchboard Pro or Analytics for 8x8 Work. When you downgrade a user license, for example, Analytics for 8x8 Work automatically changes the user's access level from Supervisor to Essentials. When you upgrade a user license, however, you still need to configure the user profile to allow the new capabilities. In the above example, you need to modify the user profile to allow Supervisor access instead of Essentials when you upgrade the license.
To downgrade a license, go to Users > Services and permissions while editing a user profile. Simply select another license from the list and save the changes. See our previous release regarding the Ability to upgrade licenses via Users page.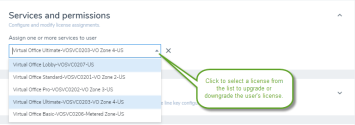
Known Issue: A limitation causes 8x8 Admin Console to return a wrong message when saving a license downgrade for a user, suggesting saving has failed when the changes are being saved correctly.
Known Issue: When changing the license, VOD and VOM may not be automatically provisioned or de-provisioned as the maximum number of participants in a meeting is different among licenses.
Known Issue: The BMW administrator's membership may not be automatically transferred from a license to the other.
- Enhanced user voicemail greeting: You can now set up a different voicemail greetings for company contacts and external contacts. You can create an external voicemail greeting, internal voicemail greeting, and general voicemail greeting. For general voicemail greeting, you have two options: either choose the default message that includes the user's extension number, or replace the user's extension number with the user's first name and last name in the default message:
- Option 1: General voicemail greeting by default contains the user's extension number, such as: "You have reached the voicemail of [1002]... "
- Option 2: General voicemail greeting contains recorded first name and last name, such as "You have reached the voicemail of [Robin Shasta]..."
This greeting is also used for auto attendant's voicemail when accessed through the company directory. To access the voicemail settings, go to Home > Users and expand Voicemail settings while editing a user. See Set up Voicemail Password and Notification.
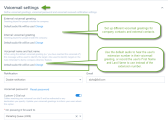
- Ability to redirect callers from voicemail by dialing zero: The callers who reach users voicemail can now dial zero and be redirected to other destinations such as users, call queues, ring groups, or auto attendants. This option gives callers a chance to reach a live person or follow the auto attendant's direction to another department if their original party is not available to take their calls. To redirect the callers from voicemail, go to Users > Voicemail settings and enable Custom 0 Dial out. Select a destination from the list and save. See Custom 0 Dial Out.
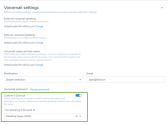
- Ability to generate users data report: You can generate a users report including name, language, license, site, etc., and quickly find the company user's information. You can decide what information to show on your report by selecting or clearing the check boxes of basic and advanced fields. You can simply find the field you are looking for through a search option To generate a users report, go to Home > Users, and click Generate users report.
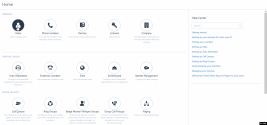
- Support for automatic notification of service changes: When you assign a service to a contact (upgrade a contact to a user), or create a new user, the system automatically sends a welcome email to the user. The welcome email includes the user's name, extension and phone number, the phone model, and more.
To disable the automatic email, go to Users > Onboarding information while editing a user, and disable the option to Send welcome email.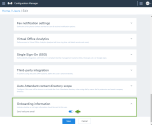
- Support for custom destinations in call forwarding: You can now add custom destinations to user's call forwarding rules, allowing administrators to add targets, such as service extensions, to forward the calls to. Let's say you need your users to access the voicemail system by calling into a ring group. The ring group would then send calls to the voicemail system extension 500. By setting the custom destination 500 for the ring group service user, all calls will go to the voicemail as set up for the custom destination.
To add a custom destination to your call forwarding, go to Users > Call forwarding rules and click to edit Forward all calls, add a custom number and save.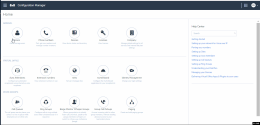
- Ability for administrators to log in call queue members: Administrators can now log in call queue members to a queue involuntarily. Prior to this release, administrators could only log out the members from the queue. This feature can help administrators monitor the call queue and add members when needed. To log in members to call queues, go to Home > Work Groups > Call Queues and click Log in to queue.
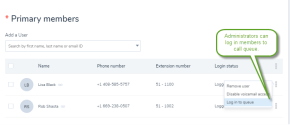
- Support for Group Paging in Cisco phones: We now support group paging in Cisco phone models 7811, 7821, 8841, and 8861. Prior to this release Group paging support was limited to Polycom phones. Paging with Cisco phones requires the paging group to have at least one member with Receive option. The Send option is automatically disabled since group members must dial the group paging extension to page other members. To access group paging, go to Home > Paging and create or edit a group paging. See Create a Group Paging to learn how to configure Cisco phones.
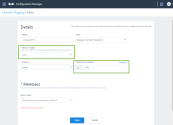
Limitation: Only emergency paging is supported in Cisco phones. Emergency paging interrupts the group members active calls.
- Ability to notify users via email when sending or receiving fax: You can choose whether a user receives email notifications when they send or receive a fax. The email notification is disabled by default, but you can configure it to be link-only, an attachment, or link and attachment. To set up the fax notification for a user, go to Home > Users > Fax notification settings. The updates are both ways, that is, the changes to 8x8 Admin Console updates the user's settings in 8x8 Work for Desktop and the changes made by the user in 8x8 Work for Desktop updates the fax notification settings in 8x8 Admin Console.
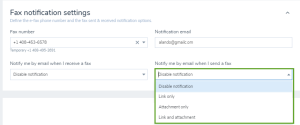
Change of Behavior
- Removed Okta sync back information section from Single Sign-On: We removed Okta Sync Back Information section from Okta Single Sign-On page in 8x8 Admin Console. The sync back is now done automatically via Okta 8x8 application and no more configuration is required by the users. To access Okta configuration page, go to Identity Management > Okta.
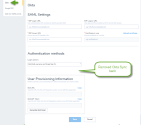
In this release, we have introduced new features and enhancements to improve overall productivity:
- Refreshed new look for the Users page: The user data is now structured in collapsible sections, facilitating navigation and usability from desktop and mobile devices. To see our refreshed look, go to Home > Users and create or edit a user. Click to expand each section for further configuration.
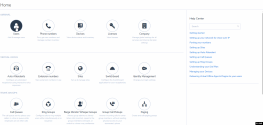
- Ability to upgrade licenses via Users page: You can now properly upgrade a user license via user profile. A list of available and active licenses for the tenant are shown under Services and permissions. When a user has no license assigned, you can choose any license from the license drop-down. But when a user already has a license, only the licenses with more capabilities (upgrade) or with similar set of capabilities are shown.
- Ability to hide a user from the company's directory: You can now hide users, rings groups, call queues, and auto attendants from publishing in the company's contact directory. If the display option is disabled, the user is no longer visible when searching for contacts. To hide a number, such as an internal fax number, from the company directory, go to Home > Users > Basic information and find the service user. Click to disable Display contact in company directory, and save.
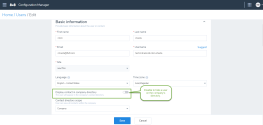
- Ability to see a phone number's source: You can now see the source of phone numbers in your tenant. To see whether a number is claimed or ported, go to Home > Phone numbers and check out the Number Source column.
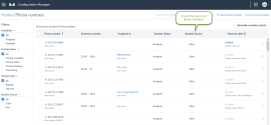
- Ability to access the pairing pin for DECT handsets via user profile: You can now see the pairing pin for DECT devices that have a base and a handset. To pair the handset to the base and activate the cordless IP DECT phones, you need a four-digit pairing pin. The pairing pin is displayed in the read-only field in Users > Voice basic settings for easier access and to facilitate the process. The pairing pin is also sent to the user via the welcome email.
To access the pairing pin, while editing a user, go to Voice basic settings and select a DECT handset and base. Pairing PIN appears next to the Device model. See our knowledge base article: How do I activate my cordless IP DECT phones.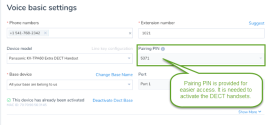
- Introducing power key templates: You can now save the power keys configuration on a device and copy it to other devices. Simply save the line key configuration as a template and import it to other devices. This saves time and effort in configuring the power keys on devices individually.
To save a new template, while editing a user, go to Voice basic settings > Device model, and click Line key configuration. Configure the keys as needed, and click Save as template. The new template is added to your system.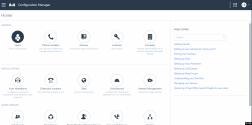
To import an existing template for a new user or device, while editing a user, go to Voice basic settings > Device model and click Line key configuration. Click Import from template. The template is imported for this user or device. - Ability to remove porting orders: You can now remove your porting order for the numbers that failed to port or are still pending porting. It allows users to remove a failed order due to a mistake or incorrect number. When you remove the porting request, the number is removed from your system. The temporary numbers are either returned to 8x8, Inc.or will remain in your inventory as a claimed number.
To remove a porting order:
- Go to Home > Phone numbers.
- Filter the numbers by the Porting Failed or Porting Pending status.
- Find the number you would like to remove and click
 .
. - Select Remove porting request from the menu.
The failed porting number will be removed from your system following a confirmation message. The temporary numbers can be kept in your inventory as claimed numbers.
- Ability to resubmit a porting order: If you are not happy with any number you have submitted, or if you need to change your order, you can simply make changes to your order and resubmit without going through the complete porting process.
To resubmit a request, you must:- Be in a portable state such as pre-porting or failed stage.
- Keep at least one telephone number unchanged in an order with multiple porting numbers, or the order will be canceled.
- Enter the same type of numbers as the original order (for toll-free and wireless orders only).
- Do not change the service provider.
To resubmit a porting order:
- Go to Home > Phone numbers.
- Filter the numbers by Porting Failed or Porting Pending, and click
 next to a number.
 - Select Resubmit porting request.
Edit the order number and click Continue. See Port your existing phone numbers.
- Ability to remove call park extensions: You can simply delete a call park extension, that you have no use for, from the list of extension numbers. When you delete a call park extension, the power keys pointing to the extension number become invalid. To delete a call park extension, open Extension numbers and find the call park extension to delete. Click
 , and select Delete.
- Ability to view port assignment for DECT bases and ATA terminals: You can now view the port assignments on a DECT base or an ATA terminal unit and inspect what ports are assigned to users. To see the port assignment on a DECT or ATA device, go to Home > Devices and click View device report. Click any device on the list to open the device's Info Panel. You can view the number of ports and the port assignments.
- Ability to contact 8x8, Inc. Support directly from within the application: Users can now contact the support team at 8x8 directly from 8x8 Admin Console. You can open and review your support cases, report operation issues, or ask questions regarding your system. This service only applies to 8x8 customers at this time. 8x8 Partners are excluded. To access support link, click Contact support from the top header.
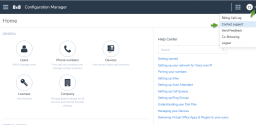
The support portal page opens including instructions of how to submit an online case or see your existing support cases: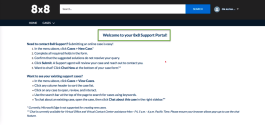
Change of Behavior
We have changed the behavior of the following features:
- Ability to select a user's Virtual Office or 8x8 Contact Center extension for BLF targets: When creating a BLF target, you can now select either VO or VCC extension for users who have both licenses. To add a new BLF key, click Line key configuration while editing the user. Click to add a BLF key and search for the user to monitor. Notice that you can see both user's extensions under User to monitor for the users who have both Virtual Office and 8x8 Contact Center licenses.
Extensions01_thumb_0_125.png)
- Ability to enter custom destinations for speed dial: You can now add custom numbers for speed dial. We provide support for +,-,*,# characters and digits. For example, for an international number, you can enter +985555555555. Notice that the label field matches the Dial to field.
To add speed dial custom destinations, while editing a user, click Line key configuration > Speed dial > Dial to. Enter the custom number and click Save.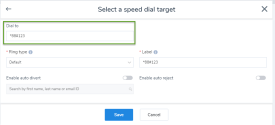
- Ability to filter sites on auto attendants page: Customers with multiple sites and a large number of auto attendants are now able to filter the auto attendants based on their sites. This enhancement helps them paginate and locate their auto attendants quickly. Go to Home > Auto Attendants and click to filter per site.

- Ability to select DECT bases and ATA terminals on large accounts: You can now select the DECT base and ATA terminals in large account with more than 200 devices for better filtering. To select the DECT base and ATA terminal, the user must have a DECT or ATA device assigned. Go to Voice basic settings > Base device while editing the user and look to find a base or ATA terminal from the list. See how to assign DECT phone to users.
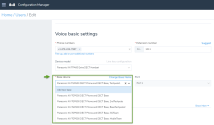
In this release, we have introduced new features, and enhancements to improve the overall productivity:
- Enhanced visibility to device details: In the Devices page, we have introduced the Info Panel that presents the device information such as: device type, status, activation code, MAC address, and more. Info Panel allows a quick visibility to the device details. To access the Info Panel, go to Devices, and click view device report to open the Details page. In the Details page, click any device on the list to view the device details in the Info Panel.
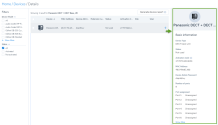
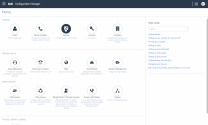
- Improved notification for failed number porting: Upon submitting your porting request, we immediately notify you about the failed porting requests by showing the status and reason for failure. We provide a temporary number for each successfully ported number. See the porting order results by going to Home > Phone numbers > Port Phone Numbers >Summary page. Resolve the issue and click Restart the porting process.
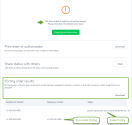
- Ability to disable Secure Real-time Protocol (SRTP) for 8x8 Work users: Transport Layer Security (TLS) and Secure Real-time Transfer Protocol (SRTP) are standard protocol for securing VoIP traffic. SRTP is enabled by default for all devices. To disable the SRTP, while creating or editing a user, go to Home > Users > Voice Basic Settings. Make sure you have a device selected such as Polcom VVX 301. Disable Enable Secure Real-time Protocol and save the changes.
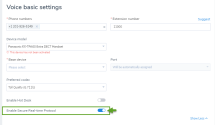
In this release, we have introduced new features, and enhancements to improve the overall productivity:
- Enhance call forwarding rules: You can now forward incoming calls to voicemail, users, or numbers when a user does not answer the call. The call forwarding rule is automatically set to 15 seconds but allows you to change the duration. When creating or editing a user, open Users > Advanced Settings > Call Forwarding and edit the value for When user does not answer the call.
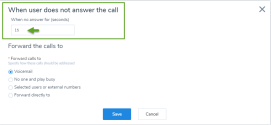
- Improved notifications for power keys in Polycom devices: In Polycom devices, in addition to the flashing red light phone notification, you can now enable call screen notifications and audio tone for power keys.
- If you enable call screen notification, full splash screen alerts you when an extension rings.
- If you enable call audio tone for incoming calls, you hear an audio tone when an extension rings.
To enable notifications, while editing the users, go to Users > Voice Basic Settings > Line key configuration and enable options under Additional BLF Call Ringing Notifications.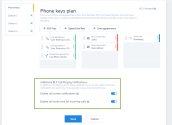
- Enhanced call queues to alert members about incoming calls: We have now added a new setting to alert the call queue members about incoming calls. If a call queue member does not answer the call within the specified time (maximum 30 seconds), the user is considered unavailable and the call is moved to another member, or back to the queue. To enter alerting time for a member, go to Call Queues > Basic Information and enter a new time for Total time to alert a member. See Set up a call queue.
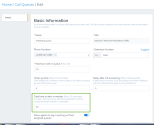
- Ability to search and filter phone numbers by a rate center: While claiming a new phone number, you can filter and look for numbers by specific rate center. Rate center is a geographically-specified area used for determining mileage or usage dependent rates in the public switched telephone network. To filter by the rate center, go to Phone Numbers > Claim Phone Number and select Filter By > Rate center. Click Search to get the result.
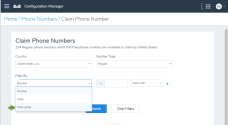
- Improved Okta configuration page in 8x8 Admin Console: We have now added helpful descriptions and decoupled two sections: User Provisioning Information and Okta Sync Back Information. To access Okta configuration page, go to Identity Management > Okta.
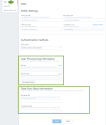
-
Enhanced ring group configuration: We have added pagination for ring group filters. The ring group name and extension is now set as default for the ring group caller ID. To access the ring group caller ID, go to Ring Groups > Ring Group Caller ID and choose or change the default.
-
Ability to generate a phone number report: You can now generate a report that lists all phone numbers, assigned or available in your phone system. Find out the list of ported numbers, or numbers that are pending porting, or those that have failed porting by using the relevant filters. The report includes the phone number, type, location, extension, and more. To generate numbers report, go to Phone Numbers, set a desired filter, and click Generate numbers report.
- Improved sorting of phone numbers: Phone numbers now appear in an ascending order helping you to locate a number easier. To see the list of phone numbers, go to Home > Phone Numbers. The sort order cannot be changed.
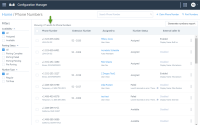
- Added support for additional countries: You can now add addresses from a wide range of countries such as: Anguilla, Barbados, Bahrain, Brazil, Bahamas, and more. To see the complete list of countries, see Appendix A. To create or edit an address, go to Users > Basic Information > Address, and select New Address from the list. The list of countries can be also accessed from site address, emergency address, porting process, and number claim.
