Configure the 8x8 Operator Connect
To configure the 8x8 Operator Connect customers must follow the next steps:
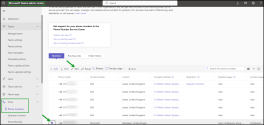
- Add 8x8 as an operator in the Microsoft Teams Admin Center.
- Manage 8x8 Operator Connect licenses in 8x8 Admin Console.
- Claim phone numbers in 8x8 Admin Console.
- Assign phone numbers to 8x8 Operator Connect in 8x8 Admin Console.
- Assign DIDs to users in the Microsoft Teams Admin Center.
Important! Important! To assign numbers to 8x8 Operator Connect, 8x8 admins must create first the emergency addresses in Microsoft Teams Admin Center. To learn how to create an emergency address, see Manage emergency calling policies in Microsoft Team.
Note: To order 8x8 Operator Connect for Microsoft Teams licenses, ensure you added 8x8 as an operator in the Teams Admin Center.
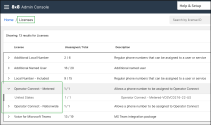
Once you have purchased the 8x8 Operator Connect for the Microsoft Teams licenses, such as Operator Connect - Metered or Operator Connect - Nationwide, they show in your account on the 8x8 Admin Console’s Licenses page.
To learn more about licenses in 8x8 Admin Console, see Review licenses.
You can claim new phone numbers and assign them to 8x8 Operator Connect for Microsoft Teams.
To learn how to claim new phone numbers in 8x8 Admin Console, see Claim phone numbers in 8x8 Admin Console.
You can also port existing phone numbers and use them for 8x8 Operator Connect for Microsoft Teams. However, only when the porting is complete, you can use and assign these numbers to 8x8 Operator Connect.
After claiming your phone numbers, you must assign them to 8x8 Operator Connect.
To assign a phone number to Operator Connect:
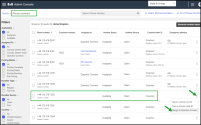
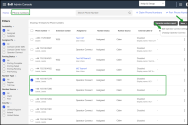
- Go to Home > Phone Numbers.
-
In the row of the number you want to assign, click
 > Assign to Operator Connect.
 -
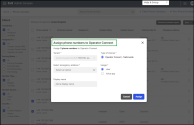
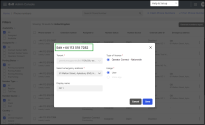
In the Assign phone number to Operator Connect box, make the appropriate settings:
- Tenant: In a Microsoft multi-tenant setup, select the appropriate tenant from the list. If you are working with a single tenant, this option is disabled.
-
Select emergency address list: Choose the emergency address you want to use. The list of available addresses comes from your Teams Admin configuration.
- Display name: Optional, type the name if you want it to be displayed on outbound calls (US only).
- Type of license: Choose either Operator Connect - Metered or Operator Connect - Nationwide if you have both types of licenses available for the same country.
-
Usage: Click User to assign the DID to an individual Microsoft Teams user, or click Voice App to assign the DID to an Auto Attendant or Queue.
-
Click Assign.
If you have more than one number you want to assign to 8x8 Operator Connect, you can choose to assign them in bulk.
Notes:
- You can only assign numbers in bulk for 8x8 Operator Connect if they are from the same country.
- For 8x8 Operator Connect, you can select up to 200 phone numbers for bulk actions. If you exceed this limit, options for bulk assigning, unassigning, or editing will be hidden.
To assign multiple numbers in bulk to 8x8 Operator Connect:
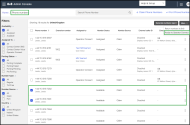
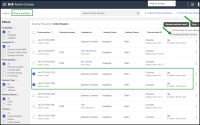
- Go to Phone Numbers.
-
Select the check box next to the desired numbers, and in the upper-right corner, click More > Assign to Operator Connect.
-
In the Assign phone number to Operator Connect box, make the appropriate settings:
- Tenant: In a multi-tenant setup, select the appropriate tenant from the list. If you are working with a single tenant, this option is disabled.
- Select emergency address list: Choose the emergency address you want to use. The list of available addresses comes from your Teams Admin configuration.
- Display name: Optional, type the name if you want it displayed on outbound calls (US only).
- Type of license: Choose either Operator Connect - Metered or Operator Connect - Nationwide if you have both types of licenses available for the same country.
- Usage: Click User to assign the DID to an individual Microsoft Teams user, or click Voice App to assign the DID to an Auto Attendant or Queue.
- Click Assign.
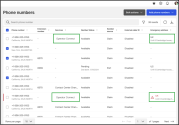
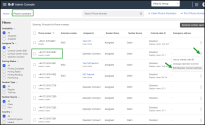
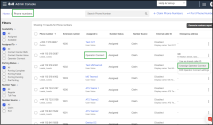
You can now view all the numbers assigned to 8x8 Operator Connect for Microsoft Teams and the associated emergency addresses. These numbers will now be visible in the Teams Admin Center too
Note: The Emergency Address column is displayed only for the numbers assigned to 8x8 Operator Connect for Microsoft Teams.
To assign a number using the Teams Admin Center:
- Log into Microsoft Teams Admin Center.
- In the left navigation, click Voice > Phone numbers.
-
On the Phone numbers page, select an unassigned number in the list, and then click Edit.
- In the Edit pane, under Assigned to, search for the user by display name or user name, then click Assign.
- To assign or change the associated emergency location, under Emergency location, search for and then select the location.
- Depending on whether you want to send an email to the user with their phone number information, turn Off or turn On Email user with telephone number information. By default, this is On.
- Click Save.
Note: For more information on this, see the Microsoft guide for managing phone numbers.
You can configure the Emergency Services for 8x8 Operator Connect within the Teams Admin Center.
Customers are responsible for updating the emergency addresses in the Teams Admin Center, as well as the address associated with a purchased DID in the 8x8 Admin Console.
Note: In 8x8 Operator Connect for Microsoft Teams, emergency addresses are associated with DIDs, not users. If a user is assigned a different DID than before in the Teams Admin Center, that DID may be related to a different emergency address.
To set up emergency calling within Teams Admin Center, including Dynamic Emergency calling, location information, network settings, etc., see the Plan and configure dynamic emergency calling Microsoft documentation. Remember that Dynamic Emergency Calling works for the US and Canada regions.
You can change an emergency address anytime.
To change the emergency address in 8x8 Admin Console:
- Go to Home > Phone Numbers.
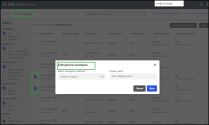
- In the row of the number you must assign, click
 > Edit Operator Connect Settings.
 - Choose a different emergency address.
- Click Save.
Note: If the emergency address is not valid, a warning is displayed in the Emergency Address column.
If you have more than one number assigned to 8x8 Operator Connect you want to edit, you can choose to assign them in bulk.
Notes:
- You can only edit numbers to 8x8 Operator Connect in bulk if they are all from the same country.
- For 8x8 Operator Connect, you can select up to 200 phone numbers for bulk actions. If you exceed this limit, options for bulk assigning, unassigning, or editing will be hidden.
To edit multiple numbers in bulk to 8x8 Operator Connect:
- Go to Home > Phone Numbers.
-
Select the check box next to the desired numbers, and in the upper-right corner, click More > Edit Operator Connect settings.
- In the Edit phone numbers box, make the changes as appropriate. You can change the emergency address and/or the display name.
- Click Save.
You can unassign numbers from Operator Connect via 8x8 Admin Console anytime.
Note: If the number is unassigned directly within the Teams Admin Center, it can cause the number to become stuck.
To unassign a number from 8x8 Operator Connect:
- Go to Home > Phone Numbers.
- Find the number you want to remove, click
 > Unassign Operator Connect, then click Unassign to confirm.
You can unassign multiple numbers from 8x8 Operator Connect in bulk via 8x8 Admin Console anytime.
Note: If the number is unassigned directly within the Teams Admin Center, it can cause the number to become stuck.
To unassign multiple numbers from 8x8 Operator Connect in bulk:
- Go to Home > Phone Numbers.
- Select the check box next to the desired numbers, and in the upper-right corner, click More > Unassign Operator Connect and click Unassign to confirm .
