Previous releases
The following features and enhancements were introduced in previous versions of 8x8 Agent Workspace![]() The brand new interface for 8x8 Contact Center agents to receive and process customer interactions.. For details on the latest new features, see our list of what's new in the current release.
The brand new interface for 8x8 Contact Center agents to receive and process customer interactions.. For details on the latest new features, see our list of what's new in the current release.
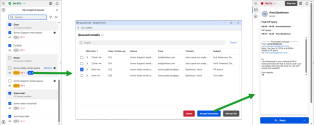
In this release of 8x8 Agent![]() Agents use the Agent Console to view and manage customer interactions. Virtual Contact Center supports Regular agents and Supervisor agents. Workspace, we have introduced the following enhancement:
Agents use the Agent Console to view and manage customer interactions. Virtual Contact Center supports Regular agents and Supervisor agents. Workspace, we have introduced the following enhancement:
New contact suggestions in email fields
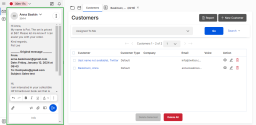
To streamline outbound communication, 8x8 Agent Workspace now automatically suggests contact matches when you start typing in the To, Cc, or Bcc fields. As you enter an email address or a contact’s name, a drop-down list appears with matching entries from your contact directory, allowing you to select the desired recipient quickly.
Note: The To field supports only one email address. The Cc and Bcc fields support multiple contacts.
For more information, see how to create and send a new email.
In this release of 8x8 Agent Workspace, we have introduced the following enhancement:
Improved pull email feature in the new email experience
The new email experience introduces an enhanced version of the pull email feature, designed to improve how agents retrieve messages from the queue. Both the classic and new email experiences allow agents to pull emails, but the new version in the new email experience provides greater efficiency, reliability, and flexibility. For more information see how to pull emails in the new email experience.
In this release of 8x8 Agent Workspace, we have introduced the following enhancement:
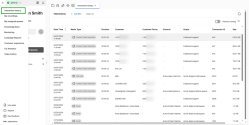
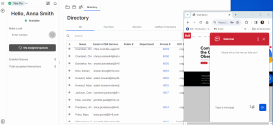
View the Interaction history page
The 8x8 Interaction history page allows you to access your recorded interactions within the 8x8 Contact Center. From this page, you can view only your personal recorded interactions, such as:
- Inbound voice interactions
- Outbound voice interactions
- Voicemails
- Email interactions
-
Chat interactions
Notes:
- Currently, outbound emails and SMS messages are not included on the Interaction history page.
- Only emails with replies to customers are displayed on the Interaction history page.
The Interaction history page empowers you to:
- Access the information from a single location.
- Provide faster support by quickly reviewing past interactions with a customer to understand their history, preferences, and any ongoing issues.
- Gain more context behind long-running or escalated cases, by having easy access to all prior communication and what steps were taken.
- Deliver faster, more accurate, and more empathetic service — which leads to higher customer satisfaction.
For more information, refer to the interaction history section of this guide.
In this release of 8x8 Agent Workspace, we have introduced the following enhancement:
Ability to enable noise suppression
When using the embedded 8x8 Agent Workspace softphone, you can enable the noise suppression feature to eliminate background noise and increase the audio quality of your interaction.
This option is enabled by default.
To enable noise suppression:
- Go to Change status
 > My profile > Settings > Audio settings.
-OR-
Go to Change status > Audio settings. The options open in a floating window.
 - Click the toggle next to Enable noise suppression. The toggle turns blue when enabled.
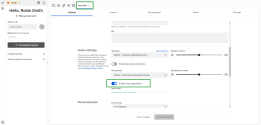

Note: The option to Enable noise suppression only displays when Use Agent Workspace is selected in Phone setup. For more information, see Set up workplace phone.
In this release of 8x8 Agent Workspace, we have introduced the following enhancement:
Enhanced Playback experience
The Playback tab used to access call recordings in 8x8 Agent Workspace has been redesigned to provide supervisors with a more user-friendly design and additional features such as new filters, the ability to download interactions, and more. With these enhancements, as a supervisor, you can easily pinpoint important moments, analyze customer interactions, and assess the quality of customer service.
To access the Playback tab:
- Log in to 8x8 Agent Workspace using your supervisor credentials.
- Click Ready to work or Work Offline.
- Click Monitoring
 from the Display Panel.
 - Click the Playback tab.
A list of today’s recordings displays if there are any available. Use the filters to access the relevant recordings.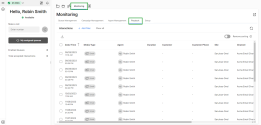
For more information, see Retrieve agent call recordings.
In this release of 8x8 Agent Workspace, we have introduced the following enhancement:
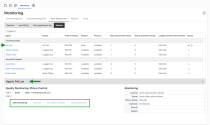
New call card for Monitoring agents
Supervisors monitoring an agent can now see a call card at the top of the Control Panel when a monitoring call is presented. The call card indicates that the call is for monitoring purposes. With this enhancement, supervisors can choose which calls to monitor.
Notes:
- When using 8x8 Agent Workspace softphone, when a call is offered for monitoring, the softphone will continue to ring until the call is rejected or the agent ends the call.
- The call card for monitoring displays even when your status is Work Offline or On Break.
- When using Auto Answer, monitored calls will be auto-answered in 8x8 Agent Workspace.
To monitor agents:
- Log in to 8x8 Agent Workspace. Only supervisor accounts can access the monitoring features in 8x8 Agent Workspace.
- From the Display Panel, click Monitoring
 .
.
-OR-
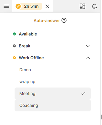
From the Control Panel, click Show menu > Monitoring.
 - From the Monitoring window, click the Agent Management tab.
The page lists the groups you selected in the Setup tab. - To begin monitoring, click Monitor in the header area.

- Click
 under the Action column for the agent you wish to monitor.
-OR-
Click an agent's name to view the monitoring controls. - Click Start Monitoring.
- A call card displays in the Control Panel and your supervisor phone starts ringing.
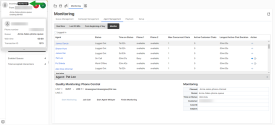
- Accept the call to listen in.
- Perform one of the following tasks:
For more information, see Monitor agents.
In this release of 8x8 Agent Workspace, we have introduced the following enhancements:
- Introducing support for Video Elevation
- Ability to handle blended interactions
- Ability to personalize your avatar and biography
- New call quality indicator when using 8x8 Agent Workspace softphone
Introducing support for Video Elevation
Video Elevation is an integrated solution that allows 8x8 Contact Center agents to establish a one-way video connection with customers in need of assistance. With this feature, as an agent, you can switch from a phone interaction to a one-way video interaction with a few clicks. This new feature ensures you can get a clear visual of the customer’s problem by extending a video call invitation to gather all the information necessary for a quick call resolution. The customer can simply click the link received from you via SMS to establish the video connection, without having to install any software.
Note: The live video feed shared by the customer can only be viewed by the agent and the customer. The customer cannot see the agent during the video interaction.
Let’s say Pat is a customer support specialist at AcmeJets, a window shutter manufacturer. Pat receives a call from Blake, a customer, claiming that the recently installed shutters cannot close. To get a clear understanding of the problem, Pat decides to elevate the conversation to video and sends out an meeting link to Blake’s mobile phone. Blake accepts the invitation and Pat can now see the window shutters installed. With the camera pointing at the shutters, Blake tries to close them. Pat notices that a safety pin is preventing the shutters from closing. After instructing Blake on the correct removal of the safety pin, the shutters work as intended. The interaction ends successfully without having to escalate to an expert or dispatch a technician to the customer’s location.
Options available to agents while using Video Elevation:
- Start recording
 : Use this option to record the video feed from the customer’s camera. An audible alert plays to inform the parties that the session is recorded.
 - Take a screenshot remotely
 : Use this option to take a screenshot of the customer’s screen (video feed). The customer is not notified that a screenshot has been taken.
 - Ask for location
 : Use this option to prompt the customer to share their current location. If the client allows you to see their current location, a Google Maps view displays in the lower left corner of the screen. This location is then stored in the Notes section on the control panel in Agent Workspace, and the CRM.
 - Swap camera remotely
 : Use this option to prompt the customer to swap their camera to front-facing mode. The customer must click Allow on their phone to authorize the switch of the video feed from the rear camera to the front-facing camera. The customer can use the Edit option listed on their phone to edit the access.
 - Close
 : Use this option to end the video call.
For more information, see how to engage with customers using Video Elevation.
Ability to handle blended interactions
With blended interactions, 8x8 Contact Center agents can simultaneously handle interactions of various media types, such as phone calls, emails, and chats. This flexibility is essential for catering to the diverse communication preferences of customers, and empowers agents to increase productivity and efficiency.
Depending on the admin configuration, the following blended scenarios are supported:
- While on a phone call, you can be offered chats and/or emails.
- While handling chat interactions, you can be offered emails and/or phone calls.
- While handling emails, you can be offered chats and/or phone calls.
The admin sets the limit for the maximum number of concurrent interactions. Still, as an agent, you can use the Stop new option to prevent the system from offering you new interactions until you decide to resume receiving interactions. This option allows agents to control the flow of incoming interactions when they need time to focus on the current interactions.
Note: Call transfers can still be offered even if the maximum number of blended interactions is reached.
For more information, see how to process blended interactions.
Ability to personalize your avatar and biography
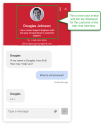
When enabled by the admin, you can personalize your avatar and biography from your 8x8 Agent Workspace profile. This personal information will be visible to customers during web chat interactions.
Let’s say a customer uses the web chat available on the company's website. Upon being transferred to an agent, the customer will view the agent's avatar and biography instead of the company logo. This feature allows you to add a personal touch to chat interactions, show your experience, and boosts customer satisfaction—ultimately resulting in a more successful customer service interaction.
- Log in to 8x8 Agent Workspace.
- Go to Change status
 > My profile.
 - From the Settings tab, scroll down to the General information section.
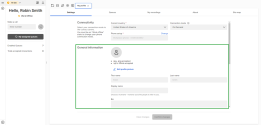
- Click Edit profile picture.
- Click Upload Picture.
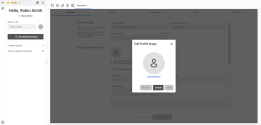
- Select the picture you want to use from your local device.
- Click Open.
- (Optional) Use the blue dots on the profile picture to adjust the cutout for the avatar.
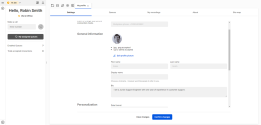
- Click Save. Your profile picture displays on the page.
- In the Bio section, add a short introduction about your professional experience.
- Click Confirm changes if you have updated your Bio.
Note: Only .jpg or .png files with a maximum size of 20 MB can be uploaded.
Note: Your profile picture is also updated in your 8x8 Work profile.
- Go to Change status
 > My profile.
 - From the Settings tab, scroll down to the General information section.
- Click Edit profile picture.

- Click Remove.
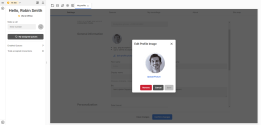
- Click
 to close the Edit Profile Image dialog.
Your profile picture is removed and replaced with a generic user icon.
Note: Your profile picture is also removed from your 8x8 Workprofile.
For more information, see how to configure your profile.
New call quality indicator when using 8x8 Agent Workspace softphone
We have included a call quality indicator—one for you and one for the customer—when using the embedded 8x8 Agent Workspace softphone to enable agents engaged in calls to see when the network conditions are not optimal. With this new feature, you can take appropriate action to rectify the connection issue. If you are experiencing connection issues frequently, reach out to your administrator for assistance.
Notes:
- The call quality indicator is only available for two-way calls.
- The call quality indicator only displays when using 8x8 Agent Workspace softphone.
Call quality indicator color label
The background color for the call quality indicator icon changes as follows to indicate the quality of the call:
- Green
 : Indicates a good connection quality.
 - Orange
 : Indicates an average connection quality.
 - Red
 : Indicates a bad connection quality.
 - Gray
 : Indicates there is no connection.
Hovering over the call quality indicator icon displays additional information about your connection, such as audio quality, quality score, packet loss, and jitter.
For more information, see how to use the 8x8 Agent Workspace softphone as your workplace phone.
In this release of 8x8 Agent Workspace, we have introduced the following enhancements:
- Ability to transfer calls to external contacts from your contact directory
- Updated text label for filtering favorites from the Transfer panel
- New filters available when transferring a call
- New sub-filters available in the Contacts directory
Ability to transfer calls to external contacts from your contact directory
Your external contacts are now integrated into your Contacts in the Transfer panel for voice interactions. This enhancement streamlines call transfers to external contacts and empowers you to increase efficiency by providing access to all your contacts from a unified directory.
By default, the contact list includes only agents and external contacts from your 8x8 Work app. Use the filters to display additional relevant contacts.
Prior to this release, when transferring an active call to an external phone number, agents had to type the phone number directly into the dialpad.
To transfer a phone interaction to an external contact via the Contacts tab:
- During an active call, notify the caller about the intended transfer.
- Click Transfer
 .
.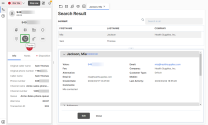
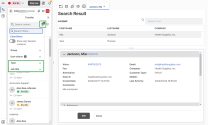
- From the Contacts tab, locate and select the external contact from the list. You can also use the Type filter or the search bar to refine your search.
- Select Warm Transfer. The system initiates a call to the selected contact.
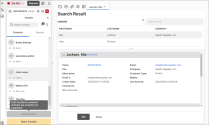
- After informing the contact about the intended transfer, click Transfer.
- Click Wrap up to change your status to back to Available.
Note: Cold transfers are not yet supported when transferring a call to an external contact.
Updated text label for filtering favorites from the Transfer panel
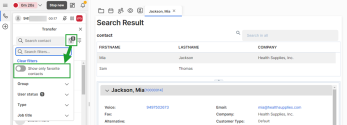
We have updated the text label for the Show only favorite agents filter available from the Transfer panel to Show only favorite contacts. This update aims to bring clarity and consistency now that the Contacts![]() directory displays both agents and external contacts.
directory displays both agents and external contacts.
New filters available when transferring a call
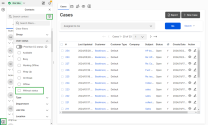
When transferring a call, you can now use the Type filter and the Job title filter to refine your search. These additional filters help you swift through your contacts list to quickly find relevant contacts without having to manually browse through the entire list.
Prior to this release, only the Group![]() A group is a collection of agents created for management or reporting purposes. Groups can be functional (for example, Technical Support) or organizational (for example Supervisor Mary’s Team). Each agent can be assigned to only one group, and cannot view or access information about other groups or group members. and User status filters were available in the Transfer panel.
A group is a collection of agents created for management or reporting purposes. Groups can be functional (for example, Technical Support) or organizational (for example Supervisor Mary’s Team). Each agent can be assigned to only one group, and cannot view or access information about other groups or group members. and User status filters were available in the Transfer panel.
New sub-filters available in the contact directory
We’ve introduced the following two new sub-filters in the Contacts![]() directory to enhance the efficiency of accessing specific contacts. These filters can also be used when transferring a call to another party.
directory to enhance the efficiency of accessing specific contacts. These filters can also be used when transferring a call to another party.
In this release of 8x8 Agent Workspace, we have introduced the following enhancements:
- Embedded 8x8 Agent Workspace softphone
- Ability to enable a secondary ring device when using 8x8 Agent Workspace softphone
- Ability to customize sounds per channel when using 8x8 Agent Workspace softphone
- Ability to chat with Microsoft Teams users from 8x8 Agent Workspace
- Enhanced Presence Sync between 8x8 Agent Workspace and Microsoft Teams
Embedded 8x8 Agent Workspace softphone
We have introduced an enhanced call-answering experience using the embedded 8x8 Agent Workspace softphone. Until now, agents had to use a hard phone, a cell phone, or a softphone app to answer calls in 8x8 Agent Workspace. With 8x8 Agent Workspace softphone, agents can answer calls directly from the browser without having to leave the application.
Note: When using Agent Workspace softphone, agents are not required to log in to 8x8 Work for Desktop to answer calls in 8x8 Agent Workspace.
If using 8x8 Agent Workspace softphone and 8x8 Work for Desktop simultaneously, incoming 8x8 Contact Center calls are offered and can be answered on both apps. Calls to the Unified Communications Direct Inward Dialing (UC DID) and 8x8 Work phone or extension are only offered on 8x8 Work for Desktop to keep the Contact Center lines open for customers.
For more information on 8x8 Agent Workspace softphone, refer to Use 8x8 Agent Workspace softphone as your workplace phone.
Ability to enable a secondary ring device when using 8x8 Agent Workspace softphone
When using the embedded 8x8 Agent Workspace softphone to handle customer interactions, you can choose to enable a secondary ring device. Let’s say you are using headphones to communicate with customers. When your headset is off, you may not hear when an interaction is offered before it times out. To ensure that you can always hear the ringtone when an interaction is offered, you can enable another device to ring in addition to your headphones.
To enable a secondary ring device:
- Go to Change status
 > Audio settings. The options open in a floating window.
-OR-
Go to Change status > My profile > Settings > Audio settings.
 - Click the toggle switch next to Enable secondary ring device. New options display when the secondary ring device is enabled.
- Select a device from the Secondary ring device list.
- Adjust the speaker volume.
- If updating the audio from My profile, click Save settings. A confirmation banner displays to notify you that your profile has been updated successfully.
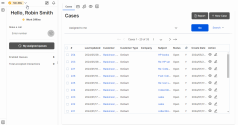
Note: This option is only available when your Phone setup is set to Use Agent Workspace. For more information, see how to set up your workplace phone.
For more information, see how to change the audio settings.
Ability to customize sounds per channel when using 8x8 Agent Workspace softphone
When using the 8x8 Agent Workspace softphone, you can customize the sounds for each channel type. This enhancement enables you to select a different sound for incoming calls, incoming chats and emails, and chat messages received after accepting the interaction.
Note: The selected sound for phone interactions plays in a loop to ensure that you do not miss the calls offered to you. This experience only applies to voice interaction sounds when using 8x8 Agent Workspace softphone.
To customize interaction sounds:
- Click the Change status
 menu option and change your status to Work Offline.
 - Click the Change status
 > My profile.
 - From the Settings tab, scroll down to the Personalization section and configure the following sound settings for the embedded 8x8 Agent Workspace softphone:
- Voice interaction sound: Select a ringtone from the list for inbound calls. By default, the Peaceful sound is selected. The sound plays continuously until you accept/reject the interaction or the acceptance timer reaches zero.
- Incoming chat/mail sound: Select a ringtone from the list for inbound chat, SMS, and emails. By default, the sound is set to None.
- Chat message sound: Select a chat message sound from the list to receive an audible notification whenever the customer replies to your message. By default, the sound is set to None.
- Click Save settings.
Ability to chat with Microsoft Teams users from 8x8 Agent Workspace
8x8 Agent Workspace users can now chat with Microsoft Teams contacts directly from the app. This feature simplifies cross-organizational communication, promotes quick call resolution, and empowers agents to collaborate effortlessly with contacts that are on the Microsoft Teams platform.
Note: You must have a license to use Microsoft Teams to be able to chat with your Microsoft Teams contacts from 8x8 Agent Workspace.
For more information, see how to start a chat with Microsoft Teams users.
Enhanced Presence Sync between 8x8 Agent Workspace and Microsoft Teams
The enhanced 8x8 Presence Sync enables the integration of Microsoft Teams presence into your 8x8 applications, as well as the presence status of 8x8 users who are on active calls in the Teams environment. This means that as an agent, when using both 8x8 Agent Workspace and Microsoft Teams to handle calls, the bi-directional presence sync will automatically update your status in both apps. The status changes in real-time but the duration may be impacted by the system load time.
This enhancement empowers you to maintain your focus while you are engaged in an interaction with customers or members of your organization. For more information, see 8x8 Presence Sync: Sync your status between 8x8 Agent Workspace and Microsoft Teams.
In this release of 8x8 Agent Workspace, we have introduced the following enhancements:
Updated text label for the agent icon
The text label when hovering over the agent icon in My assigned queues and Transfer panel has been updated to clearly indicate the number of agents enabled and logged in to a queue. Previously, when hovering over the agent icon, the text label only indicated the number of agents logged into the queue.
Depending on the queue, when hovering over the following icons, the following text may display:
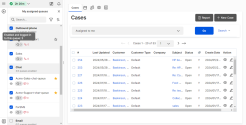
- Enabled and logged in to this queue
 : Indicates the number or agents that are enabled and logged in to the queue.
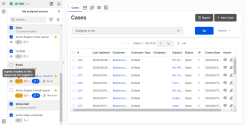
- Agents enabled to this queue are not logged in
 : Indicates that currently, none of the agents that are enabled to serve the queue are logged in.
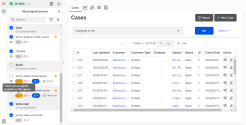
- There are no agents enabled to this queue
 : Indicates that no agents are enabled to serve the queue.
Ability to add queues to favorites from the Transfer panel
When transferring to a queue, you can add queues to favorites. Click the ![]() icon to add or remove queues from your list of favorite queues. This options helps you organize your queues more efficiently to ensure you can quickly access frequently used queues without having to search for them.
icon to add or remove queues from your list of favorite queues. This options helps you organize your queues more efficiently to ensure you can quickly access frequently used queues without having to search for them.
To add a queue as a favorite from the Transfer panel:
- In 8x8 Agent Workspace, set your status to Available.
- When an interaction is offered, accept it.
- Inform the user of the transfer and click the Transfer
 icon.
icon. - Select the Queues tab.
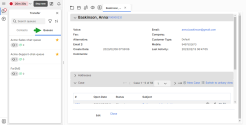
- Toggle the favorites
 icon On/Off. The icon changes to yellow when the queue is added as favorite.
 - Click the queue to which you wish to transfer the interaction.
- Click Transfer.
- Click Continue to confirm the transfer.
In this release of 8x8 Agent Workspace, we have introduced the following enhancements:
- New interaction sounds
- Ability to view your search history for contacts
- Improved UI for My assigned queues
- Improved sorting capability for My assigned queues
- Ability to view agent availability when transferring customers to a queue
New interaction sounds
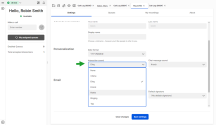
We now offer a wider selection of ringtones for incoming interactions in 8x8 Agent Workspace. To select a new interaction sound, go to My profile > Settings > Personalization > Interaction sound and select a sound from the drop-down list. The sound plays when selected.
Ability to view your search history for contacts
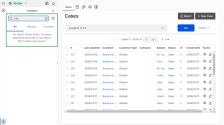
When you click on the search field in your Contacts ![]() directory, the app displays a list of contacts you recently interacted with. This feature helps save valuable time when trying to reach people.
directory, the app displays a list of contacts you recently interacted with. This feature helps save valuable time when trying to reach people.
To clear your search history, click the search field and select the Clear search history option from the bottom of the list.
Improved UI for My assigned queues
The user interface (UI) for My assigned queues has been improved to ensure 8x8 Contact Center agents can efficiently manage and prioritize their tasks.
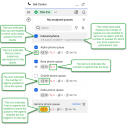
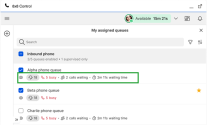
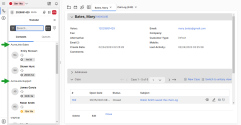
As an agent, you can now select the check box next to the media type label to enable or disable all queues within that media (if you have permission to opt in/out of queues). Additionally, the queue icons display detailed information when expanding the Control Panel to make it easier to understand how many agents are busy, how many customers are waiting in the queues, and the queue waiting time. When no interactions are waiting in the queue, the number of interactions waiting and the waiting time are not displayed. Expand the control panel to view the full description for the icons.
These enhancements improve usability and help you increase productivity and improve customer service.
For a more comprehensive list of the UI enhancements, refer to the list below.
- The media type label (inbound and outbound phone, chat, email, and voicemail) displays the number of queues you are enabled to serve and supervise.
- Supervisors will see the
 icon in the queue details for the queues they are enabled to supervise. Previously, the
  icon was used to highlight the queues for which you had supervisor permissions.
 - You can enable or disable all the queues related to a media type by clicking the check box next to the media type label. If you only wish to enable specific queues from a media type, click the check box next to the desired queue.
- If you are enabled to serve only certain queues within a media type, the media type label displays the
 icon instead of a check mark
  icon, indicating that you are not enabled to serve all the queues.
 - If you only have supervisor permissions for the queues within a media type, the media type label will not display a check box because, as a supervisor only, you are not required to opt in or out of queues to perform your tasks.
- The queue details display descriptions for the icons to allow you to quickly determine the number of agents currently serving the queue, the number of agents in busy status, the number of interactions waiting in the queue, and the queue waiting time. When no interactions are waiting in the queue, the number of interactions waiting and the waiting time are not displayed. Expand the control panel to view the full description for the icons.
- The number of agents that are currently busy are displayed in red in the queue details.
- When no agents are enabled to serve the queue or no agents are logged in to the queue, an orange-colored warning sign followed by the number zero
 displays in the queue details.
 - Queues with long labels are truncated. Hover over the truncated queue name to display the full text.
Note: The media type will not contain a check box if you don’t have permission to enable/disable queues, and the queues you are enabled to serve will display a gray check mark ![]() in front.
in front.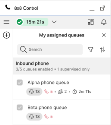
Improved sorting capability for My assigned queues
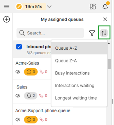
The Sort feature from My assigned queues is now accessible from the upper-right corner of the Control Panel. Additionally, you can now sort your assigned queues by:
- Queue
 A queue is an ordered collection of interactions waiting to be served by agents qualified to respond to these interactions. In addition to enabling the call center administrator to customize how incoming interactions are prioritized and routed, queues also ensure that interactions are never lost or discarded. A-Z: Sorts the queues in alphabetical order.
 - Queue Z-A: Sorts the queues in reverse alphabetical order.
- Busy interactions: Sorts the queues based on the number of busy interactions, from busiest to least busy.
- Interactions waiting: Sorts the queues based on the number of interactions waiting in queue, in descending order.
- Longest waiting time: Sorts the queues by waiting time, in descending order.
Prior to this release, you could only sort queues alphabetically.
Ability to view agent availability when transferring customers to a queue
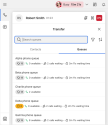
When transferring a customer to another queue, you can now see the number of agents that are currently enabled to serve the queue, the number of agents available to receive interactions (next to the green icon), the number of interactions waiting in the queue, and the queue waiting time. When no interactions are waiting in the queue, the number of interactions waiting and the waiting time are not displayed. Expand the control panel to view the full description for the icons.
When no agents are enabled to serve the queue or no agents are logged in to the queue, an orange-colored warning sign followed by the number zero ![]() displays in the queue details.
displays in the queue details.
This information empowers you to make an informed decision about which queue to transfer the interaction to, thus expediting the resolution of the issue and increasing customer satisfaction.
In this release of 8x8 Agent Workspace, we have introduced the following enhancements:
- Improved message for search results in the contact directory
- Enhanced search filter access
- New search filters available in the contact directory
- Improved email handling experience
Improved message for search results in the contact directory
When searching your Contacts![]() and either no results or more than 20 results are found for your search, the system displays a message to suggest using filters to refine your search. You can click the link in the message to access the filters, or click the Filter
and either no results or more than 20 results are found for your search, the system displays a message to suggest using filters to refine your search. You can click the link in the message to access the filters, or click the Filter![]() icon next to the search field. This enhancement aims to help you access filters more easily and make the search process more efficient.
icon next to the search field. This enhancement aims to help you access filters more easily and make the search process more efficient.
Enhanced search filter access
The Filter![]() icon, which is accessible from your Contacts
icon, which is accessible from your Contacts![]() , My assigned queues, and the agent dashboard
, My assigned queues, and the agent dashboard ![]() , has been moved to the right of the search field. This enhancement makes it easier for you to spot the search filter when you need to narrow down your search results.
, has been moved to the right of the search field. This enhancement makes it easier for you to spot the search filter when you need to narrow down your search results.
Prior to this enhancement, the Filter![]() icon was located in front of the search field on a dark color background.
icon was located in front of the search field on a dark color background.
New search filters available in the contact directory
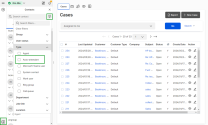
8x8 Contact Center agents can now filter their contacts by Ring group or Call queue. Using these two new filters, you can find your contacts within specific ring groups or call queues more easily. Prior to this release, agents were required to manually search for these contacts when handling calls, which led to unnecessary delays.
To access the Ring group and Call queue filters:
- Log in to your 8x8 Agent Workspace account.
- Select Ready to work or set your status to Work Offline.
- Click the Contacts
 icon from the bottom left side of Agent Workspace.
 - Click the Filter
 icon.
icon. - Select Type from the filter category list. A drop-down list displays.
- Select Ring group and/or Call queue.
Selected filters display a blue check mark in front of them. The number of selected filters displays next to the category and the Filter
 icon.
icon.
Improved email handling experience
Note: The email handling experience is configured by the Contact Center administrator.
Emails can now be handled from the Control Panel in 8x8 Agent Workspace, in addition to the previous experience of handling emails from the Display Panel. This new capability aims to improve how emails are handled in 8x8 Contact Center by allowing agents to:
- View the sender’s email address in the same panel.
- Handle emails and view the thread in same panel.
- See attachments easily and the email they are associated with.
- Have their productivity reported in Analytics.
For more information, refer to Process email interactions from the Control Panel (New email experience).
In 2023, 8x8 Agent Workspace has introduced the following enhancements:
- Ability to handle interactions handed over by Intelligent Customer Assistant
- New color label for wrap up status
- Enhanced agent classification list for call transfers
- Enhanced call history
- Enhanced UI design for setting up your workplace phone
- Updated UI for Call phone
- Ability to transfer digital chat interactions to agents
- Localization support for audio messages
- Ability to view agents and assigned queues in Agent dashboard
- Ability to send outbound SMS messages
- Ability to switch sub-status
- Enhanced filtering in contract directory
- Ability to filter favorite queues
- Ability to filter favorite agents
Ability to handle interactions handed over by Intelligent Customer Assistant
8x8 Intelligent Customer Assistant (ICA) is a conversational AI-based self-service solution that provides automated, personalized conversations with customers. While ICA self-service can quickly handle simple to complex conversational customer queries and reduce the number of inbound customer interactions, certain complex queries require an agent to be involved. By handling routine customer queries, ICA helps free up agents to focus on the more complex issues and reduces wait time.
Let’s say a customer initially interacted with 8x8 ICA about a billing issue. While ICA can offer general information about billing related issues, the customer’s problem is more complex and specific. In this case, the interaction is escalated to a Contact Center agent that can ensure personalized assistance. When the ICA transfers the customer interaction to an agent, the chat notification panel displays information such as the customer name, email address, queue name, authentication, ticket status, intent, and any additional data collected by ICA during the conversation with the customer. After accepting the chat, the entire chat transcript displays. It also removes customer frustration by eliminating the need for them to repeat the information already exchanged with the ICA, allowing the agent to quickly deal with the customer query.
For more information about handling ICA transferred interactions, refer to Accept transferred chats from 8x8 ICA.
New color label for wrap up status
When an agent ends an interaction and is in wrap up status, the status color changes to purple. This enhancement helps agents and supervisors quickly distinguish between agents in busy status and agents in wrap up status without having to hover over the status icon to see the status details. Prior to this release, a red color label was used for agents in busy status and wrap up status.
Enhanced agent classification list for call transfers
When transferring a call to another agent, the agent list displays agents by group. This enhancement enables agents to identify the desired contact faster. Prior to this release, when transferring a call to another agent, the list displayed all agents or a selection of agents if search filters were previously applied.
Enhanced call history
The call history in Agent Workspace is now displayed when you click the Make a call field on the Control Panel or when you access the dial pad. If you're trying to reach a number you previously dialed, you can select it from the call history list and dial out without having to manually input the number. Prior to this release, the call history was displayed only after entering the first digit of the phone number.
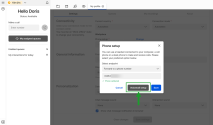
Enhanced UI design for setting up your workplace phone
The UI interface for setting up the workplace phone has been updated to display the option in a drop-down list format for a more user-friendly experience. Prior to this release, agents had to select a radio button to change their workplace phone number or SIP URI. With this release, these options are accessible from the Phone setup dialog. For more information, click here.
Updated UI for Call phone
Agents can now access the Call phone feature, which allows agents to test their phone connection and set up a voicemail greeting, from the Voicemail setup dialog. Prior to this release, the Call phone feature was listed under Workplace Phone settings in My profile. To access the Voicemail setup settings, go to My Profile > Settings > Connectivity > Change (Phone setup) > Voicemail setup. For more information, click here.
Ability to transfer digital chat interactions to agents
Agents are now able to transfer a digital chat interaction to another agent. Previously, an agent was able to transfer an interaction to another queue, but directing to a specific agent was not possible. Now agents can transfer active chat conversations to other agents in a few clicks. Let’s say Robert, a contact center agent accepted a chat interaction from a customer, and the customer informed them that they had interacted with Barry, another agent about an issue and would like to pursue the conversation with Barry; Robert can now transfer the chat interaction directly to Barry without transferring them to a queue first. Simply inform the customer about the intended transfer, check the status of the agent, and transfer for a quicker resolution. Learn more.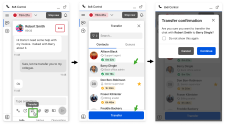
Localization support for Persistent Connection mode audio messages
Persistent Connection mode audio messages are now available in French and Canadian French. The audio messages that play when an agent attempts to establish a persistent connection will be heard in the language selected for the agent in Configuration Manager for contact Center.
Persistent Connection mode audio messages are available in the following languages:
- English (US, GB, AU, CA)
- French
- Canadian French
Ability to view agents and assigned queues in Agent dashboard
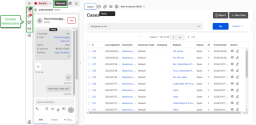
8x8 Contact Center agents can now access the agent dashboard to view a list of available agents and queues in a single panel. To access the agent dashboard, click Show dashboard![]() from the top of the Control Panel. For more info about the agent dashboard, click here.
from the top of the Control Panel. For more info about the agent dashboard, click here.
Ability to send outbound SMS messages
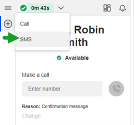
With this release, 8x8 Contact Center agents can send outbound SMS messages to customers with a few simple clicks. Previously, agents were only able to receive SMS messages. Agents can now select to send an SMS from the Control Panel or, if engaged in a call with a customer and they want to share some info with them via SMS, the agent can select the SMS icon from the call control panel. For more information on sending an outbound SMS, click here.
Ability to switch sub-status
Agents can now switch from one sub-status to another. A sub-status, also referred to as a status code, indicates the reason for taking break or working offline state, such as “lunch break” or “in a meeting”.
Let's say you are working offline to attend a meeting. Once you are done with the meeting, you want to continue to work offline, but now to prepare meeting notes. You can now switch the status code without switching your status.
Enhanced filtering in contract directory
In this release, we are introducing filtering enhancements to help make finding your contact center and back-office colleagues even simpler and more convenient. Filter the list by agent group, presence status, department, job title, location, etc. For more information about the filtering capabilities in contact directory, click here.
Ability to filter favorite queues
Agents can filter queues from the queue information panel in agent dashboard. The same queue filtering capabilities are also available in My assigned queues.
Let's say Pat is a supervisor for multiple queues. During high-traffic hours for the Contact Center, Pat must focus on chat interactions. To quickly find the chat queue, Pat can click Show dashboard![]() and manually search for the chat queue she is a supervisor for. To find out more about filtering queues, click here.
and manually search for the chat queue she is a supervisor for. To find out more about filtering queues, click here.
Ability to filter favorite agents
Agents can quickly filter favorite agents by toggling on the Show only favourite agents option from the agent dashboard .
To filter favorite agents:
- Log into your 8x8 Agent Workspace account.
- Select Ready to work or Work Offline.
- Click Show dashboard
 from the top of the Control Panel.
 - From the Groups section, click
 .
. - Click the search filters
 icon.
icon. - Toggle on Show only favourite agents
The list only displays the agents you have previously added as Favorite.
To find out more about filtering contacts, click here.
- Improved filtering of contact directory
- Bug fix—Unable to access 8x8 Analytics for Contact Center from 8x8 Agent Workspace.
- Display Calling Line Identifier(CLI) while ringing agent workplace phone
- Bux fixes:
- Add participant feature is not working when you add a number directly
- Opening a new CC Agent tab gives a wrong status when agent is in Available status
- Keyboard Navigation: WCAG Accessibility
- Ability to resize the Control Panel
- Merge Directory of 8x8 CC & 8x8 Work Users
- Ability to send webchat attachments

