Engage with customers using Video Elevation
Note: Video Elevation is only available for customers with SMS enabled on their account. Contact your account manager to have this feature enabled.
Video Elevation is an integrated solution that allows 8x8 Contact Center agents to establish a one-way video connection with customers in need of assistance. With this feature, as an agent, you can switch from a phone interaction to a one-way video interaction with a few clicks. This new feature ensures you can get a clear visual of the customer’s problem by extending a video call invitation to gather all the information necessary for a quick call resolution. The customer can simply click the link received from you via SMS to establish the video connection, without having to install any software.
Note: The live video feed shared by the customer can only be viewed by the agent and the customer. The customer cannot see the agent during the video interaction.
Let’s say Pat is a customer support specialist at AcmeJets, a window shutter manufacturer. Pat receives a call from Blake, a customer, claiming that the recently installed shutters cannot close. To get a clear understanding of the problem, Pat decides to elevate the conversation to video and sends out an meeting link to Blake’s mobile phone. Blake accepts the invitation and Pat can now see the window shutters installed. With the camera pointing at the shutters, Blake tries to close them. Pat notices that a safety pin is preventing the shutters from closing. After instructing Blake on the correct removal of the safety pin, the shutters work as intended. The interaction ends successfully without having to escalate to an expert or dispatch a technician to the customer’s location.
- Log in to your 8x8 Agent Workspace
 The brand new interface for 8x8 Contact Center agents to receive and process customer interactions. account.
 - Click Ready to work to start the session.
- When your agent phone rings, the call panel pops at the top of the Control Panel.
- Notice the acceptance timer ticking down around the accept call
 icon. Answer the call before the timer expires.
 - Communicate with the customer and ask if they would like to switch to a video call to show you the problem.
- If they agree, click the SMS button from the call panel.
- From the list that displays, select New Video Invite.
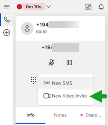
- The New SMS\ Video invite panel displays.
- Insert the phone numbers in the From and To fields if they are not automatically populated. The message field contains the meeting invite link.

- Click Send
 . The Video Elevation screen displays in a separate window.
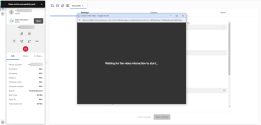
- Inform the customer that they will receive a link on their phone via SMS, and ask them to access the link.
- Tell the customer to select Allow when prompted to allow 8x8 to use their camera.
- The video starts using the back-facing camera and both you and the customer can see the same live video feed.
- Guide the customer to where you need them to point the camera.
- As an agent using Video Elevation, you can use the following options:
- Start recording
 : Use this option to record the video feed from the customer’s camera. An audible alert plays to inform the parties that the session is recorded.
 - Take a screenshot remotely
 : Use this option to take a screenshot of the customer’s screen (video feed). The customer is not notified that a screenshot has been taken.
 - Ask for location
 : Use this option to prompt the customer to share their current location. If the client allows you to see their current location, a Google Maps view displays in the lower left corner of the screen. This location is then stored in the Notes section on the control panel in Agent
 Agents use the Agent Console to view and manage customer interactions. Virtual Contact Center supports Regular agents and Supervisor agents. Workspace, and the CRM.
 - Swap camera remotely
 : Use this option to prompt the customer to swap their camera to front-facing mode. The customer must click Allow on their phone to authorize the switch of the video feed from the rear camera to the front-facing camera. The customer can use the Edit option listed on their phone to edit the access.
 - Close
 : Use this option to end the video call.
 - End the phone interaction.
- If prompted, select a disposition code.
- Click Wrap up.
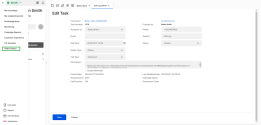
A task is automatically created for the interaction. The task linked to the customer record includes the screenshots and video recordings created during the interaction, and are stored in the local CRM for future reference. 8x8 Contact Center tasks are accessed from the Tasks tab.
Access customer recordings, screenshots, and location details in your CRM
Your recordings, screenshots, and location details captured during Video Elevation interactions are accessible to you in the CRM.
All previously recorded videos and screenshots are available in the Video history list in 8x8 Agent Workspace.
To access all video recordings and screenshots in 8x8 Agent Workspace:
- Click Show menu
 .
. - Select Video history.
- Use the arrow keys on your keyboard to navigate through the video history. You can see the customer's phone number, and the date and time of each recording.
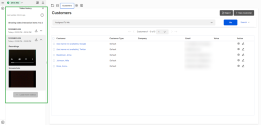
- Click
 to view the recordings and/or screenshots.
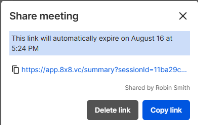
 - (Optional) Click Share
 to generate a link to the recording. Active links are valid for 30 days.
 - (Optional) Click
 to download screenshots.
 - (Optional) To download a video recording, hover over the video, click the more options
 icon on the video, and select Download.
Note: When an interaction is grayed out, it indicates there are no screenshots or video recordings available.
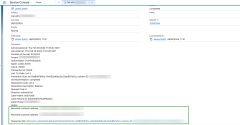
In your local CRM, recordings, screenshots, and location details are saved as a Task.
To access videos and screenshots from a Task:
- Select the Tasks tab from the Display Panel.
- Click to open a task.
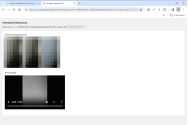
- In the Description section of the task, you can find the Resources link that contains the recordings and screenshots. Copy the link and paste it into a new browser tab to open the Interaction Resources page and access the recordings and screenshots taken during the customer interaction.
Note: You must be logged into 8x8 to view the recordings or screenshots, or it will take you through the login process.
In an external CRM, for example in the 8x8 integration for Salesforce, recordings, screenshots, and location details are saved as a call log.
From the call log, you can view the location details, and access the Resources link that contains the recordings and screenshots. Copy the link and paste it into a new browser tab to open the Interaction Resources page and access the recordings and screenshots taken during the customer interaction.
Note: You must be logged into 8x8 to view the recordings or screenshots, or it will take you through the login process.
To download screenshots from the Interaction Resources page, click the image to preview it. While in preview mode, click the image to automatically download it.
To download a video interaction, click the More options ![]() icon on the video, and select Download.
icon on the video, and select Download.
