Process email interactions from the Control Panel
If your Contact Center admin has enabled the new email experience, when an email is offered, you can accept, reply to emails, and view the thread in the Control Panel. The new email experience aims to improve how emails are handled in 8x8 Contact Center by allowing agents to:
- View the sender’s email address in the same panel.
- Handle emails and view the thread in same panel.
- See attachments easily and the email they are associated with.
- Have their productivity reported in Analytics.
Accept email interactions
8x8 Contact Center directs emails to agents via an email queue. The agent must be in the Available state to receive the incoming emails. When an incoming email is offered to an agent, a notification appears indicating an incoming request. The agent can accept, or if permitted by administrators, reject the request. On accepting, the agent's status changes to Busy. On rejecting the email, the agent's status changes to Working Offline.
Prerequisites
To receive emails, an agent must be:
- In the Available status.
- Assigned to an enabled email queue.
Note: You can view or edit your queue assignments under My assigned queues. For details, refer to view your assigned queues.
If an email queue has pending emails, you can:
Notes:
- Pulling emails is a privilege given by the administrator in Configuration Manager.
- You cannot receive emails (including attachments) larger than 30 MB via email channels.
Accept one email at a time
- Log in to 8x8 Agent Workspace
 The brand new interface for 8x8 Contact Center agents to receive and process customer interactions..
 - Click Ready to work to start the session.
- Click My assigned queues and make sure you are part of the email queue. To learn more, refer to View your assigned queues.
- Click the Change status
 icon and change your status to Available.
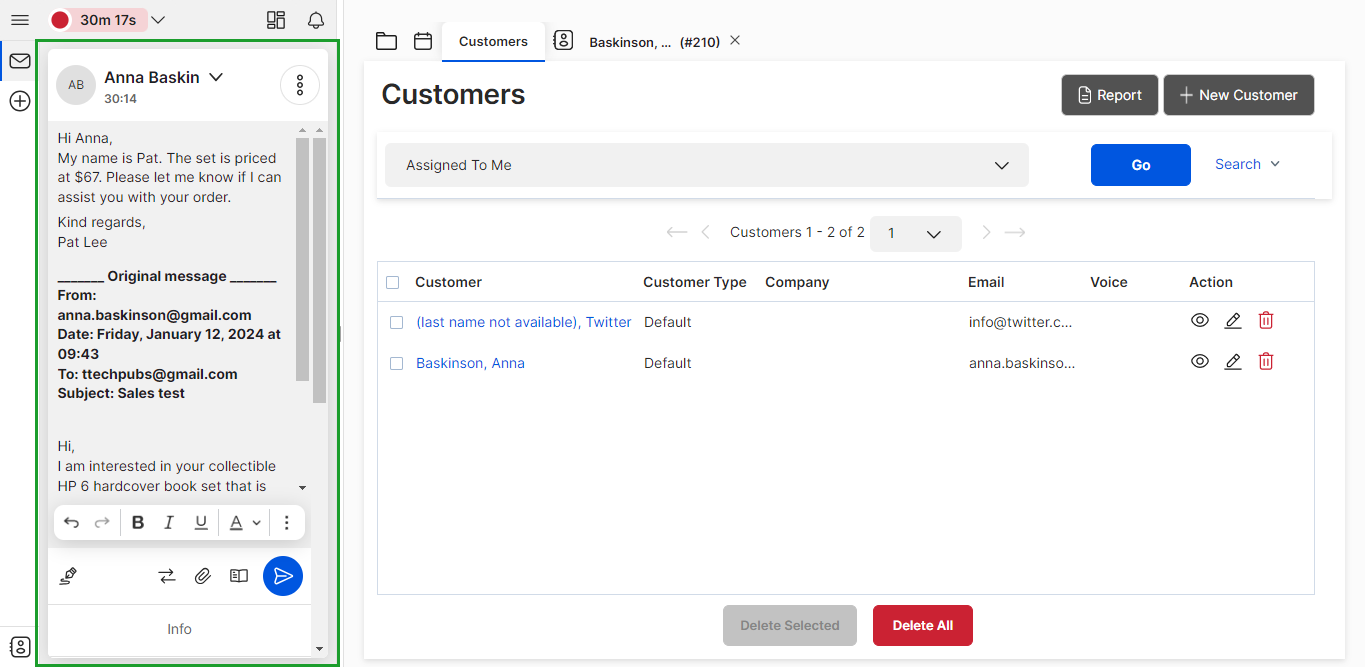
If you have an incoming email, the email notification in the Control Panel indicates the incoming email interaction. - Preview the customer or case data, and click
 to accept the email. Accept the interaction before the acceptance timer ticking down around the accept call icon expires.
 - Your status changes to Busy. A case tab pops in the Display Panel.
- Click Reply from the Control Panel.
- Type the response in the Control Panel.
- Click
 next to the contact’s name.
 - Select a From address for your reply.
- Click
 to send the email.
The post-processing time initiates if your administrator has set it up for your tenant. Post-processing gives you time to wrap up notes for the chat. While in post-processing, you can view the chat transcript by clicking Email transcript from the top of the Info section on the Control Panel.
- Click Wrap up.
- The case is updated with the reply email and the app sets your status to Available. Click Work Offline if you need more time to complete any post-processing task.
Note: Clicking ![]() displays more options such as Forward or Transfer the email.
displays more options such as Forward or Transfer the email.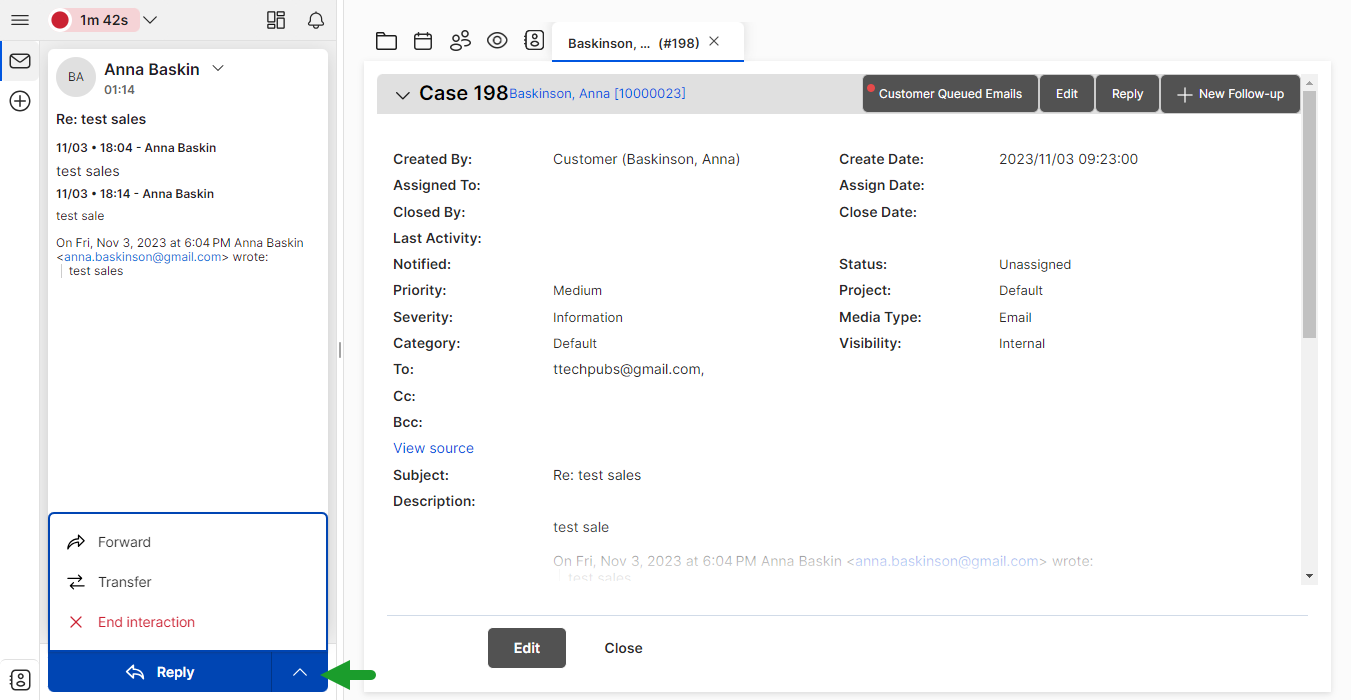
Note: To preview the original email, click the Show trimmed content ![]() icon in the message panel.
icon in the message panel.
Note: If post-processing times out your status will change to Available.
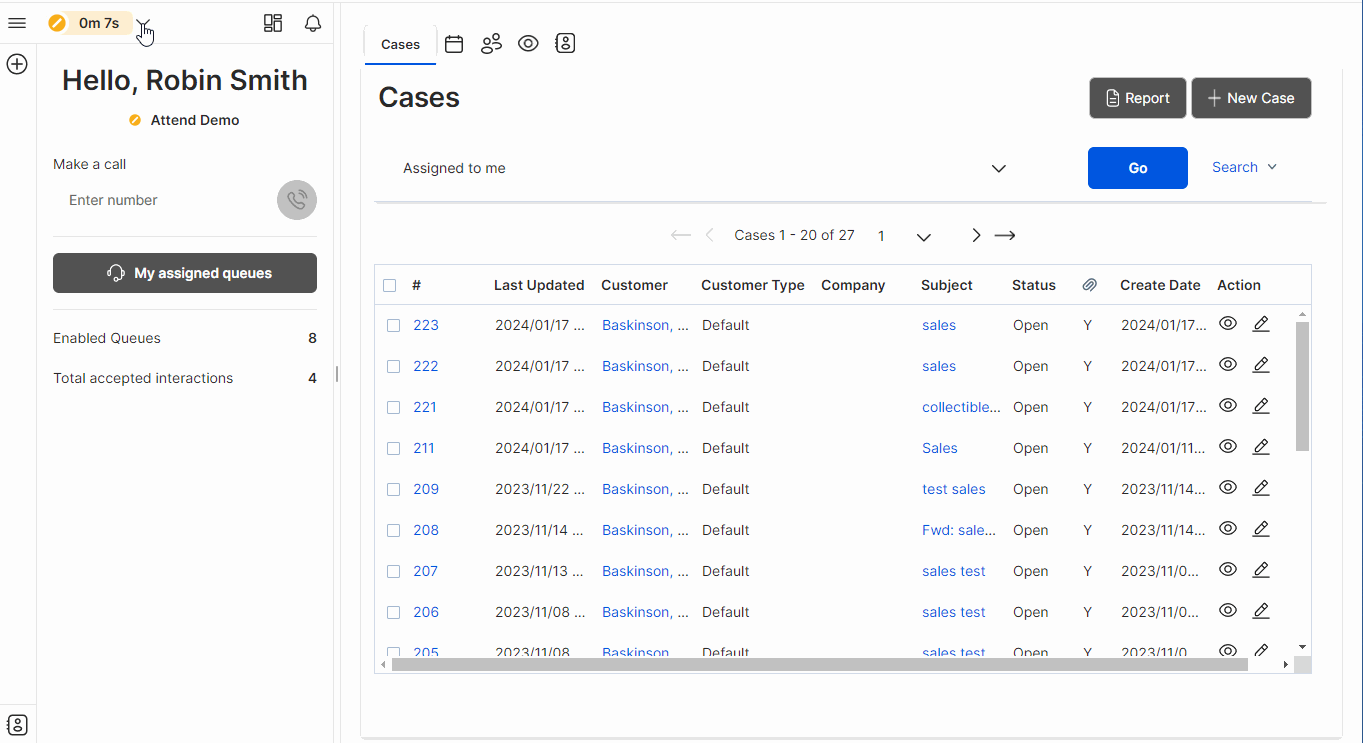
Pull emails
Note: You can only pull emails if your administrator grants you permission.
You can pull emails from your assigned queues at any time, even if the queues are not enabled, regardless of your status or the limit set by the admin for handling blended interactions.
Let's say you are on the phone with a customer who says they sent two emails with pictures of a damaged product they received to the support email address. The emails were routed to the email queue, but you are not enabled to serve emails at the moment. As an agent, you can pull the emails simultaneously from My assigned queues, to assess the damage and speed up the resolution of the case. Click Stop new to prevent the system from offering new interactions, select the emails you wish to pull, and click Accept interaction. The emails open separately in the Control Panel, and you can reply to the emails individually.
Note: This feature is only available if enabled by the admin.
- Log into 8x8 AgentAgents use the Agent Console to view and manage customer interactions. Virtual Contact Center supports Regular agents and Supervisor agents. Workspace.
- Set your status to Work Offline if you want to focus on your tasks without being offered a new interaction. You can pull emails regardless of your status or the limit set by the admin for handling blended interactions.
- Click My assigned queues.
-OR-
Click Show menu and select My assigned queues.
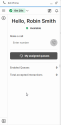
- Hover over a queue and click
 to retrieve an email from that specific queue. The icon displays the number of queued emails.
 - In the Queued emails window that displays, search for the relevant email. You can use the search bar to locate an email or click the arrow > icon in front of the wait time to preview the content of the email.
- Select the relevant email and click Accept interaction.
The email opens in the Control Panel (left hand-side of the app). If the email is from an existing customer, the customer info pops in the Display Panel. - Click Reply to respond to the email.

Note: Clicking Pull email next to the header name for the email queues allows you to pull emails from all queues.

Note: You can pull multiple emails at a time, regardless of your status or the limit set by the admin for handling blended interactions. The emails open as separate interactions in the app. Additionally, if the admin enabled the permission, you can delete queued emails to prevent spam or remove emails that are no longer relevant or have been resolved, preventing the queue from becoming overloaded.
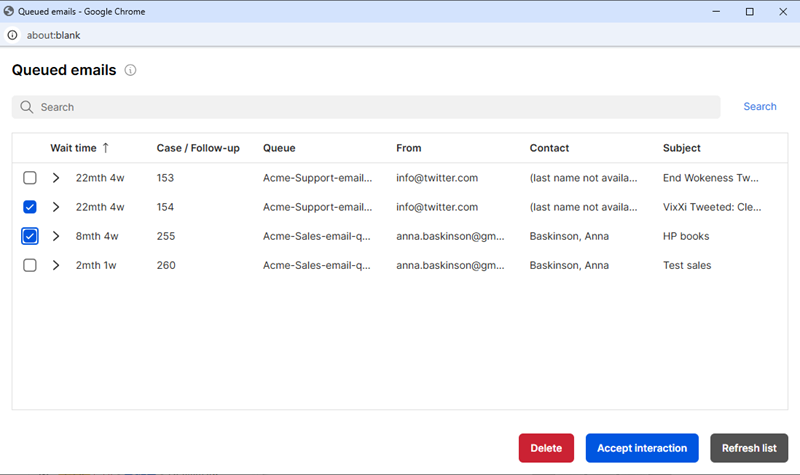
What information is available in the Queued emails window?
The Queued emails window includes the following information that you can use to determine which email to pull from queue:

- Wait time: Displays how long the email has been in the queue.
- Case/Follow-up: Displays the case or follow-up number for the email. New emails are identified using an integer number (e.g. 406). Follow-up emails are identified using a decimal number (e.g. 406.1).
- QueueA queue is an ordered collection of interactions waiting to be served by agents qualified to respond to these interactions. In addition to enabling the call center administrator to customize how incoming interactions are prioritized and routed, queues also ensure that interactions are never lost or discarded.: Displays the name of the queue the email came from.
- From: Displays the email address of the sender.
- Contact: Displays the name of the person that sent the email.
- Subject: Displays the subject of the email.
You can use the search bar to search queued emails by queue name, email address, contact name, or subject.