Previous releases
The following features and enhancements were introduced in previous versions of 8x8 Work for Desktop (formerly known as the Virtual Office desktop app). For details on the latest new features, see our list of what's new in the current release.

In the 8x8 Work for Desktop 8.0 release, we are introducing the following improvements:
In this release, a new Modern feel and look app theme is now available, and the old Classic theme was removed.
Note: For users who previously had selected the Classic theme, the default theme is OS based.
To make any changes about look and feel:
- Go to Settings
> Look & feel page.
- In the Look and feel settings page, select one of the new modern themes as you prefer, Light or Dark.
You can change the Look and feel theme anytime you wish.
To learn more about how to manage the app look and feel, click here.
Note: If you previously had selected the Classic theme, by default, the Use OS settings option is selected. The Use OS settings option enables the app to switch between light and dark themes based on your OS settings.
In this release, a brand new set of sounds is now available. You can adjust your notification preferences from a varied and colorful set of sounds tuned in for your day-to-day tasks.
For a smoother transition, the old Classic sounds theme remains still available. You can choose between a modern sound or a classic one, for both ringtones audio settings and general notifications, as you prefer.
Note: You now can control the audio preferences only from the Settings > Notifications settings page. For easy navigation through the Settings
options, the Audio & Video settings page now displays the Go to Notifications shortcut, which leads you to the Notifications settings page, where you can select the appropriate ringtones.
To learn more about making changes about the app sounds, click here.
The enhanced contact cards offers you the following improvements:
Introducing new quick actions icons
For an easier and quicker way to initiate contact with any contact in 8x8 Work for Desktop, you now can access the contact cards by clicking the contact profile picture/avatar, from many locations within the application, such as:
- Search results
- Call logs, Missed, Voicemails
- Contacts
- Chat - message list, avatars
- Fax
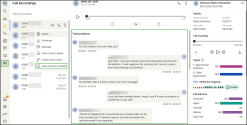
- Call Recording
By clicking the contact profile picture/avatar, you can quickly see the contact details or initiate communication with any of your contacts through the following channels:
- Call
- Chat
- Meet
- Send a fax to
To learn more about contact cards, click here.
Send a fax directly from a contact card
If you have the Fax feature enabled, the contact cards displays a new Fax
icon when you hover over the fax number. If you click Fax
, a New fax draft displays with the contact’s data pre-filled.
Call duration on Call History log
In the Calls > Call history list, in the contact row, below the contact name, the call duration now displays. When click the call duration, you can see information about:
- Call type - incoming, outcoming, missed calls
- Call duration
- Extension number
Notifications settings updates
Note: Starting with this release, the Incoming call selection was moved from the Settings > Audio & video settings page to the Settings
>Notifications settings page.
In this release, several updates are available in the Settings >Notifications settings page:
-
A new set of sounds are now available only in the Modern theme. The Classic theme displays a set of sounds only for Incoming calls.
-
When you expand Advanced settings, you can see other notification settings, displayed in a new intuitive order, grouped by actions (Calls, Messages, SMS, Calendar events reminders and Fax), which helps you to see and find settings at a glance.
-
The chat sound now has a new sound. Previously, the sound associated with chat was an OS sound. You can quickly adjust (activate/deactivate) the settings for the chat sound under Advanced settings > SMS by selecting the Sound alert toggle On/Off. By default, the Sound alert toggle is On, but you can disable it anytime.
Improved messaging experience for viewing shared documents
In this release, all documents shared in a room or in 1:1 conversation are now organized in one place, easily accessible, by going to the More Options > View shared documents option.
Let’s say you are looking for a recording on an important demo shared in a room some time ago. You can find it easily without scrolling through the conversation, by clicking the More Options > View shared documents option on the right top of the conversation panel. The list of shared documents may contain:
- Links posted to that room/conversation for Google Docs, Google Drive, Sharepoint, Onedrive.
- File attachments posted to that room/conversation.
You can jump
- Jump to the message containing that link or file
- View the full image size within the app
- Open the related page in a browser
- Download the attachment locally
To learn more about how to find an attachment /link shared in a room or an 1:1 conversation, click here.
Ability to customize room avatar
You now have the ability to set a room avatar from the available colored icons or you can attach a custom picture, as you prefer.
You can customize an avatar room either while creating a new room or while updating an existing room.
To learn more about creating and customizing chat rooms, click here.
Ability to initiate an SMS chat through the 8x8 votel:// protocol
You now have the ability to use the 8x8 votel:// protocol to quickly jump from a browser directly into 8x8 Work for Desktop, to a certain contact SMS conversation.
Let’s say you are navigating in a browser, and you want to jump to a certain contact conversation page, in the 8x8 Work for Desktop. Enter the votel://sendsms/<number> expression in the browser search bar. The conversation page with that contact (number) now displays directly in the 8x8 Work for Desktop.
To learn more about the 8x8 votel:// protocol, please click here.

In the 8x8 Work for Desktop 7.26 release, we are introducing the following enhancements:
Ability to import contacts from Microsoft 365
Starting with this release, you now have the ability to import contacts locally from Microsoft 365, in addition to the Outlook or Google sources. You now can sync your contacts across all endpoints, by importing contacts locally in both 8x8 Work for Desktop and Web apps from Microsoft 365.
To import contacts locally from Microsoft 365:
- On the navigation menu, click Settings
> click Contacts.
-
Under Add Account, click Sign in with Microsoft.
-
At the prompt, select whether to use an existing Microsoft account or another one, and sign in with your account credentials.
-
Under Linked account, you can choose to:
-
Refresh the contacts list, by clicking Refresh contacts
, whenever necessary.
-
Remove the imported contacts from the 8x8 Work app, by clicking Remove
, if no longer necessary.
-
-
Once the authentication is successful, your Contacts
> My Contacts directory shows your Microsoft 365 contacts in the list. To differentiate them from contacts imported from other sources, such as Google or Outlook, the contacts imported from Microsoft 365 are marked with a small Microsoft
icon.
Notes: When you click Refresh
in the Contacts
> My Contacts tab, all the contacts are updated (from Microsoft 365 and Google sources).
Contacts import limitations
- The maximum number of contacts that can be imported (from Microsoft or Outlook) is 10k.
- Each import overwrites the previous import and the contacts are randomly imported
- If you removed the existing import from Microsoft 365, to sync your contacts from Microsoft 365, you have to restart the import.
-
You must have an Office or an Outlook license assigned to import contacts from the Microsoft 365.
Notes:
- When Outlook app contacts are used, the Microsoft Office 365 Contacts can't be imported.
- When Microsoft 365 contacts are imported, the Outlook app contacts sync button is disabled and the Outlook app contacts can't be imported.
- When the authorization flow of a Microsoft 365 contacts is complete, up to 10k Microsoft 365 contacts are imported in the Contacts > My Contacts tab, at the device level.
Ability to manage the inbound SMS blocked numbers
A majority of incoming calls aren't from your customers, instead, they're from scammers and telemarketers. More recently, these attacks have moved over to SMS, disrupting teams’ activity.
In this release, 8x8 you have the ability to block inbound spam SMS by blacklisting phone numbers. This blocks inbound spam SMS from the specified numbers for all user extensions on the PBX including 8x8 Work and 8x8 Contact Center users. You can view the list of blocked numbers on 8x8 Work for Desktop without any editing permissions. This feature addresses any security concerns related to SMS scams, such as a user tapping a link, opening an attachment, calling a number, likely to cause some issue
To block an inbound spam SMS
You can easily block new numbers for inbound SMS:
- On the navigation menu, click Settings
> click Account Settings.
- On the 8x8 user profile page that displays, on the navigation menu from the left side of the page, click Blocked SMS.
- On the Blocked SMS page, click + Add new numbers.
- At the prompt, enter the new number(s) you want to add to the blocked list, then click Block. The new numbers now display in the blocked list.
Notes:
- Numbers blocked by users block inbound SMS only for that user extension, on 8x8 Work apps only.
- Numbers blocked by admins block inbound SMS for all their users/extensions, in CC and 8x8 Work apps.
- If an admin blocks a number, you can continue to see any existent conversation with that end user.
Unblock a blocked number
If you want to resume receiving messages from a number you have already blocked:
- On the Blocked SMS page, select the number in the Blocked SMS list, and click Unblock.
- At the prompt, confirm to unblock. You now can receive messages from that number.
Notes:
- You can see the numbers blocked by administrators in the Account settings > Blocked SMS numbers list, but you cannot remove or edit them.
- The SMS blocked numbers are listed at the end after the ones blocked by the user.

In the 8x8 Work for Desktop 7.25 release, we are introducing the improvement of the warn transfer calls experience.
Improved warm transfer calls experience
While in a call and you are trying to perform a Warm transfer, but the maximum of concurrent calls is reached, the Warm transfer icon now is disabled. When hovering over the call
icon, a pop-up window displays and informs that you cannot perform the warm transfer because the maximum number of concurrent calls has been reached.

In the 8x8 Work for Desktop 7.24 release, we are introducing the following enhancements:
- Introducing 8x8 Sales Workspace
- Updated "Status" and "Notifications" settings
- Improved experience when creating or editing chat rooms
Introducing 8x8 Sales Workspace
Beginning with this release, we introduce in 8x8 Work for Desktop a new Sales Workspace dedicated customer engagement experience. It is tailored specifically for sellers working on high-value long-cycle deals and using Salesforce® as their company’s CRM.
It optimizes external and internal communication around your sales opportunities. It allows for private and shared note taking, while auto-syncing interactions back to CRM.
You can activate or deactivate this experience anytime from Settings > Sales Workspace.
For details for Sales Workspace, please refer to Sales Workspace Quick User Guide.
New calendar event reminders
Beginning with this release, we introduced a new calendar event reminder that offers an enhanced experience for 8x8 Work for Desktop.
If a calendar is connected to 8x8 Work for Desktop and you have an incoming event in your calendar(s), you now receive a calendar event reminder from 8x8 Work for Desktop, several minutes before the meeting starts. You can now join the meeting easily on one click, directly from the calendar event reminder.
Note: You can choose how many minutes before the meeting the calendar event reminder displays from Settings > Sales Workspace.
Features of calendar event reminders
The calendar event reminder info card displays:
-
(1) The meeting provider icon.
- (2) The duration prior to the start of the meeting.
- (3) The "happening now" status displays, if the meeting has already started.
- The reminder "join meeting" link. If the meeting provider is recognized. Click that link to join the call. If the meeting provider is not recognized, no link displays.
Note: If you link your calendar from Settings > Sales Workspace, regardless if the meeting is enabled or disabled, you always receive a notification at the start time of the scheduled event in your calendar, regardless if it is an 8x8, Teams, Zoom etc.:
- For an 8x8 meeting provider, the meeting opens in the 8x8 Work for Desktop app.
- For a non 8x8 meeting provider (Zoom/Teams meeting), the meeting URL opens in the system browser.
- The reminder stays on until you join the meeting, dismiss it or it automatically goes away when the meeting ends. You can join the meeting via the link in the reminder, at any time during the meeting.
- While you are in a meeting, the reminder closes and instead the "Flip meeting" banner displays. The banner is visible until you join the meeting or join the meeting.
- When you have a meeting scheduled in your calendar, regardless if the customer disabled or not the meeting, you still see the calendar event reminder.
- (5) The calendar event reminder shows under the incoming call notification, at the top of all other notifications.
- (6) Overlapping meeting reminders are stacked.
- When an event is removed from the calendar, any open reminder for it is closed.
Manage your meeting reminder preferences
To be able to use the calendar event reminders feature, you first have to activate the reminders and set your meeting reminder preferences:
- Go to Settings
> Status & Calendar.
-
Under Calendar event reminders:
- Click the Show reminders for calendar events toggle on if you want to receive the calendar event reminders. Otherwise, click toggle off. By default it is On.
- Click the Show reminder only for events with “Join” link toggle on if you want to receive event reminders, with an easy join option, regardless of the meeting providers. Otherwise, click toggle off. By default it is On and it hides when the Show reminders for calendar events toggle is Off.
- Set how many minutes before the meeting the calendar event reminder displays. You can choose one of the pre-configured values: 0. 1. 5. 10. 15, and 30 minutes. By default, it is 5 minutes.
-
Under Calendar based status, let people know that you are in a meeting.
Important! If you disable notifications from Settings > Notifications > Allow desktop notifications, the notifications won't display anymore..
Updated "Status" and "Notifications" settings
-
Beginning this release, the Settings
> Notifications now displays a new Calendar event reminders section. With one click you are redirected directly to the Status & Calendar settings, where you can set the preferences about reminders.
-
Beginning this release, the Settings menu displays several updates:
- (1) The new 'Status & Calendar' replaces the old Status option.
-
(2) A new tooltip of the Status & Calendar option displays as "Configure calendar-based features and auto-away"
-
If an admin doesn’t allow users to control the x8 Work for Desktop calendar feature driven by presence, none of the calendar based features are shown in Settings as Status (the tooltip doesn't change either) and the reminders are not available shown in Settings
. as Status (the tooltip doesn't change either) and the reminders are not available.
In the Status and Calendar settings, a new Calendar events reminders section was added, where you can manage your meeting reminder preferences.
Improved experience when creating or editing chat rooms
While creating or editing a room, if you choose a room name that is already taken, a warning message appears. The message informs you that you cannot use a taken room name to create or edit a room. You can correct the name and continue to create or update the room.
Note: The maximum length for a room name is now 255 characters (from 50).

Updated color for the call card’s pin/unpin icon
In the 7.21 release, we introduced the option to pin/unpin the call card for 8x8 Work for Desktop. When pinned, the call card always displays on top of your active applications. To ensure you can easily determine whether your call card is pinned or unpinned, the color for the pin icon now displays as:
- Gray, when the call card is unpinned.
- White, when the call card is pinned.
Improved UX design for the Create room window
The Create room window now displays an improved UX design to optimize ease of use. With a few simple clicks, you can:
- Create a private or a public chat room.
- Add multiple members to a private chat room.
- View members’ availability from their profile picture.
To create a chat room:
- Sign into 8x8 Work for Desktop.
- In the navigation menu, click Messages
.
- Click
> Create Room .
.
- In the Create room window that displays, under Room name, enter the name of the chat room.
- Click the Make private toggle to select the chat room type:
- Toggle off (default): Create a public chat room that can be found by anyone in your company contact list by using the search bar of 8x8 Work, and can be accessed by anyone at any time. To invite co-workers, use @mentions. For example, to get Alice Fox's attention, post @Alice Fox. Alternatively, you can ask Alice to search for this room by name.
Toggle on: Create a private chat room that can only be found and accessed by room members who are invited. A member who has been invited by mistake can be removed from the room from the Members window; once a person has been removed from a chat room, they no longer have access to the message history of that room.
Note: The room type—private or public—cannot be changed after it is created.
-
If you are creating a private room by enabling the Make private toggle switch, the Add members field displays. Use the dropdown list which displays, to add members to the chat room. To add members, simply type the names of the colleagues you wish to invite and select them when their names show up in the drop-down list.
Note: You can add members to a private room at any time from the Members window. To access the Members window, select the desired private room and click the avatars of the members from the top of the chat panel, or select More Options
> View/edit members
.
-
Click Create.
The new chat room opens, and you can begin typing in the chat.
Updated label in the Room details window
The Make private toggle switch displayed in the Room details window in the 7.22 release has been removed. The window now lists the room type - Private or Public - that was selected when the room was first created.
You can still use the Room details window to change a room’s name.
Note: The room type—private or public—cannot be changed after it is created.
To access the Room details window:
- In the Messages
> Rooms, select a room, and from the top-right side of the of the chat panel, select More Options
> Room details
.