Set up email in external CRM: 8x8 integration for Microsoft Dynamics
Note: Email in external CRM is only supported on the latest integration package (version 0.3.7).
8x8 Work for Microsoft Dynamics supports email routing. For agents to be able to use this feature, you must first configure it.
Important: Prior to configuring email in external CRM, ensure that you have added the users, configured queues, and set up email channels in Configuration Manager.
To set up email in external CRM:
- Log in to your Microsoft Dynamics account.
- Go to Settings
 > Advanced Settings > Settings > Customizations > Customize the System. The Default Solution window opens.
 - From the side navigation menu, click the
 arrow icon next to Entities to expand the list.
 - Scroll down to Case and click the
 arrow icon to expand the list.
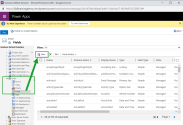
 - Select Fields.
- Click New from the top left corner of the window. A new window opens.
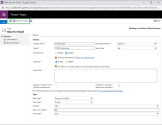
- In the Display Name field, type the name MainNumber .
- From the Field Requirement drop-down list, select Business Required
- From the Searchable drop-down list, select Yes.
- From the Data Type drop-down list, select Single Line of Text.
- In the Maximum Lenght field, type 255.
- Click Save and Close from the top left corner of the window.
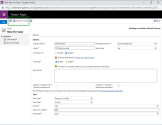
- On the Default Solution window, under Entities > Case > Fields, click New from the top left corner. A new window opens.

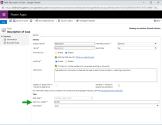
- In the Display Name field, type the name Lead.
- From the Field Requirement drop-down list, select Optional.
- From the Data Type drop-down list, select Lookup.
- From the Target Record Type drop-down list, select Lead.
Note: Keep the default settings for the other fields.
Note: Keep the default settings for the other fields.
- Click Save and Close from the top left corner of the window.
- On the Default Solution window, from the side navigation menu, click the
 arrow icon next to Entities to expand the list.
 - Scroll down to Email and click the
 arrow icon to expand the list.
 - Select Fields.
- Click New from the top left corner of the window. A new window opens.
- In the Display Name field, type the name MainNumber.
- From the Field Requirement drop-down list, select Business Required.
- From the Searchable drop-down list, select Yes.
- From the Data Type drop-down list, select Single Line of Text.
- In the Maximum Lenght field, type 255.
- Click Save and Close from the top left corner of the window.
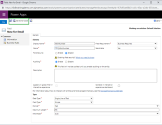
- On the Default Solution window, under Entities > Email > Fields, click New from the top left corner. A new window opens.

- In the Display Name field, type the name ChildNumber.
- From the Field Requirement drop-down list, select Optional.
- From the Searchable drop-down list, select Yes.
- From the Data Type drop-down list, select Single Line of Text.
- In the Maximum Lenght field, type 255.
- Click Save and Close from the top left corner of the window.
Note: Keep the default settings for the other fields.
Note: Keep the default settings for the other fields.
- On the Default Solution window, under Entities, scroll up to Case and click the
 arrow icon to expand the list.
 - Select Fields.
- From the Name column, select the row titled description.
- Click Edit from the top of the window.

- In the Maximum Lenght field, type 32000.
- Click Save and Close from the top left corner of the window.
Note: Keep the default settings for the other fields.
- On the Default Solution window, under Entities > Case, select Forms.
- From the Name column, select the row titled Case.
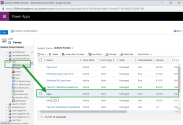
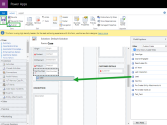
- In the window that opens, go to the Field Explorer section, and from the Filter drop-down list, select Custom Fields.
- Drag and drop Lead from the Field Explorer section to the Case Details section.
- Drag and drop MainNumber from the Field Explorer section to the Case Details section.
- Click Save.
- Click Publish.
- On the Default Solution window, under Entities > Case, select Forms.
- From the Name column, select the row titled Case Quick Create .

- In the window that opens, go to the Field Explorer section, and from the Filter drop-down list, select Custom Fields.
- Drag and drop Lead from the Field Explorer section to the Case Details section.
- Drag and drop MainNumber from the Field Explorer section to the Case Details section.
- Click Save.
- Click Publish.
- On the Default Solution window, under Entities > Email, select Forms.
- From the Name column, select the row titled Email.

- In the window that opens, go to the Field Explorer section, and from the Filter drop-down list, select Custom Fields.
- Drag and drop MainNumber from the Field Explorer section to the Case Details section.
- Drag and drop ChildNumber from the Field Explorer section to the Case Details section.
- Click Save.
- Click Publish.

- Go to the home page of your Microsoft Dynamics account.
- Open the desired app.
- Click
 from the top right side of the page.
 - Select Case from the drop-down list.

- In the Quick Create: Case panel that displays, verify that the MainNumber field is available.
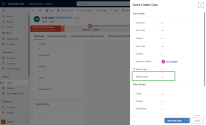
- Open a Case in Microsoft Dynamics.
- Verify that MainNumber and Lead are available in the details section.
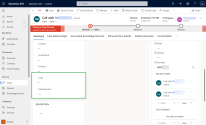
- Select Activities from the side navigation menu in Microsoft Dynamics.
- Click Email.
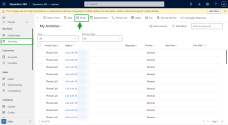
- Verify that ChildNumber and MainNumber are available in the new email window.

Note: This step ensures that a case is assigned to a ghost contact if an agent doesn't create and save the new contact before ending an interaction with zero matches.
- Click
 from the top right side of the home page of your Microsoft Dynamics account.
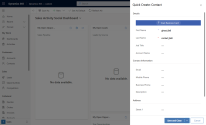
 - Select Contact. The Quick Create: Contact panel displays.
- In the First Name field, type ghost_8x8.
- In the Last Name field, type contact_8x8.
- Click Save and Close.

