Note: This version of the integration is no longer supported. For the latest version of this guide, see Configure version 3.1 of the integration for Salesforce.
Configure version 1.0 of the integration for Salesforce in Salesforce Lightning
Installing the 8x8 Work for Salesforce Lightning requires you to walk through the following steps:
- Step 1: Enable Salesforce Lightning
- Step 2: Import XML and configure call center (skip if you have already installed it in Classic mode)
- Step 3: Add users to the call center (skip if you have already added users during Classic mode setup)
- Step 4: Add a new Lightning app
Welcome to 8x8 Contact Center integration with Salesforce Lightning! Once you have enabled Lightning in Salesforce as a developer or administrator, you can install and configure the integration. Enabling the 8x8 Contact Center app for Salesforce Lightning requires you to import a new XML, install the updated integration, add users, and create a new Lightning app for 8x8 Contact Center.
Note: Only a developer or administrator in Salesforce can enable Lightning for their organization and then install 8x8 Contact Center for Salesforce; after this, all users with permissions can access Salesforce Lightning and use 8x8 Contact Center for Salesforce.
- Log in to your Salesforce account as a developer or administrator.
- Under Lightning Experience Migration Assistant in the left column of the Home screen, click Get Started to launch the wizard to enable Lightning.
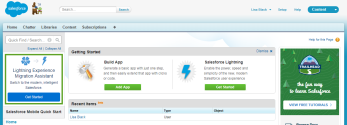
- In the wizard that opens, you can view information on what to expect from the Lightning experience in Salesforce. Proceed through the first three pages of the wizard to check your organization's readiness for Lightning.
- In the Optimize Lightning Experience with Recommended Features screen of the wizard, you can configure settings for Lightning mode. Ensure that the Social Accounts, Contacts, and Leads setting is enabled before you continue.
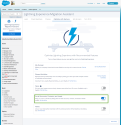
- In the Set up Users for Lightning Experience screen of the wizard, configure which users can access Lightning mode.
- In the Turn On Lightning Experience screen of the wizard, finish setup by enabling Lightning for the previously-selected users in your organization, and confirm at the prompt.
- All enabled users in your organization can now switch to Lightning mode by clicking their user name, and selecting Switch to Lightning Experience from the drop-down menu that opens.

- Click here to download the zipped XML file to your computer; if you see a prompt asking whether to open or download the file, choose to download. Note the download location.
Note: If the file automatically opens in your browser instead of downloading, you see an error. To download the file, you must clear your cache or edit your browser settings to download ZIP and XML files.
- Extract the desired Mac or Windows XML file from the downloaded ZIP file.
- In the extracted XML file, replace
<CTI URL With Tenant>with your tenant platform URL. Make sure to remove the surrounding bracket characters.
For example, if your tenant name isacmejets, you would replace<CTI URL With Tenant>with the URLhttps://vcc-na4.8x8.com/AGUI/loginSSO2.php?tenant=acmejets.
- Log in to your Salesforce account as a developer or administrator.
- While in Lightning mode, go to
 > Setup in the header.
- In the search box at the top of the left column, enter <Call Center>.
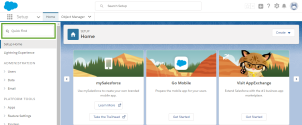
- From the result, click Call Centers to view the list of existing call centers.
Note: Before you can access the call center list, you might see an introductory page. To navigate past it and view the call center list, click Continue.
- Click Import. Browse to locate the new XML file you downloaded and extracted, and click Import again to confirm.
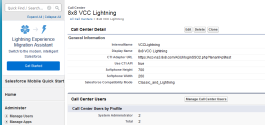
- In the Call Center details, you can click Edit to make changes. Among other options, you can:
- Save your changes. You have now installed the new call center.
- While in Lightning mode, go to
 > Setup in the header.
- In the search box at the top of the left column, enter <Call Center>.

- From the search results, select Call Centers under Call Center.
Note: Before you can access the call center list, you might see an introductory page. To navigate past it and view the call center list, click Continue.
Note: Before you proceed with the following steps, you must remove users from the previous version of your 8x8 Contact Center call center.
- From the list of call centers, select the new call center you created.
- In the call center details, click Manage Call Center Users.
- Search for users alphabetically by clicking the desired letter, or individually by clicking Add More Users.
- From the resulting list, select users to add.
- While in Lightning mode, go to
 > Setup in the header.
- In the search box at the top of the left column, enter <App Manager>.

- From the search results, select App Manager under Apps.
- Above the list of apps and below the Salesforce header, click New Lightning App.
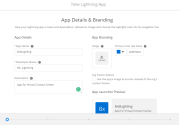
- In the App Details and Branding screen that pops up, enter the app name and description. Click Next.
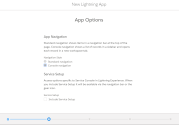
- In the App Options screen, select Console Navigation. Click Next.
- In the Utility Bar screen, to enable the utility bar for this item, Add a utility bar item, and select Open CTI Softphone. The utility bar is a fixed footer that opens components in docked panels.
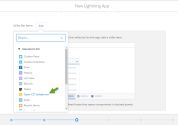
- Enter the desired app properties (such as label name, and panel height and width). The recommended height and width are 700 and 200, respectively.
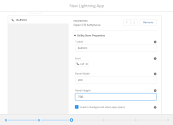
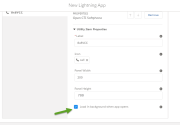
- Select the check box to load in the background when the app opens. Click Next.
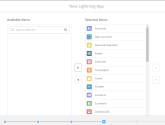
- In the Select Items screen, select all available items. Click Next.
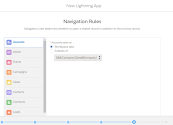
- Optionally, in the Navigation Rules screen, you can choose whether to open a related record in addition to the primary record. Click Next.
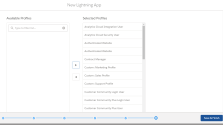
- In the Assign to User Profiles screen, select all user profiles that need access to the app. When you are done, click Save & Finish to return to the App Manager screen.
- Click
 to open the App Launcher, and click from the list of apps to activate 8x8 Contact Center for Salesforce.
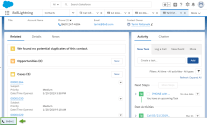
 - All enabled users can now access the app at any time from the footer bar of Salesforce.
