Install and configure version 3.1 of the integration for Salesforce
8x8 Contact Center now supports Open Computer Telephony Integration (CTI) with support for Single Sign-On access from the native Salesforce environment. Salesforce users can launch 8x8 Contact Center with just a click while in the Salesforce application, and take advantage of the benefits of integration.
- Ability to launch 8x8 Contact Center from the comfort of the Salesforce dashboard
- Reduced 8x8 Contact Center sign-in time while working in Salesforce
- Improved security; Salesforce user credentials do not need to be stored in 8x8 Contact Center
- Support for both Salesforce Service Console and non-Console mode in Salesforce
- Ability to dial out calls using native click-to-dial links in Salesforce Service Console and non-Console mode
The integration allows you to perform your Salesforce account activities using the integrated (Undefined variable: 8x8VariablesSet.AgtConsole ) with the following features:
- Multichannel support, including phone, chat, and voicemail channels
- Visibility of queue status and agent presence
- Support for screen pop of the matching end user data during inbound interactions
- Support for screen pop during phone calls (based on caller ID)
- Support for screen pop during chats (based on email ID in 3.1)
- Ability to search based on arbitrary data (requires customization)
- Ability to record custom messages for agents
- Ability to track historical data of agent activity using historical reports (for supervisor only)
- Ability to monitor agent activity (for supervisor only)
- Administrative access to a Salesforce account
- Administrative access to an 8x8 Contact Center account
The auto log from an interaction is saved to the Comments field, which limits the data size to 4000 bytes. If an interaction log exceeds 4000 bytes, you cannot save the log.
Install and configure Single Sign-On integration
Note: Version 3.1 of 8x8 Contact Center integration with Salesforce only supports Single Sign-On for users with 8x8 Unified Login, and 8x8 Unified Login with 8x8 Work. If you use a legacy 8x8 Contact Center tenant, Single Sign-On functionality is not supported. Salesforce Professional Edition is not supported.
Setting up Salesforce for Single Sign-On integration with 8x8 Contact Center requires the Salesforce administrator to:
You must install the 8x8 Contact Center package for Single Sign-On.
To install the integration packages:
- Log in to Salesforce as an administrator. If you are using a custom domain, you must log in using your custom domain name.
- Use the following URLs to set up the desired Salesforce environment:
- For Version 3.1 of Salesforce Integration (Production): https://login.salesforce.com/packaging/installPackage.apexp?p0=04t1U000006FhX4
- For Version 3.1 of Salesforce Integration (Sandbox): https://test.salesforce.com/packaging/installPackage.apexp?p0=04t1U000006FhX4
-
Select which user types to install for, and confirm to install.
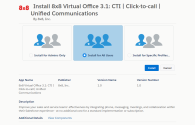
- At the notification that the installation is complete, click Done to open your list of packages installed in Salesforce. Under Installed Packages, you see 8x8integrations along with the package installation details.
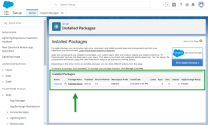
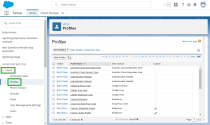
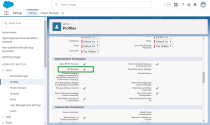
In order for the integration to function with a user role, ensure that API is enabled for the selected user roles in the administrative permissions.
To enable API:
- In the Salesforce Setup navigation menu on the left, go to Feature Settings > Service > Call Center > Call Centers.
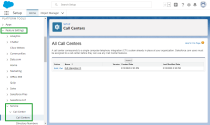
The page displays the available call center packages installed. - Next to the 8x8 Integration I3 package, click Edit.
-
Replace the CTI Adapter URL with the relevant URL as shown in the table below. Replace the placeholder naX with your cluster.
Note: You can find your cluster in the browser URL after logging in to the 8x8 Configuration Manager.
Set up CTI Adapter URL Single Sign-On (SSO) enabled https://cloud8.8x8.com/mashell/public/salesforce.html?env=salesforce&companel=vcc&vccmode=3&vccDomain=https://sso.8x8.com/login/vcc-naX&ssoMode=true&nextGen=true
Important:
- Replace the naX in the CTI URL with the cluster your tenant is hosted on.
- Customers on the na6 cluster and a mode 3 tenant must use thehttps://sso.8x8.com/login/vccvccDomain instead ofhttps://sso.8x8.com/login/vcc-na6.Single Sign-On (SSO) disabled https://cloud8.8x8.com/mashell/public/salesforce.html?env=salesforce&companel=vcc&vccmode=3&vccDomain=https://sso.8x8.com/login/vcc-naX&nextGen=true
Important:
- Replace the naX in the CTI URL with the cluster your tenant is hosted on.
- Customers on the na6 cluster and a mode 3 tenant must use thehttps://sso.8x8.com/login/vccvccDomain instead ofhttps://sso.8x8.com/login/vcc-na6.Salesforce Sandbox https://cloud8.8x8.com/mashell/public/salesforce.html?env=salesforce&companel=vcc&vccmode=3&vccDomain=https://sso.8x8.com/login/vcc-naX&sandbox=true&nextGen=true
Important:
- Replace the naX in the CTI URL with the cluster your tenant is hosted on.
- Customers on the na6 cluster and a mode 3 tenant must use thehttps://sso.8x8.com/login/vccvccDomain instead ofhttps://sso.8x8.com/login/vcc-na6. - Click Save to proceed to adding users.
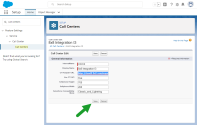
In this step, identify and set up Salesforce users acting as call center agents.
- In the Salesforce Setup navigation menu on the left, go to Feature Settings > Service > Call Center > Call Centers.
- Next to the 8x8 Integration I3 package, click Edit.
- In the package details, click Manage Call Center Users.
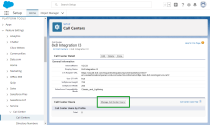
- Click Add More Users to add filters to search for specific users, and click Find.
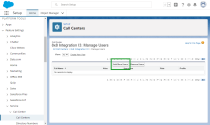
- From the list of users, select the desired users, and click Add to Call Center.
For Salesforce users to log in to 8x8 Contact Center, you must create an agent account, or edit an existing one, in 8x8 Admin Console or Account Manager. Before you start, locate the agent’s Salesforce username.
For customers using 8x8 Admin Console:
- Log in to 8x8 Admin Console.
- Go to Home > Users and edit the user profile of the prospective Salesforce user.
- Scroll down to Advanced settings > Third-party integration.
- Enter the Third party (CRM name) and Username (of the user when they log in to Salesforce), and click Save.
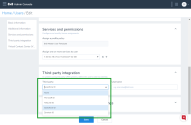
You have now completed the integration setup.
For customers using Account Manager:
- Log in to Account Manager.
- Go to Accounts > User Profiles and edit the user profile of the prospective Salesforce user.
-
Enter the Salesforce ID and click Save.
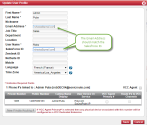
You have now completed the integration setup.Note: The Salesforce ID email address must match the username the agent uses to log in to Salesforce.
In this step, enable integration with Salesforce Lightning apps so the integration can be accessed.
- In the Salesforce Setup navigation menu on the left, go to Apps > App Manager to open your list of Salesforce apps.
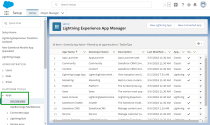
- Next to the Salesforce Lightning app you want to enable for the integration, click
 and select Edit.
 - In the Utility Items (Desktop Only) section of the app settings:
- Click Add Utility Item.
- Enter <softphone> in the search box, and select Open CTI Softphone in the search results.
- Enter a Label name for the integration icon (such as 8x8 Phone).
- Enter a Panel Width of <260> and a Panel Height of <700>.
- Verify that the Start automatically option is selected.
- Click Save.
- Repeat for all Salesforce apps you want to enable for the integration.
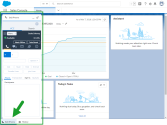
When you open a Salesforce app you enabled, click the button in the footer with the label name you entered earlier, and log in to 8x8 Contact Center.
In order for 8x8 to properly access Salesforce data, you must allow pop-ups in Chrome and whitelist the 8x8 cloud domain URL.
In addition, the first time you try to open 8x8 Contact Center for Salesforce, you get a notification that a pop-up is blocked in your URL bar. In order for the integration to work, you must accept prompts from Salesforce and 8x8 to allow the integration to access Salesforce data.
To allow 8x8 to access Salesforce data:
- When you see the blocked pop-up notification, click the icon in the URL bar to open a notification box.
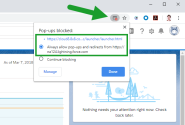
- In the notification box, select the Always allow pop-ups and redirects option, and click the URL that shows up above the option to open a Salesforce access prompt.
- Review and accept the Salesforce prompt.

- If you are a Single Sign-On user, accepting the Salesforce prompt opens a similar 8x8 prompt. Review and accept the 8x8 prompt to return to Salesforce.

The 8x8 integration is now able to access Salesforce data.
Usage restrictions can block access to uninstalled connected apps. Admins must find which uninstalled apps are in use, and decide if they’re trusted and should be installed, or block them if they’re not. This may prevent new and existing users from receiving the OAUTH_APPROVAL_ERROR_GENERIC message when trying to authenticate via an uninstalled connected app.
To install the MaestroInt app:
- In the Salesforce Setup, search for Connected Apps OAuth Usage and select it from the list of results.
- Locate the MaestroInt app in the list.
- Check if the MaestroInt app displays the Install button in the Action column. This indicates that the app is not installed.
- Click Install.
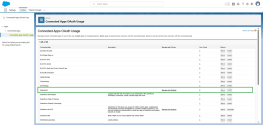
- From the confirmation page, select Install.
- After the MaestroInt app is successfully installed, click Manage App Policies.
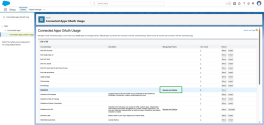
- Click Edit Policies.
- From the OAuth Policies section, click the Permitted Users dropdown menu and select one of the following options:
- All users may self-authorize (Default): Allows anyone in the org to authorize the app after signing in for the first time.
- Admin approved users are pre-authorized: Allows only users with specific profiles or permission sets to access without authorizing. For this option, you must manage profiles for the app by editing each profile’s Connected App Access list. You can also manage permission sets for the app by editing each permission set’s Assigned Connected App list.
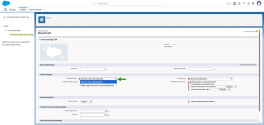
- Click Save.
If you enabled Single Sign-On by adding ssoMode=true in the CTI Adapter URL configuration in Step 3, you must install 8x8 Single Sign-On in Salesforceand configure which users can access it.
To install 8x8 Single Sign-On:
- In the Salesforce Setup, search for Connected Apps OAuth Usage and select it from the list of results.
- Locate the Single Sign-On in the list of connected apps.
- Click Install from the Actions column. A confirmation page launched in a separate tab.
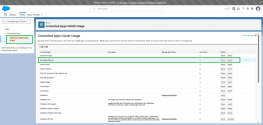
- Click Install.
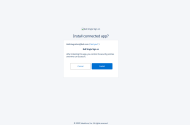
- Click Edit Policies.
- From the OAuth Policies section, click the Permitted Users dropdown menu and select one of the following options:
- All users may self-authorize (Default): Allows anyone in the org to authorize the app after signing in for the first time.
- Admin approved users are pre-authorized (Recommended by Salesforce): Allows only users with specific profiles or permission sets to access without authorizing. For this option, you must manage profiles for the app by editing each profile’s Connected App Access list. You can also manage permission sets for the app by editing each permission set’s Assigned Connected App list.
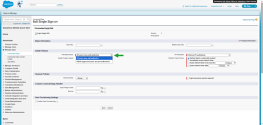
- Click Save.
Note: In a Group Edition org, you can’t manage individual user access with profiles. However, you can manage all users’ access when you edit a connected app’s OAuth settings.
The 8x8 Contact Center API token is a unique identifier that authenticates and allows access to 8x8 Contact Center call recordings.
To generate API token in 8x8 Configuration Manager:
- Log in to 8x8 Configuration Manager as an administrator.
- Go to Integration > API Token.
- Click New Token to generate a new token for security reasons.
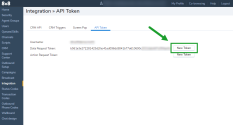
- Copy the secure access token and paste into an email or share it with the agent who wishes to access the recorded calls.
After receiving the token, the agent must open Settings in the integration, go to Advanced, enter the token in the VCC CM Integration Data Request Token field, and click Save.
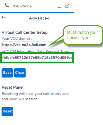
Note: The URL format of Your VCC domain must match your contact center's service type:
-General Virtual Contact Center for Salesforce users (legacy), must enter https://vcc-naX.8x8.com.
-Virtual Contact Center for Salesforce users who have opted for 8x8 Unified Login must enter their SSO link: https://sso.8x8.com/login/vcc-naX.
-Virtual Contact Center for Salesforce users who have opted for 8x8 Unified Login with 8x8 Work must also enter their SSO link https://sso.8x8.com/login/vcc-naX.
