Note: This version of the integration is no longer supported. For the latest version of this guide, see Configure version 3.1 of the integration for Salesforce.
Configure Individual System Sign-On integration with Salesforce
Individual System Sign-On provides Salesforce integration with 8x8 Contact Center from the (Undefined variable: 8x8VariablesSet.AgtConsole ) environment. Salesforce users have to enter their user ID and password to log in to 8x8 Contact Center.
Note: Salesforce does not support iframing by default, and Salesforce pages are accessed in a separate window. If you want to maintain the ability to see your Salesforce pages within (Undefined variable: 8x8VariablesSet.AgtConsole ), you can contact the Salesforce support and request them to turn off the Clickjack protection. A Salesforce representative with the right permissions can turn off Clickjack protection.
Individual System Sign-On provides CRM integration with 8x8 Contact Center from the (Undefined variable: 8x8VariablesSet.AgtConsole ) environment. CRM users have to enter their user ID and password to log in to 8x8 Contact Center.
The Individual System Sign-On includes both Enhanced and Legacy integration:
- Enhanced integration: With enhanced integration in version 1.0, records pop with matching caller ID, case ID, or email ID, and are presented in a custom format within (Undefined variable: 8x8VariablesSet.AgtConsole ). The screen pop is based on caller ID for phone calls, case ID or email ID for chats, and email ID for email interactions. Enhanced integration also creates auto call logs, chat logs, and email logs.
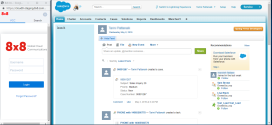
- Legacy integration: With legacy integration in version 1.0, records pop with matching caller ID, case ID, or email ID from Salesforce CRM in a separate browser window.
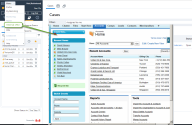
Note: Legacy integration requires agents to initiate a Salesforce CRM instance by selecting External CRM from the (Undefined variable: 8x8VariablesSet.AgtConsole ) main menu options.
The following table summarizes the differences between Enhanced and Legacy integration:
Enhanced Legacy Signs in to Salesforce account automatically. You must manually initiate the Salesforce account. Provides a custom tab for launching the native Salesforce interface. Opens the native Salesforce interface in a separate browser window. Supports Auto Log for phone, voicemail, chat, and email. Does not support Auto Log for any media. The screen pop searches for account, contact, and lead records with: - Phone field matching Caller ANI for phone and voicemail media
- Case numbers matching case ID for chat media
- Email field matching email ID for email media
Note: For screen pop, the required objects must be visible to the agent.
The screen pop searches for account, contact, and lead records with: - Phone field matching Caller ANI for phone and voicemail media
- Case numbers matching case ID for chat media
Note: For screen pop, the required objects must be visible to the agent.
Fetches and presents multiple listings if the search retrieves multiple records. Presents only the first listing. Allows opening a new window for each screen pop and controlling its occurrence. Allows opening a new window for each screen pop and controlling its occurrence. Supports customization of CRM workflow. Does not support any customization.
Set up Individual System Sign-On integration
Setting up Salesforce for Individual System Sign-On integration with 8x8 Contact Center requires the Salesforce administrator to:
Setting up Salesforce integration with 8x8 Contact Center requires the Salesforce administrator to:
- Use the following URLs to set up the desired Salesforce environment:
- For Salesforce Integration version 1.0 Production: https://login.salesforce.com/?startURL=%2Fpackaging%2FinstallPackage.apexp%3Fp0%3D04tA0000000Pygj
- For Salesforce Integration version 1.0 Sandbox: https://test.salesforce.com/?startURL=%2Fpackaging%2FinstallPackage.apexp%3Fp0%3D04tA0000000Pygj
- At the prompt, log in as a Salesforce administrator.
- Select Install for All Users, and click Install.
You are notified that the installation is complete. - Click Done.
The Salesforce Installed Packages page installs the plug-in. Salesforce can now process screen pop requests from 8x8 Contact Center.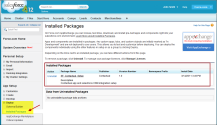
- You must now set up the visibility on call log fields.
To set up visibility on call log fields:
- Go to Setup, and then select App Setup from the left menu.
- Go to Customize > Activities.
- Open Task Fields.
- Click Type in the list.
- In the Type page, click Set Field-Level Security.
- Select the Visible check box to grant the visibility permission.
The Type field is accessible the next time the agent logs in.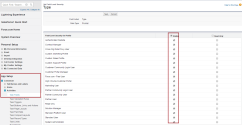
For some user roles in Salesforce, the API is not enabled by default. The integration can function if the user account enables API in the administrative permissions.
To enable API:
To enable Salesforce integration for a tenant, you have to configure screen pop settings in 8x8 Configuration Manager. The configuration requires you to select a target CRM, specify events that trigger screen pop for customer data, and specify screen pop window properties in 8x8 Configuration Manager. An agent must then save the login credentials of the external CRM account in the agent’s profile. Integration enables searching for records containing phone data matching caller ID, and pops up the corresponding record(s) for specific events.
The events triggering a screen pop may be one or all of the following:
- When an agent is offered an interaction
- When an agent has accepted an interaction
- When an agent has completed an interaction
A screen pop is the process of presenting customer data to an agent automatically during an interaction, eliminating the need to manually search for the customer data. The process involves searching for account, contact, and lead records with:
- Phone field matching caller ANI (Automatic Number Identification) for phone and voicemail media
- Case numbers matching case ID for chat media
- Email field matching email ID for email media and displaying the search results on the agent’s screen
Note: For screen pop to work, the required objects must be visible to the agent.
A screen pop occurs for:
- Inbound interactions, including those for phone, voicemail, chat, and email media
- Outbound campaign phone interactions
- Interactions involving web callback
If the search brings up multiple records, the screen pop lists all matches in a table, and displays the details of the first record. If the search fails to find matching records, a blank record pops up to create a new customer record or case, or a new contact.
To define screen pop settings for Salesforce CRM:
- Go to Integration > Screen Pop in 8x8 Configuration Manager.
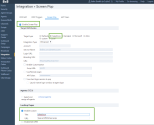
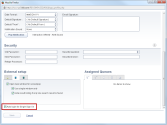
- Select the Enable Screen Pop check box.
- Define the following Target Attributes:
Target Attribute Description Target Type Select Salesforce as the target CRM to integrate with. Integration Type Select from the two available integration types: Legacy or Enhanced. Enable Customization
Script URLThis option instructs a tenant to execute a custom XML Salesforce integration script using the specified script URL.
If customization is enabled, Script URL must contain a valid URL that points to the location of the custom script. Once the script URL is specified and the screen pop page is saved, all features and functionality of the standard integration are replaced with the custom functionality. Agents see the changes with their next login.Use client login session to pop Select Use client Login Session to pop to enable support for the Salesforce security setting Lock sessions to the IP address from which they originated. - If enabled, (Undefined variable: 8x8VariablesSet.AgtConsole ) automatically launches a Salesforce login window when the agent logs in to (Undefined variable: 8x8VariablesSet.AgtConsole ).
- If disabled, the agent must manually log in to Salesforce using the next tab of the same browser window used for the (Undefined variable: 8x8VariablesSet.AgtConsole ) session.
- Select the Select and assign all agents check box to allow all available agents in your tenant to integrate with Salesforce.
OR
Click choose agents to see the list of agents in your tenant. You can choose specific agents to have access to Salesforce. This option can be used when you have a limited number of seats available. - Define the attributes for Landing Pages.
A landing page is the opening page of the CRM when you log in to (Undefined variable: 8x8VariablesSet.AgtConsole ). 8x8 Contact Center offers a custom tab to allow you to land in any CRM page you specify. If you select this option, you need to specify:- Title: A name to show on the custom tab, such as <My Salesforce>.
- URL: The landing URL when an agent logs in to (Undefined variable: 8x8VariablesSet.AgtConsole ). This field is automatically populated with your Salesforce home page. Modify this link to point to any other location.
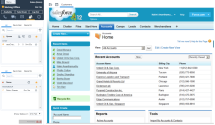
Note: Enable 8x8 CRM allows you to access 8x8 Contact Center CRM by opening the Cases, Customers, and Tasks tabs.
- Enable Trigger an auto log window after interactions to automatically log the interaction details of all inbound and outbound interactions for all media: phone, voicemail, and chat.
 What is an auto log?
Termination of all interactions using the enhanced integrated (Undefined variable: 8x8VariablesSet.AgtConsole ) triggers an auto log. The integration now supports automatic generation of call logs, chat logs, and email logs for all inbound and outbound interactions. An auto log is a record that automatically logs interaction details of all interactions across all media and relates to an appropriate object. For example, a call log includes information such as call duration, call answered time, call hang-up time, interaction ID, and call type. An auto log generates automatically at the end of interaction post-processing.
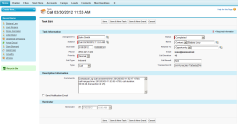
An auto log is created for:- Inbound interactions
- Outbound interactions
- Interactions involving web callback
- Interactions involving click-to-dial
An inbound auto log automatically associates with a matching contact record, provided the contact is associated with a company, while an outbound auto log creates an independent task.
Note: If a contact record is not linked to a company, the inbound call log is not associated with the contact record. The log saves as a stand-alone phone call or task.
- Allow Trigger A Popup Window to define events that trigger a screen pop for an interaction. You can configure a screen pop of a corresponding record for the following events:
- When an agent is offered an interaction
- When an agent accepts an interaction
- When an agent completes an interaction
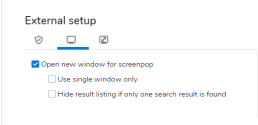
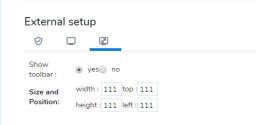
- Select the Open new window for screen pop check box to specify the screen pop window's size and position (optional).
 Control screen pop window properties
Note: The configuration of screen pop window properties may be controlled by agents from (Undefined variable: 8x8VariablesSet.AgtConsole ) if the administrator extends this capability to agents. Go to My Profile > External Setup to configure the setting.
- Save your configuration settings.
With the screen pop configuration in 8x8 Configuration Manager complete, you are now ready to set up (Undefined variable: 8x8VariablesSet.AgtConsole ) for integration.
To enable agent accounts for Salesforce integration, agents must save their Salesforce login credentials in the profile. Salesforce requires you to append a security token to the password for security purposes.
To enable an agent account for integration:
- Log in to (Undefined variable: 8x8VariablesSet.AgtConsole ).
- Go to Profile.
- Scroll down to the External Setup area.
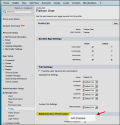
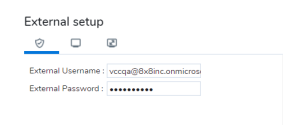
The External Setup provides three tabs. - Enter your Salesforce login ID and password in the Authentication tab.
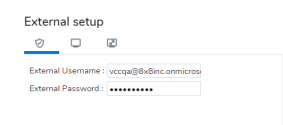
Note: You must append a security token to the password. For example, if your password is <mycode>, and your security token is <xxxxx>, then you must enter <mycodexxxxx> to log in.
- Click the Screen Properties tab to view or redefine the screen pop window properties.
- Click the Window Properties tab to view or change the settings.
- Save your settings. You are automatically signed in to your Salesforce account.
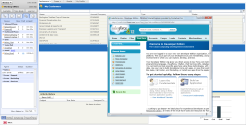
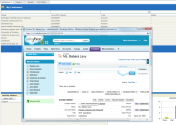
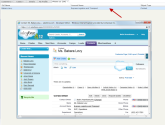
If you choose to open a new window for screen pop, a window pops up and logs you in to Salesforce. You can perform all your Salesforce account activities from within (Undefined variable: 8x8VariablesSet.AgtConsole ). Based on the settings, when an incoming call, chat, or email is offered, accepted, or completed, the matching record(s) pop in the same window as (Undefined variable: 8x8VariablesSet.AgtConsole ), or in a new window.
To log in to Salesforce from an external network, via API, or from a desktop client, you need a security token. A security token is an automatically-generated key within Salesforce that is communicated to you along with your login credentials. You must add the security token to the end of your password to log in to Salesforce.
You may reset your security token any time.
To reset your security token:
8x8 Contact Center offers click-to-dial API, which allows you to click custom hyperlinked phone numbers in CRM records to initiate outbound calls from the native Salesforce interface. This eliminates the need to enter an outbound phone number in the (Undefined variable: 8x8VariablesSet.AgtConsole ) Control Panel. The typical usage of click-to-dial is to create functional hyperlinks on CRM records to dial out to the corresponding customer phone number.
Note: Only enhanced and legacy integration use click-to-dial; it is not required for Open CTI Single Sign-On integration.
Setting up a Salesforce account to use click-to-dial functionality requires the following configuration:
- Creating a new custom link to trigger click-to-dial.
- Editing the Object Page Layout to include the custom link.
- Enabling click-to-dial for agent accounts in 8x8 Configuration Manager.
To set up the click-to-dial functionality:
- Log in to your Salesforce account.
- Go to Setup > App Setup > Customize.
- Select a tab such as Lead.
- Go to Leads > Buttons and Links.
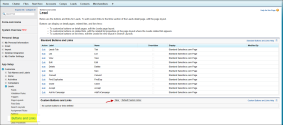
- Click New from the Custom Buttons and Links section.
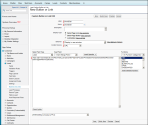
- Enter the following attributes:
Attribute Name Description Label The text displayed for the custom button or link. Name The unique name to reference the button or link. Description A brief note for administrators. Display Type Determines the type of custom link or button.
Select Detail Page Button to add a button to the Custom Buttons section of your page layout.Behavior Determines the outcome of clicking the button or link.
Select Display in new window.Content Source Select URL to show the content of the button. Content Enter the content of the button for the URL. This varies based on the platform of your tenant.
Example: https://vcc-naX.8x8.com/AGUI/make_call.php?prefix=&phone={!Lead.Phone}&callerId=18661231234&queue_id=123&extTransactionData=[extRecordId|{!Lead.Id}][extRecordType|Lead] - Click Save to save the custom button.
The next step is to edit the page layout of the object to include the custom link, allowing the custom link to show in the object page layout.
To edit a page layout:
- Go to Setup > Object > Page Layouts.
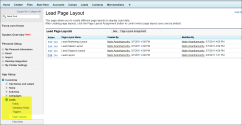
- Select a page layout, and click Edit.
- Select Buttons from the top-left of the edit layout page.
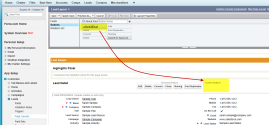
- Drag and drop the click2Dial link that you created above to the Custom Links section.
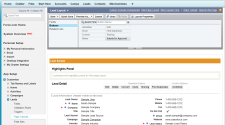
- Save your changes to the page layout.
When you log in to (Undefined variable: 8x8VariablesSet.AgtConsole ), and open a lead record, you see the click2Dial button. Clicking this button places an outbound call to the phone number tied with the record.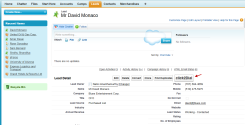
To verify click-to-dial:
- Log in to (Undefined variable: 8x8VariablesSet.AgtConsole ) as an agent.
- Open a customer record in the native Salesforce interface.
- Locate and click the click2Dial button.
The agent phone rings. Answer the phone to dial out to the customer phone indicated in the record.
When you log in to Salesforce, the app launches automatically by default. If you wish to launch it manually, you can disable the automatic login setting in the Agent Profile.
