In a typical phone menu, callers direct themselves to the desired destination using phone choices from the menu. The 8x8 Contact Center phone menu is driven by pre-recorded audio messages. Audio files serve to automate a contact center's phone menu. 8x8 Contact Center allows you to upload customized messages in 8x8 Configuration Manager to serve your contact center's needs.
To upload audio files:
- From the Configuration Menu, open Home.
-
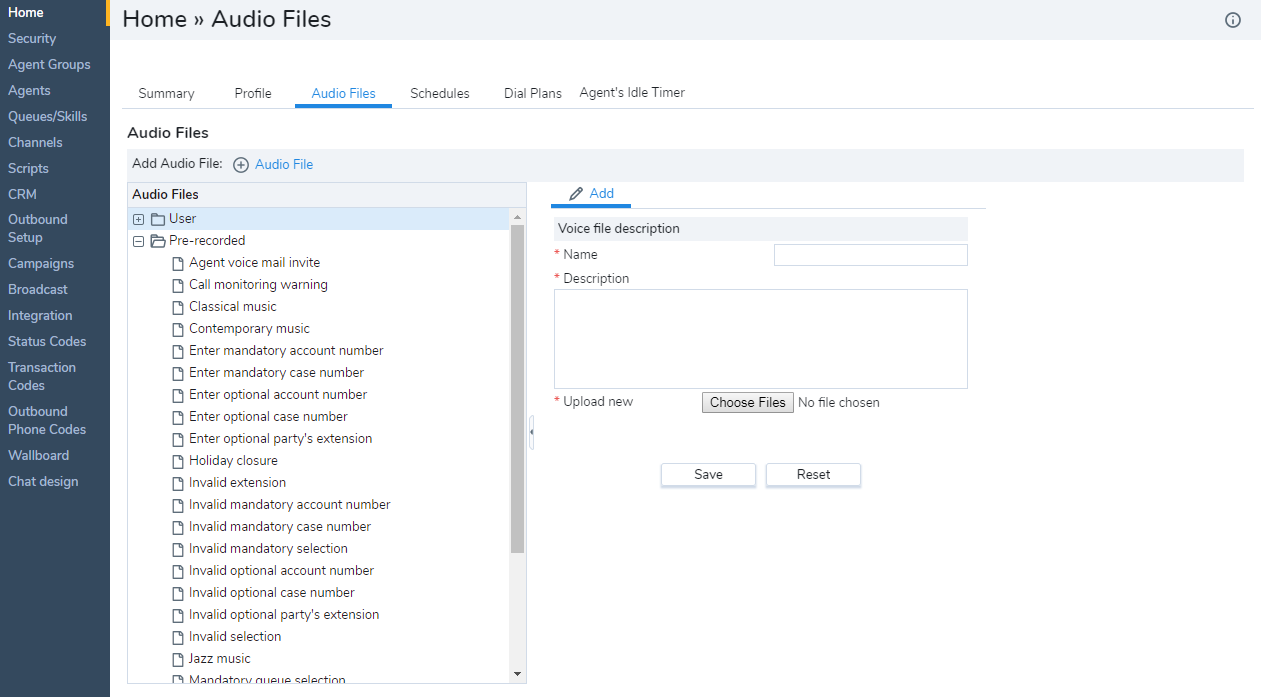
Go to the Audio Files tab.
The following table summarizes file types listed in Audio Files.
Audio Files Option Description User Lists the customized audio files uploaded by your 8x8 Contact Center administrator into this tenant. When you initially configure a tenant instance, the User folder does not contain any audio files. When you use the Audio Files tab to upload your company's customized audio files into 8x8 Configuration Manager, the uploaded files are stored in the User folder. Pre-recorded Lists the set of default audio files available for the tenant. By default, a new tenant includes a set of placeholder audio files. These files provide examples of voice Channel greetings and messages used in a variety of contact center contexts. When you upload the customized audio files required by your contact center, you replace a pre-recorded audio file assignment so that it uses your customized audio file. User-Agent whisper Lists the audio files that can be uploaded and assigned by the tenant administrator to an inbound or outbound queue to inform the agent, upon connection, about the connected call. Upon receiving calls, the system plays a brief message stating the nature of the call such as sales or support.
- Open the User folder under Audio Files.
- Click Add to upload a new audio file.
-
Enter a Name for the message you wish to upload.
The following table summarizes the options available under Voice file description.Voice File Description Option Description Name A descriptive name for the contents of the customized audio file. Description Enter a meaningful description for the customized audio file to help you remember it later. Upload new To upload a customized audio file to your tenant, select a 8 KHz, 16-bit, monaural WAV file. After you upload an audio file, you must verify that 8x8 Contact Center can play the audio file before referencing the file in an IVR script. 8x8 Configuration Manager does not upload the file until you click Save. For details on playing uploaded IVR files, refer to Verify Audio Files Deployment. Save To finish uploading the audio file you must click Save. 8x8 Configuration Manager only allows you to save user audio files. Delete To delete a customized audio file under User folders, click Edit > Delete. View To view details about a customized audio file such as type, file name, date of upload, size and file information, click View. Note: For best practices, insert a special prefix at the front of the user-created audio names so they can be distinguished from the system audio files.
- Enter a transcript or a brief description of the message in the Description box.
- Click Choose Files to select an audio file in WAV format.
- Click Play Audio to play back the uploaded message.
- Click Save.
You can edit custom audio files at any time. However, you cannot edit the default pre-recorded audio messages.
To edit custom audio files:
- From the Configuration Menu, open Home.
- Go to Audio Files.
- Select the desired audio file in the User folder.
The description of the voice file displays in the View tab. - Click the Edit tab and make the desired changes. You can also upload a new audio file from Edit mode.
Delete audio files
You can delete custom audio files at any time. However, you cannot delete the default pre-recorded audio messages.
To delete custom audio files:
- From the Configuration Menu, open Home.
- Go to Audio Files.
- Select the desired audio file in the User folder.
The description of the voice file displays in the View tab. - Click the Edit tab and make the desired changes. You can also upload a new audio file from Edit mode
- Click Delete to remove the message from the tenant.
Note: To order professionally-recorded messages, click the link at the bottom of the Voice file description area. You are sent to a service provider in professional voice recordings.