Note: AI Studio is an Early Access Program (EAP) product. Features may change after this documentation is published. If a feature is not included in this guide, use the built-in AI Builder to explore available capabilities.
Deploy agents and integrations
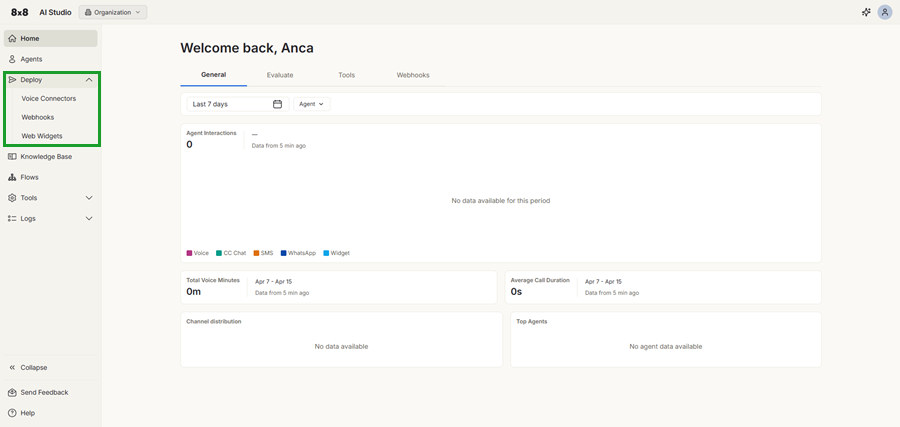
Use the Deploy menu in 8x8 AI Studio to configure how your AI agents connect to communication channels and external systems. From this menu, you can manage key deployment components such as voice routing and event-driven integrations that enable agents to interact with users and trigger workflows.
Manage voice connectors
Voice connectors allow you to manage phone numbers used for voice interactions in AI Studio. These numbers act as entry points, routing incoming calls to agents or call flows. After setting up the voice connectors, you can assign them to an agent or call flow.
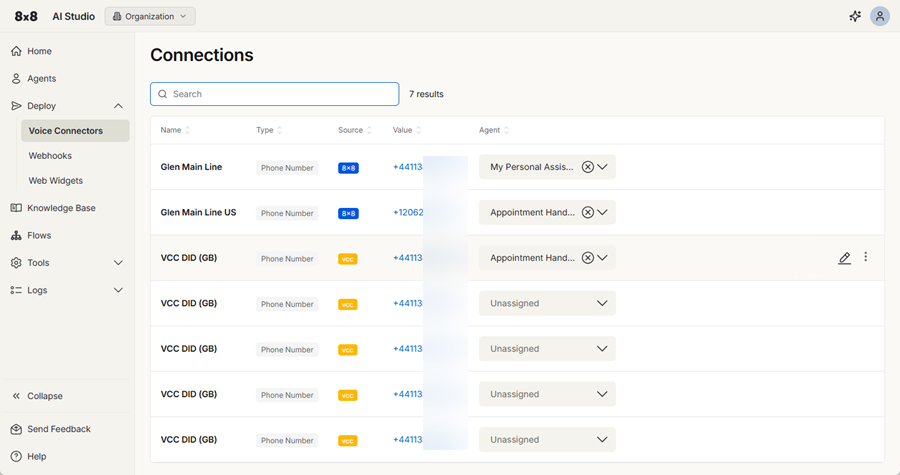
From the Voice Connectors page, you can view all available numbers, see how they are configured, and control how calls are handled.
Set up Voice Connectors
Voice connectors act as the bridge between telephony systems and your AI agents, allowing inbound calls to be routed, processed, and responded to using AI agents or call flows.
Each phone number creates a call routing configuration in AI Studio. This determines how incoming calls are handled.
When a call is received, the number is assigned either an AI agent or a call flow from the Voice Connectors submenu. The assigned resource handles the interaction, either through a conversational AI experience or a structured, IVR-style flow.
You can configure voice connectors using one of the following approaches:
| Setup type | Configuration locatio | Call handling | Human handoff support |
|---|---|---|---|
| DIDs assigned to AI Studio | 8x8 Admin Console | Calls route directly to AI Studio, where each number is configured to use either an AI agent or a call flow. | Not supported |
| 8x8 Contact Center routing | 8x8 Configuration Manager | Calls route through Contact Center, can be sent to AI Studio (agent or flow), and can be transferred back to Contact Center queues. | Supported |
Set up DIDs assigned to AI Studio (8x8 Admin Console setup)
Route all calls directly to AI Studio agents.
Note: Human handoff is not supported in this setup.
To set up exclusive DIDs to AI Studio:
- Log in to the 8x8 Admin Console.
- Go to the 8x8 App Store and select AI Studio.
- Click Configure App from the upper right side.
- From the DID management tab, click Add DIDs.
- Search for a DID or select DIDs from the list.
- Click Preview selection.
- Click Add selected.
- Click Save.
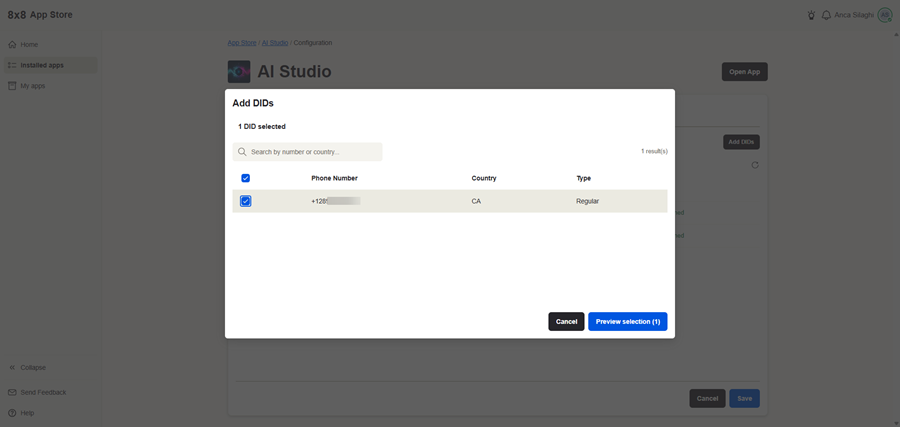
The numbers provisioned appear automatically in AI Studio.
Set up Contact Center routing (8x8 Configuration Manager setup)
Use Contact Center scripts to control routing and enable human handoff.
To route numbers through 8x8 Contact Center, with AI Studio as an IVR step:
- Log in to 8x8 Configuration Manager.
- From the menu, select Scripts.
- Edit your target channel's script or create a new script.
- Go to the Scripts tab.
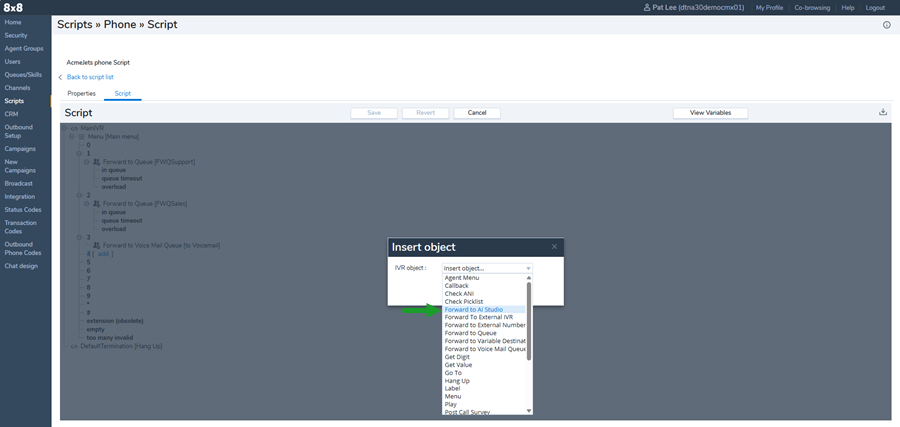
- Add a Forward to AI Studio IVR object in the script.
- Add an Object tag.
- Click OK.
- Click Save.
Assign voice connectors to an agent
To enable an agent to handle calls, you must assign a phone number to it.
To assign a number to an agent:
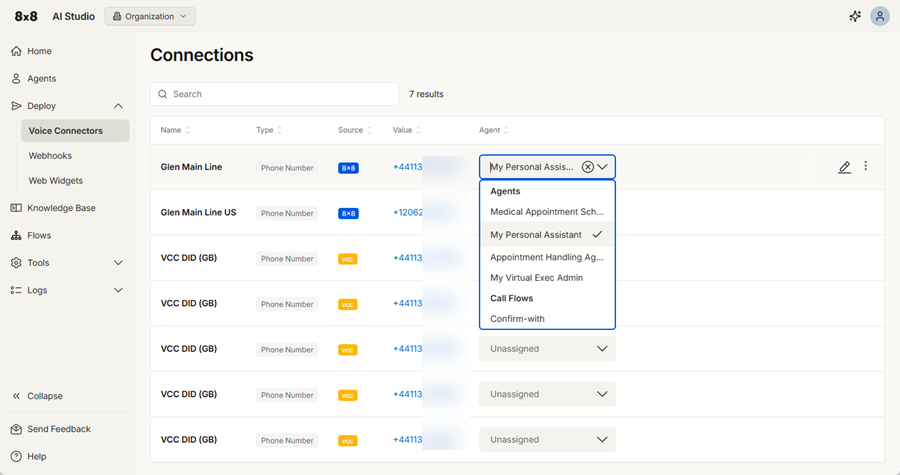
- In AI Studio, click Deploy from the menu and select Voice Connectors.
- Locate the number you want to configure.
- In the Agent column, click the arrow and select:
- An agent to handle calls directly.
- A call flow to control routing before reaching an agent
Set up webhooks
A webhook is a secure URL that acts as a bridge between AI Studio and another system. They are optional features which allow AI Studio to receive data from external systems and respond automatically in real time. When that system sends an HTTP request to the webhook, AI Studio processes the incoming data and triggers an action based on your configuration.
For example, a webhook works like this:
- An external system sends an HTTP request to the webhook URL.
- AI Studio receives the request.
- The webhook processes the request based on its type and configuration.
- The webhook returns a response or performs an action, such as sending a message to an agent, starting a call flow, or calling another service.
Depending on the webhook type, the processing logic may be fully custom code or a predefined routing configuration.
AI studio supports the following webhook types:
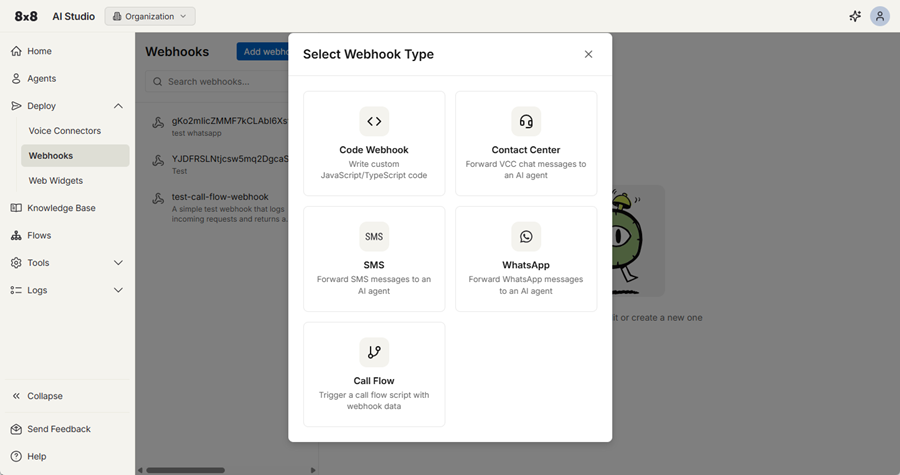
- Code webhook: Use when you need custom logic, request validation, data processing, or access to platform capabilities such as data stores, agents, calls, or SMS.
- Contact Center: Use when you need to route chat messages to an AI agent.
- SMS: Use when you need to route SMS messages to an AI agent.
- WhatsApp: Use when you need to route WhatsApp messages to an AI agent.
- Call Flow: Use when you want an external event such as an HTTP request to start a call flow.
Note: SMS and WhatsApp webhooks require an API token in their configuration. The token authenticates your account with those external services to allow the platform to deliver the AI agent's reply.
To add a webhook:
- In AI Studio, click Deploy from the menu and select Webhooks.
- Click Add webhook.
- Select the type of webhook you wish to create.
- Fill in the required fields.
- Click Create Webhook.
Update a webhook
You can only edit code in code webhooks. Other webhook types use templates and do not support code editing but can support changing the name, model, and version.
To edit code, open a code webhook, make the code edits, then click the Save & Deploy button from the top of the screen.
Versions for each updated webhook are saved after each deployment. You can access the versions and restore previous ones whenever necessary.
To revert a webhook to a previous version:
- From the Webhooks submenu, select the webhook you wish to restore to a previous version.
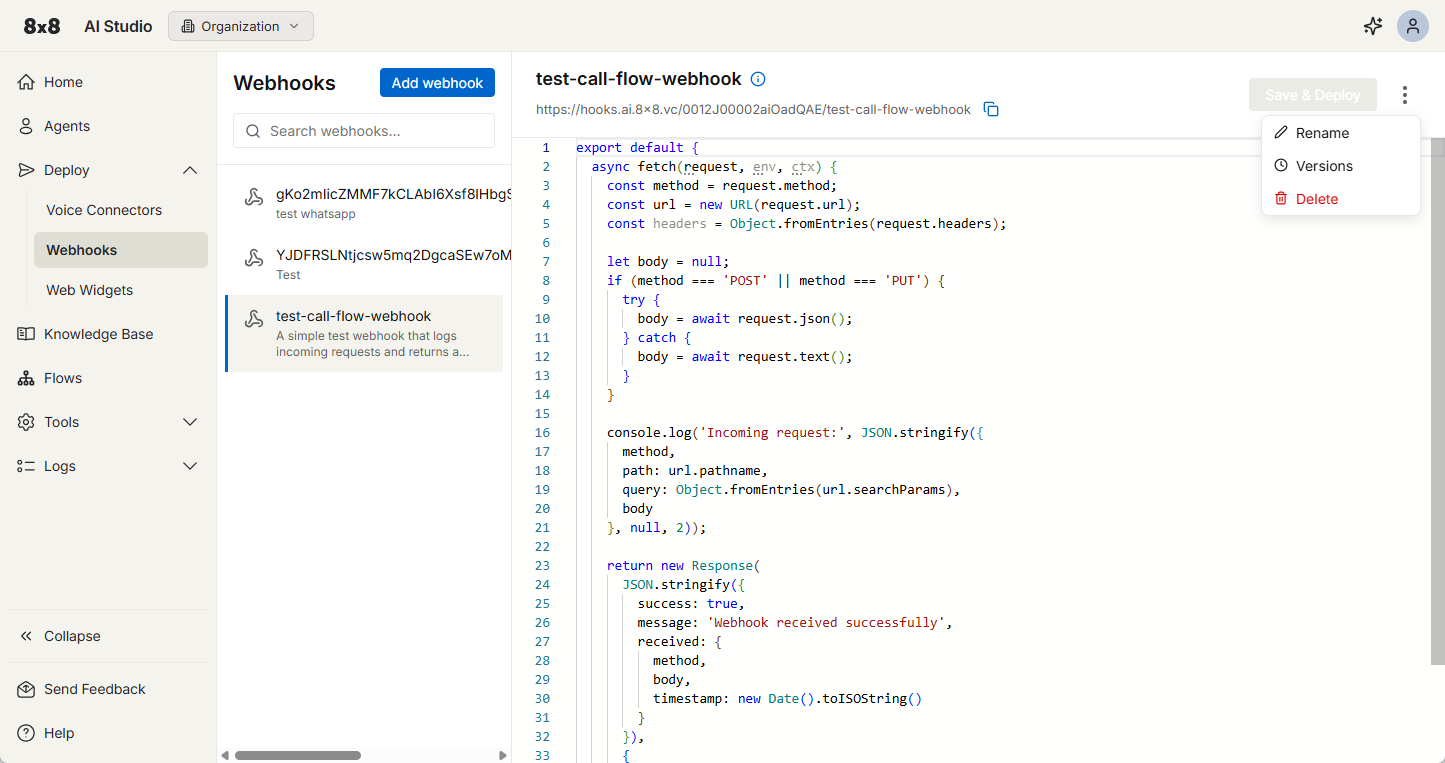
- Click the three
 dots next to the Save & Deploy button.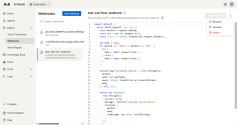
- Select Versions from the list.
- Select a version. Each version displays a timestamp that indicates when it was last updated.
- The selected version and the current version display side by side. The panels highlight the changes between versions.
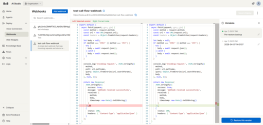
- Click Restore this version to replace the current one with the previous version.
- Click Restore to confirm.
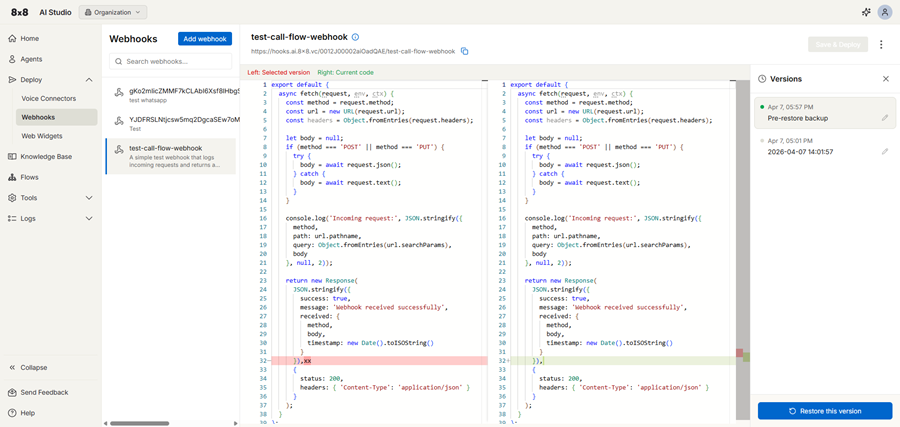
A confirmation banner shows briefly to confirm the change. The webhook is deployed automatically.
Set up web widgets
Web widgets are lightweight, embeddable components that add AI-powered voice and/or chat to your website. They allow visitors to interact with an AI agent directly from any web page without leaving your site.
Each widget uses a unique embed code that you add to your website. After deployment, all configuration updates are applied server-side without redeployment.
Benefits
Web widgets allow you to:
- Add voice and text interactions to any website
- Customize appearance and behavior without redeploying code
- Route conversations to different AI agents or call flows
- Collect post-call feedback from visitors
- Update configuration instantly for all users
Limitations
Live agent handover through the web widget to 8x8 Contact Center is not supported for voice interactions.
Manage web widgets
You can create and manage widgets in the following ways:
- Using AI Builder: Create, update, and delete widgets using the AI Builder.
- Manually: Navigate to Deploy > Web Widgets and manage your widgets manually.
To create a web widget manually:
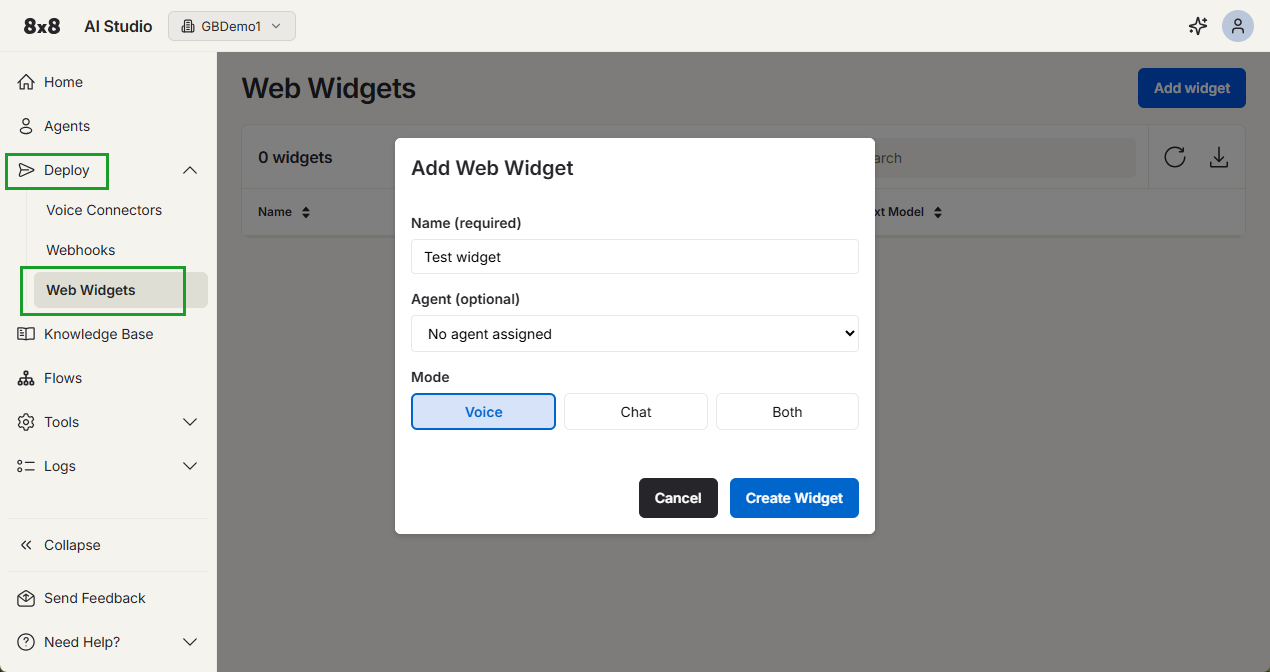
- In AI Studio, click Deploy from the menu and select Web Widgets.
- Click Add widget.
- Add a name for your widget.
- (Optional) Select the AI agent that will handle the interactions.
- Select the mode:
- Voice: Customers can call directly through the widget to speak with an AI agent in real time.
- Chat: Customers can send and receive text messages through the widget.
- Both: Customers can call and send text messages through the widget.
- Click Create Widget.
Configure your web widget
Configure your web widget to control how visitors interact with your AI agent. Customize the widget’s appearance, behavior, and interaction settings directly in AI Studio, without updating your website code.
Changes apply immediately to new interactions, so you can update the experience without redeploying your site.
To configure a widget:
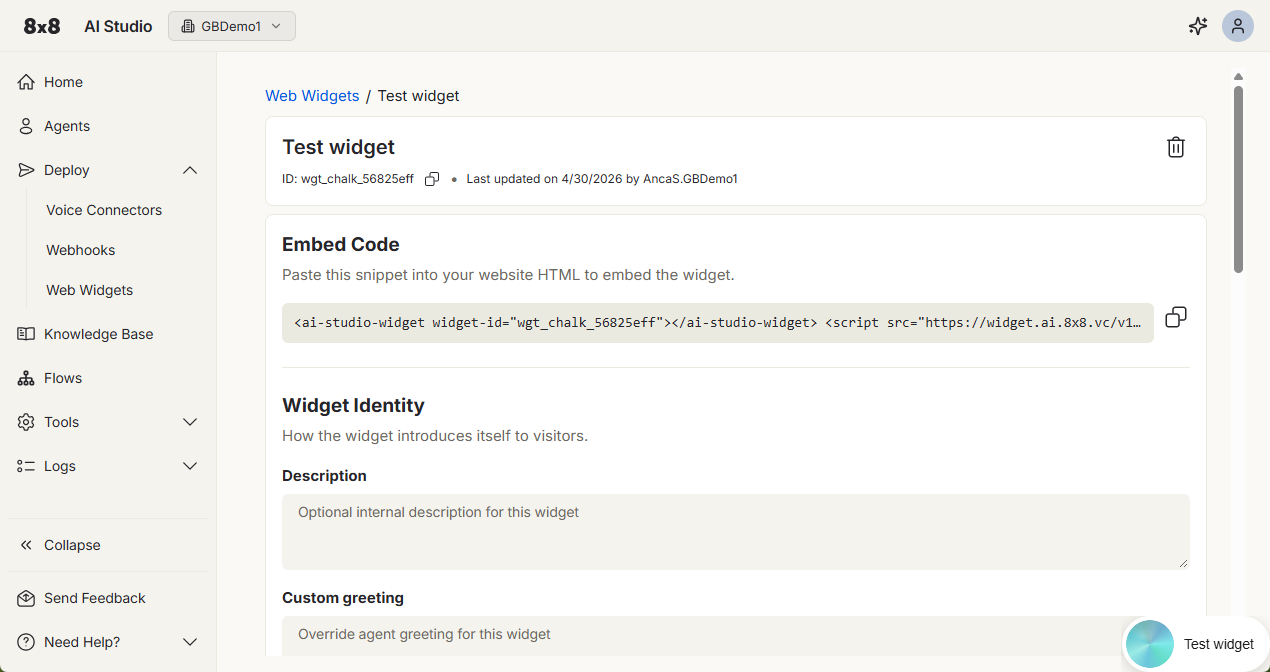
- Select a widget and click the edit icon.
- Use or configure the following fields:
- Embed Code: Copy the embedded code and paste the HTML snippet into your website code. The script loads asynchronously and renders a floating button in the bottom-right corner of the page.
- Widget Identity : Configure how the widget introduces itself to customers.
- Description: Describe the widget's purpose for internal use so your team understands what each widget is for.
- Custom greeting: Set a message to greet customers when they open the widget. This overrides the agent’s default greeting and is delivered before any interaction begins. If you do not set a custom greeting, the widget uses the agent’s configured greeting behavior.
- Avatar: Customize the appearance of your widget’s avatar.
- Agent & Interactions: Configure which AI handles conversations.
- Agent/Call Flow: Select the AI agent that handles all conversations or assign a call flow instead of an agent for IVR-style routing.
- Mode: Select the interaction type available to customers when opening the widget.
- Connection sound: Select a sound effect that plays when a voice call connects.
- Interface Controls: Click the check box next to the available options to configure which user interface elements are available in the widget.
- Click Save.
Note: If the AI agent assigned to a web widget is deleted, the widget will not work as intended. Assign a new agent to restore functionality.
How to route chats to a Contact Center queue
Note: Live agent handover through the web widget to 8x8 Contact Center is only supported for chat interactions.
When a widget is created, a Chat API channel is automatically added to the tenant.
If the AI agent determines that the customer needs human assistance, or if the customer asks to chat with a person, the widget uses the transferToQueue tool. This tool routes the interaction to the queue ID linked to the assigned agent.
After the transfer request:
- The customer is notified that they are being transferred to a human agent.
- The AI agent stops responding.
- The human agent receives an AI summary with the conversation context, so they can continue assisting the customer.
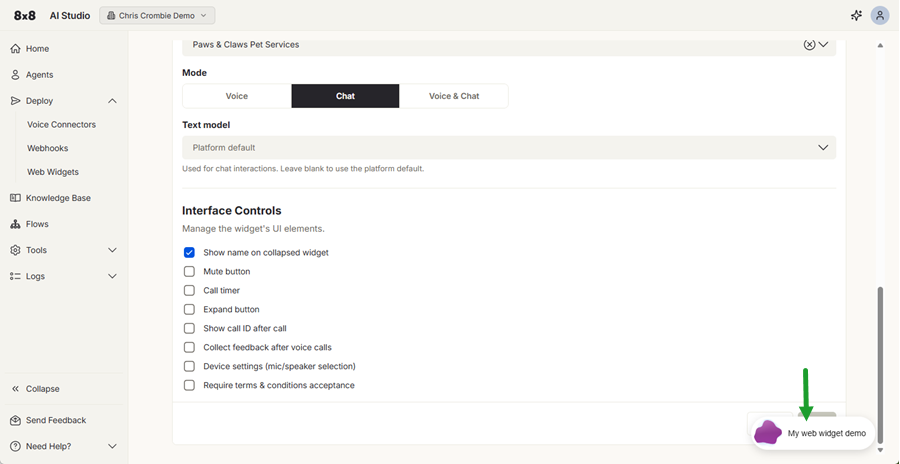
You can test the widget by selecting it from the bottom of the widget’s configuration page.