About User Profiles
User profiles are required to give users access to their 8x8 system. Create a user profile first before you assign users to an extension or grant administrative privileges in Account Manager.
Creating user profiles and setting password policies are managed in Account Manager. You need to create one user profile per individual. When creating a new user profile, the username must be globally unique. By default, a user’s email address is copied in the username field. If this email address is not unique within 8x8, or you wish to create a username of your own, you must choose a username that has never been used before. The system notifies you if a duplicate currently exists.
See Virtual Contact Center users to learn about the type of users in Virtual Contact Center. After creating a user profile, you can associate 8x8 services and general permissions to it. Typical assignments include physical and virtual extensions, as well as VCC agent or administrative privileges.
The following fields are mandatory in creating a new user profile:
- First Name
- Last Name
- Email Address
- Username
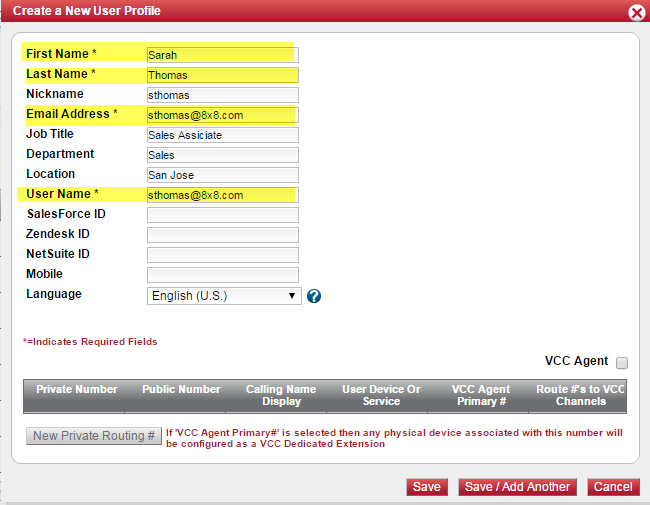
Note: When creating a new user profile, by default the user name is the email address. The system administrator has the flexibility to change the user name to something other than the email address.
You can create user profiles one at a time or in bulk. To create a single user profile, refer to Step 1: Create a User Profile. Follow the instructions below to create multiple user profiles:
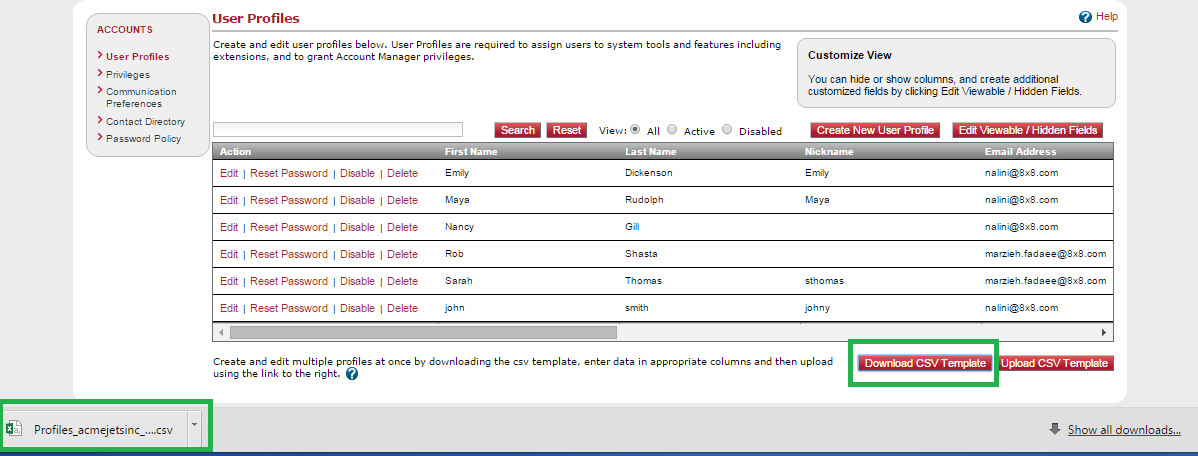
- Click Accounts in the top navigation bar.
- On User Profiles, click View.
- Click Download CSV Template to download an Excel file that stores the user profile information.
- Save the file to your computer once you make all your changes.
Note: Do not make any changes to the 8x8 Internal ID column.
- On the User Profiles page, click Upload CSV Template.
- Click Proceed.
- Click Add, and locate the file you just saved.
- Click Open, then Upload.
- Verify that the new information is correct, and click Submit.
- Click Accounts in the top navigation bar.
- On User Profiles, click View.
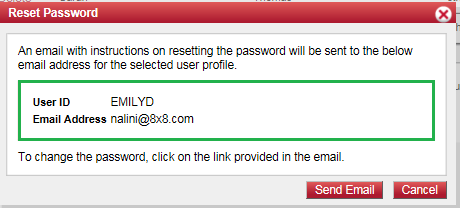
- Find the agent from the list, and click Reset Password.

- The Reset Password confirmation window opens.
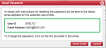
Check the user ID and email address, and click Send Email. - An email is sent to the agent's address as seen in the user profile. To change the password, the agent has to click the link provided in the email and follow the instructions.
The new password requires specific types of characters for security purposes. In the Reset Password window, hover over the question mark to see the requirements.