Handle calls in 8x8 Work for NetSuite
If your 8x8 Work extension uses only a softphone, you must log in to one of the following clients to handle calls:
- 8x8 Work for Desktop
- 8x8 Work for Mobile
Use the same credentials to log in to 8x8 Work for NetSuite. If your 8x8 Work extension is assigned with a desk phone, use the call control panel in the application to answer incoming and outgoing calls.
About screen pop
During an inbound or outbound call, 8x8 Work for NetSuite looks up the phone number of the caller and then searches for a matching record in the CRM. On finding a matching record, it presents the record for you to preview and prepare for the call. This process is referred to as screen pop.
The search may return:
- A single match: The number is associated with a single 8x8 Work for NetSuite record. The matching record is presented in a new browser tab under the Search tab.

- Multiple matches: The number is associated with multiple 8x8 Work for NetSuite records. In the event of multiple matching records, the app lists all matches in the Search tab of the integration. By default, the call log is linked to the first record in the list. Assign the call to the appropriate user, and click Search
 next to the record to view the details. There is no screen pop if there are multiple matches.
- No match: In the absence of matching records a call log (Task) is created in NetSuite. After the call ends, the Phone Call screen pops which contains the unknown user’s phone number. You can manually create a record based on the log information for an existing company, contact, or lead. Follow your company's process for how to associate it with an existing contact.


Place calls
You can place calls to your 8x8 Work and NetSuite records from the dial pad, record list, or call log in 8x8 Work for NetSuite.
Note: All outbound calls are two-legged calls. When you dial out, the call dials out to you first. Once you accept the call, the call dials out to the dialed party.
For phone numbers dialed from the dial pad, call log, or contact list, the system looks up a matching record and pops it up for your preview. For details, see the content on screen pop.
Depending on the number you call, you go through one of three calling experiences:
- Single match: The number you are calling is associated with a single NetSuite record. By default, single-match calls bring up a record via screen pop after the call connects.
- Multiple match: The number you are calling is associated with multiple NetSuite records.
- No match: The number you are calling is not associated with any of your NetSuite records.
Receive calls
When you receive an inbound call, the app notifies you of an incoming call and indicates whether the caller is associated with an existing record. When you receive a call, the system looks up a matching record and pops it up for your preview. For details, see the content on screen pop.
Depending on the caller number, you go through one of three calling experiences:
- Single match: The number you are calling is associated with a single NetSuite record. By default, single-match calls bring up record records via screen pop via screen pop.
- Multiple match: The number you are calling is associated with multiple NetSuite records. In such cases, there is no screen pop.
- No match: The number you are calling is not associated with any of your NetSuite records.
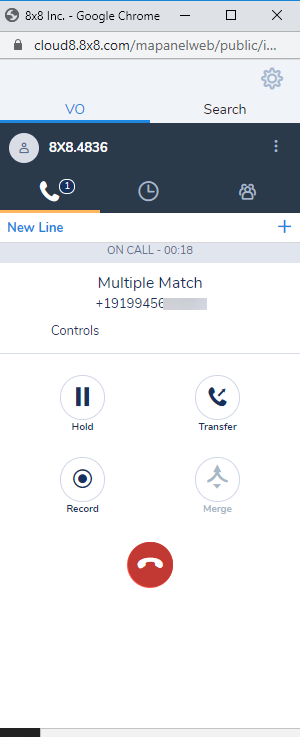
Use call controls
While on a call in 8x8 Work for NetSuite, you have access to call controls that enhance your calling experience. Using the call controls, you can:
- Hold
 : Place the caller on hold, or resume a held call.
 - Transfer
 : Transfer the caller to another user.
 -
Merge
 : If multiple lines are available on your extension, you can combine the current caller with another record to create a three-way call.
Click New line above the call control panel, and dial the number. Once the new party answers the call, you can merge your two calls into a three-way conference.
Note: The ability to make additional calls depends on how your 8x8 Work (Virtual Office) extension is set up.
-
Record
 : Start or stop call recording.
After the call ends, you can access and download the recording by opening your 8x8 Work for Desktop and opening the Call recordings tab from the navigation menu.
Note: Before recording a call, please review applicable call recording laws in your vicinity or region.
Log calls
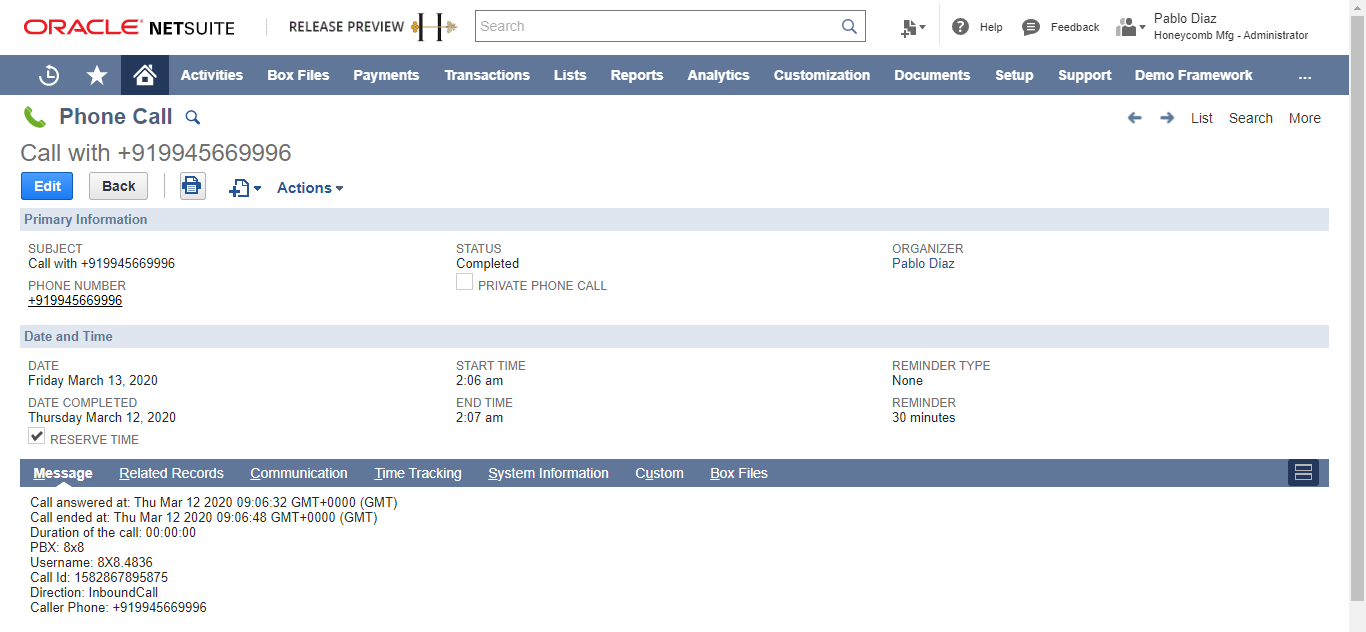
Upon terminating a call (inbound or outbound), 8x8 Work for NetSuite generates a call log known as a Phone Call. You can view the call logs in a variety of ways by clicking on the Activities option on the top-navigation bar and selecting Scheduling > Phone Calls. Each log includes information such as the call’s start time and date the call was answered, duration, tenant, agent name and call direction.
A call log also includes a link to the recorded call along with any notes you entered on the 8x8 Search tab Note field. To access the recorded call, you need the API token from your administrator. You can assign a status to the log call. From the Status field, click the drop-down menu and select Completed or Scheduled.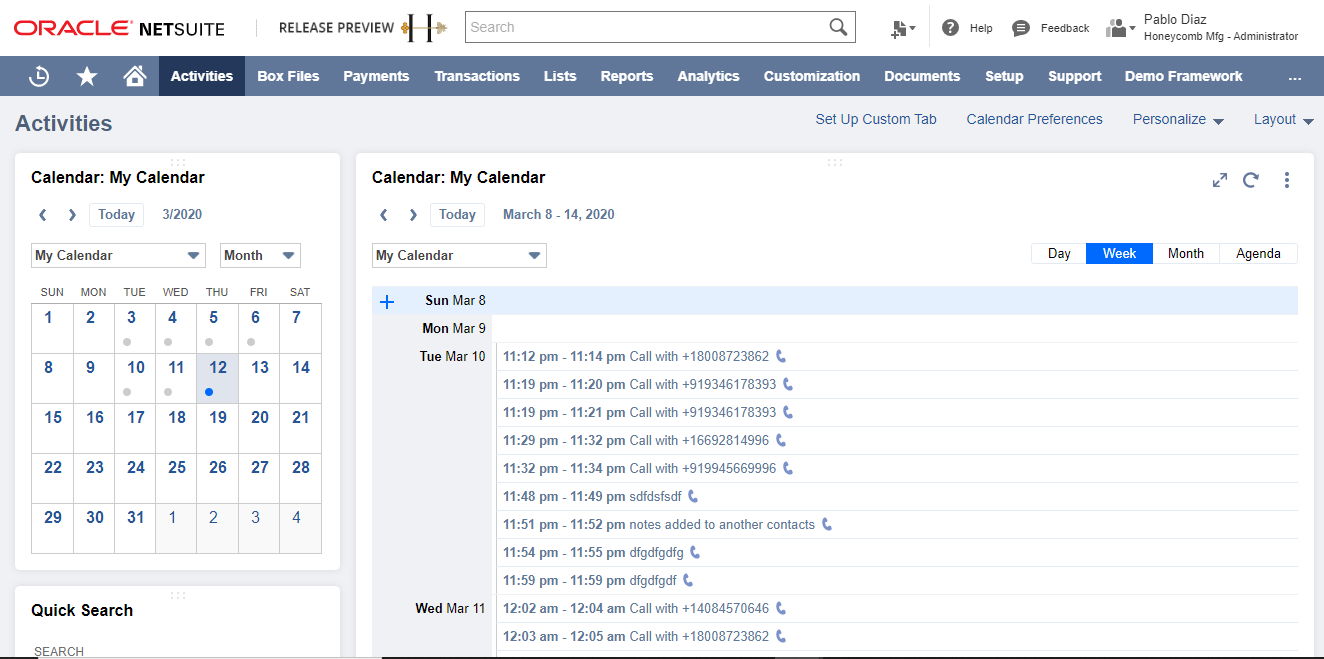
Depending on the number of matches, call log can be linked to the end-user record as follows:
- Single match: If there is a matching record, the call log is created and associated as a task to the record by default.
- Multiple matches: If there are multiple matching records, the call log is created and associated as a task to the first record in the list. You can search for another record and link the call to it.
- No match: In the absence of a matching record, the call log is not linked to any record.
Track incomplete call logs
We recommend that you complete and save your call logs immediately after a call ends; this ensures that the call log is as complete and accurate as possible. If agents are busy and unable to complete the call log activity immediately after the call, they can do so at their leisure by accessing the logs from 8x8 Work for NetSuite.
To finish and save a previously-uncompleted call log:
- Open the Call log
 tab in the integration panel to see the list of recently handled calls.
 - From the list of calls, hover over the call you want and click the Notes
 icon to open the call log for editing. The page opens in a new tab of the CRM.
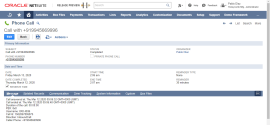
-
The call details will be displayed in the Messages tab.
-
The call log page displays the date and time of the call, call ID or number, direction of the call, duration of the call and call recordings, if any.
- Click the Edit button on the top-left corner to set the date and time for a follow-up schedule. You can also change the status of the task to Completed or Scheduled.
- Once you have logged all the calls you want, click Delete
 next to the name of the Unassigned tab of the integration to clear the list.