Get started with 8x8 Work for Microsoft Dynamics
Once you have access to 8x8 Work for Microsoft Dynamics, you can launch the application and start managing calls directly from your workspace.
Open the integration panel to explore the interface, access call controls, and begin handling customer interactions.
Single Sign-On login
Note: Single Sign-On (SSO) is available only if it is configured by your administrator.
8x8 Work for Microsoft Dynamics supports Single Sign-On (SSO). If you are already logged in to 8x8 Work for Desktop or Web, you are automatically signed in when you open 8x8 Work for Microsoft Dynamics.
To log in to 8x8 Work for Microsoft Dynamics:
- Log in to your Microsoft Dynamics account.
- If needed, open the desired app.
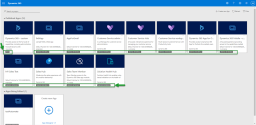
- Click an entity from the Customers section in the navigation bar, such as Accounts, Contacts, and Social Profiles.
- From the top of the home screen click the 8x8
 icon.
icon.
- The app opens in a floating window.
- If prompted, enter your credentials, then click Login.
Note: This is only required the first time you log in or after clearing your browser cache.

If SAML Single Sign-On (SSO) is enabled and you are already signed in to the 8x8 Work app, you are logged in automatically.
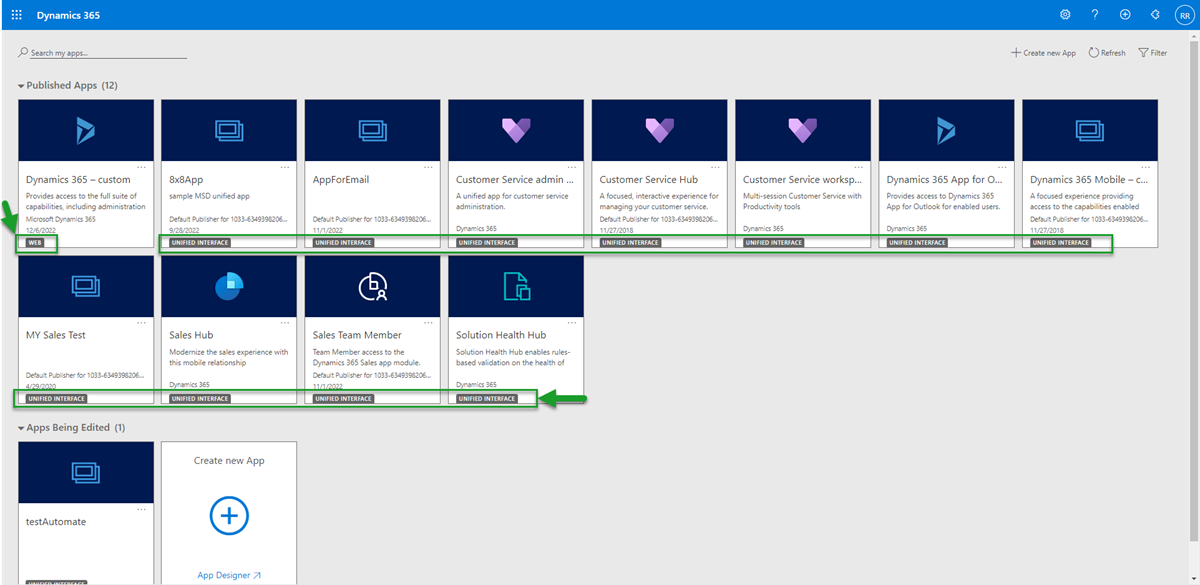
8x8 integration support for Microsoft Dynamics Unified Interface
The updated 8x8 integration for Microsoft Dynamics supports the existing functionality in the Unified Interface. To use the 8x8 app with the new Microsoft Dynamics Unified Interface, the admin must download the latest integration package for Microsoft Dynamics (version 0.3.6).
To confirm that you are using the Unified Interface:
- Look at the label listed on the apps:
- UNIFIED INTERFACE: Displays for Unified Interface applications.
- WEB: Displays for the Web Client Interface applications.
- Open an app and look for “appid=” in the URL. Only the Unified Interface displays the app ID in the URL.
Example:
https://8x8inc.crm.dynamics.com/main.aspx?appid=812e345f-67c0-ec12-345e-000d1a2cd345&pagetype=entitylist&etn=account&viewid=00000000-0000-0000-00aa-000010001001&viewType=1309
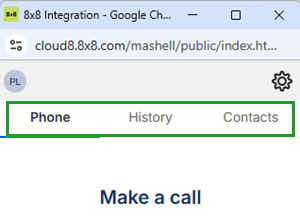
Tour the interface
The 8x8 Work for Microsoft Dynamics interface includes three main tabs at the top of the app:
- Phone: Use this tab to manage calls.
- History: View your recent incoming, outgoing, and missed calls. From this list, you can quickly return a call or remove entries you no longer need.
- Contacts: Access and search contacts and internal extensions.
- Settings: Click the settings icon to configure your app preferences.
Select a tab to switch between features and manage your communications efficiently.
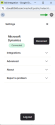
Access your integration settings
You can manage your 8x8 integration and application preferences from the integration’s Settings panel. You can view connection status, manage the screen pop settings if permissions are granted, access advanced options, and report issues.
To access your integration settings:
- Click the icon from the top of the screen.
- If required, add your credentials then click Login.
- Click the Settings
 icon from the top of the 8x8 Work for Microsoft Dynamics integration app.
 - Use the following options:
- Connect/Disconnect: To reconnect or disconnect the integration from Microsoft Dynamics. The integration automatically connects when you log in.
- Integrations: Provides access to screen pop settings that control how the integration behaves during interactions. You can edit these settings if granted permission by the administrator. See Manage your integration settings.
- Advanced: Reset the panel to clear call history and end your 8x8 session.
- About: Displays application information such as username, phone number, extension, PBX, and version details.
- Report a problem: Allows you to report issues or contact support.
- Log out: Log out of 8x8 Work for Microsoft Dynamics.

Manage your integration settings
Integration settings allow you to control how the 8x8 Work for Microsoft Dynamics behaves during interactions. Based on permissions configured by your administrator, you can enable or disable specific options that affect call handling, screen behavior, and activity logging.
To manage your integration settings:
- Click the Settings icon from the top of the 8x8 Work for Microsoft Dynamics integration app.
- Select Integrations to view the options.
You can only change interaction settings if permitted by the admin.
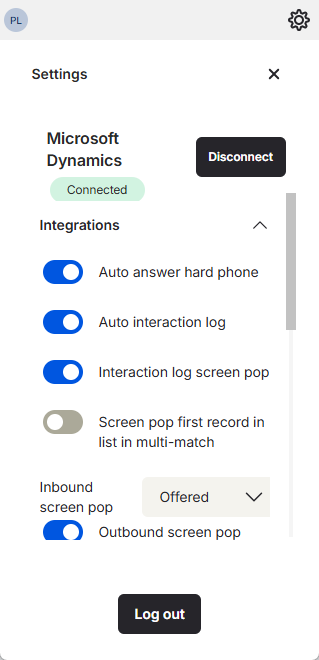
Integrations settings
| Setting | Description | Default state |
|---|---|---|
| Auto answer hard phone | Allows calls to be automatically answered if the headset supports it. | Enabled |
| Auto interaction log | Allows the integration to automatically create a call log | Enabled |
| Interaction log screen pop |
Allows the integration to automatically pop the newly created interaction log. Note: Auto interaction log must be enabled. |
Enabled |
| Screen pop first record in list in multi-match | When enabled, automatically pop the first identified record in a multiple-match scenario when an inbound interaction is offered or an outbound interaction is initiated. | Disabled |
| Inbound screen pop |
Controls when the screen pop shows for inbound interactions:
|
Offered |
| Outbound screen pop | Controls screen pop for outbound interactions. If enabled, when a user initiates an outbound interaction and a single-match record is found, then the matched record automatically displays. The matched record does not display if this option is disabled. | Enabled |
| Pop a record during an interaction |
Controls the screen pop behavior while handling multiple concurrent inbound interactions. When enabled, during a second interaction, a single-match record screen pops. When disabled, during the second call, no contact screen pop displays. Note: This feature is for inbound interactions with a single matching record only and Inbound screen pop must be enabled. |
Enabled |
| Search types |
The integration searches Microsoft Dynamics for existing selected record types.
|
Enabled for:
|