Get started with 8x8 Contact Center for SugarCRM
Once you have access to 8x8 Contact Center for SugarCRM, follow the checklist below in order to get started:
- Before you begin
- Log in to the integration
- Activate SugarCRM Integration
- Tour the interface
- Set up a phone to receive calls
- Check queue assignments
Before you begin
- Login access to SugarCRM account.
- Login access to 8x8 8x8 Contact Center agent account.
Log in to the integration
Single Sign-On is not supported for SugarCRM. For manual sign-on:
- Using Google Chrome, go to the SugarCRM login page.
- Enter your user name and password.
- Click Log in.
Within SugarCRM the 8x8 Contact Center app can be accessed and logged in to using the following steps: - Click
 at the bottom right corner of your home screen.
 - The first time you log in, a new browser tab appears. Enter your SugarCRM login credentials and select Submit.
- At the prompt, enter your user ID and password to log in to the 8x8 Agent Console application. Consult your supervisor for credentials.
Note: Multiple invalid login attempts may lock you out.
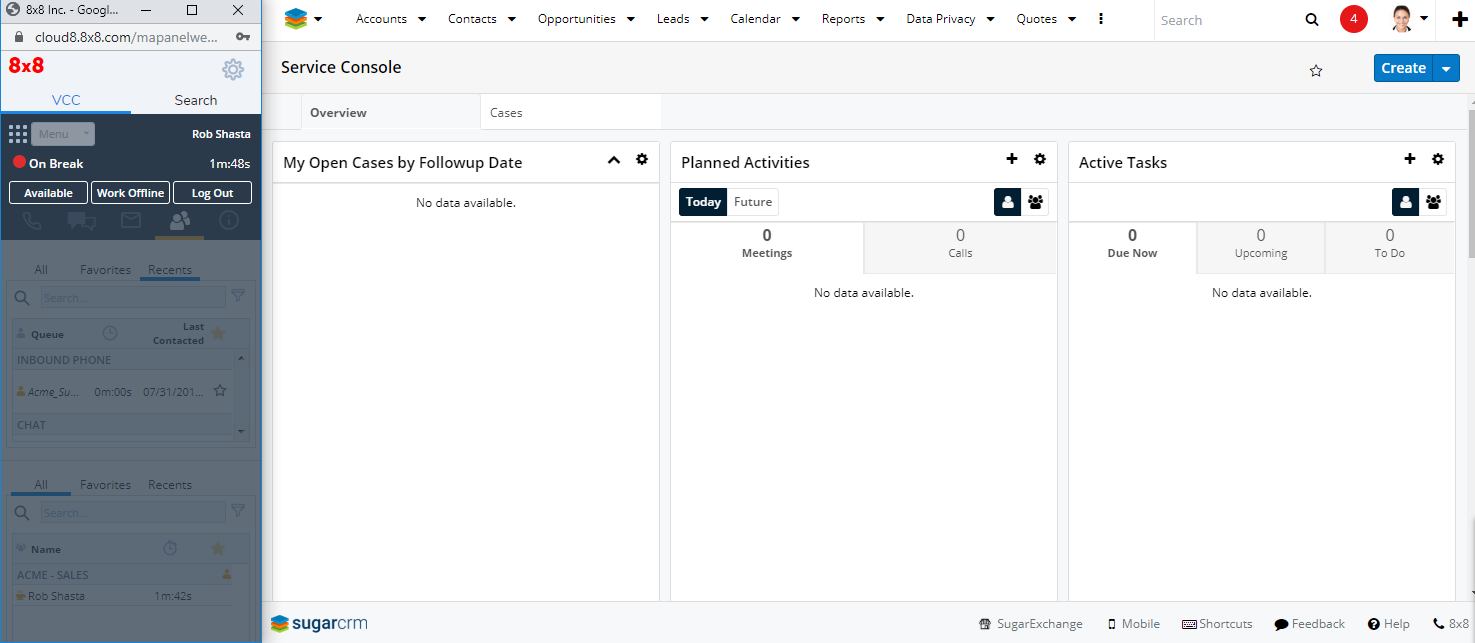
- You are now logged in to the app. The app launches in a floating window and places you on Break status.

- For more information on agent status and an overview of Agent Console, refer to the Quick Start Guide.
- Change your status to Available or Work Offline.
Activate SugarCRM integration
In order for your integration to function, ensure that the integration is connected with Zoho via your settings.
To activate the integration:
- Click the Settings
 icon in your integration panel.
 - Go to Integrations > SugarCRM > Connect.
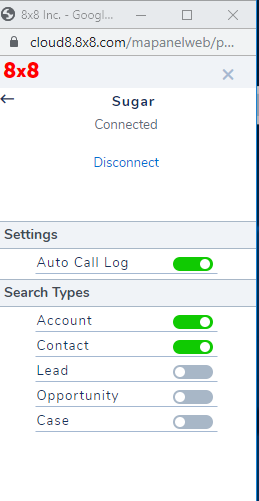
If connected successfully, a message shows Connected. - Click X to return to the main screen of the integration. Your integration is now active.
Tour the interface
You can enable automatic call log and screen pop of a call log under Settings. By default, these settings are disabled.
To view and change the settings:
- In Agent Console, click on the top right corner of the 8x8 Contact Center integration app.

- Select Integrations > Sugar. You can see the list of settings:
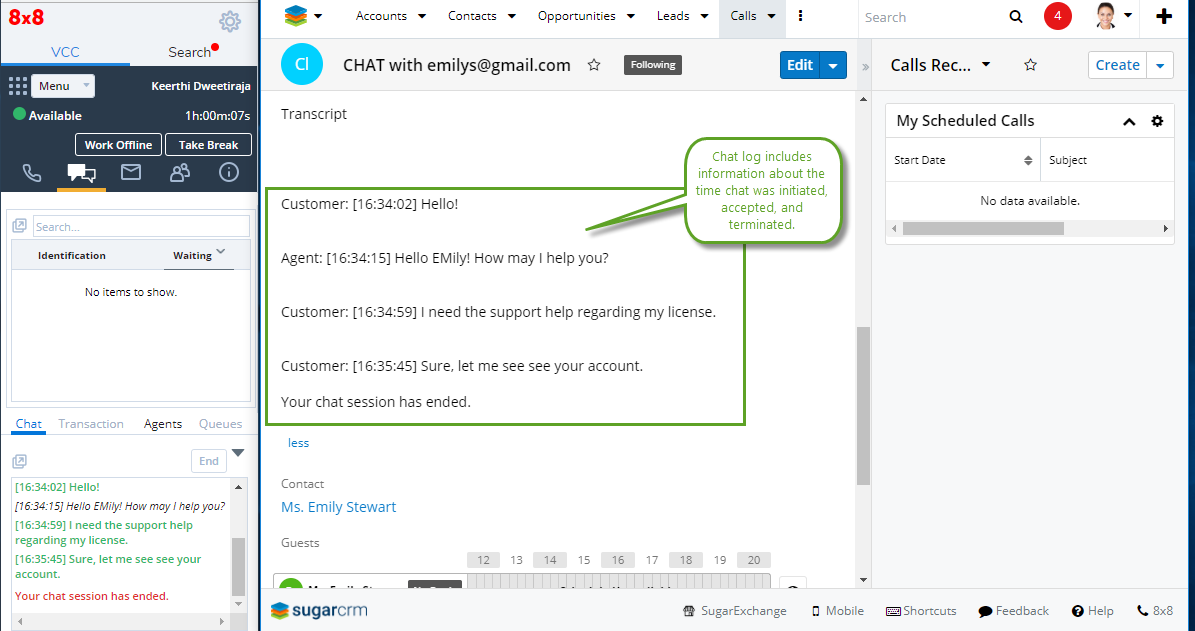
- Auto Call Log: Enable this option to automatically generate a call, chat, and voicemail log. A call log includes information about the time a call was initiated, terminated, duration, queue name, and more. A chat log includes the chat time and transcript. Just like a phone log, the voicemail log includes information about the time a call was initiated, terminated, duration, queue name, and more. This option is enabled by default.


- Account: Search the customer records by their account. This option is enabled by default.
- Contact: Search the customer records by their contact. This option is enabled by default.
- Auto Call Log: Enable this option to automatically generate a call, chat, and voicemail log. A call log includes information about the time a call was initiated, terminated, duration, queue name, and more. A chat log includes the chat time and transcript. Just like a phone log, the voicemail log includes information about the time a call was initiated, terminated, duration, queue name, and more. This option is enabled by default.


Set up a phone to receive calls
You can set up a softphone or a hard phone from the agent profile in the 8x8 Contact Center integration app to receive calls.
- From the drop-down menu, select Menu > Profile.
- In Personal settings, enter a phone number or SIP Phone URI.
- Click Make Verification Call to verify the phone number.
Make sure the phone number is in the correct format. For example, you may need to add 1 before your area code. Check with your administrator for the correct format. and click Save.

Check queue assignments
To process phone and chat interactions from the Virtual Contact Center, you must be a member of phone and chat queues.
Note: Phone queues are separately defined for inbound and outbound communication.
- From Profile, go to the Assigned Queues area.
- Click the desired tab for phone, chat, or voicemail queues.
- Make sure your queue assignment is active.