Handle calls in 8x8 Contact Center for NetSuite
To receive or place calls using 8x8 Contact Center for NetSuite, you must:
- Be a member of the call queue to which the call is routed.
- Set your status to Available.
About screen pop
During an inbound or outbound call, 8x8 Contact Center for NetSuite looks up the phone number of the caller and then searches for a matching record in the CRM. On finding a matching record, it presents the record for you to preview and prepare for the call. This process is referred to as screen pop.
The search may return:
- A single match: The number is associated with a single NetSuite record. The search yields a single matching record and pops the customer record in a new browser tab.
- Multiple matches: The number is associated with multiple NetSuite records. In the event of multiple matching records, The number of matches displays on the call panel and, after answering, in the customer’s avatar. Click the avatar
 and manually select the record to which to link the call log. By default, the call log is associated with the first record in the list. No screen pop is generated when multiple matching records are found.
- No match: In the absence of matching records a call log is created in NetSuite after the call ends. The Phone Call screen pops which contains the unknown user’s phone number. You can manually create a record based on the log information for an existing company, contact, or lead. Follow your company's process for how to associate it with an existing contact.


Receive calls
If 8x8 Contact Center for NetSuite is open and you are in the Available state,when an interaction is offered, a call panel displays. If the caller is an existing customer, the end-user record opens in a browser tab as soon as the call is offered, allowing you to preview the customer details and prepare to greet accordingly. For details, see our content on screen pop.
To handle an incoming call:
- When a call is offered, your phone rings, and a call panel displays.
- Answer the call.
- The system searches the NetSuite CRM for a matching customer record. Depending on the situation, the search may return:
- No matching records: The search yields no results and at the end of the call the CRM screen pops a Phone Call log in a new browser tab.
- A single matching record: The search yields a single matching record and pops the customer record in a new browser tab.
- Multiple matching records: The search yields multiple search results but the CRM does not generate a screen pop by default. The number of matches displays on the call panel and, after answering, in the customer’s avatar. Click the avatar and manually select the record to which to link the call log. By default, the interaction log is associated with the first record in the list.
- To add your notes for the interaction, select Notes under the call controls.
- Click Hang up
 to end the call. The post-processing time initiates.
 - If required, select a disposition code.
- Click Wrap up. The wrap-up notes you entered appear in the call log.
Note: Wrap-up fields can only be populated from the 8x8 integration during an active interaction.
- At the termination of the call, a Phone Call log is automatically generated and pops in a new browser tab. The call log typically includes information on the transaction ID, call initiation time, call termination time, call duration, and more. If the call is recorded, and Add CC Call Recording to Auto Call log is enabled in My Profile > Integrations > Advanced, the recording is accessible via a URL in the call log.
Note: Your administrator sets the post-processing timer. If the post-processing countdown interval reaches zero, the 8x8 Contact Center app automatically sets your status to Available.
Place calls
You can place outbound calls in 8x8 Contact Center for NetSuite to call:
- Customers
- Agents
The 8x8 Contact Center app uses a two-step process to dial an outbound call.
To place a call:
To make an outbound call from the 8x8 Contact Center app:
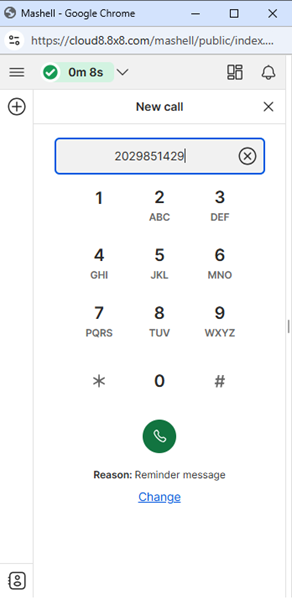
- Enter a customer phone number directly in the Make a call field.
-OR-
Click Add interaction > Call, and enter the desired phone number in the dial pad.
 - Click
 .
.
- If set up by your administrator, select the reason for the call.
- Click Confirm and dial.
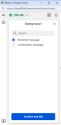


Note: You are only prompted to select the dialing reason once. The Contact Center app remembers your selection. To change the dialing reason, after adding the phone number, click Change and select a different dialing reason.
- Your agent telephone rings first. Answer the call. The call is then directed to the destination. Your external phone number rings next.
- If the phone number is linked to a contact, the contact record pops in a new browser tab after the call connects.
Contact your supervisor for your contact center's policies to place outbound calls.
Transfer calls
Warm and cold call transfers between agents is now supported. This new integrated functionality aims to increase efficiency in communication and improve customer experience.
Let’s say as an agent, you receive a call from a customer with questions that are best suited for a more experienced agent. You can now transfer the call to the agent that can provide a solution to the customer. While on a call, click the transfer ![]() icon, and select:
icon, and select:
- Warm Transfer: Implies notifying the agent you wish to transfer the call to before transferring the call. The customer is placed on hold while you are connected with the other agent. After briefing the agent, you can complete the transfer.
- Cold Transfer (blind transfer): The call is transferred without notifying the other agent. The agent receiving the call transfer will not see which agent transferred the call. If the second agent does not answer the phone, and the agent does not have 8x8 Contact Center voicemail set up, the call is dropped after the timeout period. For information about your contact center's timeout interval, contact your contact center administrator
Notes:
- A warm/cold transfer can only be performed if the agent you are transferring the call to has the status set to Available.
- The agent receiving the warm/cold transfer via an agent/queue/direct agent routing is presented with a screen pop with the customer information if a record of the customer already exists in the CRM. If the search does not yield a matching record, the system pops a new record entry screen.
- The call context such as the reason for the call, the reason for the call transfer, the agent's notes, etc., is not transferred.
Use call controls
While on a call in 8x8 Contact Center for NetSuite, you have access to call controls that enhance your calling experience. Using the call controls, you can:
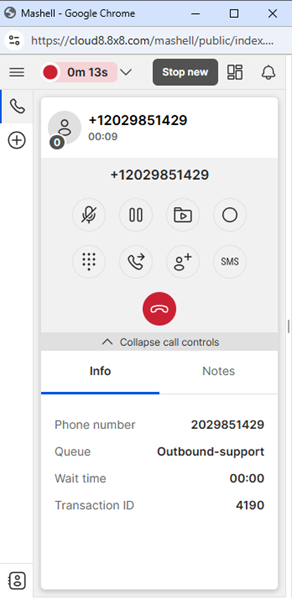
- Mute: Mute yourself during an active call.
- Hold: Place an active call on hold.
- Recordings: Access saved recordings.
-
Record call/Stop recording : Start or stop recording an active call (availability is subject to privileges). After the call is recorded, the recording is accessible via a URL in the call log. To access the recording, you need an API token from your tenant administrator.
Note: Before recording a call, please review applicable call recording laws in your vicinity or region.
- Dialpad: Enter a phone number.
- Transfer: Transfer calls to a contact or queue.
- Add participant: Add another agent to the call. The customer is placed on hold until the other agent is added to the conference call.
- SMS > New video Invite: Send a video invite. This option is only available for customers with SMS enabled on their account.
- Hang up: End an active call.
Log calls
Upon terminating a call (inbound or outbound), the CRM generates a call log known as a Phone Call log. You can view the call logs in a variety of ways by clicking on the Activities option on the top-navigation bar and selecting Scheduling > Phone Calls. Each log includes information such as the call’s start time and date the call was answered, duration, tenant, agent name, and call direction.
A call log also includes a link to the recorded call along with any notes you entered in the Notes tab. To access the recorded call, you need the VCC token from your administrator. You can change the status of the log call to Completed or Scheduled in the Status field.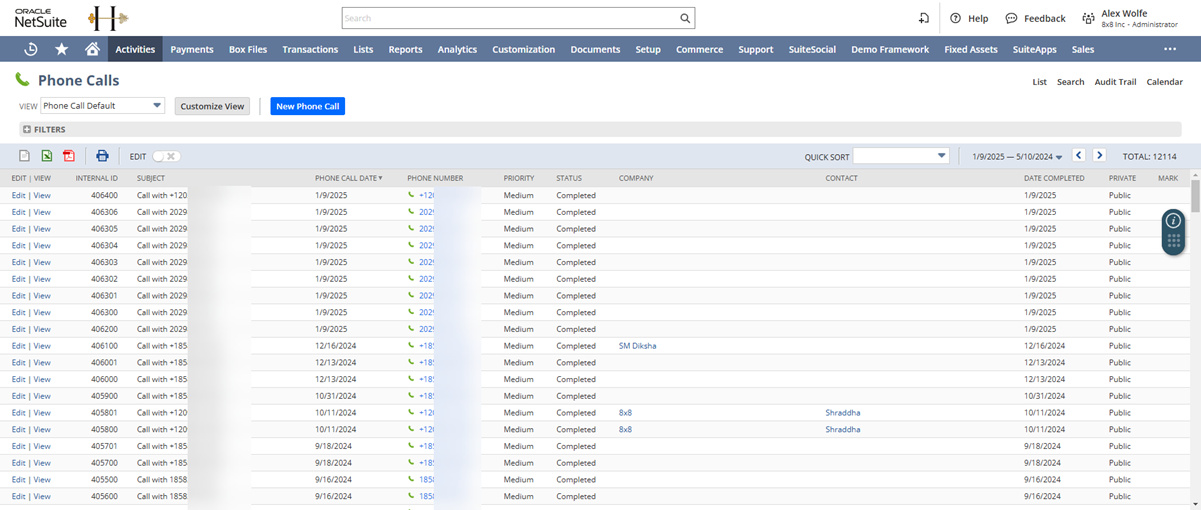
Depending on the number of matches, call log can be linked to the end-user record as follows:
- Single match: If there is a matching record, a log is created and associated as a task to the record.
- Multiple matches: In the case of multiple matching people records, there is no screen pop. A call log is created and associated as a task to the first record in the list. You can search for another record and link the call to it.
- No match: In the absence of a matching record, the CRM screen pops a Phone Call log in a new browser tab at the end of the call.