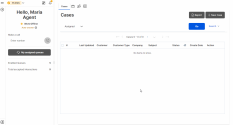
8x8 Contact Center allows you to play pre-recorded messages during an inbound or outbound call. These messages can be predetermined responses to frequently asked questions, personal greetings, or campaign messages. By playing these messages, you can deliver a faster and consistent response, thereby enhancing customer satisfaction. When you place an outbound call and reach voicemail, you can choose to play your pre-recorded message, such as a campaign message before wrapping up. The application plays the message and terminates the call, allowing the message to continue playing while you move on to the next call. During an inbound call, you may choose to play a welcome message or greetings if you have direct agent access.
- Log in to your 8x8 Agent Workspace
 The brand new interface for 8x8 Contact Center agents to receive and process customer interactions. account.
 - Click
 Show menu > My recordings from the top left corner of the Control Panel to bring up options.
-Or-
Click Change status > My profile, then click the My recordings tab.
 - Select + New recording from the top right of the Display Panel. .

- In the Name field, add a relevant name for the recording. This name will be displayed in the list of recordings.
- In the Description field, add a relevant description for the recording. The description will be displayed in the list of recordings.
- Toggle the switch to enable or disable the playback of the recording during a phone call.
- Click Next: Record a message.
- In the new dialog that displays, click
 to call your phone.
 - Answer the call and listen to the instructions.
- Press the record button
 to record your message.
 - When your are done recording, press the # key or click the record button
 to stop recording.
 - Your recording starts playing. If you wish to rerecord your message, click the record button again or press 1 on the dialpad.
- Click Save to save your message.
Your recording is now available in My recordings.
Note: You can have a maximum of ten recordings in your list. When the limit is reached, the + New recording option is grayed out and cannot be selected. To record a new message when the limit is reached, review your recordings and delete the ones that are no longer used.
- Click
 Show menu > My recordings from the top left corner of the Control Panel to bring up options.
-Or-
Click Change status > My profile, then click the My recordings tab.
 - Click the Edit
 icon next to the recording.
 - From the Edit recording dialog, you can:
- Change the name of the recording.
- Change the description of the recording.
- Enable or disable the toggle switch for the playback of the recording during a call.
- Play the recording.
- Record a new message to replace the old recording.
- Click Save changes.
- While on a call, click the Recordings
 icon from the call panel.
- From the list of available recordings displayed, select the message to be played.
- Click Play to play your message and remain on the call after the recording ends. Hang up when you are done.
-Or-
Click Play & hang up to play the recording for the customer while the call is automatically ended, allowing you to focus on the next call. The customer will hear the message playing even after the call drops.


