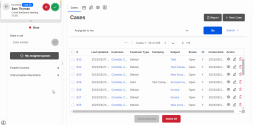
Use Facebook and Twitter messaging to service customers directly and increase customer satisfaction with 8x8 Contact Center Social Integration. By unifying the agent experience, 8x8 Social allows users to channel their messages from social media into 8x8 Contact Center. Customers can contact the businesses and receive support from within their social platform.
Agents handle social requests similar to handling the regular chat requests. They are offered chats when they are in Available status. They will then follow the steps below:
- Accept a chat interaction received via a social channel.
- View the screen pop for existing users in the Local CRM (The screen pop may trigger when the chat is offered).
- For new customers, the system creates a new customer record automatically.
- Interact with the customer, save the transcript to the CRM and end the chat. The chat transcript is saved as a closed case in the Local CRM.
- Access the chat transcript in the Local CRM.
Before you start
To receive chat interactions, agents must:
- Be assigned to an enabled chat queue
- Be in Available state
Accepting a chat
-
Click the status
 menu option and change your status to Available.
The chat notification in the Control Panel indicates an incoming chat request.
- Preview the record details and click
 to accept chat.
Note: The reject interaction button
 is disabled if your contact center administrator has not granted the permission. This prevents agents from rejecting the interactions they are offered.
Note: If you reject the chat, or fail to accept it before the acceptance interval lapses, your status is changed to On Break.
- If the incoming chat is from an existing customer, the customer or case record pops for preview. The screen pop behavior may vary based on the settings.
Note: If the screen pop fails to open, clean up your browser cache and cookies and log back in.
- If the request is from a new customer, a new customer record entry form pops up. Enter the details of the new customer, and save the customer record.
- Answer the customer in the chat window and click
 to send your message. Your chat entry is posted on the customer's chat window. You can also insert information from FAQs. For details, refer to Insert FAQ responses into chat interactions.
 - After finishing the chat, click
 . The timer indicates the time for wrap-up.
 - You may be required to select an outcome for Disposition. Select one for this interaction from the list and click Continue.
- Click Wrap up.
- At the termination of the chat, a chat log may pop up. The chat log opens in view mode or edit mode based on the settings. Auto log occurs only if the administrator has configured it.
Notes:
- A chat log opens in view mode if the chat request is from an existing customer. The log case is associated with that customer record automatically.
- A chat log opens in edit mode if the chat request is from a new customer. While saving the log, you are prompted to select a customer from the existing list. - Edit the chat log case as desired, and save it or save it as a draft. Select the newly-created customer from the list.
The chat log containing the chat transcript is saved as a case.
