Note: If enabled by your 8x8 Contact Center administrator, as an agent, you can create or download custom reports to extract the desired customer data. You can always run a report even if the ability to download the report is disabled.
A CRM case report provides both customer and case information. The customer-related fields can be used to filter report data, and appear in the Case, Follow-Up, and Attached fields.
Note: The Description field displays only the first 256 characters on reports.
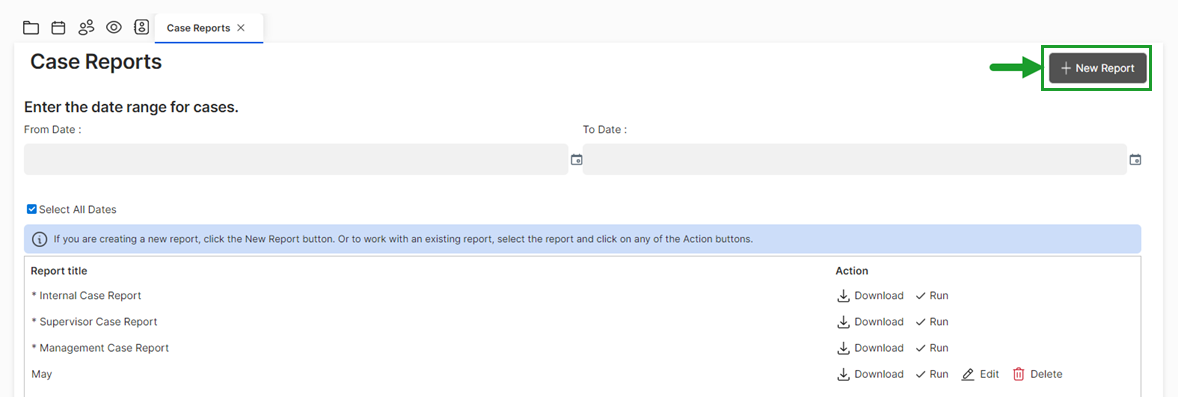
8x8 Contact Center provides three preset reports by default. You cannot edit these reports, but you can create a new report.
- Internal Case Report
- Supervisor
 An agent with the supplementary privileges required to create FAQ categories and answers, monitor agent interactions in progress, listen to recordings of previous interactions, and create reports for the agents groups they supervise. Case Report
 - Management Case Report
- Go to the Cases tab.
- In the header area, click Report.
8x8 Agent WorkspaceThe brand new interface for 8x8 Contact Center agents to receive and process customer interactions. displays the Case Reports page.
The Case Reports list contains three default case reports:- Internal Case Report
- Supervisor Case Report
- Management Case Report
- To run one of the default reports, select a date range and click Run next to the desired default report. If you want to create your own report, follow the steps below.
- In the Case Reports page, click New Report.
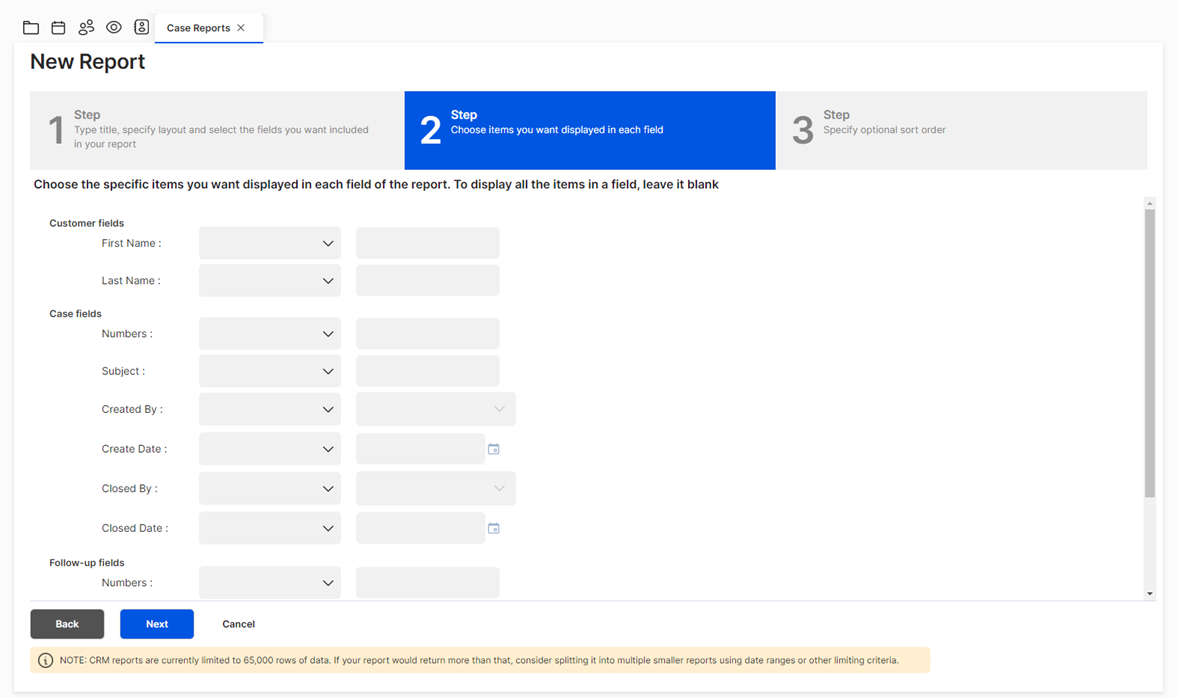
8x8 AgentAgents use the Agent Console to view and manage customer interactions. Virtual Contact Center supports Regular agents and Supervisor agents. Workspace walks you through the three-step New Report wizard.
If your contact center administrator has added custom fields to your Local CRM, the custom fields appear in the list of fields. - In Step 1 of the New Report wizard:
- In the Report Title text entry area, type the name of the report.
- From the Time Zone drop-down list, select a time zone. By default, the tenant's time zone is selected.
- Select a vertical or horizontal layout.
- In the Fields to include area, select the fields to be included in the report.
- Click Next.
8x8 Agent Workspace displays the next step in the wizard.
- In Step 2 of the New Report wizard, for each customer and case field you chose in Step 1, create optional filtering statements.

- For each report field, choose a logical operator, then in the adjoining text entry area type (or if applicable, select) a filter.
- Click Next.
8x8 Agent Workspace displays the next step in the wizard.
- In Step 3 of the New Report wizard, perform the following:
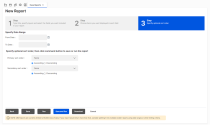
- Specify the date range for the report.
- Choose the primary and secondary report fields 8x8 Agent Workspace uses to order the data contained in the case report, then choose the sort order of the two fields.
- Produce and save the report. Perform one of the following:
- To save the report configuration without running the report, click Save.
- To run the report without saving the report configuration, click Run.
- To save the report configuration and run the report, click Save and Run.
- If the agent's computer has Microsoft Excel installed, to produce the report in the computer's Microsoft Excel program without saving the report configuration, click Download.
After 8x8 Agent Workspace produces the report in Excel, click Save in the New Report wizard to save the report configuration.