Multilingual Transcription Policies and Custom Dictionary
Through the Transcription Policy page, administrators can manage established policies regarding which calls are transcribed and in which language those transcriptions occur and also enhance the accuracy of interaction transcriptions using the custom dictionary feature.
Access the Transcription Policy page
To access Transcription policy page:
- Go to https://login.8x8.com.
-
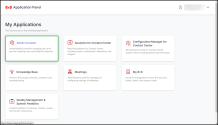
In the 8x8 Application Panel, select Admin Console.
-
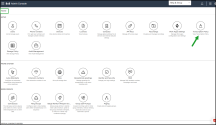
Go to Home > Transcription Policy.
-
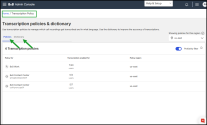
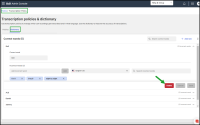
On the Transcription policy & dictionary page, you can manage which call recordings are transcribed and in which language:
-
Open the Policies tab to manage which calls are transcribed and the languages into which those calls are transcribed.
-
Open the Dictionary tab to improve the accuracy of transcriptions.
-
Multilingual transcription policies
Note: Multilingual transcription is available t8x8 Contact Center and 8x8 Work users.
Through the multilingual transcription policies, 8x8 Admin Console administrators can set which calls are transcribed, and the languages into which those calls are transcribed.
For example, you can perform speech analytics on non-English phrases. If you have a Contact Center with queues in English and Spanish, you can now transcribe the calls in the Spanish queue, ensuring that your transcriptions accurately reflect the language spoken during the call.
This is a significant advantage, as your non-English calls are transcribed correctly.
The administrator can set a policy at the agent or queue level and assign or unassign the language individually or in bulk.
- Dutch (NL)
- English (AU)
- English (CA)
- English (GB)
- English (US)
- French (CA)
- French (FR),
- Spanish (US)
- German (DE)
- Italian (IT)
- Portuguese (BR)
- Portuguese (PT)
- Spanish (US)
Assign a transcription policy to an 8x8 Contact Center queue or user
You can assign a transcription policy to a queue or a user and enable transcriptions for call recordings within the selected contact center. Any changes made here will take effect in the next available recording.
To assign a transcription policy to a queue or user of an 8x8 Contact Center:
- On the Transcription policies & dictionary page, open the Policies tab.
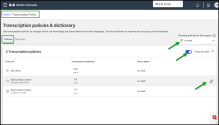
- In the upper-right corner of the Policies tab, select a region to see the associated policies.
- Optional: Enable the Profanity filter to identify offensive language in the transcriptions and conceal it; special characters will replace any inappropriate words. Currently, the profanity filter is only available for all English dialects.
-
Select the preferred contact center policy from the policy list and click Edit
 on the left side of the row.
 -
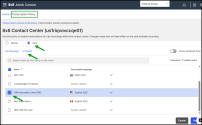
On the selected policy page, under Assign by, select Queue or User to assign the language for transcription.
Note: Transcriptions can only be assigned by queue or by user. If you switch to users, your current transcription settings will be lost.
-
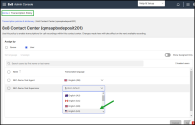
In the preferred user/ queue row, click the down arrow
 under the Transcription language column and select a language.
 -
Click Save.
Assign a transcription policy to multiple 8x8 Contact Center queues or users
You can assign a transcription policy to multiple queues or users and enable transcriptions for call recordings within the selected contact center. Any changes made here will take effect in the next available recording.
To assign a transcription policy to multiple queues or users of an 8x8 Contact Center:
- On the Transcription policies & dictionary page, open the Policies tab.
- In the upper-right corner of the Policies tab, select a region to see the associated policies.
- Optional: Enable the Profanity filter to identify offensive language in the transcriptions and conceal it; special characters will replace any inappropriate words. Currently, the profanity filter is only available for all English dialects.
- Select the preferred contact center policy from the policy list and click Edit
 on the left side of the row.
 -
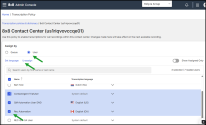
On the selected policy page, under Assign by, select Queue or User to assign the language for transcription.
Note: Transcriptions can only be assigned by queue or by user. If you switch to users, your current transcription settings will be lost.
-
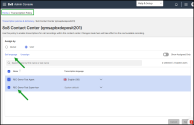
Select two or more users /queues and click Set Language.
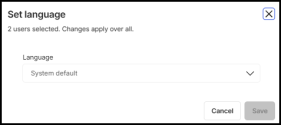
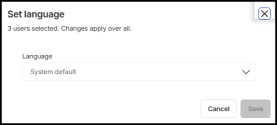
- In the Set language window, click the down arrow
 under the Language and select the language you want to associate with these users/queues.
 - Click Save.
Assign a transcription policy to an 8x8 Work user
You can assign a transcription policy to a user and enable transcriptions for call recordings within the 8x8 Work applications. Any changes made here will take effect in the next available recording.
To assign a transcription policy for 8x8 Work users:
- On the Transcription policies & dictionary page, open the Policies tab.
- In the upper-right corner of the Policies tab, select a region to see the associated policies.
- Optional: Disable the Profanity filter to identify offensive language in the transcriptions and conceal it; special characters will replace any inappropriate words. Currently, the profanity filter is only available for all English dialects.
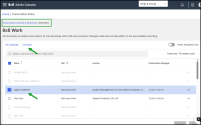
- Select a preferred 8x8 Work policy from the policy list and click Edit
 on the left side of the row.
 - Optional: Enable the Show assigned only toggle to display only those users assigned a language.
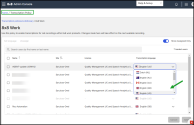
- In the preferred user row, click the down arrow
 under the Transcription language column and select a language.
 - Click Save.
Assign a transcription policy to multiple 8x8 Work users
You can assign a transcription policy to multiple users and enable transcriptions for call recordings within the 8x8 Work applications. Any changes made here will take effect in the next available recording.
To assign a transcription policy to multiple 8x8 Work users :
- On the Transcription policies & dictionary page, open the Policies tab.
- In the upper-right corner of the Policies tab, select a region to see the associated policies.
- Optional: Disable the Profanity filter to identify offensive language in the transcriptions and conceal it; special characters will replace any inappropriate words. Currently, the profanity filter is only available for all English dialects.
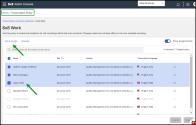
- Select a preferred 8x8 Work policy from the policy list and click Edit
 on the left side of the row.
 - Optional: Enable the Show assigned only toggle to display only those users assigned a language.
-
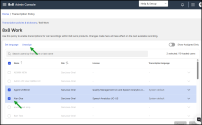
Select multiple users and click Set Language.
- In the Set language window, click the down arrow
 under the Language and select the language you want to associate with these users.
 - Click Save.
Unassign a transcription policy from a queue or user of an 8x8 Contact Center
Unassign a transcription policy from a queue or user and disable transcriptions for call recordings within the selected contact center. The changes will be applied to the next recording.
To unassign a transcription policy for an 8x8 Contact Center queue or a user:
- On the Transcription policies & dictionary page, open the Policies tab.
- In the upper-right corner of the Policies tab, select a region to see the associated policies.
- Select the preferred contact center policy from the policy list and click Edit
 on the left side of the row.
 - On the selected policy page, under Assign by, select either Queue or User to unassign the transcription language.
- Optional: Enable the Show assigned only toggle to display only those users assigned a language.
- Select the user or queue from whom you want to unassign the transcription language.
- Click Unassign A prompt will appear asking you to confirm.
- Click Unassign and Save.
Unassign a transcription policy from multiple queues or users of an 8x8 Contact Center
Unassign a transcription policy from multiple queues or users simultaneously and disable transcriptions for call recordings within the selected contact center. The changes will apply to the next recording.
To unassign a transcription policy from multiple 8x8 Contact Centerqueues or users:
- From the Transcription policies page and under Assign language by, select Queue or User.
- In the upper-right corner of the Policies tab, select a region to see the associated policies.
-
Select the preferred contact center policies from the policy list and click Edit
 on the left side of the row.
 - On the selected policy page, under Assign by, select either Queue or User to unassign the transcription language.
- Optional: Enable the Show assigned only toggle to display only those users assigned a language.
- Select the users or queues from whom you want to unassign the transcription language.
- Click Unassign.A prompt will appear asking you to confirm.
- Click Unassign and Save.
Unassign a transcription policy from an 8x8 Work user
You can unassign a transcription policy from an 8x8 Work user and disable transcriptions for call recordings for that user. Any changes made here will take effect in the next available recording.
- On the Transcription policies & dictionary page, open the Policies tab.
- In the upper-right corner of the Policies tab, select a region to see the associated policies.
- Select the 8x8 Work policy from the policy list and click Edit
 on the left side of the row.
 - Optional: Enable the Show assigned only toggle to display only those users assigned a language.
-
Select the user from whom you want to unassign the transcription language.
- Click Unassign A prompt will appear asking you to confirm.
- Click Unassign and Save.
Unassign a transcription policy from multiple 8x8 Work users
You can unassign a transcription policy from multiple 8x8 Work users and disable transcriptions for call recordings for those users. Any changes made here will take effect in the next available recording.
To unassign a transcription policy to multiple 8x8 Work users:
- On the Transcription policies & dictionary page, open the Policies tab.
- In the upper-right corner of the Policies tab, select a region to see the associated policies.
- Select a preferred 8x8 Work policy from the policy list and click Edit
 on the left side of the row.
 - Optional: Enable the Show assigned only toggle to display only those users assigned a language.
- Select the user from whom you want to unassign the transcription language.
- Click Unassign A prompt will appear asking you to confirm.
- Click Unassign and Save.
Manage the custom dictionary
The Custom Dictionary feature, recently introduced in 8x8 Admin Console, enables customer administrators to enhance the accuracy of interaction transcriptions through the custom dictionary feature. Admins can create a list of specific terms, names, jargon, or industry language that our standard transcription service may not accurately recognize. This feature improves transcription accuracy.
The specified words or phrases are incorporated into our transcription system, helping it correctly identify and transcribe these terms in audio files.
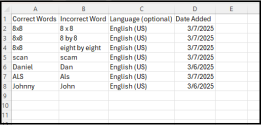
For example, if your transcript contains '8x8' written as 'eight by eight', you may want to include the correct term ('8x8') and various incorrect variations (such as 'eight by eight', '8 by 8', or '8 x 8') in the custom dictionary. Consequently, the appropriate term will be used in the following transcription.
Add a word to the custom dictionary
- On the Transcription policy page, open the Dictionary tab to improve the accuracy of transcriptions.
-
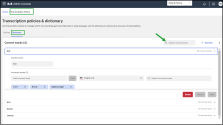
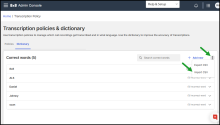
On the Dictionary page, click + Add New in the upper-right corner.
- Enter the word you want to include in your dictionary in the Correct word box.
- Optional: Add the incorrect version in the Incorrect words box and click Add. Repeat to add another incorrect word.
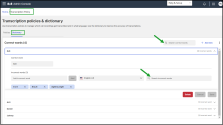
- Click the down arrow
 under the Transcription language column and select the language to which the dictionary is applied.
 - Click Save.
Edit a word in the Custom Dictionary
- On the Transcription policies & dictionary page, open the Dictionary tab.
- On the Dictionary page, look for the term you wish to modify.
- Make the required adjustments, such as adding or deleting an incorrect version or changing the transcription language.
- Save your changes.
Note: You can use the appropriate Search ![]() bar to locate the desired correct or incorrect word quickly.
bar to locate the desired correct or incorrect word quickly.
Delete a word in the Custom Dictionary
- On the Transcription policies & dictionary page, open the Dictionary tab.
- On the Dictionary page, look for the term you wish to remove.
- Click Delete to remove the term from the dictionary.
Export a custom dictionary in a CSV file
Admins can export an existing dictionary in a CSV file.
To export a custom disctionary:
- On the Transcription policy page, open the Dictionary tab.
-
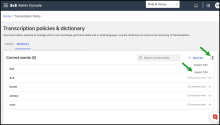
On the Dictionary page, in the upper-right corner of the correct words section, click More
 > Export CSV.
 - Save the CSV file on your computer for future use.
Import a custom dictionary from a CSV file
- On the Transcription policy page, open the Dictionary tab.
-
On the Dictionary page, in the upper-right corner of the correct words section, click More
 > Import CSV.
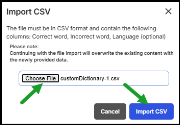
 - In the Import CSV window, click Choose File select the CSV file you wish to import.
-
Click Import CSV. The existing content of the dictionary will be overwritten with the newly provided data.
Note: The file must be in CSV format and must include the following columns: Correct word, Incorrect word, and Language (optional).
