Manage recordings
As an admin, you can configure call recording settings per user and can access interaction recordings from the Recordings app.

Recorded interactions are displayed at a glance, including interactions deleted by a user at their end. Use the advanced filtering capability to refine your search and quickly locate specific interactions based on the date and time of an interaction, the source of an interaction, the agent’s name, the duration of an interaction, and other related information. This ensures admins and supervisors can efficiently track performance and retrieve critical information from recordings at any time.
Access recorded interactions
To access recorded interactions:
- Go to https://sso.8x8.com/v2/login.
- Enter your user credentials and click Login.
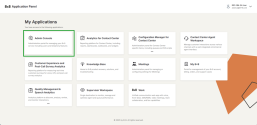
- In the 8x8 Application Panel, select the Admin Console tile.
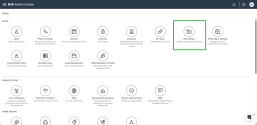
- The Home page displays. Select the Recordings tile.
- The Recordings page displays. You can access all recordings from this page.
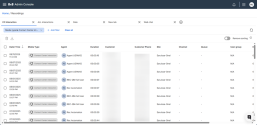

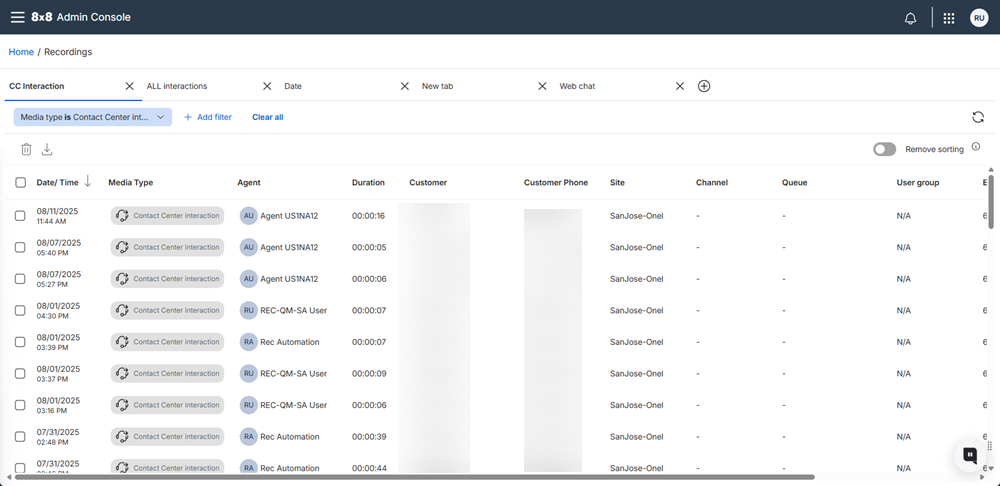
The recordings page displays the following data for the recorded interactions:
- Date/Time: It indicates the date and time an interaction was handled. Click the column header to sort by the most recent or oldest interaction.
- Media Type: It indicates the type of interaction, such as Meeting, Work interaction, Contact Center interaction, Web chat, Email, as well as whether the interaction was inbound or outbound.
- Agent: It indicates the name of the agent who handled the interaction.
- Duration: It indicates the duration of an interaction.
- Customer Phone: It indicates the customer’s phone number.
- Site: It indicates the site the interaction was handled in.
- Channel: It indicates the channel for a contact center interaction.
- Queue: It indicates the queue the contact center interaction came through.
- User group: It indicates the user group the agent was assigned to.
- Extension: It indicates the agent extension.
- Transaction ID: It indicates the contact center transaction ID associated with the interaction.
- Size: It indicates the size in kilobytes (KB) for the recorded interaction.
Manage recordings in multiple tabs
You can easily review different recordings by keeping them open in separate tabs. This feature lets you switch between datasets without resetting filters, compare results side by side, and work more efficiently across multiple channels, queues, media types, or time periods.
Your tabs are saved until you delete them.
To create a separate tab, click the Add new tab![]() icon from the top of the Recordings page. The active tab has the heading bolded and highlighted using a blue underline.
icon from the top of the Recordings page. The active tab has the heading bolded and highlighted using a blue underline.
Double-click the tab header to add a custom name to the tab. Click anywhere on the page to save your name or hit Enter on your keyboard.
Click ![]() next to the tab to delete it.
next to the tab to delete it.
Filter recorded interactions
You can filter recorded interactions from the Recordings page. Compound filters allow users to combine multiple criteria to narrow down your search and view only the most relevant segments of the dataset.
To add a filter:
- From the Home page, click Recordings.
- On the recordings page, select a relevant date range for your recordings. The system automatically includes the Date/Time filter set to today’s date.
- Click + Add filter.

- Search for a specific filter or select one from the drop-down list.
- Select an operational criterion such as <is> or <is not>.
- Select the sub-criteria to complete your compound filter. The compound filter displays at the top of the page.
- Click Apply.
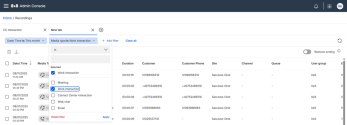


To delete a filter, select it and click Delete filter. To remove all filters within a tab, click Clear All.
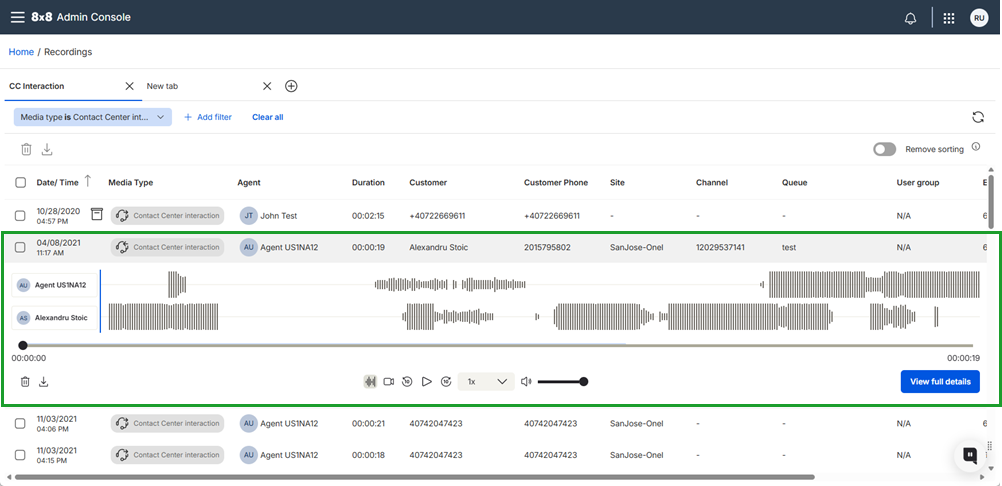
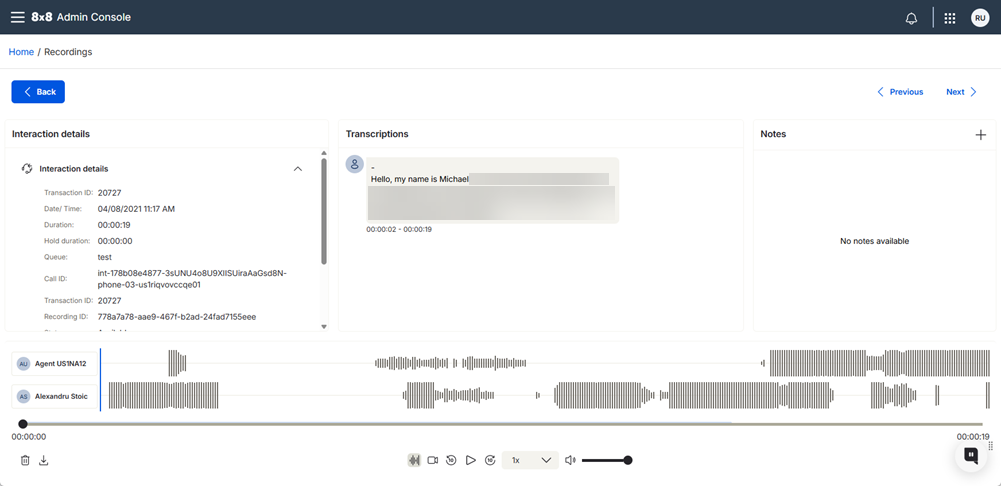
View interaction details
You can view interaction details from the Recordings page.
To view the details of a recorded interaction:
- Go to the Recordings page.
- Click on an interaction. The section expands to display the recording’s waveform.
- Click View full details.
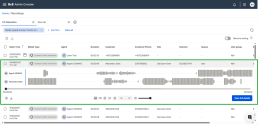
- From the interaction details page, view the interaction details, the transcription, notes, and recording.

- When you are done reviewing the interaction details, click:
- Back: Exit the interaction details and return to the list of interactions.
- Next: Display the details for the next interaction.
- Previous: Display the details for the previous interaction.
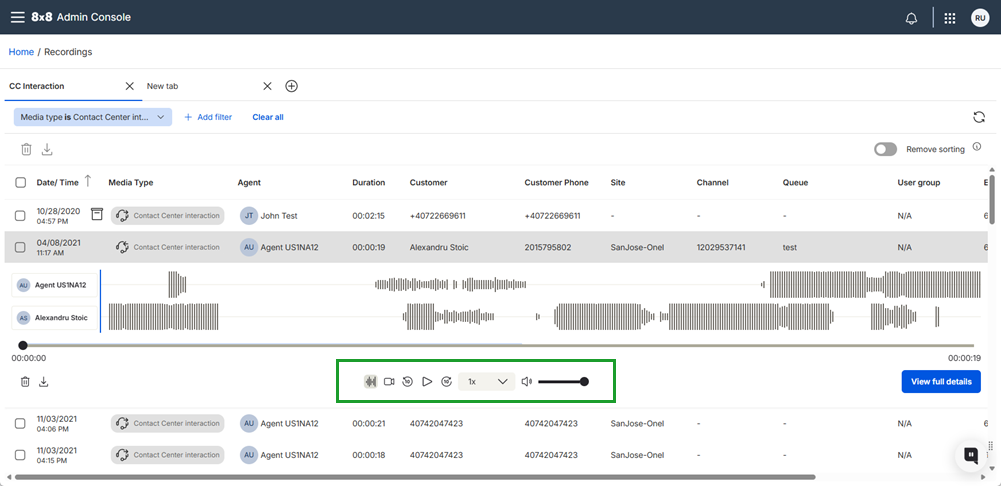
Play interaction recordings
You can listen to audio and/or view video interactions from the Recordings page.
To play an interaction:
- Go to the Recordings page.
- Click on an interaction to display the recording’s waveform. You can also access the waveform from the interaction details page.
- Click Play
 to start listening to the interaction. These additional audio controls are displayed:
- Show/Hide waveform: Select
 to hide or show the waveform of the audio file.
 - Show/Hide video: For video interactions, select
 to show or hide the video playback window.
 - Rewind: Select
 to rewind the playback by 10 seconds.
 - Pause: Select
 to pause the playback.
 - Forward: Select
 to forward the playback 10 seconds.
 - Playback speed: Select the drop-down menu to view options for adjusting the speed of the playback. The options range from 0.5x to 2x.
- Mute/Unmute: Select
 to mute or unmute the sound of the audio file during playback.
 - Volume control: Select the volume slider to adjust the volume.
- Show/Hide waveform: Select
Note: Chat and emails display the transcript instead of the waveform.
Delete recordings
Recorded interactions can be manually deleted from the Recordings page.
To delete a recording:
- Go to the Recordings page.
- Select the recordings you wish to delete.
- Click the Delete
 icon from the top-left of the page.
You can also delete individual recordings by clicking the interaction or accessing the interaction details and selecting.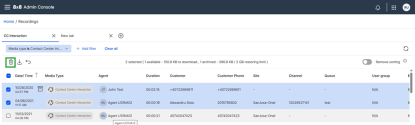
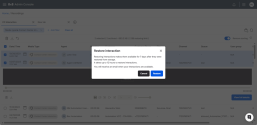
- In the confirmation window that displays, type DELETE using capital letters.
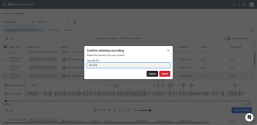
- Click Delete.


Download recordings
You can download recordings individually or in bulk from the Recordings page.
To download recordings:
- Go to the Recordings page.
- Select the recordings you wish to download.
- Click the Download
 icon from the top-left of the page.
You can also download individual recordings by clicking the interaction or accessing the interaction details and selecting.
- When downloading multiple recordings, click the Downloads
 icon from the top-right corner of the page.
 - From the drop-down list, select . The files download as a zipped folder on your computer.

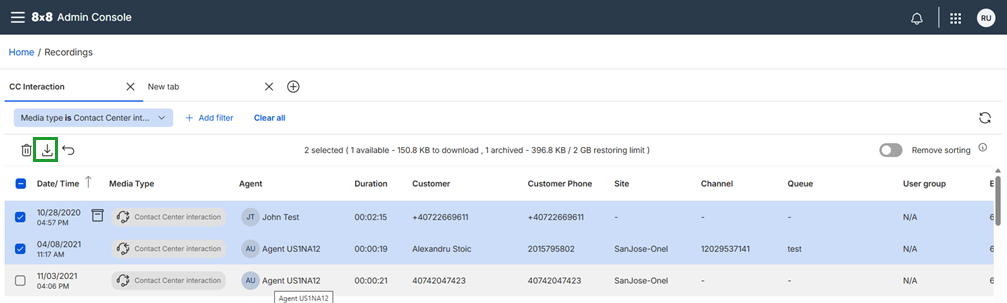
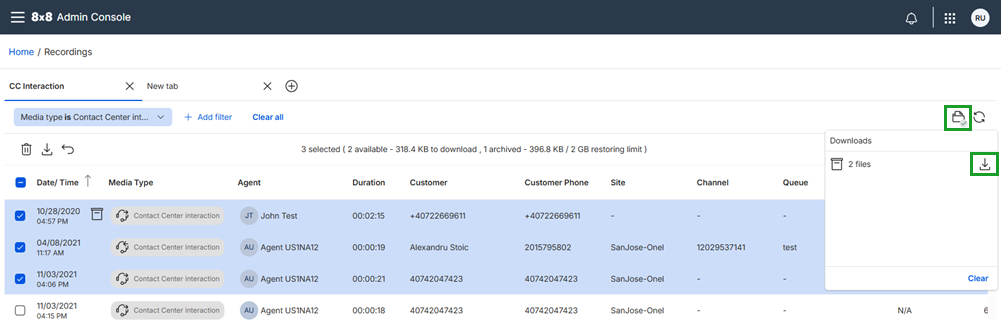
Note: Archived recordings cannot be downloaded before they’re restored.
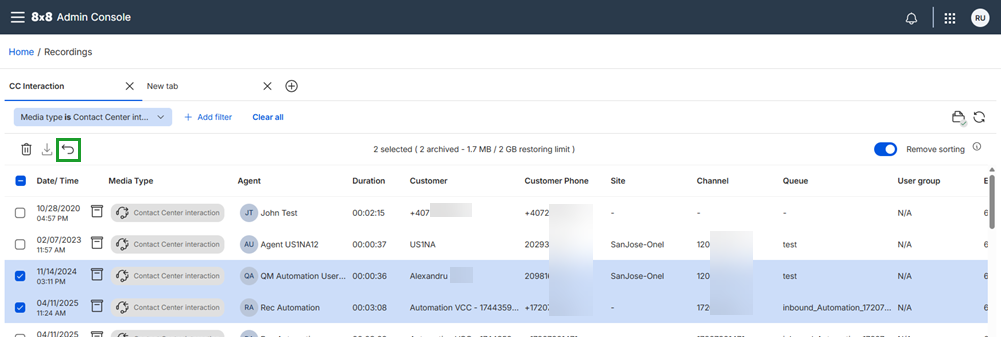
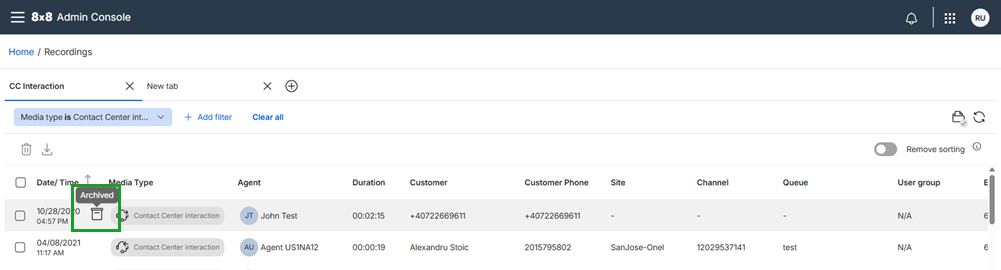
Restore archived recordings
You can restore archived recordings from the Recordings page. Archived interactions display the Archived ![]() icon in front of the Media Type column.
icon in front of the Media Type column.
To restore archived recordings:
- Go to the Recordings page.
- Select the archived recordings you wish to restore.
- Click the restore
 icon from the top-left of the page.
You can also restore individual recordings from the interaction details by clicking the Restore button.
- A notification message appears stating that restored recordings are only available for seven days post retrieval. It takes up to 12 hours to restore recordings. You will receive an email when your recordings are available.
- Click Restore to proceed.
Interactions that are in the process of being restored display the message Restore in progress when accessed.