Set up 8x8 Spaces
As an administrator, you can set up a conference room with an in-room conferencing system, and then further enhance the conference room with 8x8 Spaces to empower users with a robust in-meeting experience as well as offer an instant solution for collaboration!
Once you have a room that supports an in-room system, you can pair a conference room computer with a supported tablet that has the 8x8 Spaces app installed. Once you pair the room computer and the tablet, the tablet is used as an in-room controller by people in the conference room to join meetings via 8x8 Spaces.
To fully set up 8x8 Spaces, you must:
- Step 1A: Create 8x8 Spaces to associate with physical conference rooms.
- Step 1B: Add a new calendar to 8x8 Spaces.
- Step 2: Set up hardware for 8x8 Spaces.
- Step 3: Install the 8x8 Spaces app on the in-room controller.
- Step 4: Pair an in-room controller with a conference room computer.
Step 1A: Create 8x8 Spaces
- As a 8x8 Work administrator, log in to 8x8 Work 8x8 Admin Console.
-
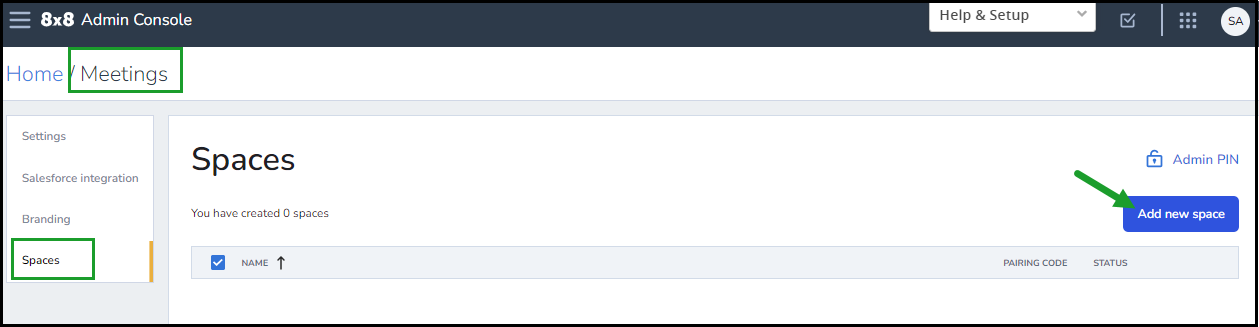
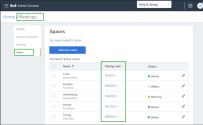
From the main menu in 8x8 Admin Console, go to Meetings > Spaces to open your list of meeting rooms.
Note: The Spaces option is only accessible once your organization is fully enabled for 8x8 Meet; if your organization is fully or partially using the classic Virtual Office Meetings experience instead, you cannot access your list of meeting spaces.
- In the list of meeting spaces, click Add new space.

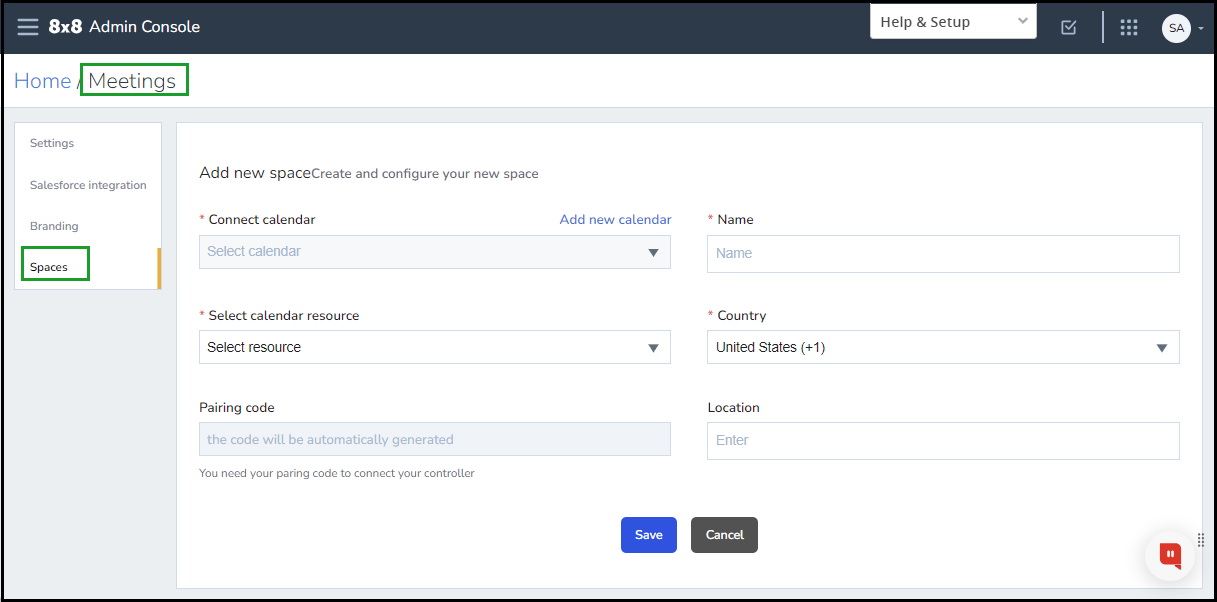
- In the space creation screen:
- Connect the new space to the calendar used by your organization. The first time you create a space, you must add the desired calendar.
- Select the calendar resource that corresponds to the space; the calendar resource shows up to users when they schedule a meeting with the conference room.
For details on how to set up 8x8 Meeting Rooms, refer to Setting Up 8x8 Meeting Rooms or to the documentation of the relevant calendar app. - Enter the name of the space; the space name shows up as a label on the in-room television and controller.
- Enter the location of the space; the space location shows up as a label on the in-room television and controller.

- Save your changes to set up the space and display it in the list of meeting spaces.


Note: In order for 8x8 to be able to access calendar resources and/or spaces, your email account must have resources enabled by your vendor. Some vendors require premium subscription to provide calendar resources. Please contact your vendor for assistance.
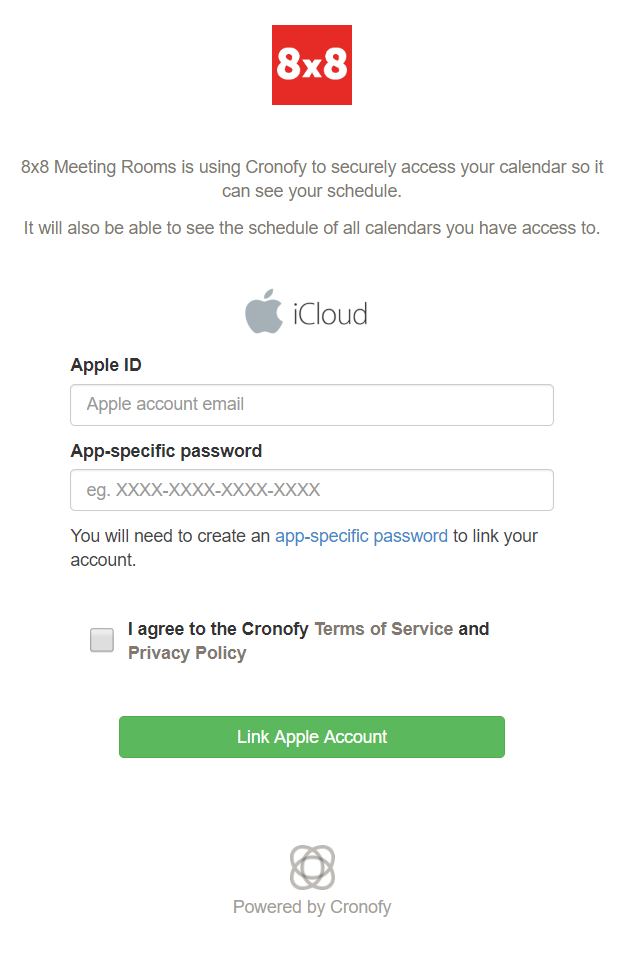
Step 1B: Add a New Calendar to 8x8 Spaces
- While creating a new meeting room, click Add new calendar next to Connect calendar to bring up a calendar selection prompt.
- At the prompt, select the type of calendar your organization uses from the supported calendar types, such as Office 365 or Google Calendar.
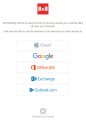
- Once you select the desired calendar, confirm and log in to the calendar account that hosts the calendar resources that correspond to your organization’s physical conference rooms, and confirm.
The calendar account you log in to is now available to associate with 8x8 Spaces that you create.

Step 2: Set up Hardware for 8x8 Spaces
In your conference room, be sure to set up the following audio and video hardware to function with 8x8 Spaces:
- TV/display monitor: Show remote and local meeting content.
- Room computer: Load the Chrome-based 8x8 Spaces application, and connect all hardware.
- Camera: Show in-room meeting attendees to meeting participants outside of the room.
- Speaker: Play remote attendee audio (a separate speaker device is optional, as a speaker may be built into the display monitor).
- Microphone: Receive audio from room participants (a separate microphone device is optional, as a microphone may be built into the display monitor).
- Tablet device (AKA in-room controller): Start meetings, dial in to meetings, provide wireless in-room content sharing, and control the in-room display.
- Screen share adapter: Allows in-room attendees to share their computer screen via a physical cable.
|
Component |
Required or optional |
Minimum requirement |
|---|---|---|
|
|
Required |
|
|
|
Required |
Mac mini Quad-core with 8GB memory |
|
|
Required (may be bundled) |
|
|
|
Required (may be bundled) |
3.5mm audio, or USB 3 or USB-C connectivity |
|
|
Required (may be bundled) |
USB 3 or USB-C connectivity |
|
|
Required |
|
|
|
Recommended |
|
Step 3: Install the 8x8 Spaces app on the in-Room Controller
- Once a conference room has been set up for 8x8 Spaces, the conference room computer must be paired with a tablet that has the 8x8 Spaces app installed.
This tablet is to be connected to a power source and left in the conference room as an in-room controller.
On a tablet (AKA in-room controller) that meets hardware requirements for 8x8 Spaces, open the App Store. - Go to the 8x8 Spaces download page, and install the appropriate apps for the conference room computer ("Desktop") and in-room controller ("Mobile").
Once the app is installed on the in-room controller, you are ready to pair the in-room controller with a conference room computer.
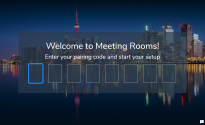
Step 4: Pair an in-Room Controller with a Conference Room Computer
- In a conference room that has been set up for 8x8 Spaces, bring an in-room controller with the 8x8 Spaces app to pair with the conference room computer.
- On the room computer, open the 8x8 Meeting Spaces app you downloaded in Step 3. Previously, you had to rely on a web-based setup method, but this is no longer recommended.
- At the prompt in the app on the room computer, enter the pairing code assigned to the conference room; find the pairing code in 8x8 Work 8x8 Admin Console under Home > Meetings > Spaces
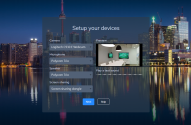
- Confirm the pairing code you entered to see a device setup screen where you can confirm the hardware in the conference room. You can preview audio and video quality for the selected devices before you confirm.
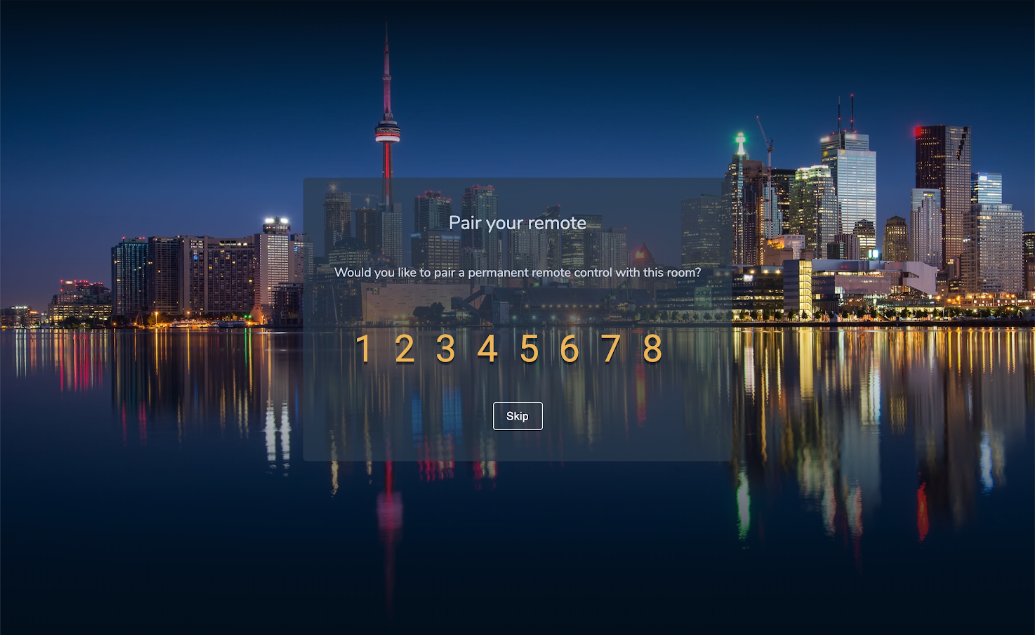
- Click Next to bring up a pairing code for the in-room controller.
- At the prompt in the app on the room computer, enter the pairing code assigned to the conference room; find the pairing code in 8x8 Work 8x8 Admin Console under Home > Meetings > Spaces
- On the in-room controller, open the Meeting Spaces app.
- In the app, go past the starting screen to open a pairing code prompt.
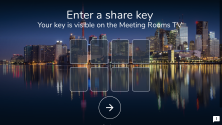
At the prompt in the app, enter the pairing code shown on the television connected to the room computer, and confirm.
Note: The code should be 8 digits long. If your code is 6 digits instead, press the Enter key twice to skip the last two digits.

- On the room computer, confirm the pairing to finish assigning the in-room controller for 8x8 Spaces.
- To prevent navigating away from the 8x8 Spaces app, add a PIN code to the meeting room the in-room controller is paired with, or lock the home and power buttons of the in-room controller.
If you want to prevent the in-room controller from going to sleep while the app is open, open the device settings and:- On an iOS device, go to Accessibility > Guided Access, and enable Mirror Display Auto-Lock.
- On an Android device, go to the device-appropriate setting to prevent the tablet from locking automatically.