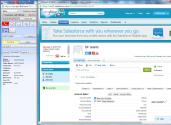
8x8 Contact Center now supports Open CTI Integration with support for Single Sign-On access from the native Salesforce environment. Salesforce users can launch 8x8 8x8 Contact Center app with just a click, while in the Salesforce application, and take advantage of the benefits of integration.
- Ability to launch 8x8 Contact Center from the comfort of the Salesforce dashboard.
- Reduced sign-in time while working in the Salesforce environment
- Improved Security, Salesforce user credentials do not need to be stored in the 8x8 Contact Center environment
- Support for both Salesforce Service Console and non-Console mode in Salesforce
- Ability to dial out calls using native click-to-dial links in Salesforce Service Console and non-Console mode
The integration allows you to perform your Salesforce account activities using the integrated (Undefined variable: 8x8VariablesSet.AgtConsole) with the following features:
- Multichannel support including phone, chat, and voicemail channels
- Visibility of queue status and agent presence
- Ability to see screen pop of the matching end user data during inbound interactions
- Ability to see screen pop based on caller ID for phone calls
- Ability to see screen pop based on case ID for chats
- Ability to search based on arbitrary data (requires customization)
- Ability to record custom messages for agents
- Ability to track historical data of agent activity using historical reports (for supervisor only)
- Ability to monitor agent activity (for supervisor only)
- Administrative access to a Salesforce account
- Administrative access to an 8x8 8x8 Contact Center account
The auto log from an interaction is saved to the Comments field, which limits the data size to 4000 bytes. If an interaction log exceeds 4000 bytes, you cannot save the log.
Configuring Single Sign-On Integration
Setting up Salesforce for Single Sign-On integration with 8x8 8x8 Contact Center requires the Salesforce administrator to:
You need to install two packages for Single Sign-On integrations:
- 8x8 Virtual Contact Center: Installs the 8x8 8x8 Contact Center
- SF_Contactural_Setup: Creates the required fields for call log
To install the integration packages:
- Use the following URLs to set up the desired Salesforce environment:
- For Salesforce Production:
https://login.salesforce.com/packaging/installPackage.apexp?p0=04ti0000000Xzqu - For Salesforce Sandbox:
https://test.salesforce.com/packaging/installPackage.apexp?p0=04ti0000000XzquNote: You can get the 8x8 Contact Center app from the Salesforce market in future.
- For Salesforce Production:
- At the prompt, log in as a Salesforce administrator.
- Select Install for All Users, and click Install.
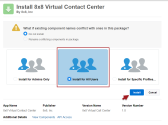
You are notified that the installation is complete. - Click Done.
You can see 8x8 Virtual Contact Center under Installed Packages, along with the package installation details.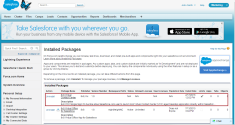
- To create the required fields for call log, install the following supplementary package:
- SF_Contactual_Setup for Salesforce Production:https://login.salesforce.com/?startURL=%2Fpackaging%2FinstallPackage.apexp%3Fp0%3D04tA0000000Pygj
- SF_Contactual_Setup for Salesforce Sandbox: https://test.salesforce.com/?startURL=%2Fpackaging%2FinstallPackage.apexp%3Fp0%3D04tA0000000Pygj
- Log in to Salesforce with your administrator account.
- Select Install for All Users, and click Install.
You are notified that the installation is complete. - Click Done.
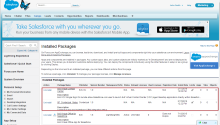
You can see SF_Contactual_Setup under Installed Packages, with the package installation details.
After installing the above supplementary package, you must set up visibility on call log fields.To set up visibility on call log fields:
- Click Setup, and then select App Setup on the left menu.
- Go to Customize > Activities.
- Open Task Fields.
- Click the Type link.
- In the Type page, click the Set Field-Level Security button.
- Select the Visible check box to grant the visibility permission.
The Type field is accessible the next time the agent logs in.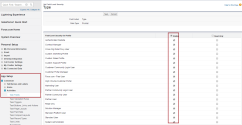
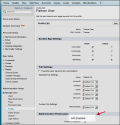
For some user roles in Salesforce, the API is not enabled by default. The integration can function if the user account enables API in its administrative permissions.
To enable API:
- Click Setup.
- In the left navigation menu, go to Customize > Call Center > Call Centers.
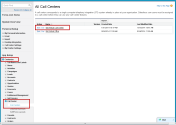
The page displays the available call center packages installed. - Click Edit next to the 8x8 Virtual Call Center package.
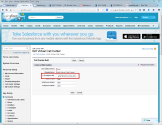
- Edit the CTI Adapter URL with the URL for your cluster and tenant. The format of the URL is as follows:
- Salesforce Production
https://vcc-naX.8x8.com/AGUI/loginSSO2.php?tenant=yourtenantnamenaXis the 8x8 Contact Center platform instance your tenant is hosted on.yourtenantnameis the tenant id of your tenant.
https://vcc-na4.8x8.com/AGUI/loginSSO2.php?tenant=AcmeJetsNote: Refer to the Platform URL Guide to get the cluster URL your tenant is hosted on.
- Salesforce Sandbox: You must append &sandbox=true to the URL for your cluster and tenant.
https://vcc-naX.8x8.com/AGUI/loginSSO2.php?tenant=yourtenantname&sandbox=truenaXis the 8x8 Contact Center platform instance your tenant is hosted on.yourtenantnameis the tenant ID of your tenant.
https://vcc-na4.8x8.com/AGUI/loginSSO2.php?tenant=AcmeJets&sandbox=true
- Salesforce Production
- Click Save.
In this step, identify and set up Salesforce users acting as call center agents.
- In the Call Center view mode of Virtual Call Center, click Manage Call Center Users.
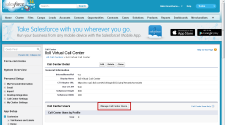
- Click Find to list all users or add filters to search for specific users.
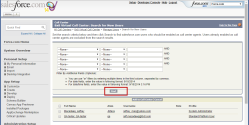
- From the list of users, select the desired users and click Add to Call Center.
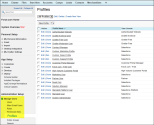
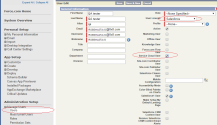
- To allow users to use the Salesforce Service Console, you need to enable Service Cloud User in the agent profile.
For more information regarding screen pop, refer to 8x8 Configuration Manager Guide.
- Log in to 8x8 Configuration Manager and enable Salesforce integration.
- Go to Integration > Screen Pop.
- Select the Screen Pop check box.
- Select Salesforce for the Target type.
- Select Enhanced for Integration type.
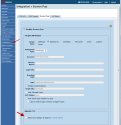
- Select agents to provide access to Salesforce integration.
- Select media for auto log from Phone, Voicemail, and Chat. You can disable auto log for a specific medium by clearing that medium's check box.
- Select the auto log screen pop mode from the available choices.
- Define events that trigger screen pop for each interaction from the following choices:
- When agent is offered interaction
- When agent accepts interaction
- When agent completes interaction
- Under Window Properties, define the desired screen pop settings. This allows agents to define the size of the screen pop window and also set window properties.
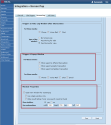
Note: The screen pop window is applicable to non-console mode users only.
- For details on these settings, refer to the 8x8 Configuration Manager guide for 8x8 Contact Center.
- Click Save.
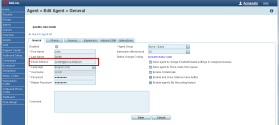
For Salesforce users to log in to 8x8 8x8 Contact Center, you must ensure agent accounts in 8x8 Contact Center are configured using the same email ID as the corresponding Salesforce user login.
When first configuring 8x8 Contact Center integration for Single Sign-On, the agent needs to give permission for the 8x8 app to interact with Salesforce. In order to give permission access to the 8x8 plug-in, the agent needs to open the app from a non-Console Salesforce page.
If you wish to launch the app manually, you can disable the automatic login setting in the Agent Profile. The app behavior varies based on your Salesforce login mode.
- If you are a non-Console user, the app launches in a stand-alone browser window. The screen pop occurs in a new browser session or refreshes the same browser session based on your administrator's screen pop settings.
- If you are a Salesforce Service Console user, the app launches as a pop-up window within the Salesforce login window. You can minimize it whenever needed.
- Log in to Salesforce in non-Console mode. If your administrator has set up integration with 8x8 8x8 Contact Center, you must see the 8x8 Contact Center link on your home page dashboard.
- Click the 8x8 Contact Center link to launch the app.
- Click Allow to accept the app permissions at the prompt.
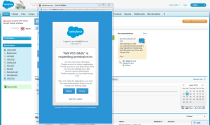
- The 8x8 Contact Center app launches automatically in a separate browser window.
You have the break status upon logging in. You are not offered any interactions in break status.
For details on agent status, refer to Agent Quick Start Guide. - Change your status to Available or Working Offline.
You are now ready to process your customer interactions using the 8x8 Contact Center app.
- Log in to Salesforce account in Salesforce Service Console mode.
- Switch to non-Console mode.
- Switch back to Salesforce Service Console mode.
- In the footer, click the Phone link to launch the app.
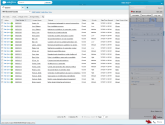
Note: The app is a pop-up window embedded in your Salesforce login window. You can minimize the app by clicking the minimize button.
You have the break status upon logging in. You are not offered any interactions in break status.
For details on agent status, refer to Agent Quick Start Guide. - Change your status to Available or Working Offline.
You are now ready to process your customer interactions using the 8x8 Contact Center app.
When you log in to the Salesforce, the app launches automatically by default. If you wish to launch it manually, you can disable the automatic login setting in the Agent Profile.
- In the Control Panel, select Profile from the Window menu.
- In the External Setup, clear the Auto login for Single Sign on check box.
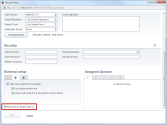
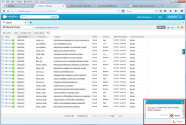
Disabling the auto login requires you to initiate the app manually by clicking the link to log in to 8x8 Contact Center. - In Salesforce Service Console mode, click the Phone tab in the footer bar to bring up a box containing a link.
In non-Console mode, click the link to launch the app as shown below.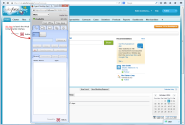
Note: If you have multiple 8x8 Contact Center agent accounts with the same email addresses, the system looks up and links to the first agent found with the matching email address.
Screen Pop Behavior in Salesforce Service Console Mode vs. Non-Console Mode
In Salesforce Service Console mode, the screen pop occurs in separate tabs within the dashboard. You can manage your interactions better in tabbed mode.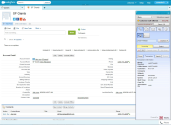
In non-Console mode, the screen pop occurs in a separate browser session. Each new screen pop shows either in a new browser session, or refreshes the same browser window.