Note: The Customer Experience (CEX) and Post-Call Survey (PCS) Analytics application has reached end of life. Starting August 20th, 2025, CEX/PCS will no longer be available as a standalone product. For more information, refer to this Help Center article.
Customize the Digital Channels report table
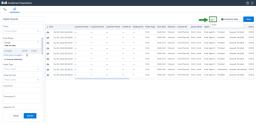
Let’s say as an agent, you’ve filtered out all the Web Chat interactions you handled this week, but you want to eliminate some information that is not relevant to your current report, such as Time in Script, Chat Language, External Transaction Data, etc. You can easily customize the table to display only the information that is relevant to you.
By default, the report table includes all data, but you can easily customize it to suit your needs.
To customize your digital channel report:
- From the Digital Channels
 report page, select Customize table.
 -
From the drop-down list, click the
 icon for the columns you wish to hide/unhide from your report.
Notes:
- Hidden columns display the icon.
icon.
- By default, the Time column cannot be moved, and cannot be hidden from the report.
- Click the icon in the header, next to Column, to hide/unhide all column metrics.
- To lock a column in place and prevent the metrics from moving on the page when scrolling, click the lock icon. When locked, the lock
  icon displays in blue. When you lock a column, the lock
  icon automatically displays on the next column—click it to enable the lock.
- To rearrange the columns, click the icon and drag and drop them to the desired location.
 - Click Save.
- Apply the relevant filters for your report or select a saved filter, then click Submit.
The display page populates with the filtered data and the selected column metrics. Click on the header to arrange the data in ascending or descending order.
Download Digital Channels reports
To download the report in Excel format, click ![]() and select XLSX from the list. The report downloads and a notification banner briefly displays on the page.
and select XLSX from the list. The report downloads and a notification banner briefly displays on the page.
Note: The downloaded report includes the totals for the count type columns. The totals are not included on the display page.

