Assign audio files to campaigns
During a campaign, an 8x8 Contact Center agent can play pre-recorded audio messages defined for the campaign to ensure a uniform delivery of the campaign message across all campaign calls. If as an 8x8 Contact Center administrator, you have uploaded audio files of pre-recorded messages during Outbound Setup, you can assign those messages to the campaign now using 8x8 Configuration Manager. An agent accepting campaign calls can access and play pre-recorded messages at any point during the call. On reaching a voicemail, an agent can play a pre-recorded message, then immediately switch back to available status, and attend the next interaction.
To assign a pre-recorded message to a campaign:
- Log in to 8x8 Configuration Manager.
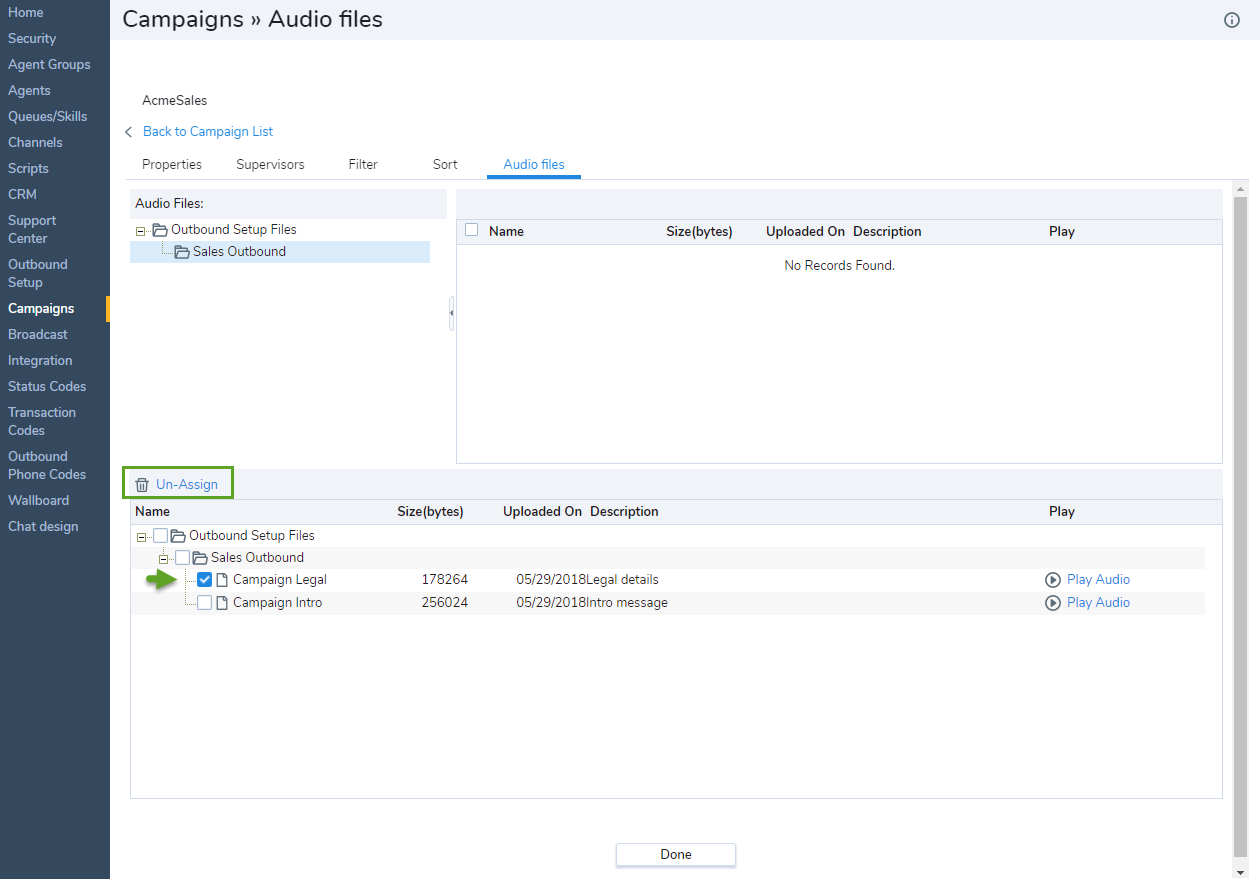
- Go to Campaign > Audio Files.
- In the Audio Files pane, select a folder. The voice messages in this folder appear in the list.
- Select the voice message you would like to assign to the campaign.
- Click
 Assign above the check boxes.
A dialog box appears with a message confirming the assignment.
- To un-assign an audio file, select the file from the Assigned Audio Files window, and select Un-assign from the menu.
- Click Done.
Assigning abandoned messages to campaigns
A campaign call is considered abandoned if a live answered call is not accepted by an agent. Abandoned calls in predictive campaigns need to play a message within two seconds of a live answer for compliance.The message typically should identify the company running the campaign or the company they are calling on behalf of, provide a free or standard cost call back number, and contain no marketing or sales information.
To assign an abandoned message to a campaign:
- Go to Campaign > Audio Files.
- In the Audio Files pane, select Abandoned Message files. The voice messages in this folder appear in the list.
- Select the voice message you would like to assign to the campaign.
- Click Assign above the check boxes.
A dialog box appears with a message confirming the assignment. - To un-assign an audio file, select the file from the Assigned Audio Files window, and select Un-assign from the menu.
- Click Done.