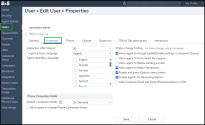
As an 8x8 Contact Center administrator, you can define properties such as an agent's interaction offer timeout, primary and secondary language, ability to pull or delete emails from the queues, recording ability, and much more in the 8x8 Configuration Manager. The user's properties help agents and supervisors do their job better when working in 8x8 Agent Console.
Note: The Properties tab is not available to administrator-only accounts.
To configure user properties:
- From the Configuration Menu, open Users.
If you enabled the VCC agent check box for the user in Account Manager, the user shows up in the list.
- Open the Properties tab.
-
Select the properties.
The following table summarizes the options under Users > Properties.Properties Tab Option Description Interaction Offer Timeout Specify the duration, in seconds, that a user is offered an interaction before the interaction times out. After the specified time, the user status automatically changes to On Break.
Note: If the interaction offer timer runs out for a user and the caller is back to the queue, the caller's position in the queue will remain the same and not changed or reset.Agent Primary Language Select the agent's primary language. If the agent speaks the same language as customer's, they can choose to handle the conversation without the aid of the translation tool. Agent Secondary Language Select the agent's secondary languages. If the chat request is in one of these languages, agents can chat in the requested language. Default Connection Mode Select how agents in your contact center handle phone interactions:
- On demand - Agents connect temporarily to the workspace phone system and must manually accept calls on their softphone or desk phone.
- Persistent - Agents maintain a continuous connection to the workspace phone system, which remains active until they log out. Any changes will apply for the entire duration of an agent's persistent connection.
Allow agent to change Phone Connection Mode Control an agent's ability to change phone connection mode. Status-change Coding Indicates the agent has no status code list assigned when defining a new agent. If an existing agent is assigned with a code list, the code list name shows here. Allow agents to change Enable/Disable settings in Assigned Queues Control an agent's ability to change queue assignment from the agent profile. Allow agents to pull e-mails from queue By default, 8x8 Contact Center presents emails to agents on the basis of first-in-first-out. To enable agents to selectively pull email messages from their email queues, select Allow agents to pull e-mails from queue. Allow agents to Delete pending e-mails If enabled, agents can delete pending emails in 8x8 Agent Console. By default, agents do not have the privileges to delete pending emails. Allow Agents to Reject Interactions This option is enabled by default allowing agents to reject interactions. If disabled, the Reject button in 8x8 Agent Console is disabled preventing agents from rejecting the interactions they are offered. The Reject button in 8x8 Agent Console appears when an interaction is offered to the agent. You can set up this ability for an agent group, or individual agents. If you disable this option at the tenant level, the checkbox will not show up for agent groups or individual agents. Enable and show Options menu button
(Obsolete setting)
If enabled, the Options button appears during an active call session, which provides access to transaction codes, dial pad, and call recording options during a call. The Options button in 8x8 Agent Console is located under Control Panel > Phone
Important! This setting has become obsolete and no longer used. The 8x8 Agent Console app has transitioned to the 8x8 Agent Workspace app, and the Options menu setting no longer exists in the 8x8 Agent Workspace app.
Enable agent's My Recording feature If enabled, an agent can record personal prompts, greetings, or messages that can be played to the customers when a call comes in, for example. The recording functionality in 8x8 Agent Console is accessible via Menu > My Recording. - Click Save.
The next step is to configure phone settings.
