8x8 Contact Center administrators can set up custom priority for interactions in the queue based on the conditions they define. If an interaction meets the condition, it takes a higher or a lower priority than the default priority of the queue. To take advantage of this feature, you must use the Local CRM. Go to the Interactions tab in 8x8 Configuration Manager to customize how the selected queue prioritizes specific types of interactions.
For example, AcmeJets has a support voicemail queue with a default priority set to 50.
This queue handles support inquiries from all customers. To better serve its premium customers before others, AcmeJets can define a higher interaction priority for interactions from premium customers by setting a condition to determine the customer type. When an interaction meets the condition, the interaction priority overrides the default priority of the queue, allowing agents to serve the premium customers faster.
To define custom priority for interactions:
- From the Configuration Menu, open Queues/Skills.
- Find the voicemail queue you wish to modify, and click
 .
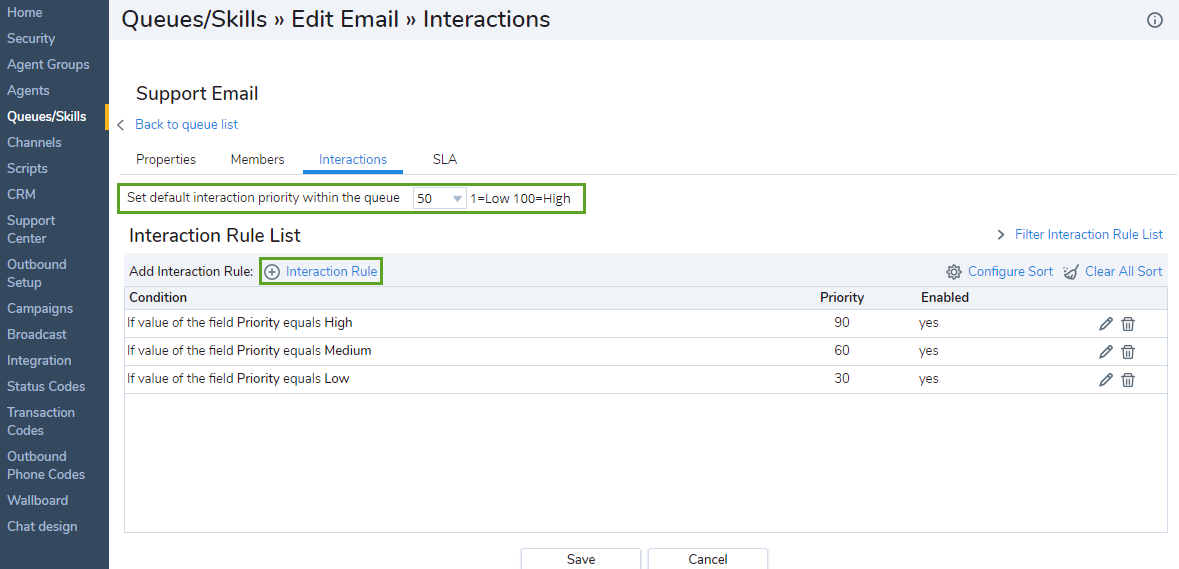
. - Go to the Interactions tab.

-
Select a value for Set Default Interaction Priority within the Queue.
The following table summarizes the options under Queues/Skills > Voicemail > Interactions:Interactions Tab Option Description Set default interaction priority within the queue To customize the priority for specific types of interactions within this queue, choose a non-default priority level, then in the condition area, specify the conditions that receive the non-default priority.
In the list, 1 equals the lowest default interaction priority, and 100 equals the highest interaction priority.Add Interaction Rule Click  to create an interaction priority rule.
If the value of the field Choose a Local CRM field to enable the options available in the equals list such as Case: Priority.
For details, refer to Configure CRM Fields.equals The values in this field varies based on what field you choose for Local CRM. For example, for Case: Priority in the CRM field, you can choose Low, Medium, or High. Set interaction priority to Choose a priority level for the interaction from 1 (lowest) to 100 (highest). Enable priority routing rule Select to enable the routing rule in your 8x8 Contact Center. - Define an interaction rule to specify a matching condition.
- Click or Interaction Rule.
- Select a CRM field for If value of the field, such as Case: Priority.
- Select a value for equals. For example, for Case: Priority in the CRM field, you can choose Low, Medium, or High.
- Choose a value for Set interaction priority to from 1 to 100.
This number sets the priority of the interactions that match the rule. For example, a platinum support customer gets a high priority, such as 90. - Select the Enable priority routing rule check box to activate the rule.
- Click Add this Rule.
The interaction rule appears in the list. - Repeat the above procedure to add more rules.
- Click Save.