Configure user provisioning settings
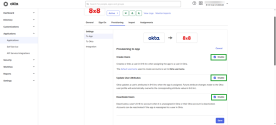
Once you have added and set up 8x8 integration with Okta as needed, you can change the synchronization and mapping settings of the integration to best suit your organization's user provisioning needs.
To configure user provisioning settings:
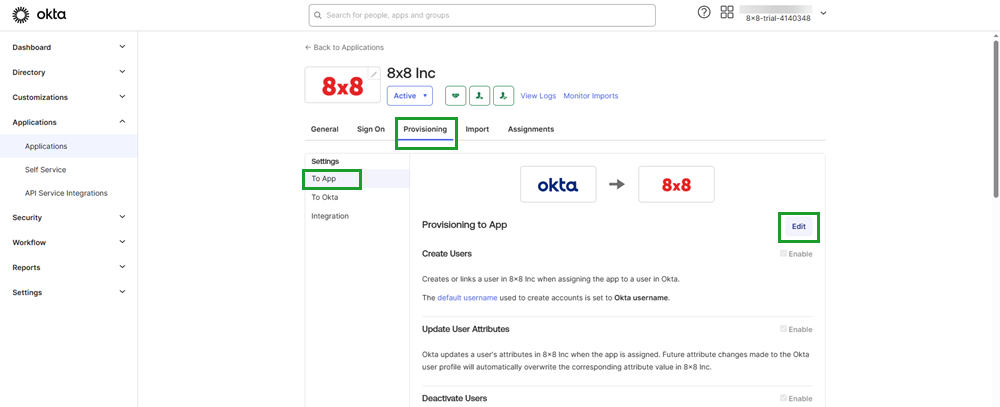
- Under Applications in Okta, open your 8x8 integration app details, and then go to Provisioning > To App.

- Click Edit to begin enabling or disabling features of the integration. By default, all features are enabled.
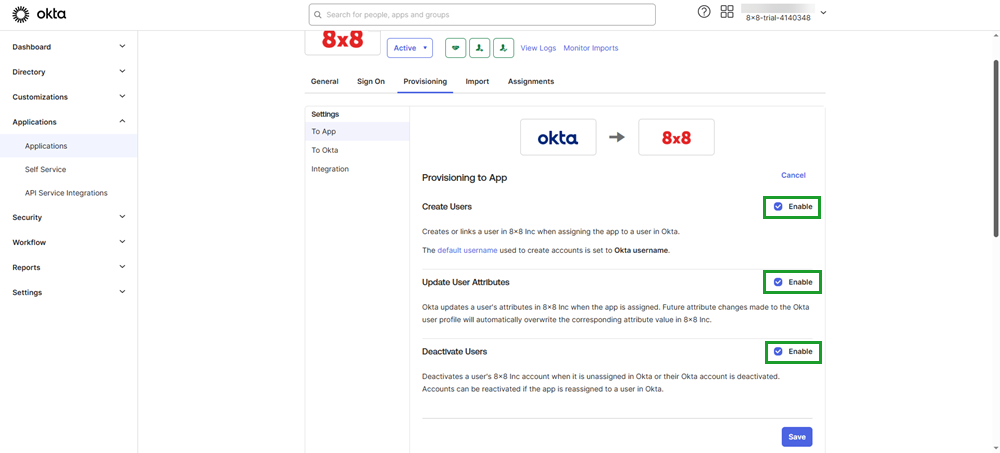
- You can enable or disable:
- Automatic user creation in 8x8 8x8 Admin Console when you assign the 8x8 integration to a user in Okta.
- Automatic user detail sync to 8x8 Admin Console when you change user details in Okta.
- Automatic user deactivation in 8x8 Admin Console when you unassign the user from the integration or deactivate the user in Okta.
Depending on your selected features, the features display as icons at the top of the app details page. You can see at a glance whether features are enabled (in color) or disabled (grayed out).
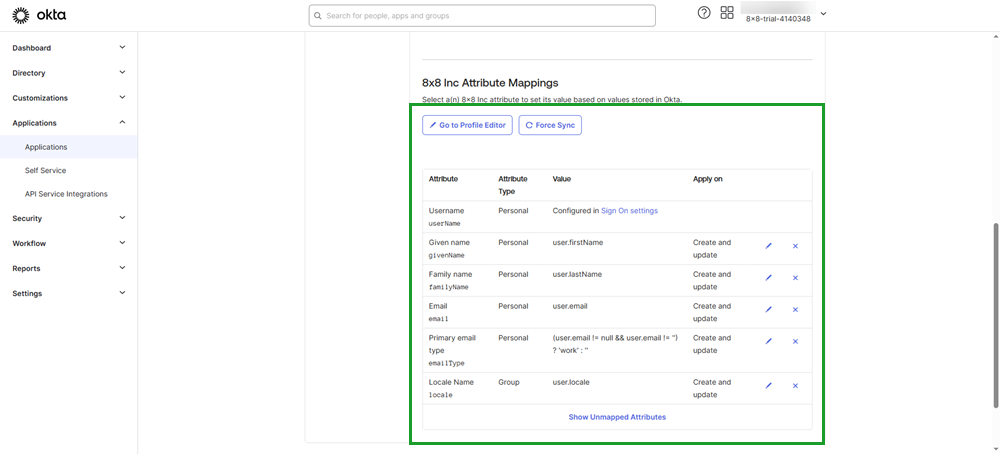
- Scroll down to view user attribute mappings for the integration. By default, 8x8 integration with Okta already includes the minimum attributes from a user profile that are required to sync a user in Okta with 8x8 services in 8x8 Admin Console. If needed, you can configure these attributes further. If an attribute is not mapped, it does not sync. The default mapped attributes are:
- Username (mandatory)
- Given name (mandatory)
- Family name (mandatory)
- Primary email address (mandatory)
- Primary email type (optional)
- Locale (optional)

- Save your settings.
You are now ready to assign Okta users to the 8x8 integration.