Set up Branches
Setting up branches requires you to select a branch main number from your pool of virtual numbers, define a branch receptionist, and point the virtual number to the branch receptionist.
Preparation
- Determine a receptionist for each branch:
- If the receptionist of a branch is a live attendant, gather the extension number.
- If the receptionist of a branch is an auto attendant, define an auto attendant.
- If the receptionist of a branch is a ring group or a call queue, define the desired ring group or call queue.
- Determine a virtual number for each branch.
- Determine the number of extensions for each branch.
Main Tasks to Set Up
- Create your call queue, ring group, or auto attendant as desired.
- Select a virtual number for each branch.
- Specify a receptionist for the branch; if a call reaches voicemail, the caller can either leave a voicemail or dial <0#> to reach the branch receptionist.
Your receptionist can be:- An extension (live receptionist)
- An auto attendant
- A call queue (multiple live receptionists)
- A ring group (multiple live receptionists)
- Add extensions to the branch.
- Point the branch virtual number to the branch receptionist.
- Segment the auto attendant options (dial by name, extension, or (Undefined variable: LocalVariables.CompanyDirectory)) to streamline searching if a branch virtual number points to an auto attendant.
Configure a Branch
Configuring a branch involves the following steps:
- Log in to Account Manager.
- Click Phone System.
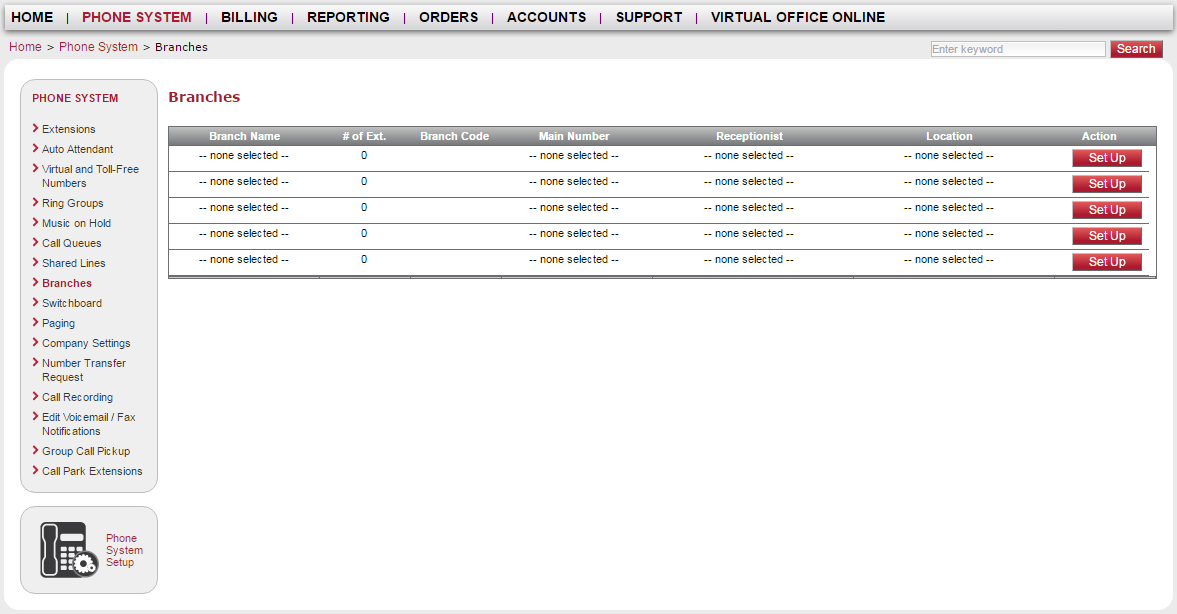
- Under the Phone System menu, click Branches.
A set of branches is waiting to be configured.
- Select a branch and click Set up to begin defining a branch.
- Enter a Branch Name.
- Enter a Language.
This language is set as your branch default language. Telephony IVR messages, such as voicemail greetings, are played in this language. You can also set the language at the PBX level.Note: The PBX or branch language does not affect the agent's desk phone display. You must select the language of preference for the individual extension user. For details, refer to Edit Individual Extensions.
 Summary of Localization Settings
The following table summarizes the localization settings in Account Manager:
Setting Description Configured At Edit My Profile
The primary or secondary administrators who have access to Account Manager can configure the Language setting in Edit My Profile to communicate emails in their language of choice.
This setting overrides the default PBX or branch language setting. It only applies to the administrator's email communications.
User level
Account > User Profiles
Configure the Language setting for extension users to communicate emails in their language of choice.
This setting in user profile overrides the default PBX or branch language. It only applies to the user's email communications.
User level
Phone System > Company Settings
Configure the Language setting for all users in the PBX to receive Telephony IVR messages, such as voicemail greetings in the selected language. This setting is overridden by language settings at the branch and/or individual extension level.
In the absence of the individual extension user's language of choice, the language setting of branch overrides the PBX language setting.
PBX level
Phone System > Branches (Add-on subscription-based)
Configure the Language setting for users to receive Telephony IVR messages, such as voicemail greetings in the selected language.
In the absence of the individual extension user's language of choice, the branch language setting overrides the PBX company language setting. In other words, if an extension belongs to a branch set to Japanese, and if you have not defined another language at the extension level, Telephony IVR messages are played in the Japanese language. If the extension belongs to a branch with no other language defined, you inherit the PBX language.
Branch level
Phone System > Edit Individual Extension
Configure the Language setting for extension users to receive Telephony IVR messages, such as voicemail greetings in the selected language. The display on the user's desk phone also appears in this language.
This setting overrides the PBX and branch language setting.
Note: If you need help with setting the user language in bulk, contact 8x8 Support for help.
Note: To access localized versions of 8x8 Virtual Office applications, refer to your computer or device manual to learn how you can change the display language of your operating system.
Extension level
- Select Main Number for the branch by choosing a virtual number.
Note: The destination for the virtual number is your receptionist.
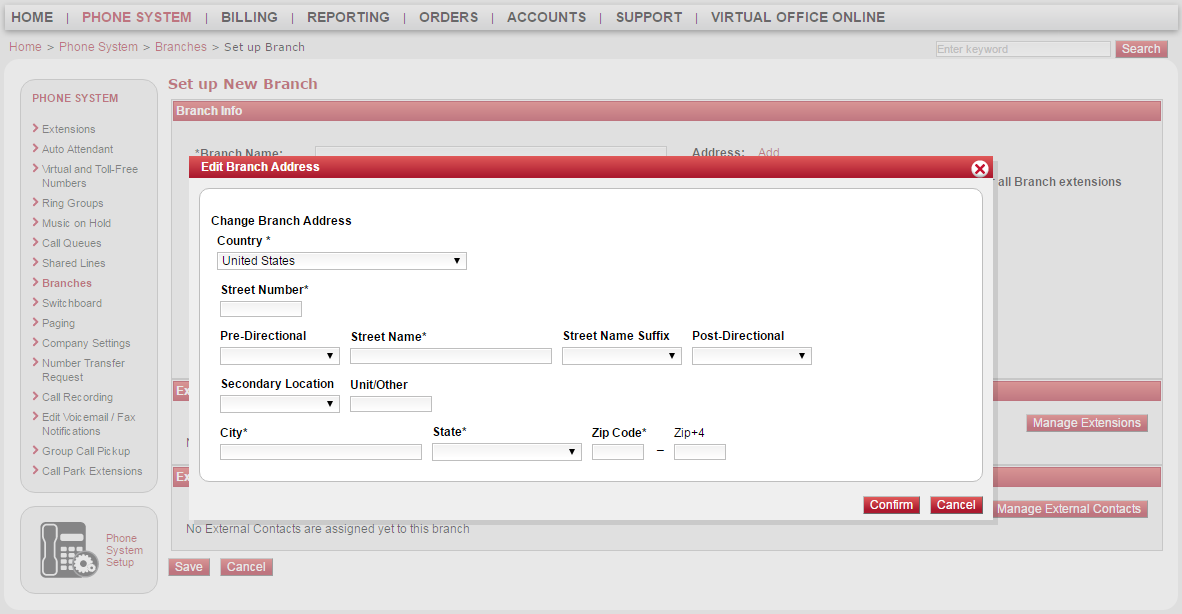
- Enter the branch address.

The address is validated.Note: The Address field is for reference purposes, and does not have any impact on the functionality.
- Select a Receptionist Type.
Receptionist type points to the branch receptionist, which defines the destination for calls landing in an extension voicemail. On reaching an extension voicemail, callers can leave a voicemail or dial <0#> to be directed to the branch receptionist from the following choices:- Extension (local receptionist)
- Ring Group (multiple receptionists)
- Auto Attendant
- Call Queue
- Select a Receptionist based on the type.
If the receptionist type is Extension, select an extension from the available list.Note: The branch administrator appears under the view-only Admin list. You can determine the secondary administrator for a particular PBX under Accounts > Privileges > PBX.
- Enter a Branch Code. A branch code must be unique within the same PBX, but can be used in a different PBX.

- Enter an Extension Length. This is the combined length of the branch code and short code. This is specific to the branch only.
The short code will now transform to a fully-qualified extension, which includes the branch code and the short code. For example, if you assigned branch code 4 to the San Francisco branch office, branch users with short codes (such as 1001) will be assigned with a fully-qualified extension number (such as 41001).Note: Branch Code and Extension Length are only applicable to enterprise customers with multiple PBXs and branches.

You can assign regular extensions as well as service extensions to a branch. Assigning a service extension is managed in the respective configuration page for ring groups, call queues, and auto attendants. For details, refer to Assigning Service Extensions to a Branch.
To assign regular extensions:
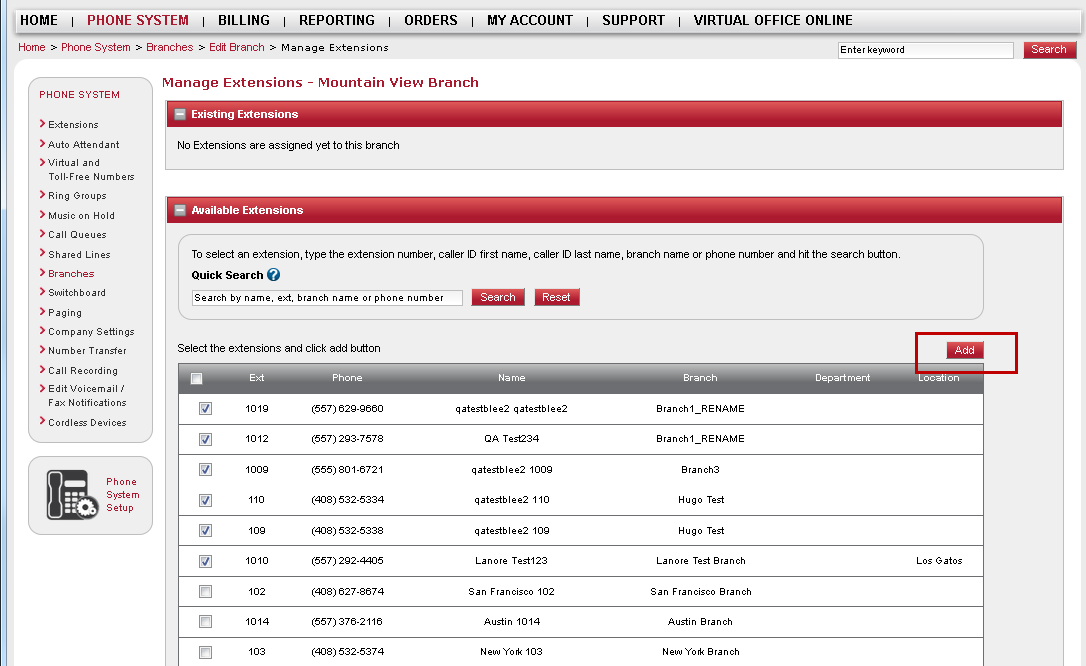
- Click Manage Extensions.

A list of all extensions within the iPBX is displayed. - Select the desired extensions, and click Add.
The extensions are now mapped to the branch. - Click Save.
Repeat the setup process to define all other branches in your iPBX.
The next step is to assign a destination for the branch virtual number. If you already assigned the destination, make sure it matches the receptionist type defined for the branch.
- Click Phone System in the top navigation bar.
- Under the Phone System menu, select Virtual and Toll Free Numbers.
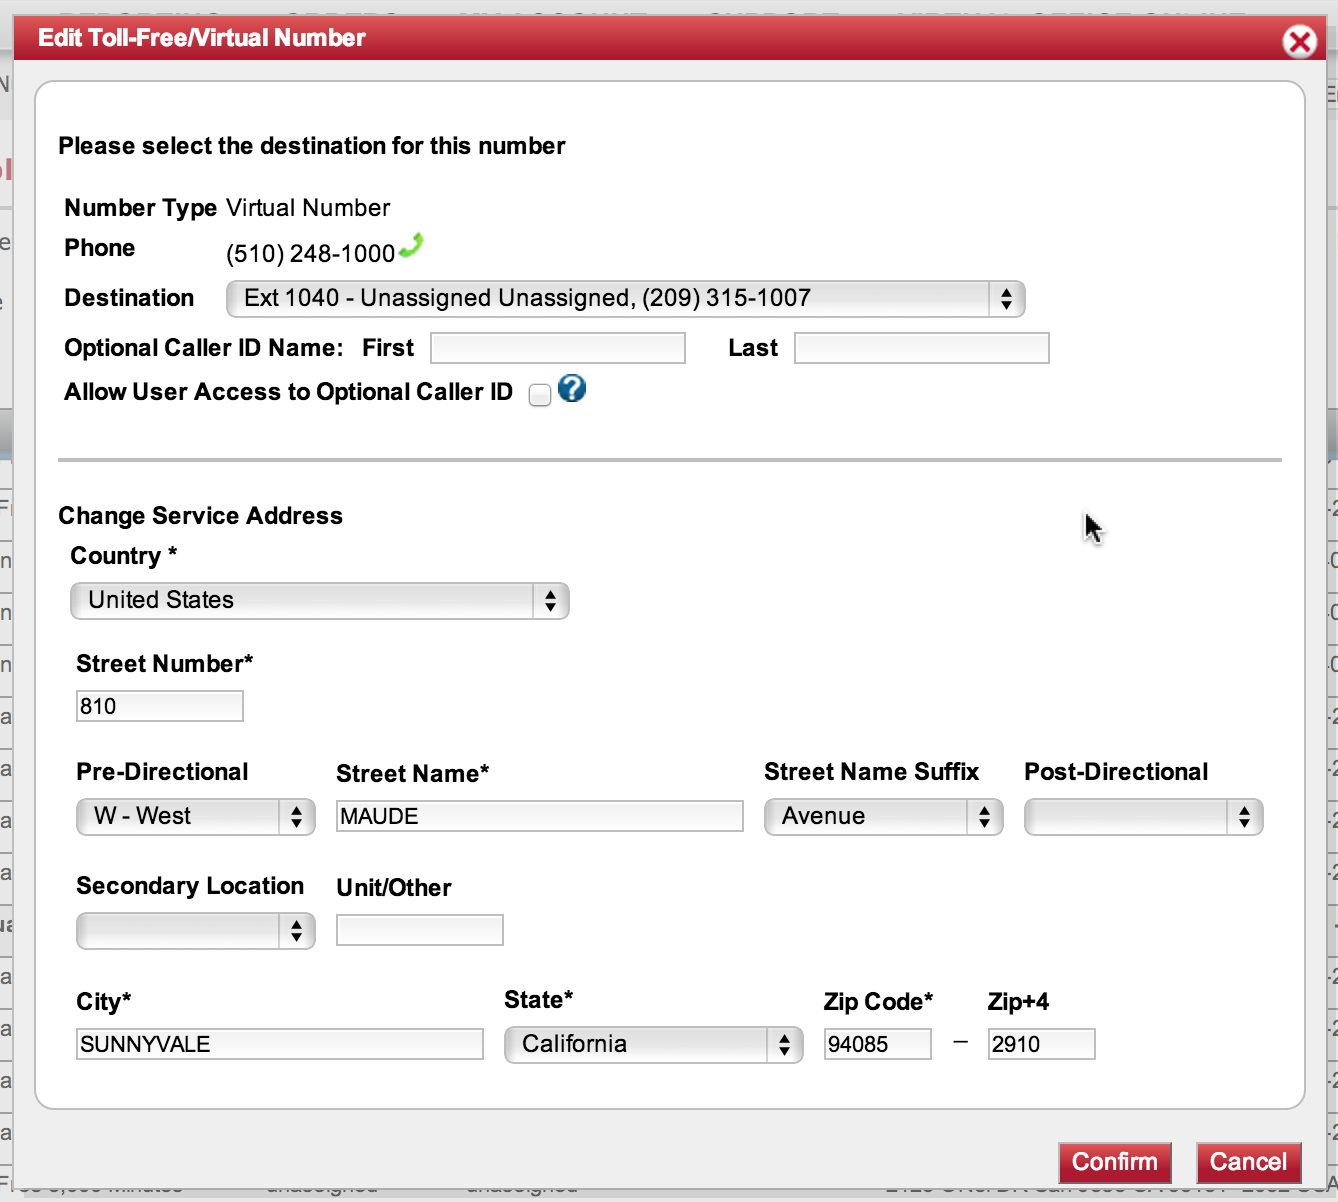
- Select the virtual number assigned to a branch, and click Edit.
- Select the destination to match the receptionist type defined for the branch in Step 3: Assign Extensions to the Branch.
- Optionally, change Service Address to match the branch address.
- Click Confirm to save.

Note: The destination for the branch virtual number must match the receptionist type defined for the branch.
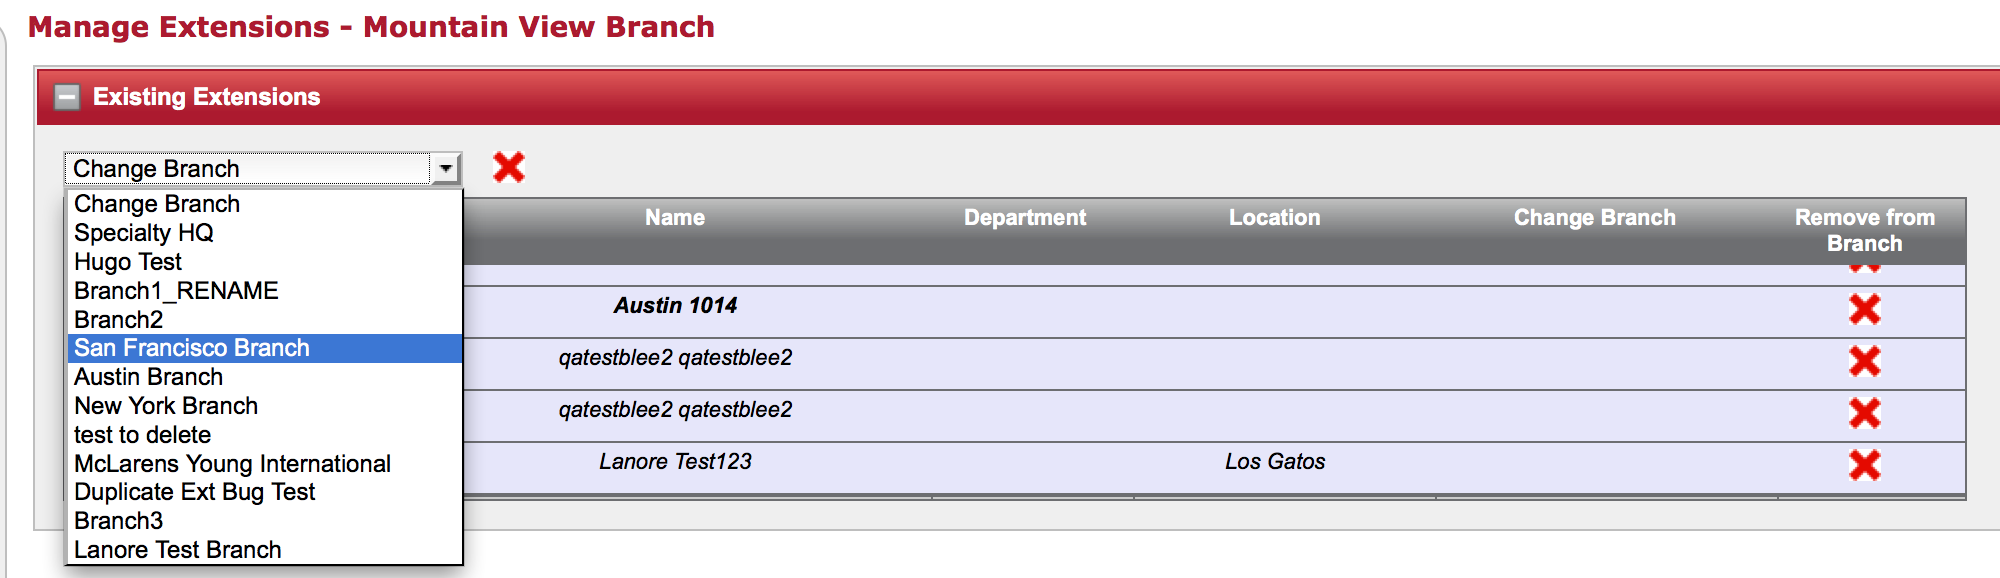
Manage Extensions in a Branch
You can add or remove regular extensions to a branch and change branch assignment any time. Click Manage Extensions within the branch settings.
- Add: From the available extensions, select extensions and click Add.
- Change Branch: Select a branch extension. In the Change Branch drop-down, select a desired branch from the available branches.

- Remove Branch: Click
 to remove a branch.
Note: Adding or removing service extensions should be managed via the respective service extension configuration page.