About User Profiles
User profiles are required to give users access to their 8x8 system. Create a user profile first before you assign users to an extension or grant administrative privileges in Account Manager.
- First Name
- Last Name
- Email Address
- Username
Note: When creating a new user profile, by default the user name is the email address. The system administrator has the flexibility to change the user name to something other than the email address.
You can create user profiles one at a time or in bulk. To create a single user profile, refer to Step 1: Create a User Profile. Follow the instructions below to create multiple user profiles:
- Click Accounts in the top navigation bar.
- On User Profiles, click View.
- Click Download CSV Template to download an Excel file that stores the user profile information.
Note: If you are using customizable fields, before downloading the template, make sure that you have labeled the field by following the instructions in Show Customizable Fields.
- Save the file to your computer once you make all your changes.
Note: Do not make any changes to the 8x8 Internal ID column.
- On the User Profiles page, click Upload CSV Template.
- Click Proceed.
- Click Add, and locate the file you just saved.
- Click Open, then Upload.
- Verify that the new information is correct, and click Submit.

- Click Accounts in the top navigation bar.
- On User Profiles, click View.
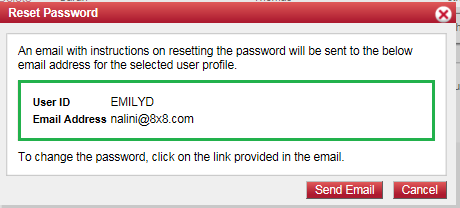
- Find the agent from the list, and click Reset Password.

- The Reset Password confirmation window opens.
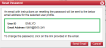
Check the user ID and email address, and click Send Email. - An email is sent to the agent's address as seen in the user profile. To change the password, the agent has to click the link provided in the email and follow the instructions.
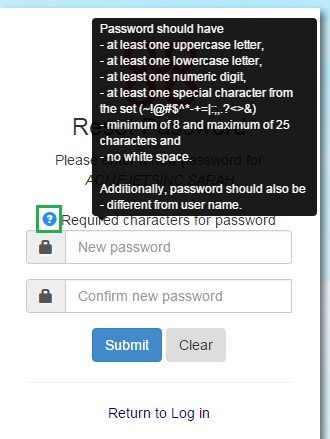
The new password requires specific types of characters for security purposes. In the Reset Password window, hover over the question mark to see the requirements.