Send and receive fax
With Internet Fax in 8x8 for Microsoft Teams app (8x8 Teams app), your fax service is available 24 hours a day and seven days a week. Send business faxes directly to your contacts at any time. You can send virtually any document on your computer as a fax, and manage past and received faxes from the convenience of your desktop app.
Before getting started, to set up your fax notification preferences, go to Settings , scroll down through the page and select Fax notification settings. In your fax settings, you can choose whether to receive email notifications when you send or receive a fax. You can configure these notifications to be text-only, choose to include a link to access faxes, attach the fax itself to the notification, or all three. If you choose to include fax attachments, faxes up to 200 pages in length can be attached.
Features
- Send faxes: Attach multiple files in a single fax, to a total of just under 20 MB.
- Attach business details to a fax: Include additional information in your fax cover sheet before you send a fax, such as your contact information and business number.
- Receive and manage faxes: Access a fax directly from the app for up to 60 days, and download an important fax to keep it for longer.
Send a fax
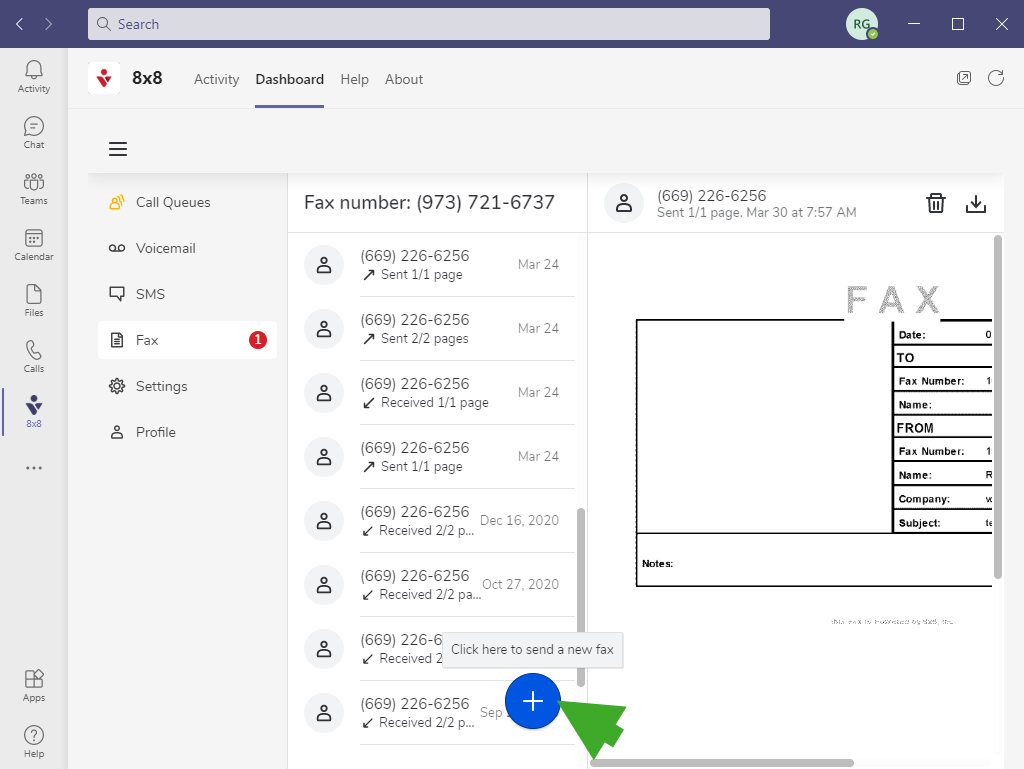
- From the dashboard menu, go to Fax
 to view the list of faxes sent and received.
 - Click
 to begin sending a new fax.
- In the New Fax window that pops up:
- Enter the fax recipients.
- Add information to the cover page to accompany the fax.
- Enter the subject of the fax.
- Attach the desired files to send.
- Click Send
 to send the fax. If you have enabled email notifications for fax, you also receive an email to let you know if the fax was sent successfully or failed.
 - When you receive a fax, you are notified via email and the Activity tab in the app. The new faxes appear in bold font in the list for easier identification.
To customize your fax cover sheet:
- While creating a new fax, click Open
 in the Cover field to open the cover page details.
 - In the cover page details, you can:
- Enter the recipient name.
- Write a note to preface the fax.
-
To save changes to the cover page, and go back to creating the fax, click Save.
Note: If you want a more heavily customized cover sheet for your faxes, you can instead detach the cover sheet of the fax you are about to send from 8x8 Work, and create an external cover sheet from your preferred word processing application. In the desired application, create a document to serve as your fax cover sheet, customize as needed, and save. You can then attach this document in front of the main content of your fax to have it serve as a cover page.
Manage faxes
For your convenience, you can mark your faxes as read or unread, download and print out your faxes, and delete faxes once you no longer need them.
- Open your Fax list.
-
From the fax list that opens, hover over the desired fax to view the following options:
- Download
 : Downloads the fax to your Microsoft Teams account for later use. Find it under Files > Downloads in Microsoft Teams.
 - Mark read or unread : Marks the fax as read or unread. Unread faxes appear in bold font, and read faxes appear in regular font. Note that outgoing faxes cannot be marked as unread.
- Delete
 : Marks the fax for deletion. Click Delete to confirm.
- Download