Configure and enable your services in the admin portal
In order to connect to your 8x8 and Microsoft services, you need to configure the Voice for Teams admin portal.
To configure the Voice for Teams admin portal:
Important: Complete the 8x8 PBX Service setup before enabling your Teams service. This ensures that user location has been established, which is critical to the generation of unique 8x8 session border controller (SBC) domains in the Microsoft 365 environment that occurs during the initial Voice for Teams setup sync. If your domains fail to be generated and activated, users will not see the Teams dialpad, and will not be able to make or receive calls.
Enable the 8x8 PBX service
To sync of users with Teams, enable your 8x8 PBX service to allow it to connect to the admin portal:
-
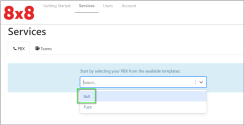
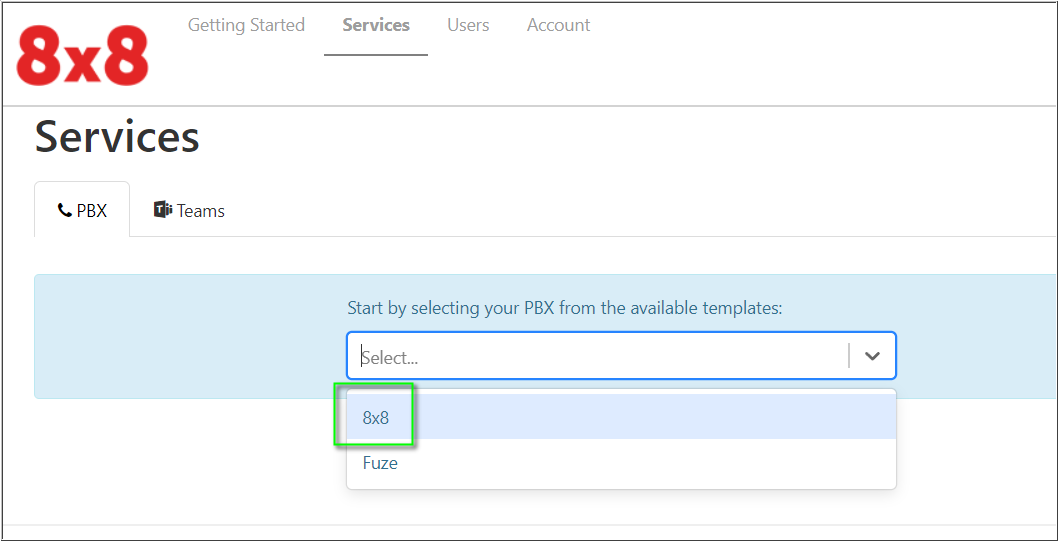
In 8x8 Voice for Microsoft Teams admin portal, on the Services > PBX tab, click 8x8 in the dropdown list.
-
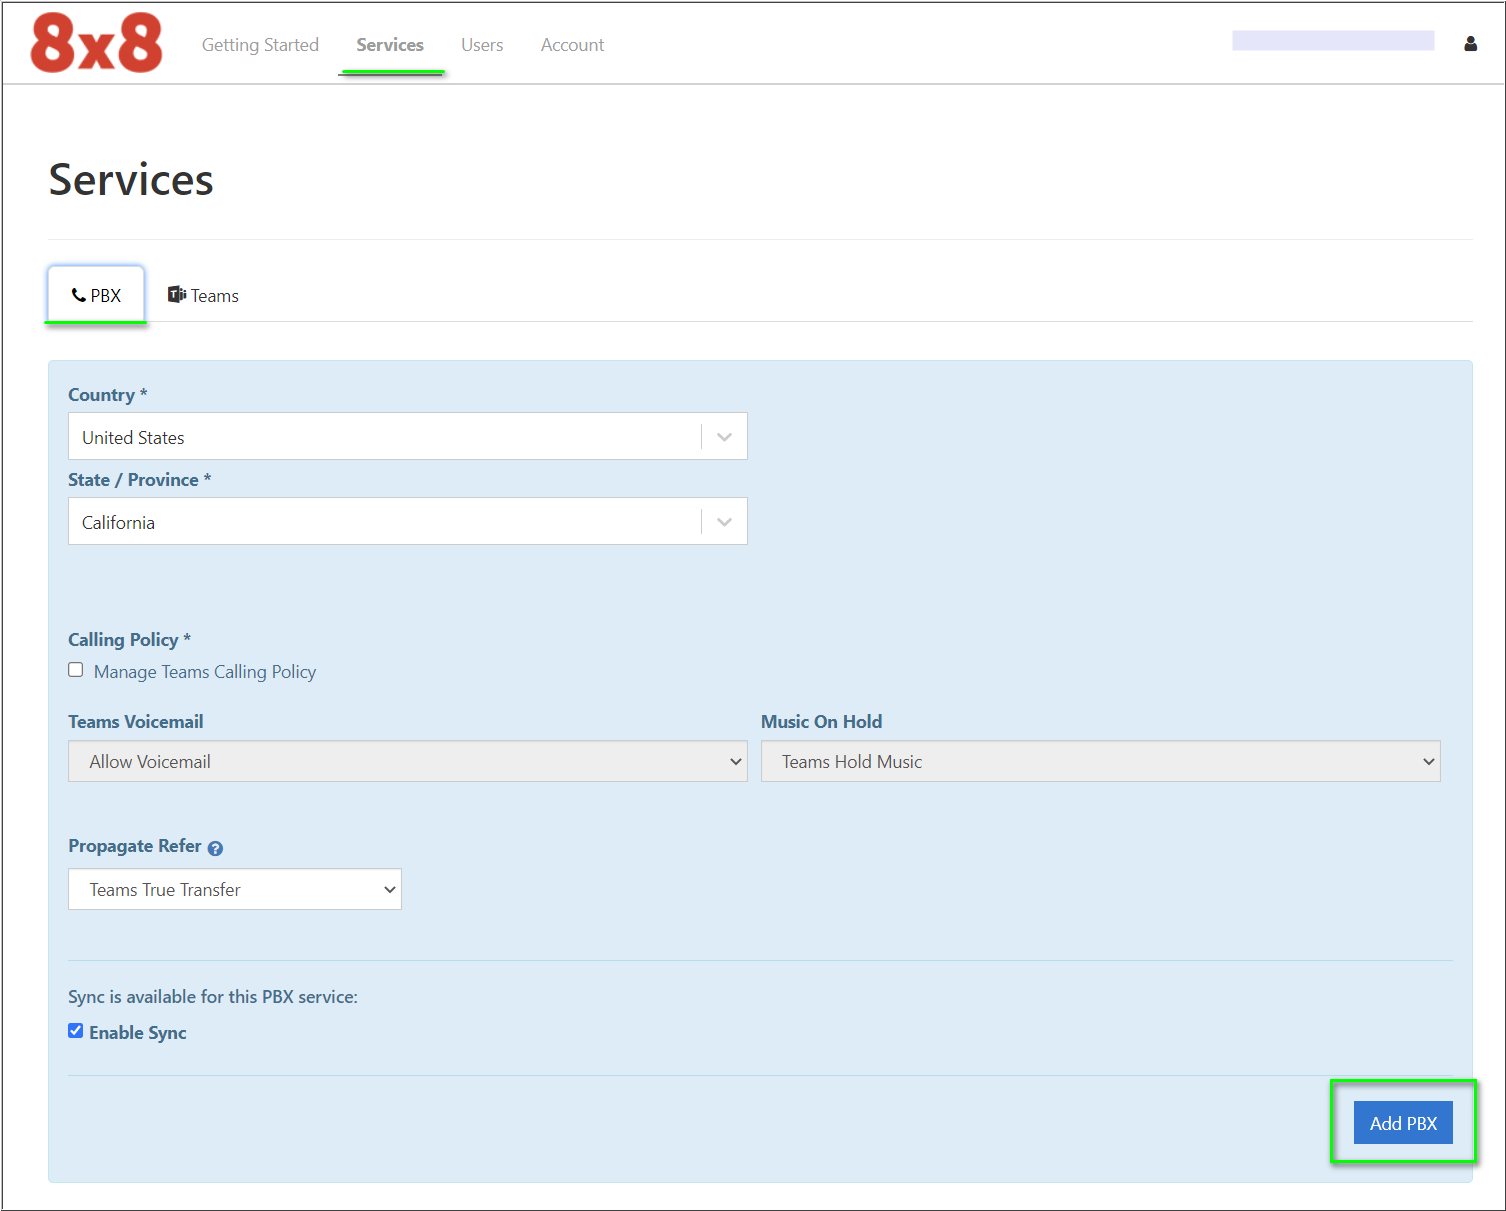
Select the appropriate Country and State / Province from the respective list, then click Add PBX.
-
Under Calling Policy, choose which service (8x8 or Teams will provide voicemail service to your Teams service:
-
Select the Manage Teams Calling Policy checkbox, and choose one of the following options to be used:
-
8x8 Voicemail and 8x8 Music On Hold (recommended):
- In the Teams Voicemail list, click Prohibit Voicemail & Call Forwarding.
- In the Music Hold list, click PBX Hold Music.
-
Teams Voicemail and Teams Music On Hold, or any combination of Teams and 8x8 services:
- In the Teams Voicemail list, click Allow Voicemail.
- In the Music on Hold list, click Teams Hold Music..
-
Notes:
-You can change this setting whenever necessary.
- For more details, see Teams Calling Policies.
- For detailed configuration instructions, see Configure your Services to Use either Teams or 8x8 Voicemail. -
- In the Propagate Refer list, click Teams True Transfer for best call transfer performance.
-
Click Save.
Note: PBX Service configuration does not trigger a sync between 8x8 and Teams. The above configuration only makes 8x8 PBX synchronization possible. You'll be prompted for your 8x8 and Teams credentials at a later stage to sync the 8x8 and Teams service users together in the admin portal.
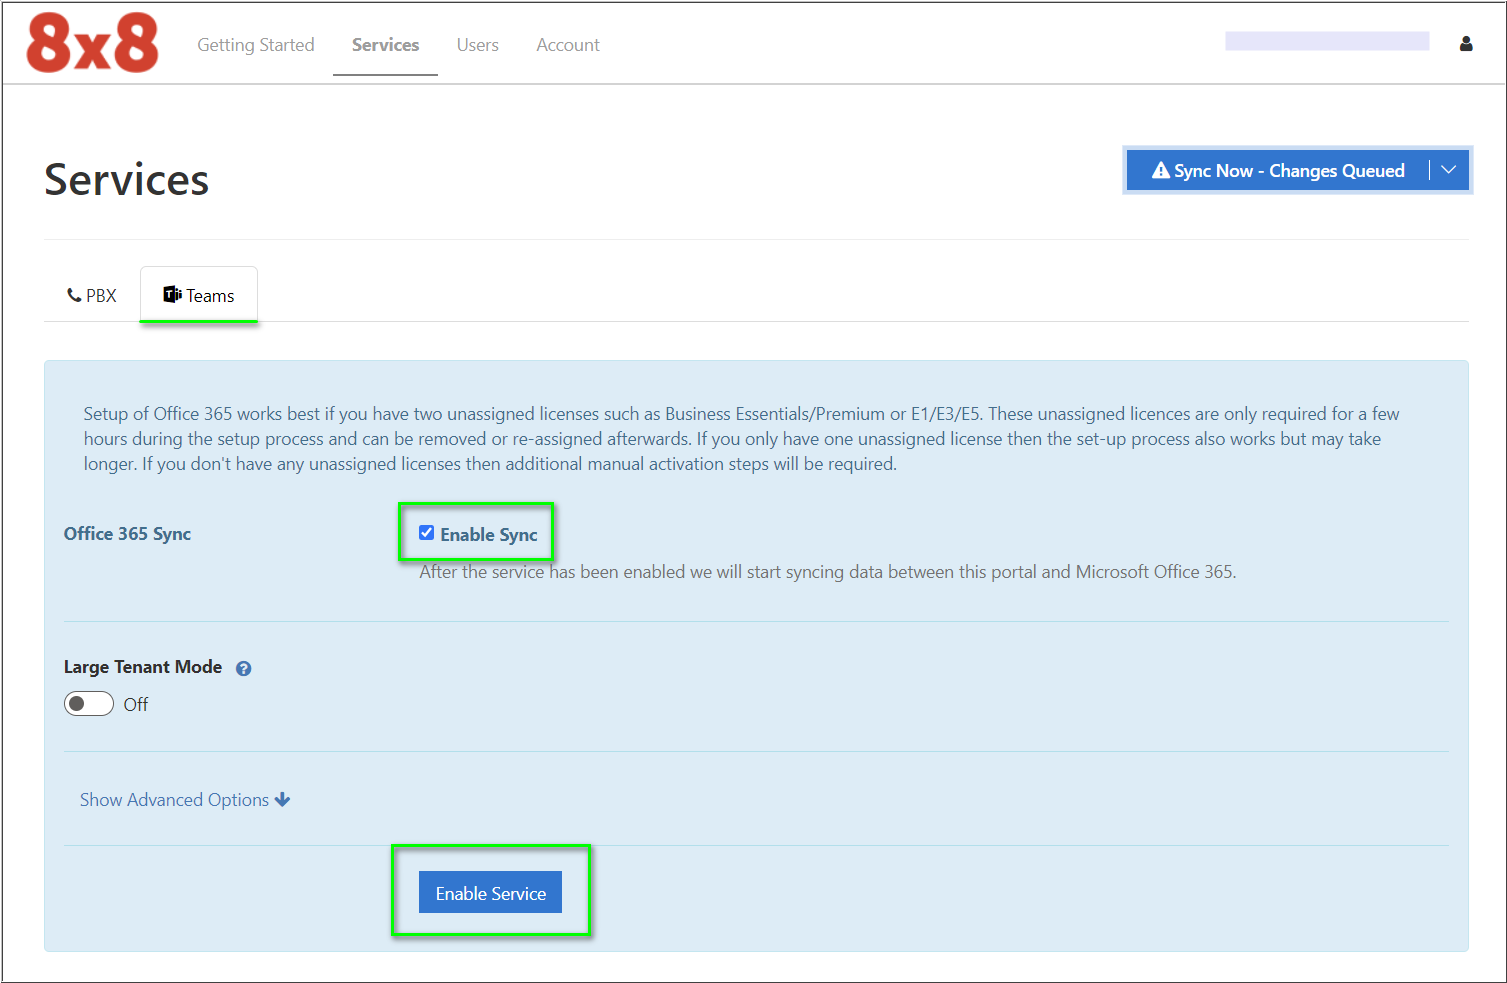
Enable the Teams service
When a sync is performed, the service automatically allocates endpoints based on the location of 8x8 users. The Enable Sync function allows the portal to automatically configure the service, and set phone numbers directly into your Microsoft 365 tenant.
Choose one of the following methods to configure the admin portal's Teams service to sync users with:
Important: Part of the Voice for Teams setup sync process will automatically add unique 8x8 SBC (Session Border Controller) domains to your Microsoft 365 service, and will activate them for voice. This process requires that a licensed user has their sign-in address changed to each of these domains, long enough for Microsoft to activate that domain in the voice subsystem. The sync process will do this automatically, using the first of these three methods that apply:
- Use a spare license to create a user, then delete the user when finished.
- Change the sign-in address of the user whose credentials were specified for the sync if it has an appropriate license, changing it back once finished.
- Change the sign-in address of an arbitrary user who has an appropriate license, changing it back once done.
The sync will wait up to 20 minutes for Microsoft to activate the domains before giving up and restoring the sign-in address. In most cases this is more than enough time. Occasionally the Microsoft subsystem that activates domains for voice may stop working and it could be necessary to wait up to 24 hours before trying again.
Note: To facilitate the creation of all required global 8x8 SBC (Session Border Controller) domains, it’s recommended to enable the Voice for Teams integration in the 8x8 Admin Console for at least one user from each global region before the initial setup sync process, if possible.
Sync all Teams users
When the service is configured to sync all Teams users, the admin portal will poll the Microsoft Teams tenant for all available users (users who have been assigned a Teams license).
Notes:
- When this Sync All Teams Users configuration is applied, the Sync Now process will perform a test of every Teams user for appropriate assigned Microsoft Teams licensing. Only Teams users with correct licensing enabled in both Microsoft services and the 8x8 Admin Console will actually be synced (connected) in the 8x8 Voice for Teams admin portal.
- If you have a large number of Teams users (1000 or more), or you need to sync one or more specific Azure groups of Teams members, you should follow the process to Sync Teams users from a specified Azure AD Group, instead. The syncs using that process do not test for appropriate Teams user licenses.
To sync all Teams users, follow the steps:
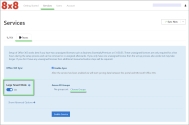
- On the Services > Teams tab.
- Select the Enable Sync checkbox to enable the sync function.
-
Click Services.

-
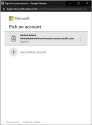
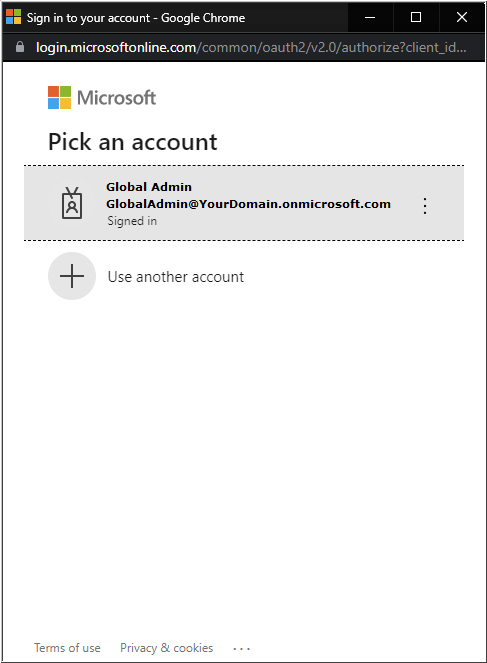
Sign in to Microsoft 365 services using your administrator credentials with Global Admin rights to the Microsoft 365 tenant.
-
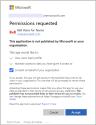
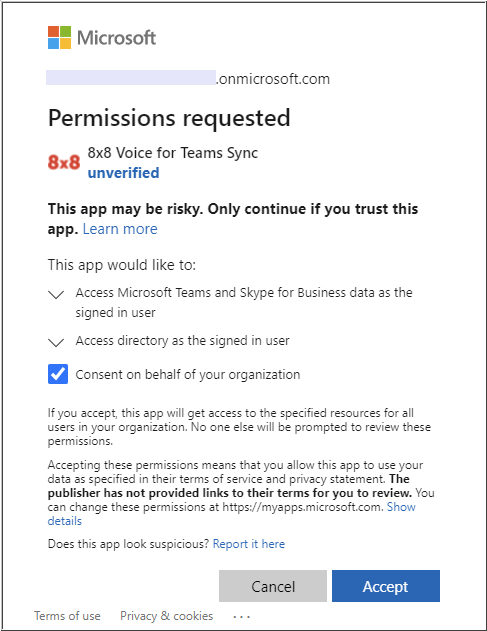
Select the Consent on behalf of your organization checkbox. Two different applications are installed on your Microsoft service, which are critical to the Voice for Teams sync process.
-
Click Accept.
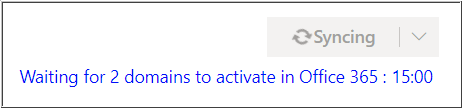
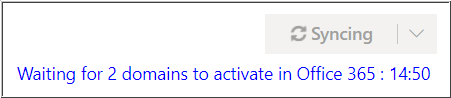
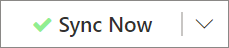
At this point, the Sync Now button on the upper-right corner of the page changes and displays a Syncing notice.

CRITICAL: Two unique 8x8 domains are added to the Settings > Domains section of your Microsoft 365 admin center. These 8x8 domains are critical to the functioning of Voice for Teams. If this process does not complete, the Teams dial pad will not appear for any Microsoft Teams user, and they will not be able to make or receive calls.
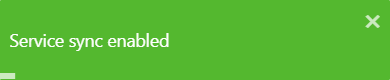
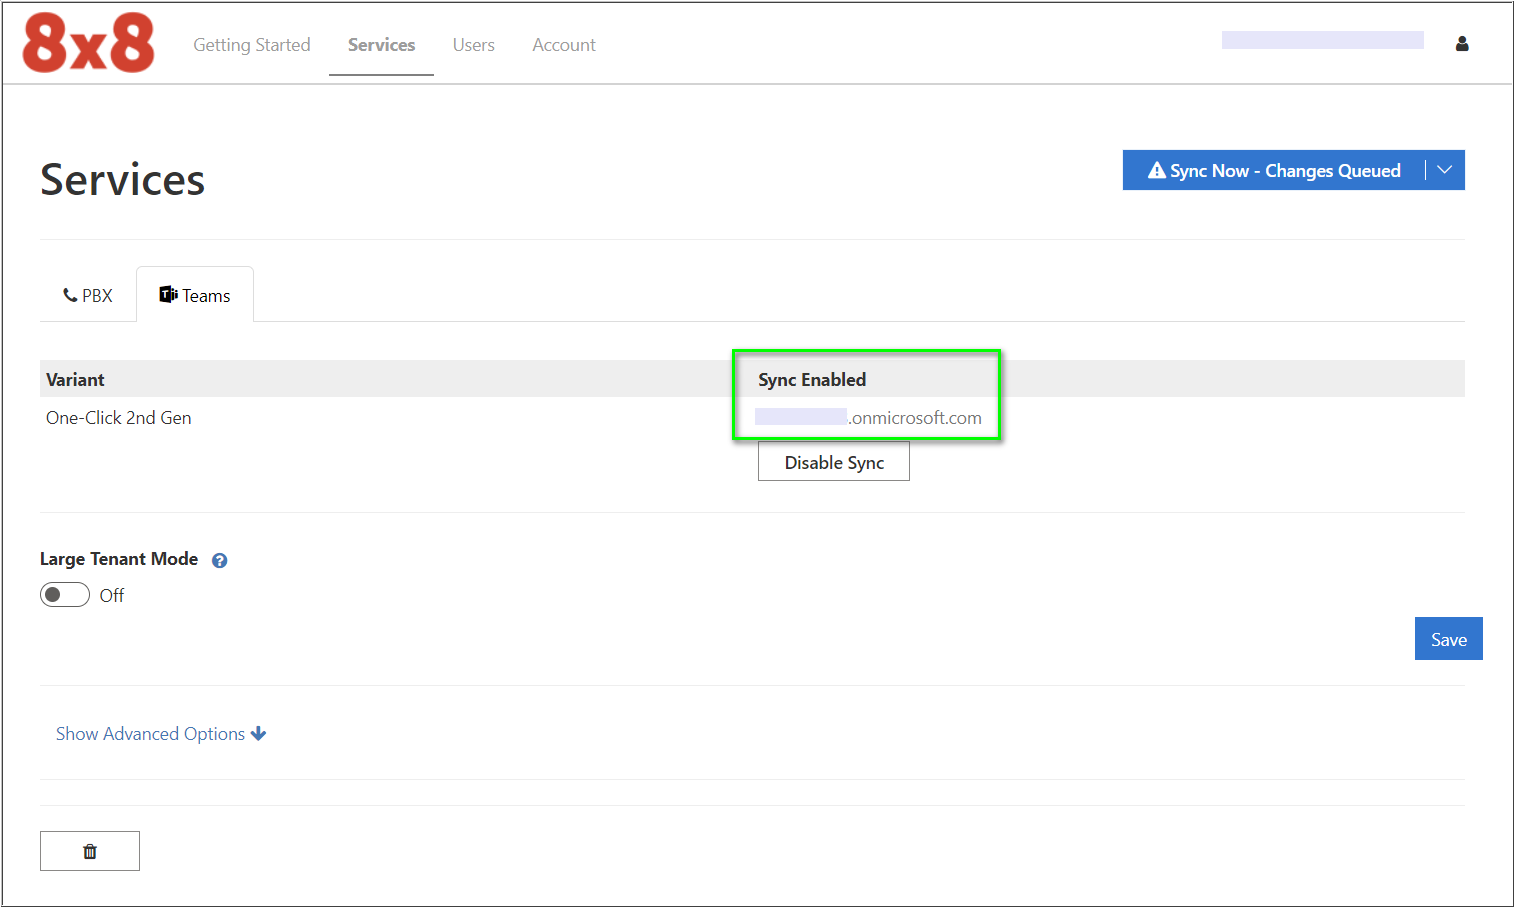
When the update process is complete, a brief Service sync enabled confirmation notice displays. At this stage, you have not actually performed a full service sync. That's coming up.
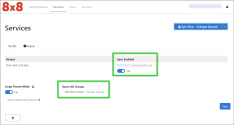
- Click Save. Your Microsoft 365 service domain is listed below Sync Enabled.
- Click Sync Now - Changes Queued to initiate the full sync of your Microsoft Teams users with their corresponding 8x8 user accounts.
-
Enter the appropriate administrator credentials to continue the process, if you didn’t have already entered them during the configuration session.
For future user syncs, simply click Sync Now The instructions and sync options for this are located in the Sync Users section.

Finally, the Users page displays a list of your Microsoft Teams users.
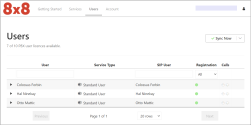


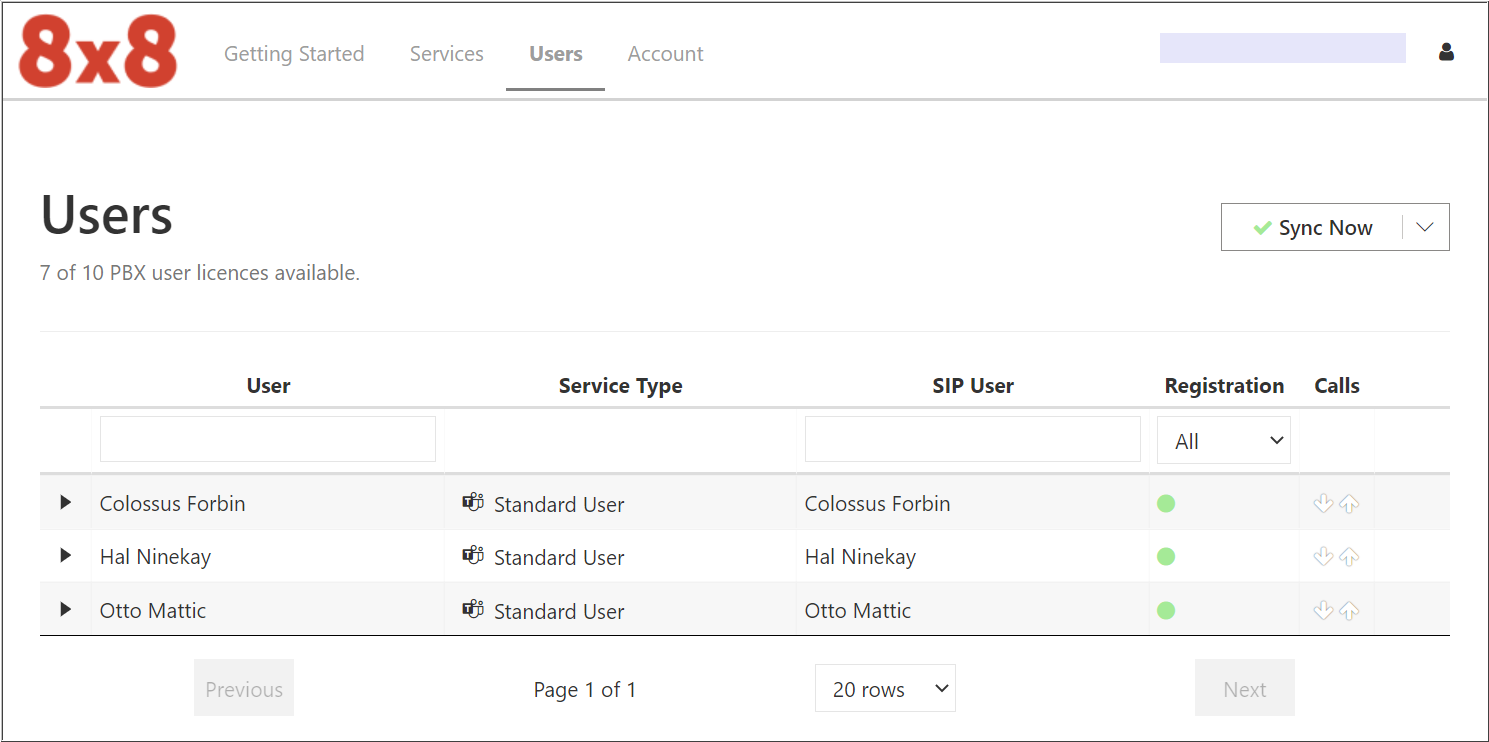
Admin portal Users tab definitions:
- User: Displays the names of the synced Microsoft Teams users.
- Service Type: Displays the type of Teams user that has successfully been synced to the portal from Microsoft Teams.
- Sip User: Displays the names of the synced 8x8 users.
- Registration: A green dot indicates that a successful registration between the Voice for Teams admin portal and the 8x8 service has been made. It does not indicate that a sync has been made with Microsoft Teams.
- Calls: Indicates the status of the user's most recent inbound and outbound calls. Thegreen arrows represent error-free calls, and red arrows indicate calls with problems. Hover over these arrows. A dialog opens and displays the recent call log.
Sync Teams users from a specified Azure AD Group
If you want to sync a large number of members of an existing Azure AD Group with their corresponding users through the 8x8 Admin Console, you need to prepare the 8x8 Voice for Teams admin portal fist by using Large Tenant Mode.
Important:
- In the Voice for Teams admin portal, the Large Tenant Mode feature quickly brings large numbers of Teams users into the portal when a sync is performed, and also eases the administration of Voice for Teams users.
- To achieve this, the intensive-testing process of Microsoft user license is bypassed. Normally, when Large Tenant Mode is not enabled, this testing process is performed by the admin portal. In this case, it's especially important to ensure that your Teams users have proper Microsoft licenses assigned to them before performing a sync with Large Tenant Mode enabled.
This process automatically syncs your Teams and 8x8 users, when completed. If you have not already done so, first follow the required Enable the PBX Service procedure, and then follow the steps below to enable sync of Azure user group members.
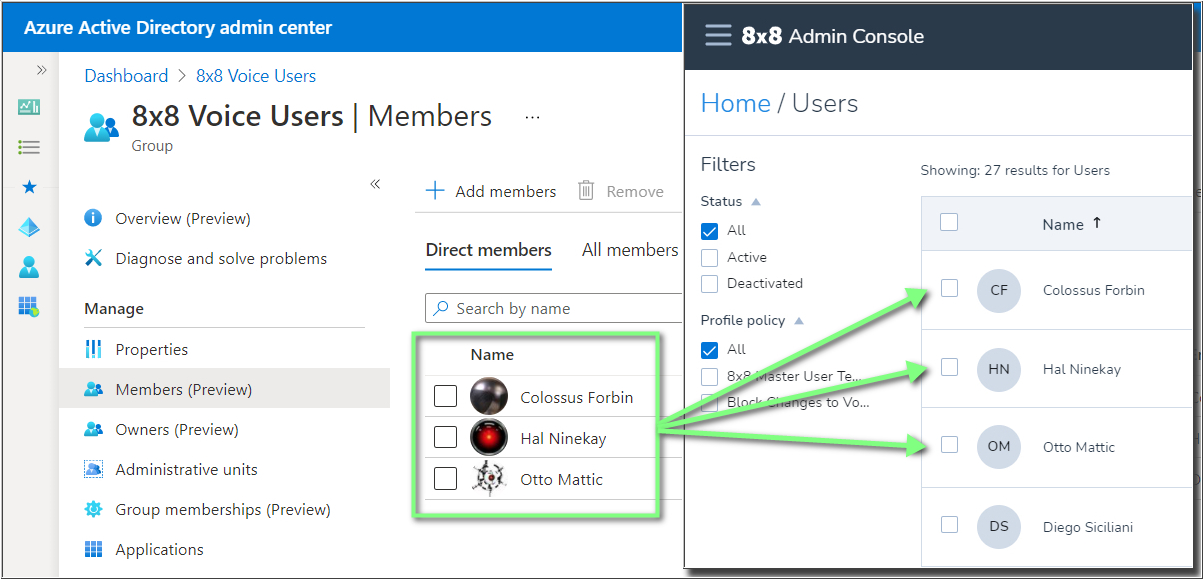
Note The name used in our example Azure user group is 8x8 Voice Users, but you can choose any name you wish.
To enable the sync of Azure user group members:
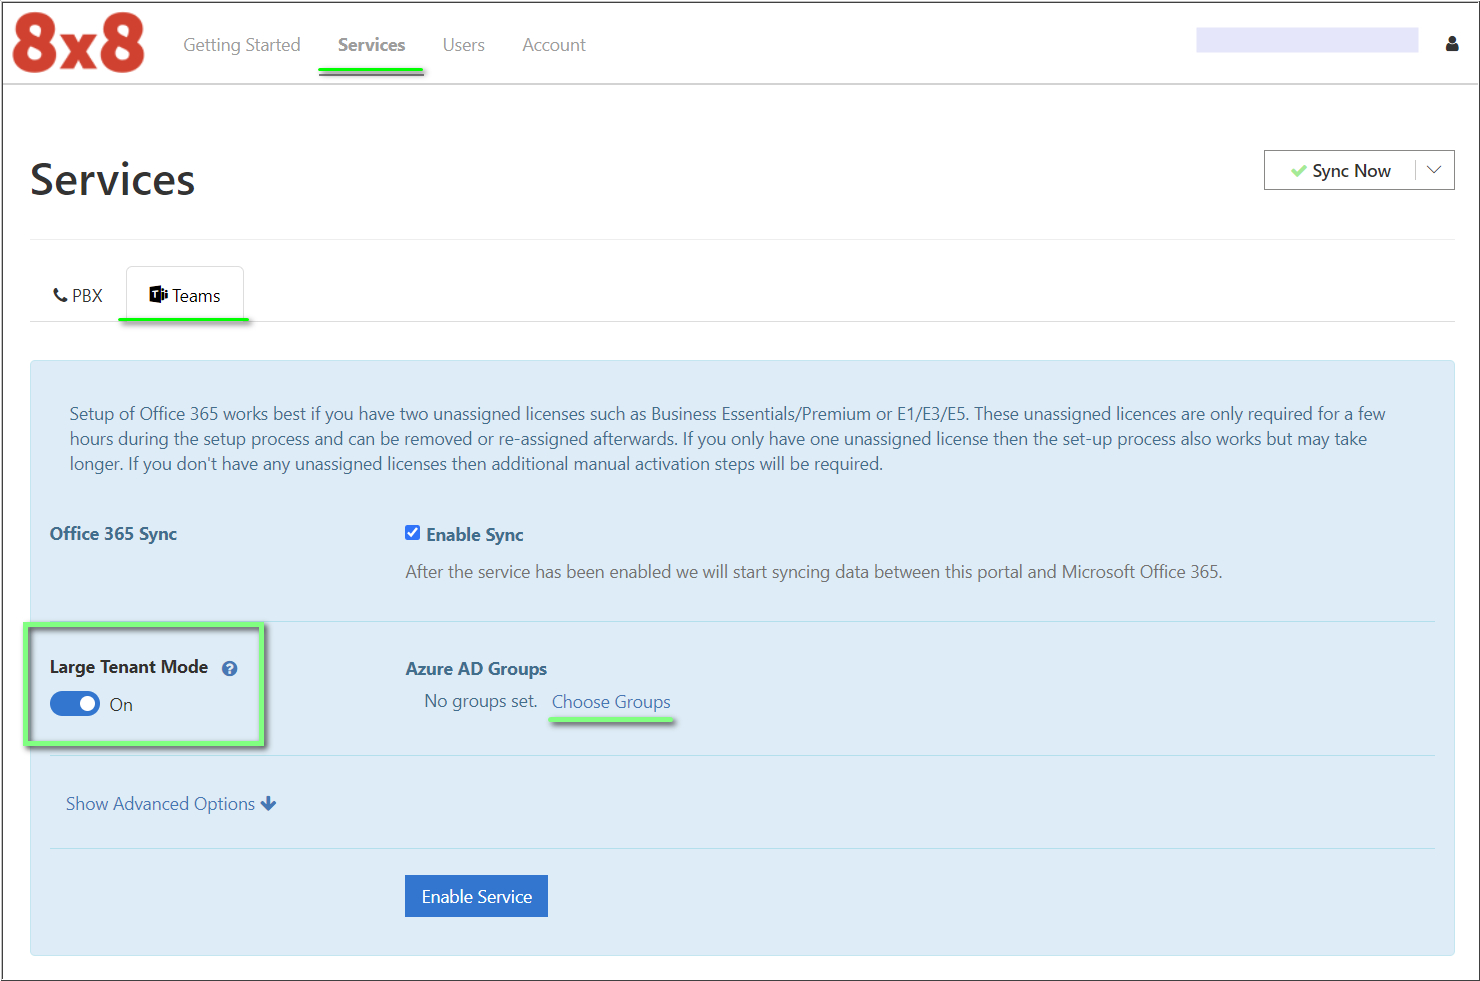
- In the 8x8 Voice for Microsoft Teams admin portal, on the Services > Teams tab, switch the Large Tenant Mode toggle to turn it On (blue).
-
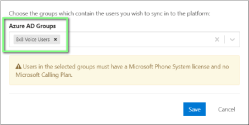
Under Azure AD Groups, click Choose Groups.
-
Sign in to Microsoft 365 services by using your administrator credentials with Global Admin rights to the Microsoft 365 tenant.
-
In the Permissions requested dialog box, select the Consent on behalf of your organization checkbox, and click Accept to install the 8x8 Voice for Teams app into your Microsoft service.
-
In the Azure AD Group list, choose the group which contains the users you want to sync to 8x8, in the dialog that opens.
Users from the Azure AD group(s) you selected must have a Microsoft Phone System license, and cannot have a Microsoft Calling Plan assigned to them.
-
Click Save.
-
Click Enable Service.

-
Enter your Microsoft 365 Global Administrator credentials.
Note: Because you already signed in, the dialog may only briefly appear and automatically sign you in.
-
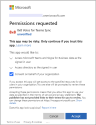
Select the Consent on behalf of your organization checkbox, and click Accept. to install the 8x8 Voice for Teams Sync app in your Microsoft 365 service.
When the process is updated, a brief Service added successfully confirmation notice displays.

The Sync Now button on the upper- right corner of the page changes and displays a Syncing notice.
CRITICAL: Two unique 8x8 domains will be added to the Settings > Domains section of your Microsoft 365 admin center. These 8x8 domains are critical to the functioning of Voice for Teams. If this process does not complete, the Teams dial pad will not appear for any Microsoft Teams user, and they will not be able to make or receive calls.
Your Microsoft 365 service domain displays below Sync Enabled, and the assigned Azure AD group name(s) displays below Azure AD Groups
-
Click Save.
Notes:
- At this point, our Azure AD group members will already have been synced to the admin portal.
- Optional: You can see the user list by clicking the Users tab. -
Click Sync Now - Changes Queued on the upper-right corner of the page.

-
Enter your Microsoft or 8x8 Global administrator credentials as needed. If you've performed all of the above steps in a single session, you already have supplied your credentials, and may not be required again.
When Sync Now displays a green check mark, the sync process is complete.
Finally, the Users page displays a list of your Azure AD Group members.
Note: For future user syncs, click Sync Now. Detailed instructions and sync options are located in the Sync Users section.


Finally, the Users page displays a list of your Azure AD Group members.
Admin portal Users tab definitions:
- User: Displays the names of the synced Microsoft Teams users.
- Service Type: Displays the type of Teams user that has successfully been synced to the portal from Microsoft Teams.
- Sip User: Displays the names of the synced 8x8 users.
- Registration: A green dot indicates that a successful registration between the Voice for Teams admin portal and the 8x8 service has been made. It does not indicate that a sync has been made with Microsoft Teams.
- Calls: Indicates the status of the user's most recent inbound and outbound calls. Green arrows represent error-free calls, and red arrows indicate calls with problems. Hover over these arrows. A dialog opens and displays the recent call log.