8x8 Frontdesk allows you to transfer calls to the desired party within or outside your organization. You can consult with the party before transferring (warm), or transfer directly (cold).
Cold transfer
- Accept the incoming call and keep the caller on the line.
Note: Placing a call on hold disables auto-filtering of contacts by site and loads the entire contact directory.
-
Hover over a contact in the contact directory list to view the transfer options.
Note: Contacts in your directory include company contacts as well as personal contacts saved as My Contacts.
-
From the options, click
 to transfer the call without consulting. The call is transferred to the contact.
Note: You can also drag and drop the contact record to the active call card and click
to transfer.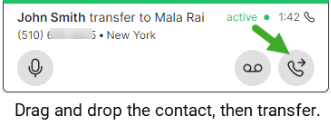
Warm transfer
-
Accept the incoming call and place it on hold.
Note: Placing a call on hold disables auto-filtering of contacts by site and loads the entire contact directory.
- Hover over a contact in the contact directory list to view the transfer options.
- From the options, click
 to place a call. A new call card appears for this outbound call.
- Once the call is answered, inform the contact about the transfer.
- Click in the outbound call card to transfer the call.

Cold transfer outside the organization (using the dial pad)
Let’s say you need to transfer a call to an external contact or a contact’s personal phone number, and you do not have them in your contact directory. Simply call the number using the dial pad, once answered, transfer the call.
To cold transfer a call by dialing the external number that is not saved in your contacts directory:
-
Accept the incoming call by clicking
 .
. -
In the call card that opens, click Put on Hold
 .
. -
On the upper-right corner of the contacts directory panel, click click Dialpad
 .
. -
In the dialpad that opens, enter the phone number and click Cold Transfer

-
A transfer notification card displays and informs you when the call was successfully transferred.
![]()
Notes:
- If there is a recently used number, by clicking Cold Transfer or Warm Transfer, the last dialed number used for transferring a call is automatically prefilled in the dialpad when To make the cold transfer, click again Cold Transfer or press Enter. Wait for the transfer info card to close. Now the call was transferred.![]()
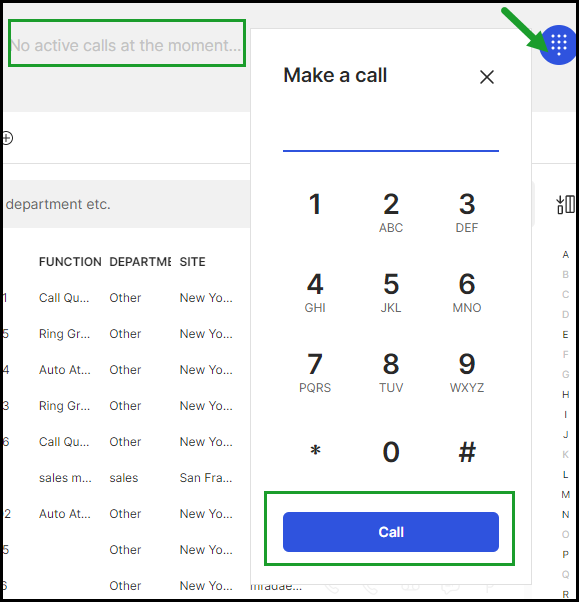
- When no number displays on the dialpad, you first have to type the number to which you want to transfer the call and press Enter. By default, it triggers a warm transfer to that number.
- When the active call is on-hold, the dialpad displays the Warm Transfer and Cold Transfer buttons. If there is no active call, the dialpad displays only the direct Call button.![]()
Cold transfer with chat consultation
You can consult contacts in your contact directory via chat before transferring a call. Chatting with contacts can help facilitate cold call transfers.
-
Accept the incoming call and keep the caller on the line.
- Hover over a contact in the contact directory to view the transfer options and click
 to chat.
 - After confirming their availability, click
 in the chat window to transfer the call.
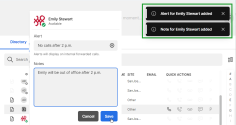
Add alerts and notes to contacts
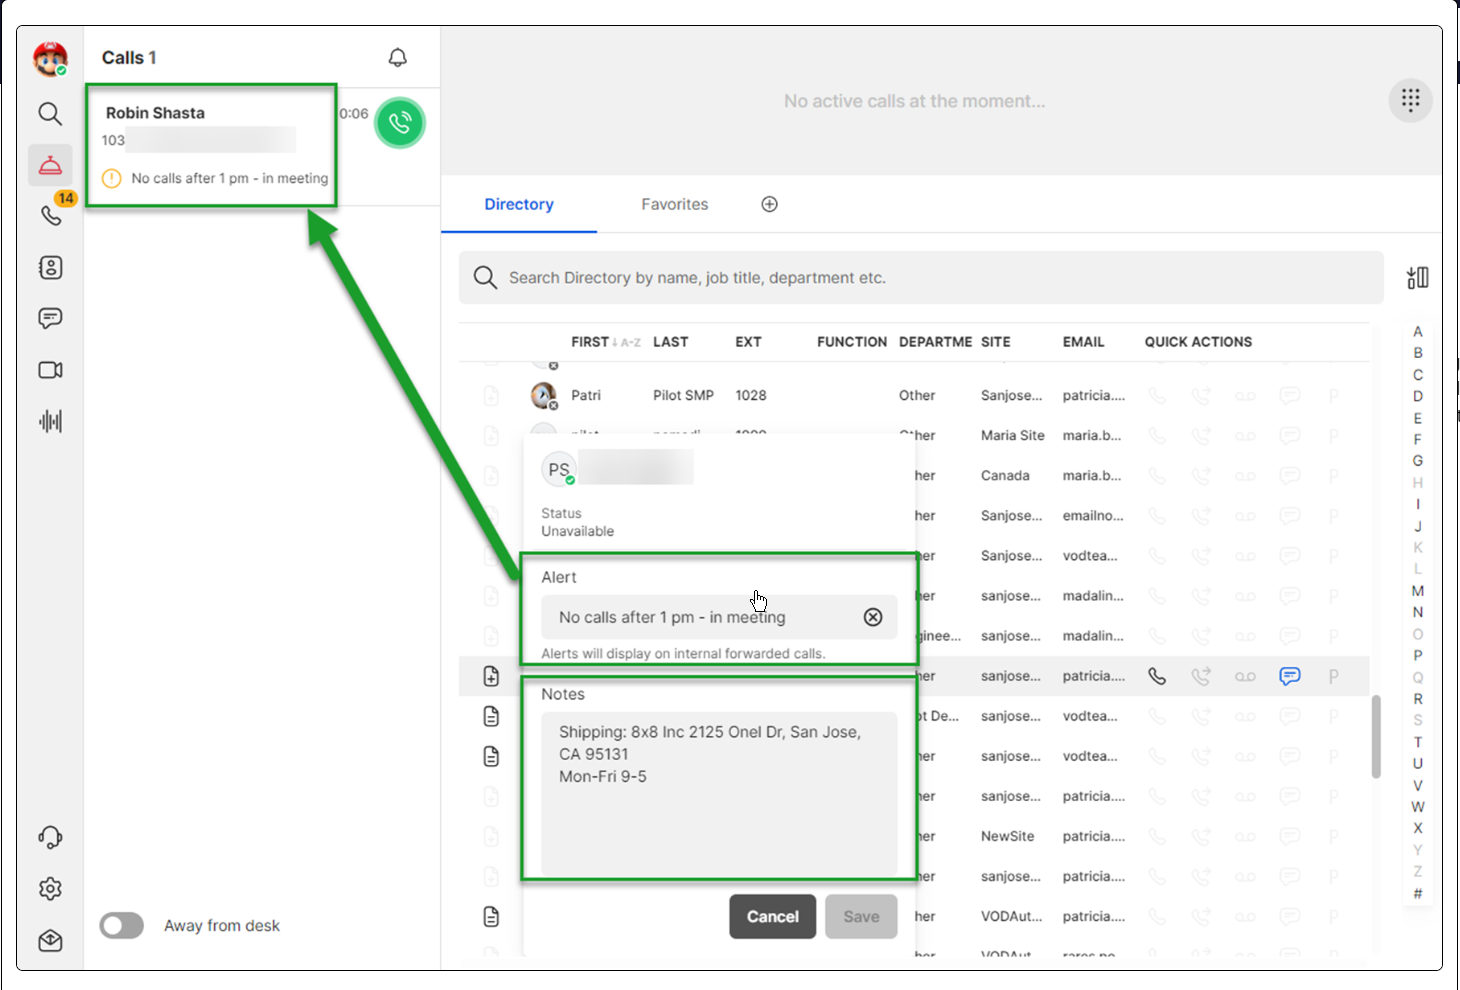
Receptionists can add notes to contacts indicating their preferences in regards to taking calls. If a contact is busy and wishes to forward all their calls to voicemail temporarily, the receptionist can enter a note for the contact and access it until removed.
The contact alert provides receptionists with useful information before answering a corporate forwarded call. To ensure there is a clear distinction between contact alerts and contact notes, the app now clearly indicates that the Alert field contains the alert message from the internal forwarded call, and the Notes field displays the notes attached to the contact in general.
To add a note and/or an alert to a contact:
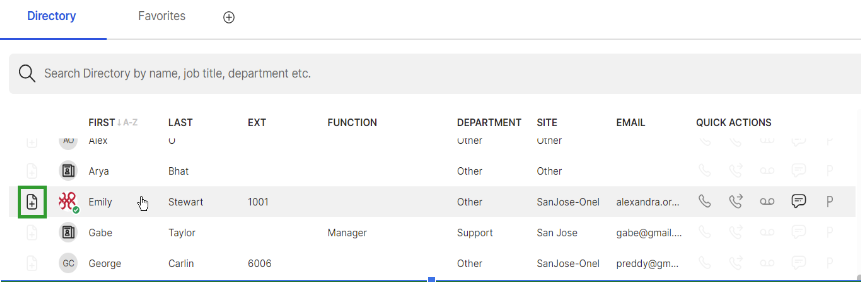
- Hover over the desired contact in the contact directory list.
-
Click
 button, next to the contact’s profile, to add a note and/or an alert.
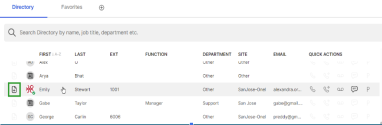
-
Add notes/alerts and click Save. A notification banner will appear.
- The highlighted note icon indicates an existing note.
-
To read a note, simply click
 next to the user status.

Transfer to voicemail
If a caller needs to reach a contact directly, but the contact is busy, you can transfer the caller to the user’s voicemail.
- Accept the incoming call and place it on hold.
- Hover over a contact in the contact directory to view the transfer options and click
 .
. - The caller is transferred to the user’s voicemail.
In certain situations, the Send to voicemail ![]() quick action is disabled for contacts in 8x8 Frontdesk. To help you understand why you cannot send a call to a contact’s voicemail, the system displays a tooltip when hovering over the disabled Send to voicemail
quick action is disabled for contacts in 8x8 Frontdesk. To help you understand why you cannot send a call to a contact’s voicemail, the system displays a tooltip when hovering over the disabled Send to voicemail ![]() quick action in the contact Directory or on the call card.
quick action in the contact Directory or on the call card.
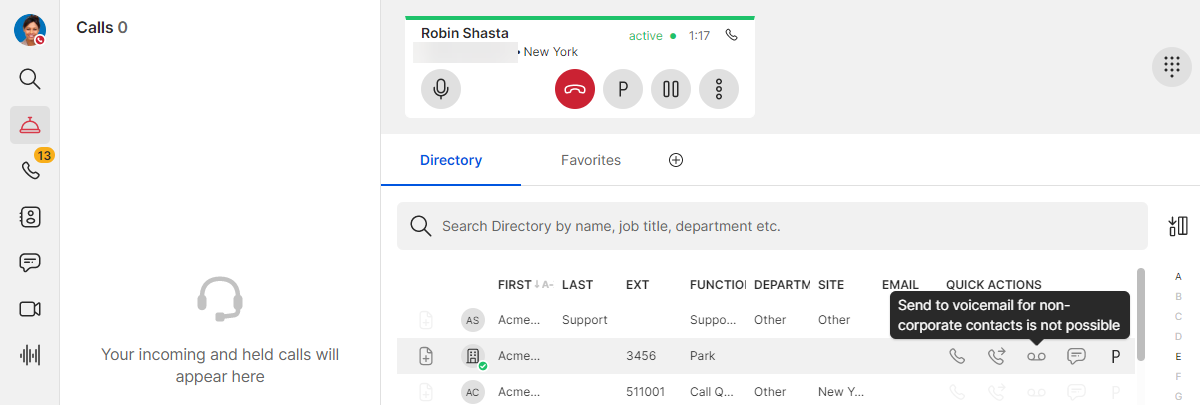
When disabled, the tooltip for Send to voicemail ![]() displays one of the following notes:
displays one of the following notes:
- Send to voicemail for Contact Center extensions is not possible: Displays when you cannot send a call to voicemail for Contact Center extensions.
- Send to voicemail for Microsoft Teams contacts is not possible: Displays when 8x8 Presence Sync integration is enabled to prevent an accidental voicemail transfer from 8x8 Frontdesk when your company is using Microsoft Teams voicemail and most employees are using 8x8 Voice for Microsoft Teams.
- Send to voicemail for non-corporate contacts is not possible: Displays when you cannot send a voicemail to non-corporate contacts.