Manage Contacts
The contact directory is an online directory for users to view their contacts and see who is online and available. Information used by the contact directory is pulled from user profiles that are created and maintained by your phone system administrator in your system’s Account Manager.
Phone system administrators can exclude extensions and user profiles from the contact directory using Account Manager. By default, all extensions appear in the contact directory, and the user profiles that have not been assigned to an extension do not appear.
To configure the global system settings for your system's contact directory, go to the 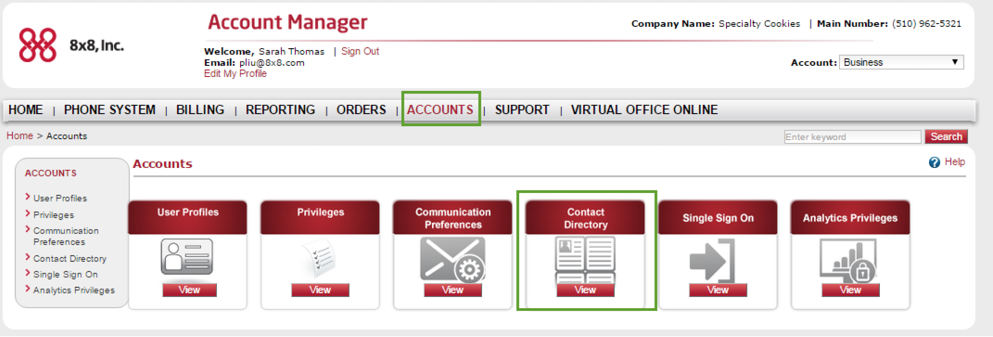
Note: Your contact directory is pulled from the system's user profiles. To edit an individual contact's information, you must make the changes to the user profile. For details, refer to Create User Profiles.
Exclude Extensions from Company Contacts
By default, all extensions and the user profile information attached to that extension, are shown in the contact directory. To exclude a user or service extension from the contact directory, select the corresponding check box in the Contact Directory Exclude Extension column.
Include Contact Information for Non-Extension Users
By default, user profiles assigned to an extension are shown in the contact directory. However, phone system administrators can also choose to display contact information for user profiles not assigned to an extension. User profiles not assigned to an extension are displayed in the table below the extensions. To display contact information for a non-extension user profile, clear the corresponding check box in the Contact Directory Exclude User Profile column.
Exclude Contacts from the Auto Attendant Directory
When using the Auto Attendant feature of your phone system, you can give callers the option to:
- Dial by extension
- Dial by name
- Search directory
To exclude an extension from these three options, select the corresponding check box in the Auto Attendant Exclude Extension column.
Company Contact Display Preferences
Phone system administrators can control what user profile information to display in the contact directory of user profiles. You can display Contact Card information such as email address, job title, and location, and also choose to filter contacts by department, or show more details for job titles.
- To select which user profile information is available to display, click Display Preferences.
- Select the check box to determine the data that is available to display or be used in the Contact Card, for contact Filters, and to customize Detail Mode.
- Click Save.
Note: By default, all but custom user profile fields are checked.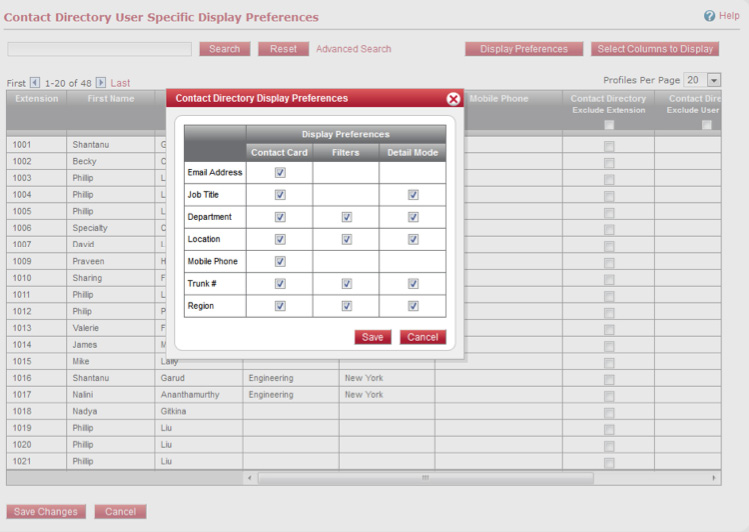
External Directory Upload
You can bring external contacts from Microsoft Exchange, Skype for Business, or other directories into the 8x8 contact directory. The external contacts are displayed in your contact directory, giving you the ability to interact with external and 8x8 contacts.
The 8x8 Work for Desktop and Switchboard Pro display the contacts uploaded in contact directory. In the 8x8 Work for Mobile, external directory contacts can be filtered by the application user.
To upload external contacts:
- Go to Accounts > Contact Directory.
Hover over the tool tip to learn about the upload requirements. This helps you comply with the upload requirements, and prevent errors while uploading the data.
- To download and open the Comma-Separated Values (CSV) file in Excel, click Download CSV Template.
- Add external contacts to the template file by entering the necessary details.
Notes:
-First name and last name are mandatory.
-Address entries are separated by a <_>. Multiple entries such as work address and home are separated by a <;> without a space. For example, you can have two entries written as <123 Street_San Jose_CA_12345_USA_WORK;456 Street_San Jose_CA_12345_USA_HOME>. - Once you have added all the data, Save the file to your computer.
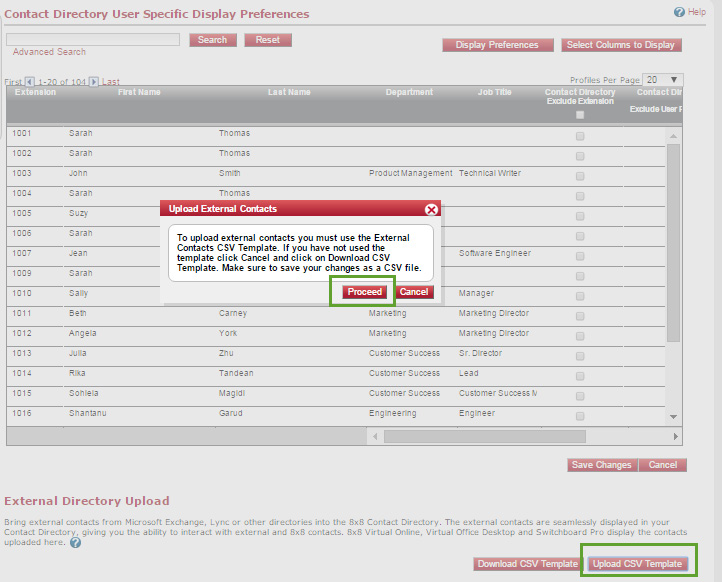
- In Accounts > Contact Directory, click Upload CSV Template.
- If your browser prompts you to accept the download, click Proceed.

- Click Add.
- Locate the file you just saved, and click Open.
- Click Upload.
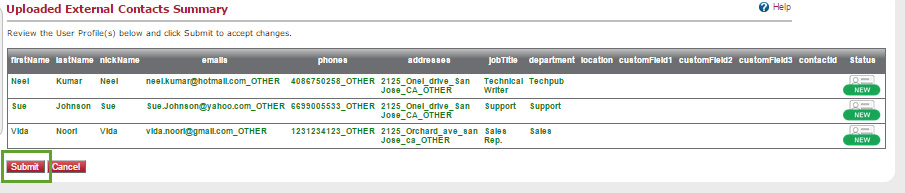
If you encounter any errors, please check the error message, fix the issues in the CSV file, and upload again. - Verify that the new information is correct, and then click Submit.

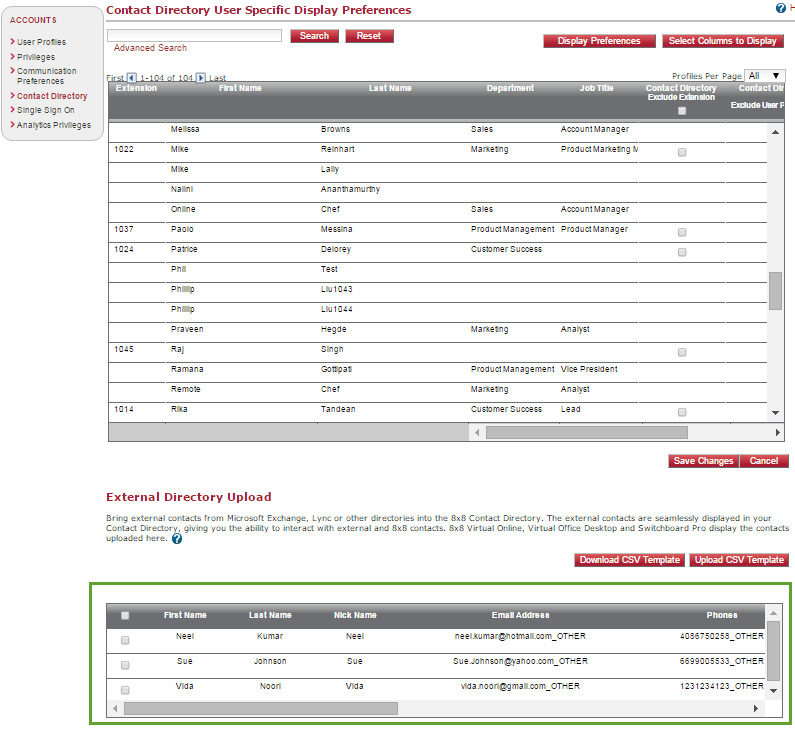
The new contacts appear in the External Directory Upload table.