Check Enable Screen Pop option.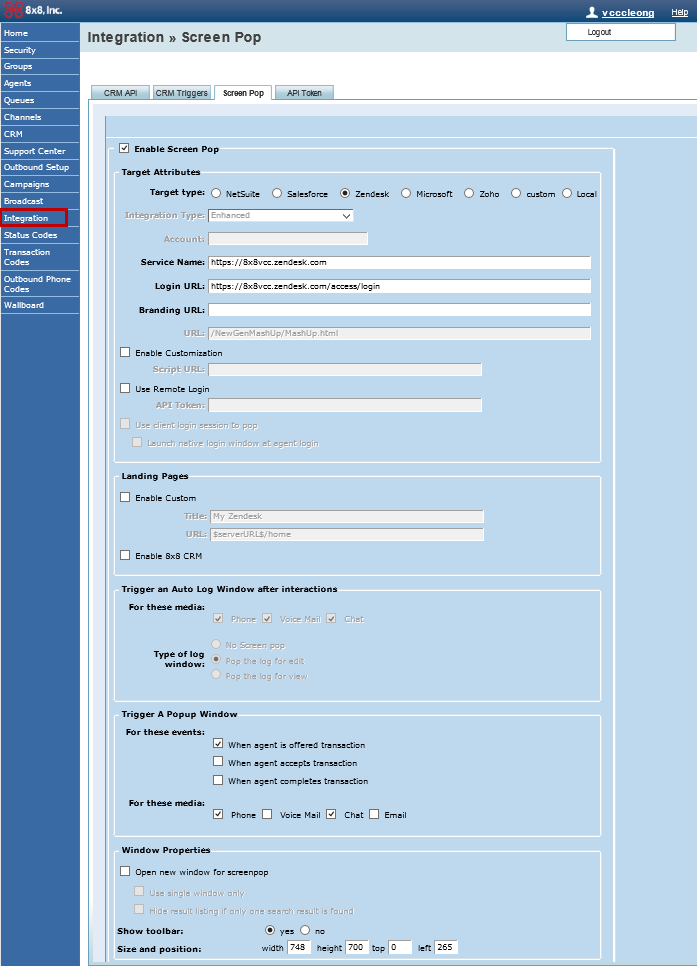
To enable Zendesk integration for a tenant, an administrator has to configure Screen Pop settings in the Configuration Manager. The configuration requires you to:
Agents then have to save the login credentials of their Zendesk account in the agent’s profile. Integration enables searching of records containing phone data matching caller ID, and pops up the corresponding record/s for specific events. The Screen Pop triggers when an agent is offered a call.
Configuring Zendesk involves defining Screen Pop settings, and entering external setup properties in an agent’s profile.
Screen Pop refers to the process of presenting end user data to an agent automatically during an interaction eliminating the need to manually search for the customer data. Screen pop occurs when the interaction is offered to an agent within the Zendesk dashboard. The process involves searching for end user records with one of the followings:
The Screen Pop applies to inbound transactions including phone, chat, and voicemail. If the search retrieves multiple records, the Screen Pop lists all matches in a table and displays the details of the first record. If the search fails to find matching records, then pops a new end user record.
Termination of all phone and chat interactions using the 8x8 Virtual Contact Center application triggers an auto log. An auto log captures transaction details of interactions. For example, a call log includes information about the call answered time, call duration, call termination time, and more.
Accepting an inbound interaction triggers a new ticket. At the termination of the call, the ticket gets updated with the auto log information.
To define Screen Pop settings for Zendesk:
Check Enable Screen Pop option.
Enter the Login URL. Append /access/login to the service URL.
https://subdomain.zendesk.com/access/login
For example: https://acmejet.zendesk.com/access/login
The Screen Pop configuration in the Configuration Manager is now complete.
|
Download User Guides
|
Product Information
|
|
Follow us on
|
Contact Us
|