Set up the 8x8 integration for Microsoft Dynamics
To take advantage of the 8x8 integration for Microsoft Dynamics, you must download the 8x8 integration app from the Microsoft Dynamics marketplace and configure it. Configuring 8x8 Work (also known as 8x8 Work) and/or 8x8 Contact Center with Microsoft Dynamics requires you to download the 8x8 integration package and then create a custom solution for 8x8 Work for Microsoft Dynamics or 8x8 Contact Center for Microsoft Dynamics.
To download the 8x8 integration package:
- Log in to Microsoft Dynamics as an administrator.
- Navigate to Settings
 > Advanced Settings > Settings > Solutions.
 - Click
 Get Solutions from Marketplace on the top menu.
 - Search for the 8x8 Integration for Microsoft Dynamics 365 app.
- Click Get It Now.
- Select an instance or Dynamics 365 organization to add the 8x8 solution to.
- Review the legal terms, select the check boxes to accept the terms, then click Install.
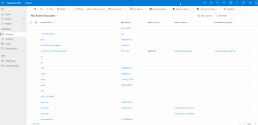
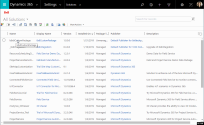
- Click Publish All Customizations o complete the installation process. The integration package displays in the list of solutions.
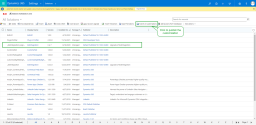
- Go to Settings
 > Advanced Settings > Settings > Solutions to copy the current configuration code.
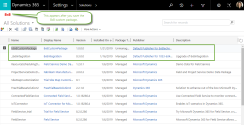
 - Click the 8x8 integration package version 0.3.6. A new window displays.
- Double-click new_config to open the web resources window.
- Click Text Editor.
- Copy and save the custom configuration details in a notepad.
- Open the Power Apps admin center platform and go to Solutions.
- Locate the integration package for the app and click on Update available from the Status column.
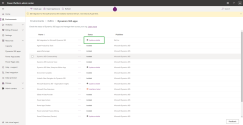
- Select the check box to agree to the terms of service, and click Update.
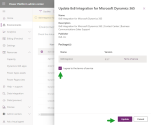
- Go to the Solutions page. You will now see two 8x8 integration packages installed.
- Click on the 8x8 integration package version 0.3.6.
- Click Apply updated solution. A new page displays.
- Click Overwrite Customizations.
- Click Import.
- Click Publish All Customizations.
- Close the window.
- Go to Settings
 > Advanced Settings > Settings > Solutions to update the current configuration code.
 - Click the 8x8 integration package version 0.3.7.
- Double-click new_config to open the web resources window.
- Click Text Editor.
- Update the new_config with the custom configuration details you saved prior to updating the installation package.
- Click OK.
- Click Publish All Customizations.
Important: We recommend copying your custom configuration details from the new_config file and saving them prior to updating the installation package. The updated installation package overwrites the new_config. You are required to add your custom configuration details into the new_config file for your updated custom integration to work.
Important: Only add the custom configuration details in the new_config file. Do not copy and paste the entire old code over the new one to avoid overriding the new code.
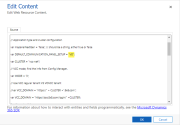
For example, the new_config for tenants using 8x8 Unified Login or 8x8 Unified Login with 8x8 Work will look like this: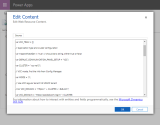
When you download the 8x8 integration package, the package points to the 8x8 Contact Center cluster by default. You must configure the team members in Microsoft Dynamics, and then customize the package for 8x8 Contact Center users, or 8x8 Work (also known as 8x8 Work) users, or both:
To configure teams in Microsoft Dynamics:
- Log in to your Microsoft Dynamics account.
- Go to Settings
 > Advanced Settings > Settings > Security > Teams.
 - Click the +New tab.
- In the Team Name field, type a relevant team name.
- In the Administrator field, add the unique identifier of the primary user responsible for the team. You can also click
 to select an ID from the record list.
 - Click the save icon
 from the bottom right corner of the page.
 - From the Team members section, click
 to add a user.
 - In the search field that displays, type the user name and:
- press Enter on your keyboard.
- click
 to search for the user.
 - Select the user from the search result list to make them a team member.
- Click the save icon
 .
.
-OR-
If the search finds a match for the user name, it displays the user info.
To create a custom solution for 8x8 Contact Center users:
- In Microsoft Dynamics, go to Settings
 > Advanced Settings > Solutions.
 - Click the New button.
- Enter a Display Name such as My 8x8 Custom Package.
The Name field value is also populated as the display name.Note: A Microsoft Dynamics limitation prevents you to start the name with a number. If you must start with a number, edit the name field to start with an alphabet letter instead of a number, such as My8x8CustomPackage.
- Select the default Publisher for your organization from the list. The publisher belongs to your organization and is created when the admin creates a domain. For example, the default publisher for AcmeJets is created when the admin creates https://AcmeJets.crm.dynamics.com.
- Enter a Version number such as 1.0.0.0.
- Click Save.
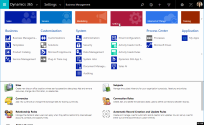
The custom solution, 8x8 Custom Package, appears in the list of solutions of your Microsoft Dynamics. - While in the Information window, open Components.
- Select Add Existing on the top horizontal menu.
- Select Web Resource from the list.
- Select new_config and click OK.
- Double-click new_config. It opens the web resources window.
-
Click Text Editor to edit the content.
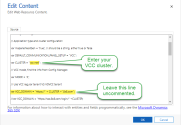
To integrate Microsoft Dynamics with regular 8x8 Contact Center tenants, you are only required to update the highlighted (bolded) part of the code as shown in the following example. Keep the rest of the code in your configuration file as is:
Important: Enter your VCC cluster and leave the highlighted (bolded) code line uncommented.
In the code, VO refers to 8x8 Work, while VCC refers to 8x8 Contact Center.// Team configuration: Use VO_TEAM and VCC_TEAM only if VO & VCC both needed. otherwise, leave it empty
var VO_TEAM = [];
var VCC_TEAM = [];
// Application type and cluster configuration
var DEFAULT_COMMUNICATION_PANEL_SETUP = "VCC";
var CLUSTER = "vcc-na4";
VCC mode, find the info from Config Manager.
var MODE = '1';
// Use VCC regular tenant VS VOVCC tenant
var VCC_DOMAIN = "https://" + CLUSTER +".8x8.com";
//var VCC_DOMAIN = "https://sso.8x8.com/login/" +CLUSTER;
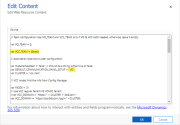
To integrate Microsoft Dynamics with 8x8 Contact Center tenants using 8x8 Unified Login or 8x8 Unified Login with 8x8 Work, you are only required to update the highlighted (bolded) part of the code as shown in the following example. Keep the rest of the code in your configuration file as is:
Important: Leave the highlighted (bolded) code line uncommented.
In the code, VO refers to 8x8 Work, while VCC refers to 8x8 Contact Center.// Team configuration: Use VO_TEAM and VCC_TEAM only if VO & VCC both needed. otherwise, leave it empty
var VO_TEAM = [];
var VCC_TEAM = [];
// Application type and cluster configuration
var DEFAULT_COMMUNICATION_PANEL_SETUP = "VCC";
var CLUSTER = "vcc-na4";
VCC mode, find the info from Config Manager.
var MODE = '3';
// Use VCC regular tenant VS VOVCC tenant
//var VCC_DOMAIN = "https://" + CLUSTER +".8x8.com";
var VCC_DOMAIN = "https://sso.8x8.com/login/" +CLUSTER;
Note: If a customer is on an na6 cluster and a mode 3 tenant, the domain is
https://sso.8x8.com/login/vccinstead ofhttps://sso.8x8.com/login/vcc-na6.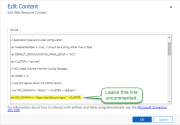
To learn more about 8x8 Contact Center platform URLs, see our Platform URL guide.To integrate Microsoft Dynamics with 8x8 Work:
Important: You are only required to update the highlighted (bolded) part of the code. Keep the rest of the code in your configuration file as is.
In the code, VO refers to 8x8 Work, while VCC refers to 8x8 Contact Center.// Team configuration: Use VO_TEAM and VCC_TEAM only if VO & VCC both needed. otherwise, leave it empty
var VO_TEAM = [];
var VCC_TEAM = [];
// Application type and cluster configuration
var DEFAULT_COMMUNICATION_PANEL_SETUP = "VO";
var CLUSTER = "vcc-na4";
// VCC mode, find the info from Config Manager.
var MODE = '3';
// Use VCC regular tenant VS VOVCC tenant
//var VCC_DOMAIN = "https://" + CLUSTER +".8x8.com";
var VCC_DOMAIN = "https://sso.8x8.com/login/" +CLUSTER;
To integrate Microsoft Dynamics with 8x8 Contact Center and 8x8 Work:
Important: You are only required to update the highlighted (bolded) part of the code. Keep the rest of the code in your configuration file as is.
In the code, VO refers to 8x8 Work, while VCC refers to 8x8 Contact Center.Determine the primary application of the tenant used by most employees and then specify the teams who are the exceptions. Note that teams are configured earlier in the installation process. To learn more, refer to the configure teams in Microsoft Dynamics section.
For example, let’s assume all AcmeJets employees use 8x8 Work except the Sales team who uses both 8x8 Work and 8x8 Contact Center. Designate 8x8 Work as the default application of the tenant and add the Sales team as the 8x8 Contact Center user. See the example code below:
// Team configuration: Use VO_TEAM and VCC_TEAM only if VO & VCC both needed. otherwise, leave it empty
var VO_TEAM = [];
var VCC_TEAM = ["Sales"];
// Application type and cluster configuration
var DEFAULT_COMMUNICATION_PANEL_SETUP = "VO";
var CLUSTER = "vcc-na1";
// VCC mode, find the info from Config Manager.
var MODE = '3';
// Use VCC regular tenant VS VOVCC tenant
//var VCC_DOMAIN = "https://" + CLUSTER +".8x8.com";
var VCC_DOMAIN = "https://sso.8x8.com/login/" +CLUSTER;
Note: If a customer is on an na6 cluster and a mode 3 tenant, the domain is
https://sso.8x8.com/login/vccinstead ofhttps://sso.8x8.com/login/vcc-na6. - Click OK.
- Click Save.
- Click Publish All Customizations and then close the window.
- Refresh the page to see the
 in Microsoft Dynamics application.
 Double-click
 icon on the left corner of Microsoft Dynamics to open the 8x8 integration app. Enter your credentials as an agent and log in.
With click-to-dial capability, you can simply click phone numbers within the Microsoft Dynamics records and initiate calls via the 8x8 Contact Center for Microsoft Dynamics or 8x8 Work for Microsoft Dynamics. Agents can click the phone field to make a call. Customize the contact form in Microsoft Dynamics, save your changes, and publish to see the click-to-dial capability. This feature is also available for any other object with a phone field.
To set up click-to-dial:
- Log in to Microsoft Dynamics.
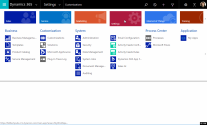
- Open Settings > Customizations and click Customize the system.
- Go to Components > Entities > Contact > Forms.
-
In the active forms list, click to open the Contact form, and start making changes:
- In the Contact form, double-click the CONTACT INFORMATION window.
- In the Section Properties window, go to the Formatting tab.

- Select Two Columns for the field layout. This option stretches the field box across two columns.
- Click OK to close the section window.
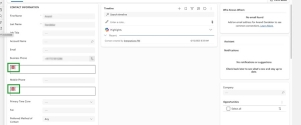
- Double-click each field individually, except the Business and Mobile phone fields, go to the Formatting tab and select Two columns.
Note: Keep the Business and Mobile phone fields as One column. It leaves enough room for the click-to-dial icon.
-
In the Insert tab on top of the page:
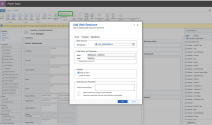
- Click Web Resource in the horizontal menu.
- In the General tab, select new_clicktodialform for web resource.
-
Enter a designated Name such as telephone1. The Label field is populated with the exact name. The click-to-dial label must be unique within each entity. Use the label mapping below for your convenience:
Entity Entity Field Click to Dial Label Contact Business Phone telephone1 Contact Mobile Phone mobilephone Account Phone telephone1 Lead Business Phone telephone1 Lead Mobile Phone mobilephone - Go to the Formatting tab and select layout as One column. It creates space for click-to-dial icon.
- Enter 1 for the Number of Rows.
- Click OK.
The new click-to-dial icon appears in the form. Drag and drop this field to the second column of the phone field .
- Go back to the Home tab on top of the page:
- Click Save.
- Click Publish and close the contact form.
- Open your Contacts in Microsoft Dynamics and click any contact to see the changes.
A red phone icon appears next to the phone field, indicating the click-to-dial capability. Click the phone number to establish a call from within the contact.
 - Repeat this procedure for other fields with a phone number to set up the click-to-dial functionality.
