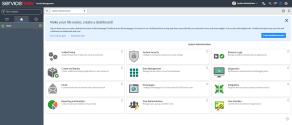
Get started with 8x8 Work for ServiceNow
Your ServiceNow administrator must install the 8x8 Work for ServiceNow Communication Panel before you can use it. If Single Sign-On is configured for your account, then the integration app launches automatically, eliminating the need for additional authentication.
Log in
Once your administrator has installed the integration, you can log in at any time.
To log in to 8x8 Work for ServiceNow:
- Access ServiceNow and log in with your username and password.
-
The ServiceNow dashboard and the 8x8 Work control panel display.
Note: If the 8x8 Work control panel does not automatically display or if at any time during your session you inadvertently close it, click the Phone
 icon at the top of your ServiceNow dashboard to bring it back.
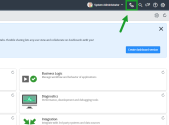
Important: If you are on Chrome and do not see 8x8 Work for ServiceNow, verify whether you have configured Chrome for the integration.
Note: The control panel floats on your interface, allowing you to move it.
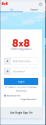
- Enter your 8x8 username and password on the control panel and click Login to begin using the integration.
- To enable automatic connection to the control panel for your future sessions, access the Settings icon and go to Integrations > ServiceNow.


Tour the interface
The 8x8 Work for ServiceNow interface has the following display and navigation menu:

Under the VO tab, you can access:
- Phone
 : Access your dial pad and view your active calls.
 -
Call Log
 : Access historic inbound and outbound calls to your phone extension.
Note: From here, you can also access incidents created for each of your calls in ServiceNow.
- Contacts
 : Access 8x8 Work directory contacts and ServiceNow directory users.
 - More
 : Click to access the following option:
- Logout: Log out of the app.
- Settings
 : Customize your app settings.
- Integrations: Manage your ServiceNow integration.
- 8x8: Use the drop-down menu to select either the 8x8 Work or Virtual Contact Center product.
- Locale: Use the drop-down menu to select the language locale for your integration.
- Report a problem: Report any issues you encounter with your integration.
- Locale: Specify your locale.
- About: View details on your user extension and your ServiceNow app.
Note: When you begin using the integration, you can assign users to active calls with unknown numbers, or with numbers that have multiple user matches. Click the Search tab and access the call information display and assign correct user information.