Install and configure the 8x8 Work app in Lightning mode
Important:
Salesforce has announced the deprecation of Open CTI, which is the framework used by the 8x8 Work for Salesforce integration. This change is driven by Salesforce. As a result, the current integration is only available to existing customers.
- If you are an existing customer (including those who installed the package before February 4, 2026), you can continue to use the integration without disruption until Salesforce retires Open CTI on February 28, 2028.
- If you are a new Salesforce customer, this change prevents you from setting up the current integration.
8x8 is actively developing an alternative integration to support both existing and new customers ahead of the retirement date.
Configuring the 8x8 Work for Salesforce in Lightning mode requires you to walk through the following steps:
If you are using an earlier version of the 8x8 integration, update your installation package.
To update your installed package:
- Log in to your Salesforce admin account.
- Check the version on the installation package available on Salesforce AppExchange or open the following link https://login.salesforce.com/packaging/installPackage.apexp?p0=04t1U000007sn1t
- The installed version and the latest version shows on the page. If your installed package is outdated, select which user types to install for.
- Click the acknowledgement check box, then click Upgrade.

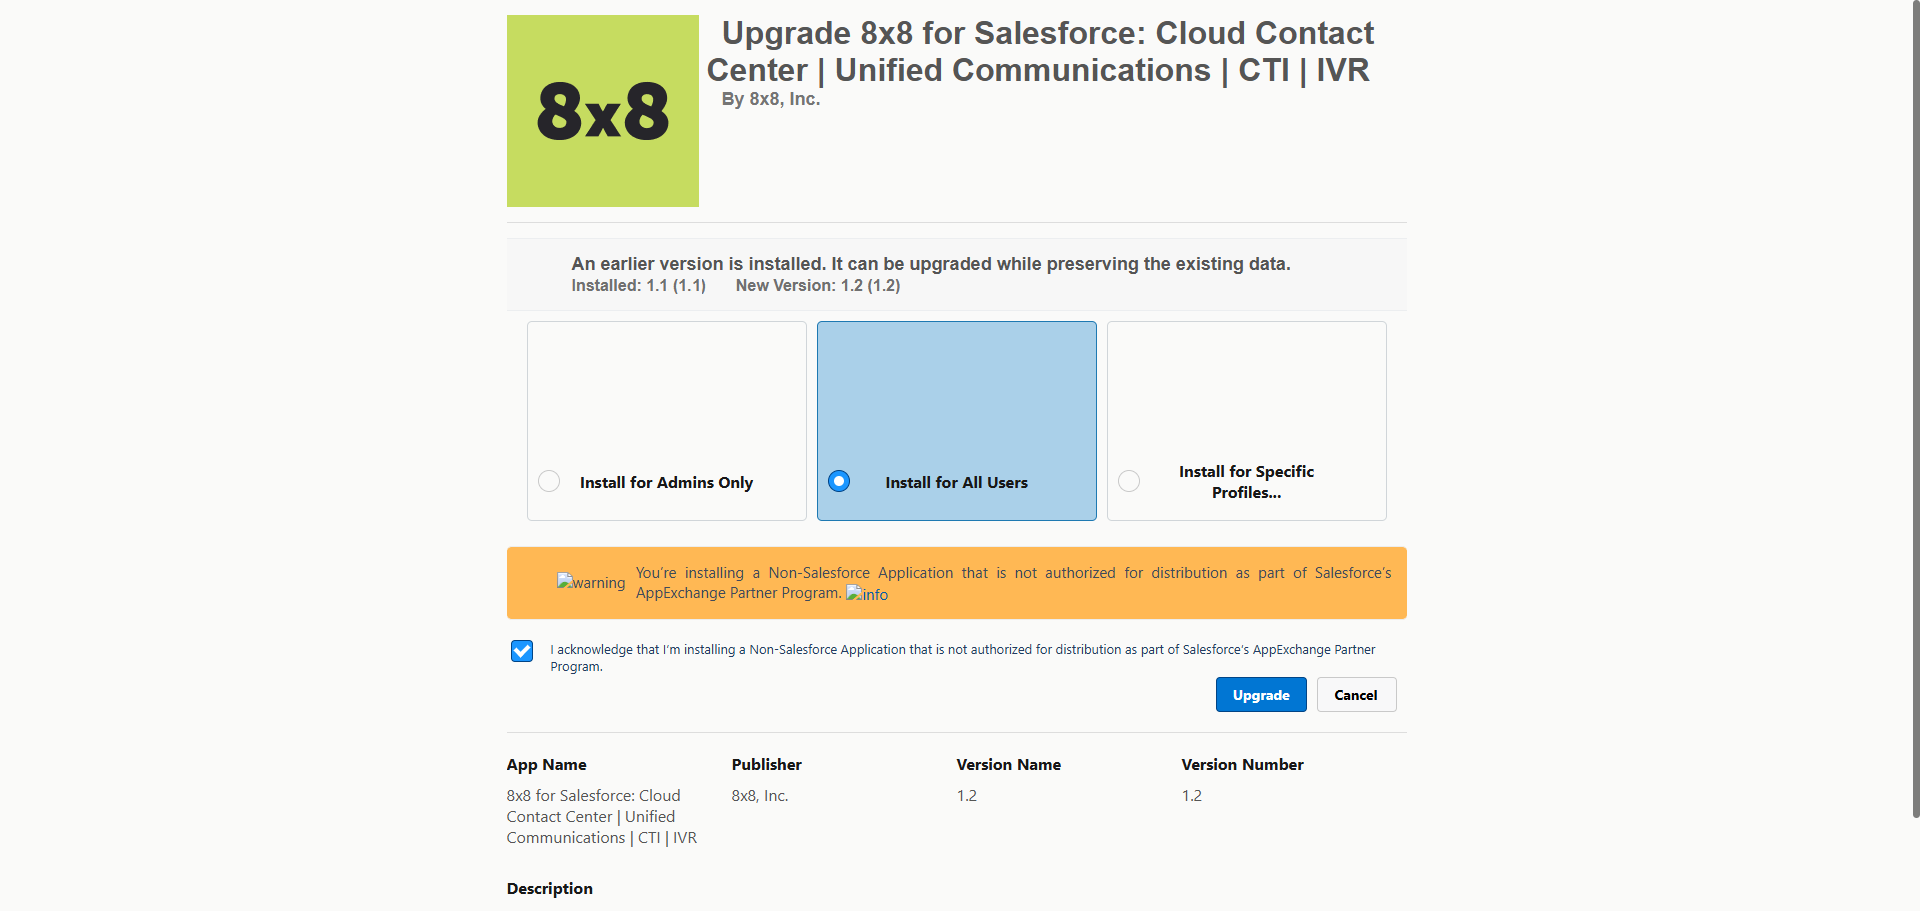
When the upgrade is complete, click Done. You are redirected to the Installed Packages page.
After the installation of your 8x8 integration is complete, you must configure your call center.
- In the Salesforce Setup navigation menu on the left, go to Feature Settings > Service > Call Center > Call Centers. The page displays the available call center packages installed.
- Click Edit from the left of the 8x8 Integration I3.

- Replace the placeholder CTI Adapter URL with the URL for your cluster as shown in the table below.

- Click Save.


| Tenant | CTI Adapter URL link |
|---|---|
| Salesforce production for 8x8 Work tenants (SSO enabled) | https://cloud8.8x8.com/mashell/public/salesforce.html?env=salesforce&companel=vo&ssoMode=true&nextGen=true |
| Salesforce production for 8x8 Work tenants (SSO disabled) |
https://cloud8.8x8.com/mashell/public/salesforce.html?env=salesforce&companel=vo&nextGen=true |
| Salesforce Sandbox | https://cloud8.8x8.com/mashell/public/salesforce.html?env=salesforce&companel=vo&sandbox=true&nextGen=true |
- While in Lightning mode, go to
 > Setup in the header.
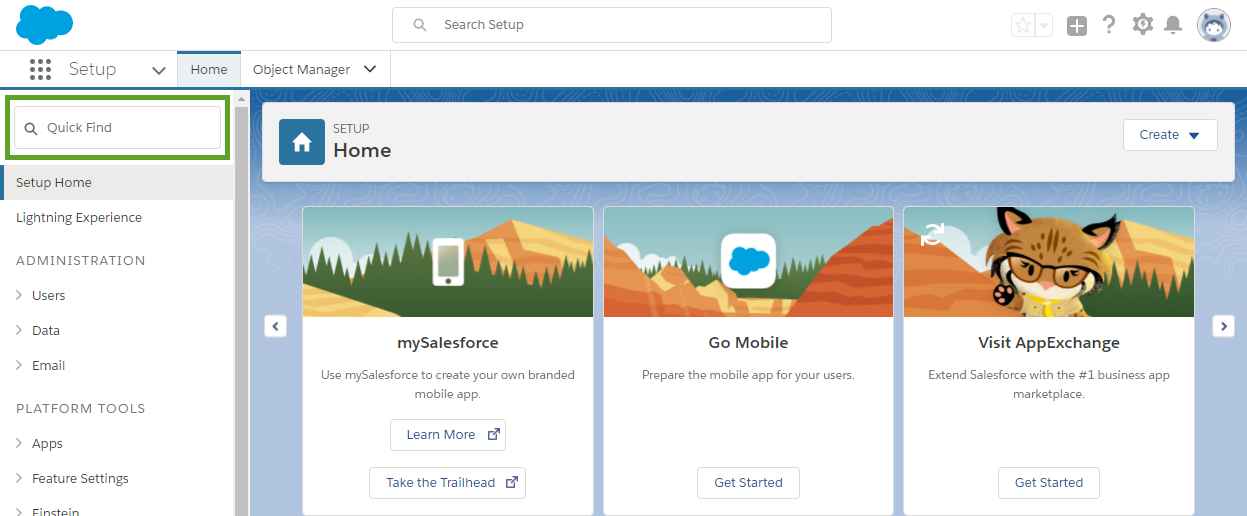
- In the search box at the top of the left column, enter <Call Center>.

- From the search results, select Call Centers under Call Center.
Note: Before you can access the call center list, you might see an introductory page. To navigate past it and view the call center list, click Continue.
Note: Before you proceed with the following steps, you must remove users from the previous version of your 8x8 Work call center.
- From the list of call centers, select the new call center you created.
- In the call center details, click Manage Call Center Users.
- Search for users alphabetically by clicking the desired letter, or individually by clicking Add More Users.
- From the resulting list, select users to add.
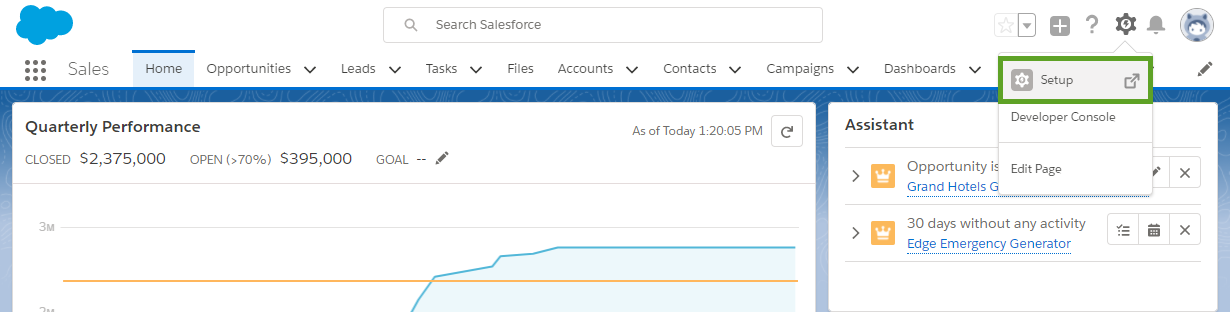
- While in Lightning mode, go to > Setup in the header.
- In the search box at the top of the left column, enter <App Manager>.
- From the search results, select App Manager under Apps.
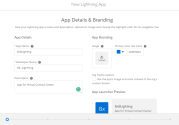
- Above the list of apps and below the Salesforce header, click New Lightning App.
- In the App Details and Branding screen that pops up, enter the app name and description. Click Next.
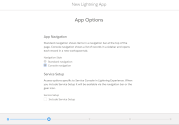
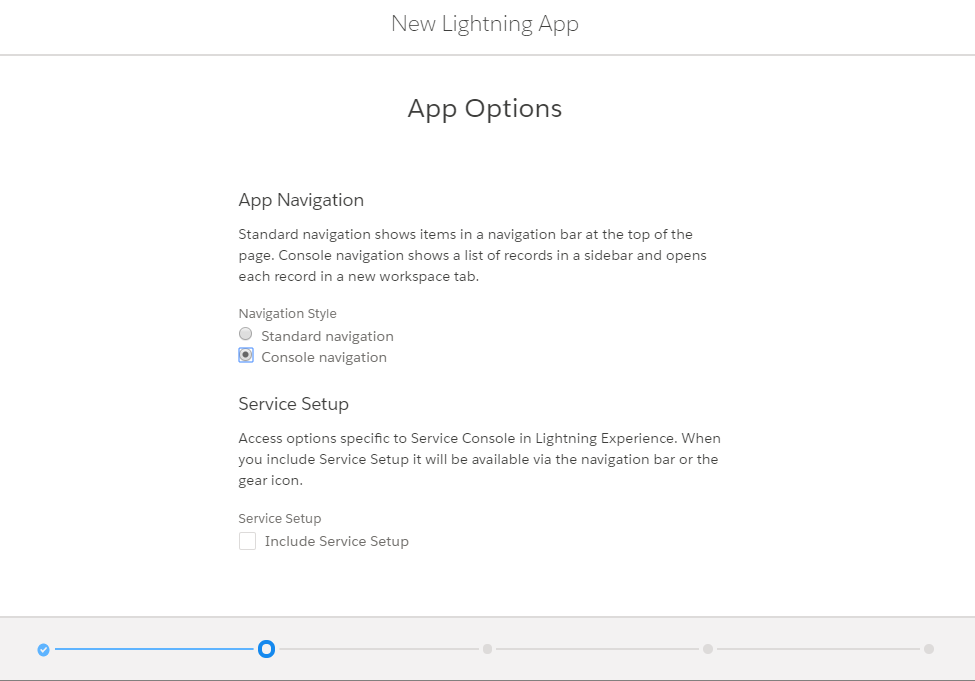
- In the App Options screen, select Console Navigation. Click Next.
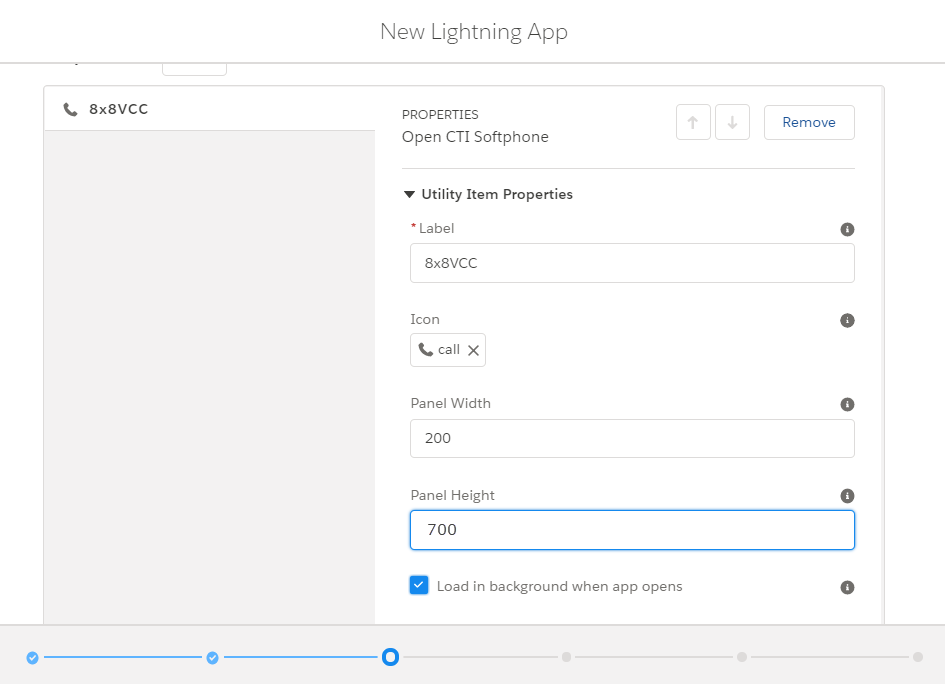
- In the Utility Bar screen, to enable the utility bar for this item, Add a utility bar item, and select Open CTI Softphone. The utility bar is a fixed footer that opens components in docked panels.

- Enter the desired app properties (such as label name, and panel height and width). The recommended height and width are 700 and 200, respectively.
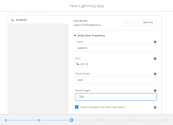
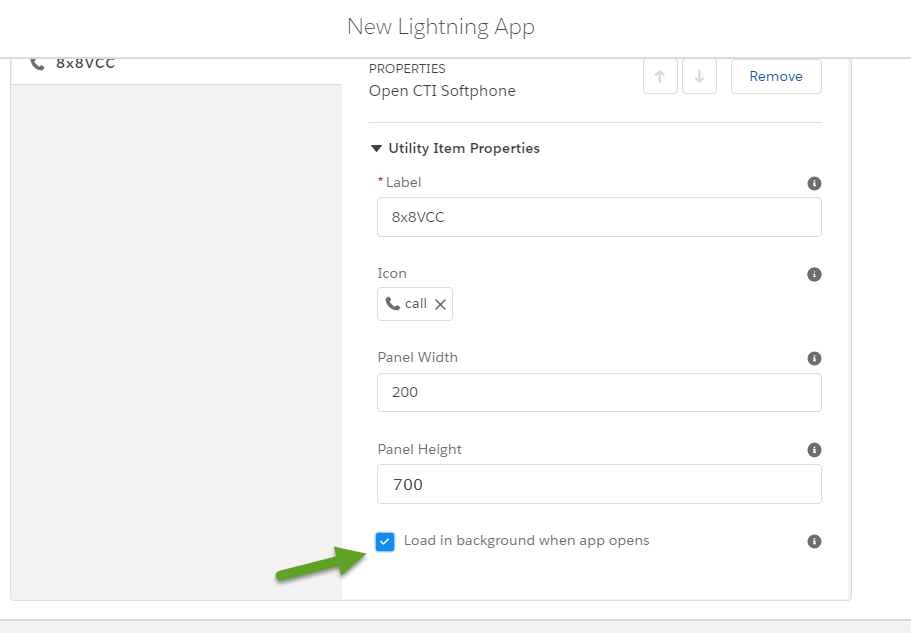
- Select the check box to load in the background when the app opens. Click Next.

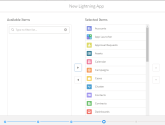
- In the Select Items screen, select all available items. Click Next.
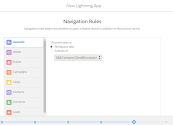
- Optionally, in the Navigation Rules screen, you can choose whether to open a related record in addition to the primary record. Click Next.
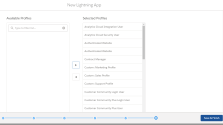
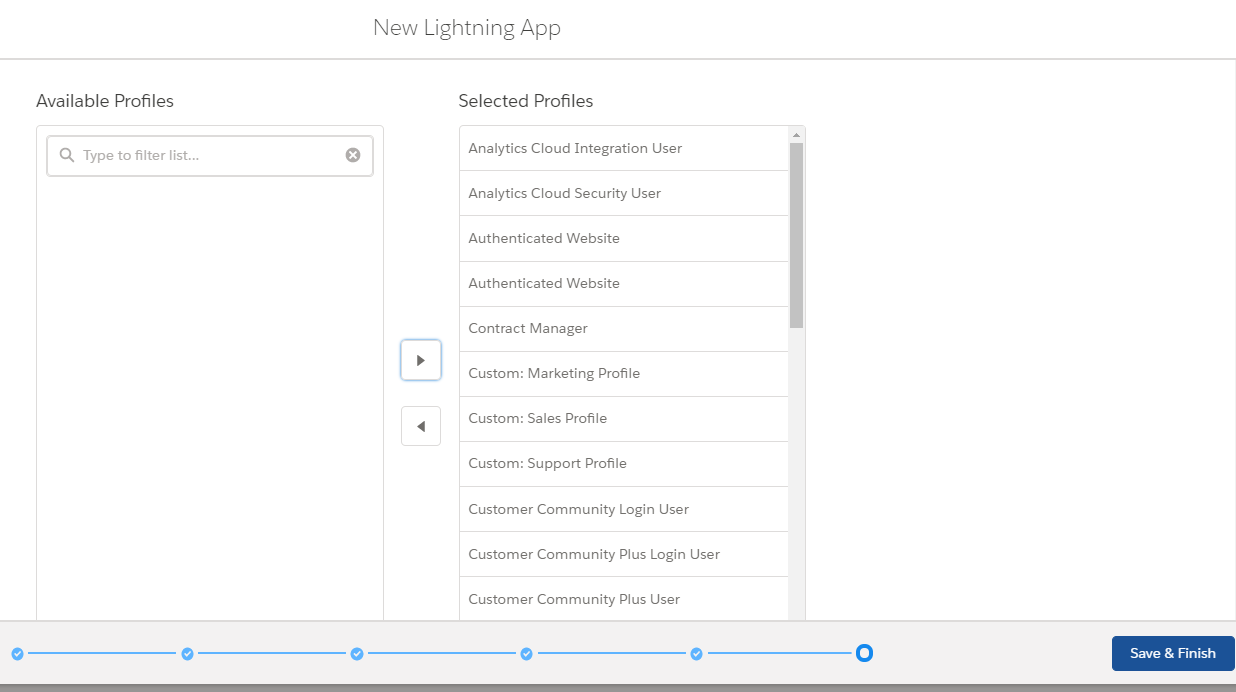
- In the Assign to User Profiles screen, select all user profiles that need access to the app. When you are done, click Save & Finish to return to the App Manager screen.
- Click
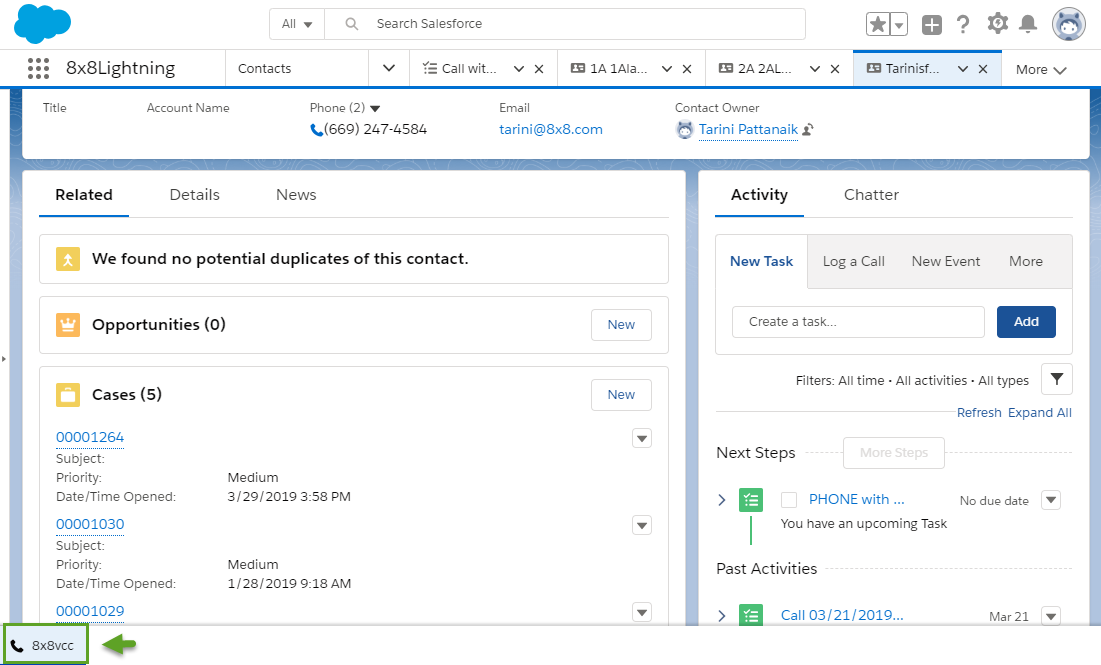
 to open the App Launcher, and click from the list of apps to activate Virtual Contact Center for Salesforce.
 - All enabled users can now access the app at any time from the footer bar of Salesforce.


In order for 8x8 to properly access Salesforce data you must allow pop-ups in Chrome and whitelist the 8x8 cloud domain URL.
In addition, the first time you try to open Salesforce, you get a notification that a pop-up is blocked in your URL bar. In order for the integration to work, you must accept prompts from Salesforce and 8x8 to allow the integration to access Salesforce data.
To allow 8x8 to access Salesforce data:
- When you see the blocked pop-up notification, click the icon in the URL bar to open a notification box.
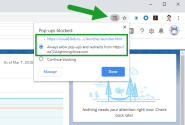
- In the notification box, select the Always allow pop-ups and redirects option, and click the URL that shows up above the option to open a Salesforce access prompt.
- Review the Salesforce prompt, then click Allow.

- If you are a Single Sign-On user, accepting the Salesforce prompt opens a similar 8x8 prompt. Review and accept the 8x8 prompt to return to Salesforce.
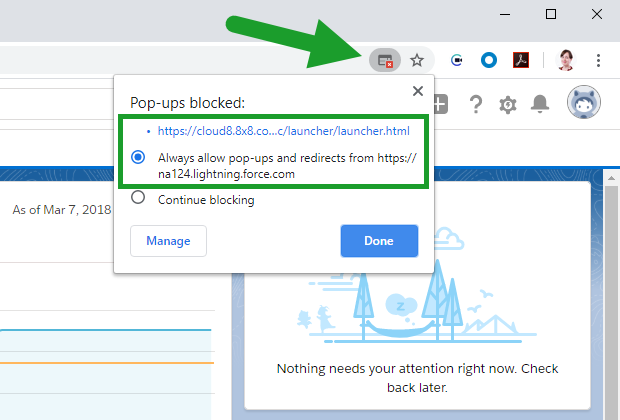
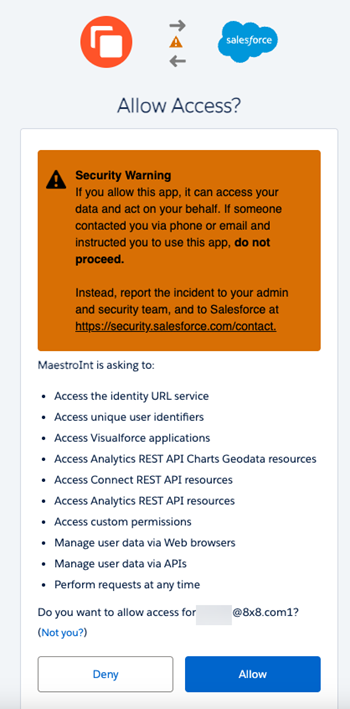
The 8x8 integration is now able to access Salesforce data.
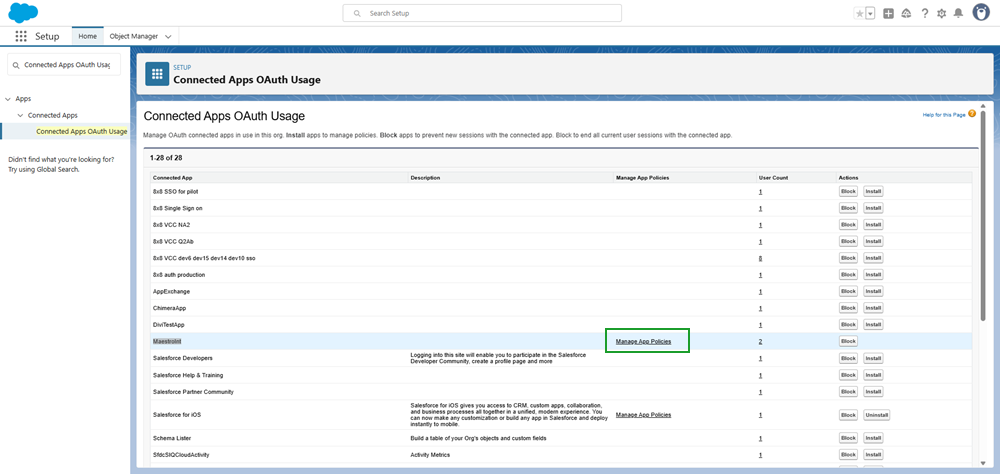
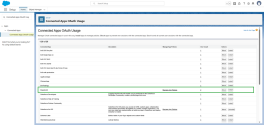
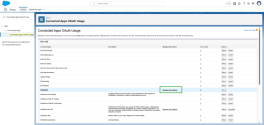
Usage restrictions can block access to uninstalled connected apps. Admins must find which uninstalled apps are in use, and decide if they’re trusted and should be installed, or block them if they’re not.
To install the MaestroInt app:
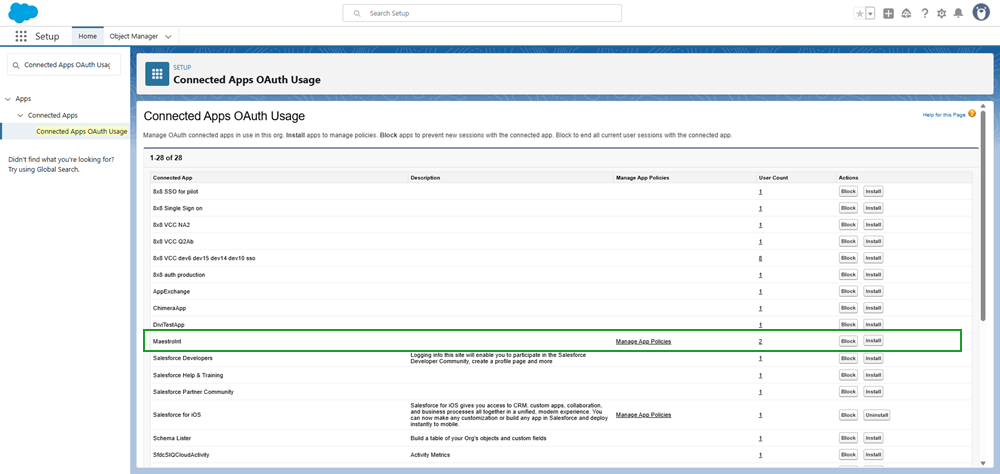
- In the Salesforce Setup, search for Connected Apps OAuth Usage and select it from the list of results.
- Locate the MaestroInt app in the list.
- Check if the MaestroInt app displays the Install button in the Action column. This indicates that the app is not installed.
- Click Install.
- From the confirmation page, select Install.
- After the MaestroInt app is successfully installed, click Manage App Policies.
- Click Edit Policies.
- From the OAuth Policies section, click the Permitted Users dropdown menu and select one of the following options:
- All users may self-authorize (Default): Allows anyone in the org to authorize the app after signing in for the first time.
- Admin approved users are pre-authorized: Allows only users with specific profiles or permission sets to access without authorizing. For this option, you must manage profiles for the app by editing each profile’s Connected App Access list. You can also manage permission sets for the app by editing each permission set’s Assigned Connected App list.
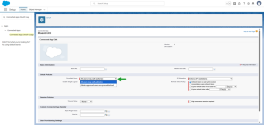
- Click Save.
Important: If you haven’t already added yourself as a user, you must do so now. This ensures that when you open the MaestroInt app, the OAuth screen will display. On this screen, enable OAuth access on the Connected Apps OAuth Usage page so non-system admin users can access the panel.