Install and configure the 8x8 Work app in Classic mode
Installing 8x8 Work for Salesforce is a one-time task for the administrator. Once installed, the app is available to all Salesforce agents. Setting up Salesforce for Single Sign-On integration with 8x8 Work for Salesforce requires the Salesforce administrator to:
To install the integration packages:
- Use the following URLs to set up the desired Salesforce environment:
- For Salesforce Production https://login.salesforce.com/packaging/installPackage.apexp?p0=04t1U000006FhX4
- For Salesforce Sandbox https://test.salesforce.com/packaging/installPackage.apexp?p0=04t1U000006FhX4
- At the prompt, log in as a Salesforce administrator.
- Select Install for All Users, and click Install.
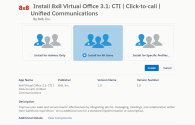
You are notified that the installation is complete. - Click Done.
You can see 8x8 Work for Salesforce under Installed Packages, along with the package installation details.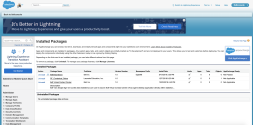
- Select Install for All Users, and click Install.
You are notified that the installation is complete. - Click Done.
- Click Setup.
- In the left navigation menu, search for or go to Customize > Call Center > Call Centers.
The page displays the available call center packages installed.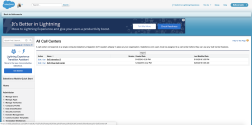
- Click Edit next to the 8x8 Work for Salesforce package.
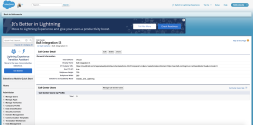
- Edit the CTI Adapter URL with the URL for your cluster and tenant. The format of the URL is as follows:
- For non-Single Sign-On users:
https://cloud8.8x8.com/mapanelweb/public/launcher/salesforce.html?env=salesforce&companel=vo - For Single Sign-On users:
https://cloud8.8x8.com/mapanelweb/public/launcher/salesforce.html?env=salesforce&companel=vo&ssoMode=true - For Sandbox:
https://cloud8.8x8.com/mapanelweb/public/launcher/salesforce.html?env=salesforce&companel=vo&sandbox=true
- For non-Single Sign-On users:
- Click Save.
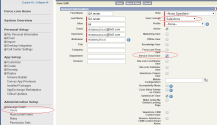
In this step, identify and set up the Salesforce users who need to use the 8x8 Work app. You can also add new users by clicking New User.
- Click Setup.
- Click Manage Users > Users.
- Click Find to list all users, or add filters to search for specific users.
- From the list of users, select the desired users, and click Add to Call Center.
- To allow users to use the Salesforce Service Console, you need to enable Service Cloud User in the agent profile.
When first configuring 8x8 Work for Salesforce integration for Single Sign-On, the agent needs to give permission for the 8x8 app to interact with Salesforce. In order to give permission access to the 8x8 plug-in, the agent needs to open the app from a Classic Salesforce page. The app behavior varies based on your Salesforce login mode.
- If you are a Salesforce Classic user, the app launches in a stand-alone browser window. The screen pop occurs in a new browser session or refreshes the same browser session based on your administrator's screen pop settings.
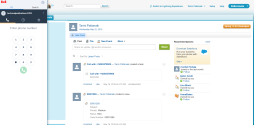
- If you are a Salesforce Service Console user, the app launches as a pop-up window within the Salesforce login window. You can minimize it whenever needed.
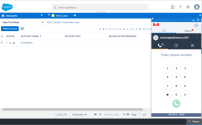
- If you are a Salesforce Lightning user, the app launches as a pop-up window within the Salesforce login window. You can click
 to move or minimize it whenever needed.
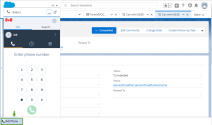
Usage restrictions can block access to uninstalled connected apps. Admins must find which uninstalled apps are in use, and decide if they’re trusted and should be installed, or block them if they’re not.
To install the MaestroInt app:
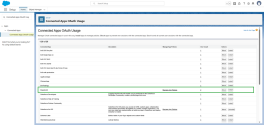
- In the SalesforceSetup, search for Connected Apps OAuth Usage and select it from the list of results.
- Locate the MaestroInt app in the list.
- Check if the MaestroInt app displays the Install button in the Action column. This indicates that the app is not installed.
- Click Install.
- From the confirmation page, select Install.
- After the MaestroInt app is successfully installed, click Manage App Policies.
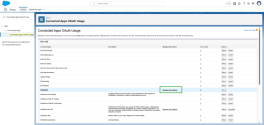
- Click Edit Policies.
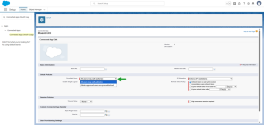
- From the OAuth Policies section, click the Permitted Users dropdown menu and select one of the following options:
- All users may self-authorize (Default): Allows anyone in the org to authorize the app after signing in for the first time.
- Admin approved users are pre-authorized: Allows only users with specific profiles or permission sets to access without authorizing. For this option, you must manage profiles for the app by editing each profile’s Connected App Access list. You can also manage permission sets for the app by editing each permission set’s Assigned Connected App list.
- Click Save.
