Get started with Salesforce integration
If your admin has configured the integration, when you log in to the 8x8 Contact Center app, it automatically connects to Salesforce CRM. The authentication window displays in a separate tab. When connected to Salesforce, the window closes. If the integration disconnects, you can manually reconnect it.
To reconnect the integration:
- In the 8x8 Contact Center app, go to Change status
 > My profile.
 - In the window that displays, click the Integrations tab.
- Click Reconnect.
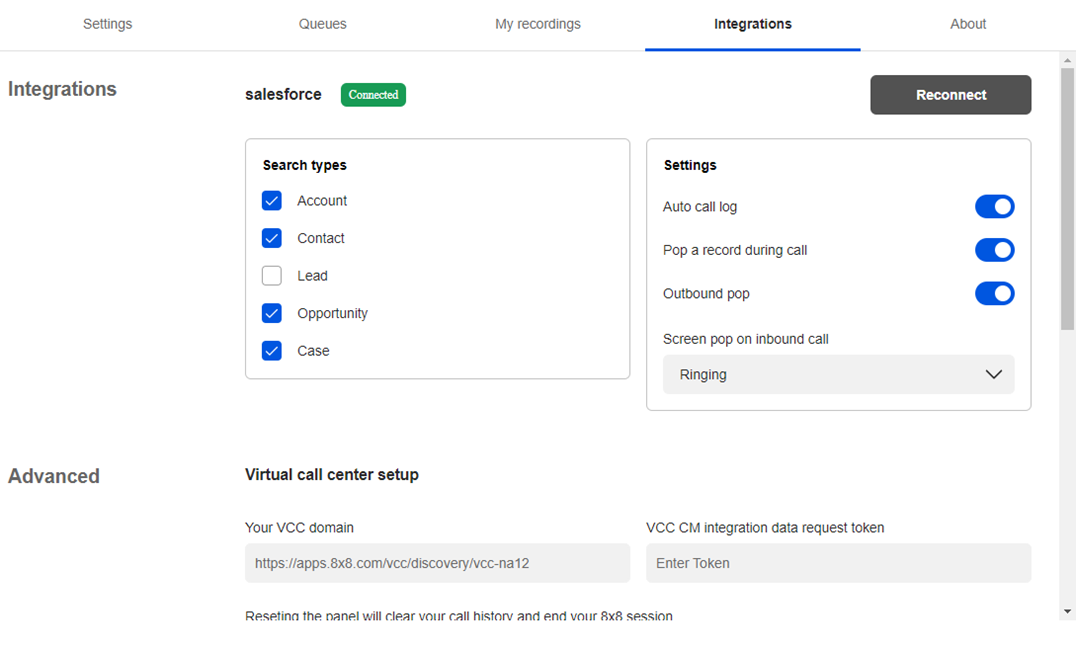
When connected, the system displays Connected in green in the Integrations section.
Integration settings
You can enable several integration settings in the 8x8 Contact Center app.
To customize your integration:
- Log in to the 8x8 Contact Center app.
- Click Ready to work or Work Offline to start the session.
- Go to Change status > My profile.
- In the window that displays, click the Integrations tab.
- Customize the integration:
- Under Search types:
- Account: Enable this option so a call is searched for an existing Account. This option is enabled by default.
- Contact: Enable this option so a call is searched for an existing contact record. This option is enabled by default.
- Lead: Enable this option so a call is searched for an existing lead record. This option is disabled by default.
- Opportunity: Enable this option so a call is searched by a specific opportunity. This option is disabled by default.
- Case: Enable this option to search cases associated to matched records containing the same phone number or email address as the current interaction. This option is disabled by default.
- Under Settings:
- Auto call log: Enable this option to automatically generate a log for all phone calls, chat interactions, and voicemails. A call log includes information about the time a call was initiated, terminated, duration, queue name, and more. A chat log includes the chat time and transcript. Just like a phone log, the voicemail log includes information about the time a call was initiated, terminated, duration, queue name, and more. This option is enabled by default.
- Pop a record during a call: This controls the screen pop behavior while handling multiple concurrent inbound calls. If enabled, then during a second call, a contact screen pop displays if the call has a single match record. If disabled, then during the second call, no contact screen pop displays.
- Outbound pop: This controls contact screen pop for outbound calls. If enabled, when an agent makes an outbound call and a single-match record is found for that phone number, then a contact screen pop displays. The contact screen pop does not display if this option is disabled.
- Screen pop on inbound call: Allows you to set a screen pop when the agent's phone is ringing, connected, or never.
- Ringing: A contact pops up for a single-match record during an inbound call, chat, or voicemail when the agent's phone is ringing.
- Connected: A contact pops up for a single-match record when an inbound call, chat, or voicemail connects.
- Never: The contact does not pop up when there is a single-match record during an inbound call.
