Note: This version of the integration is no longer supported. For the latest version of this guide, see Virtual Office for Salesforce 3.1.
Important: For Salesforce administrators only.
Installing 8x8 Virtual Office for Salesforce Communication Panel is a one-time task for the administrator. Once installed, the app is available to all Salesforce agents.
- Log in to your Salesforce administrator account.
- Navigate to AppExchange.
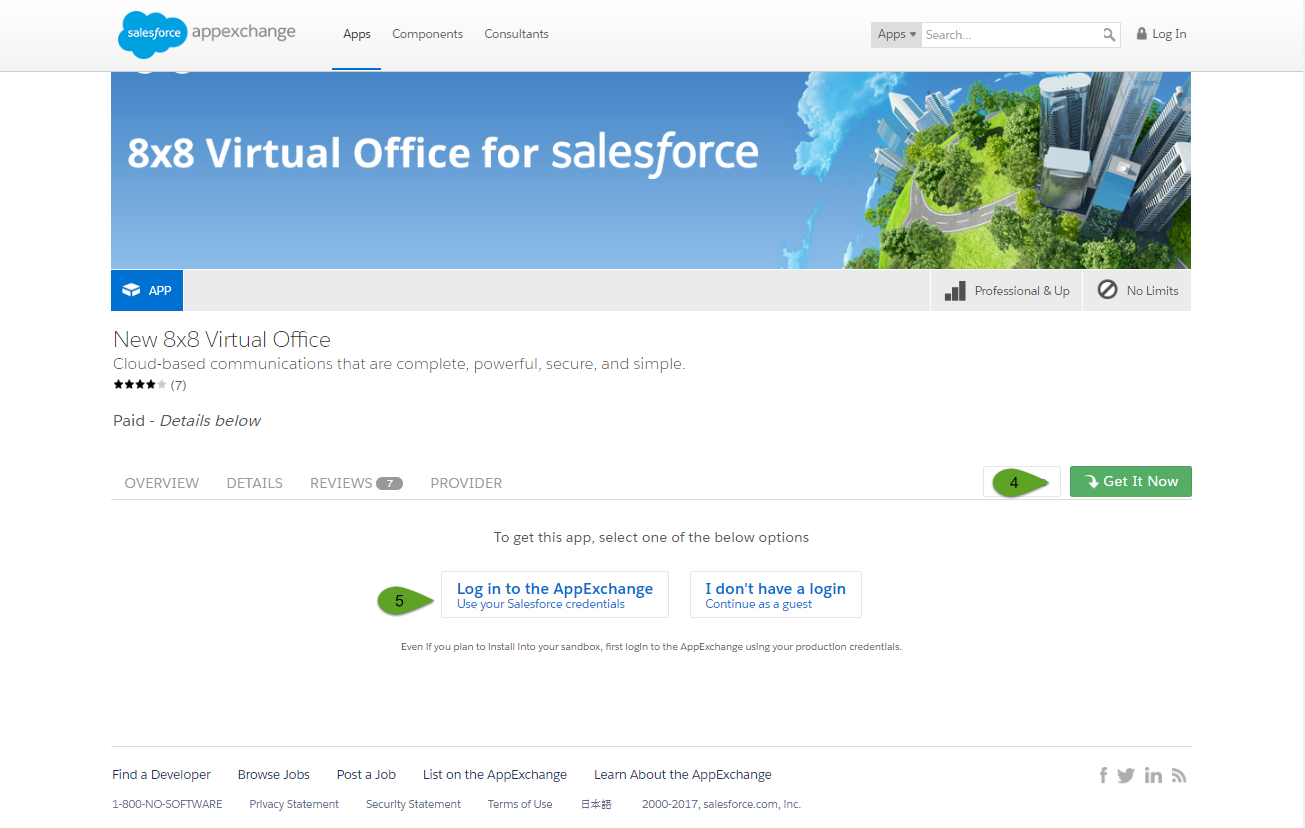
- Find and select 8x8 Virtual Office app.
- In the app description page, click Get it Now.
- Log into the AppExchange using Salesforce credentials.

- Select to install in Production or Sandbox.
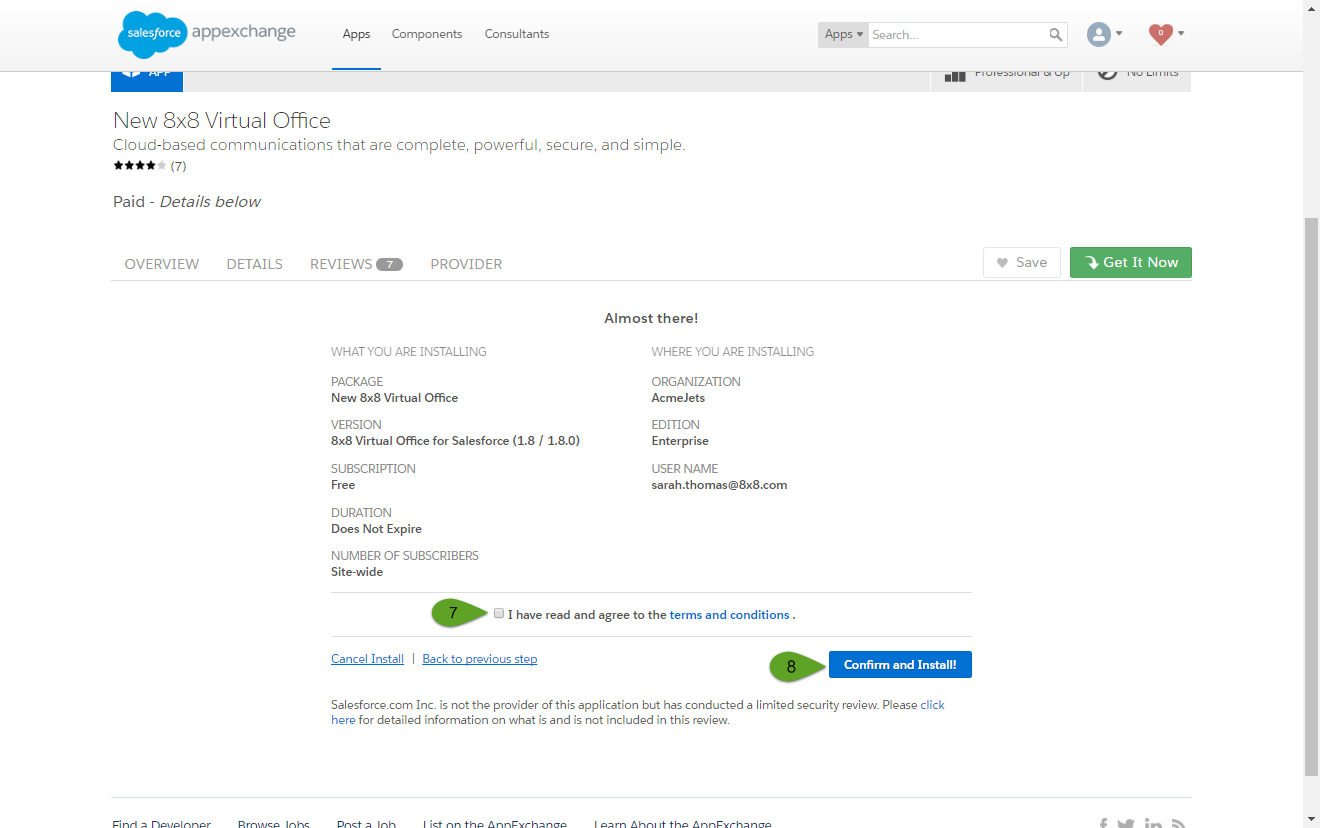
- Agree to the terms and conditions.
- Click Confirm and Install.

- Log in to Salesforce again.
- Install the application for all users; the Call Center settings will be used to control access to the application. See Configuration.

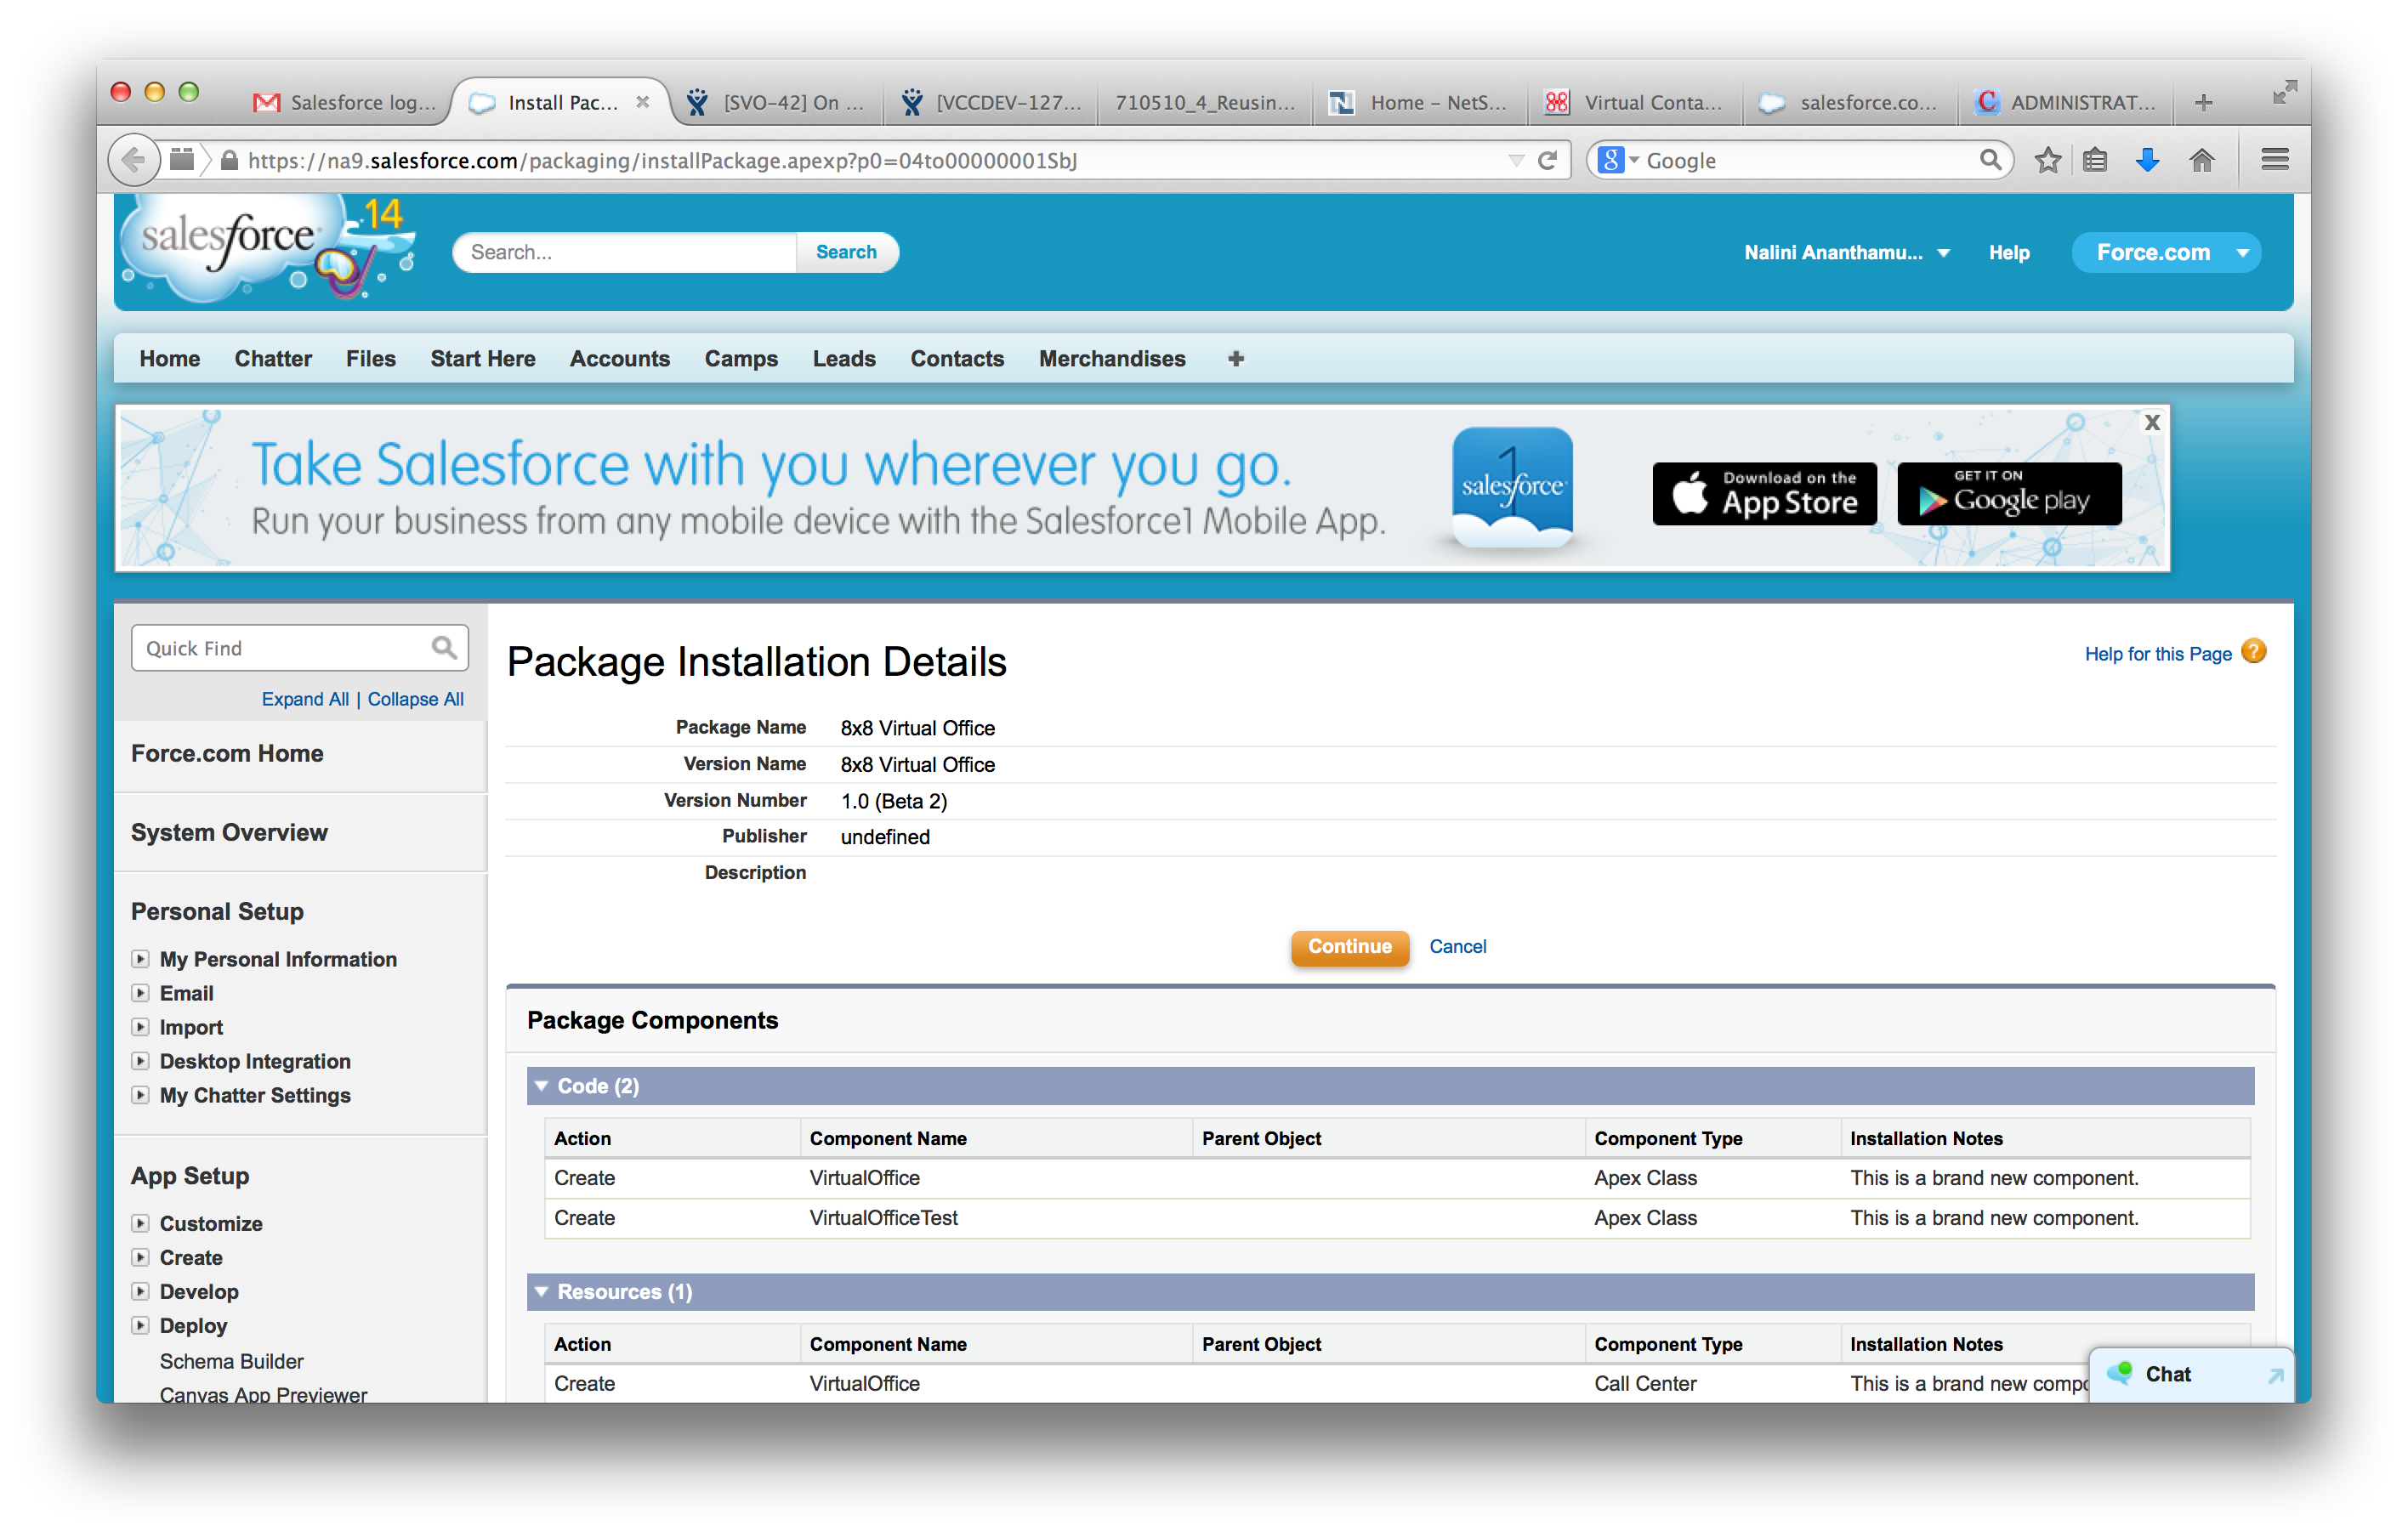
- Click Continue.
Step 1: Approve Package API Access - Click Next.
Step 2: Choose security level - Click Next.
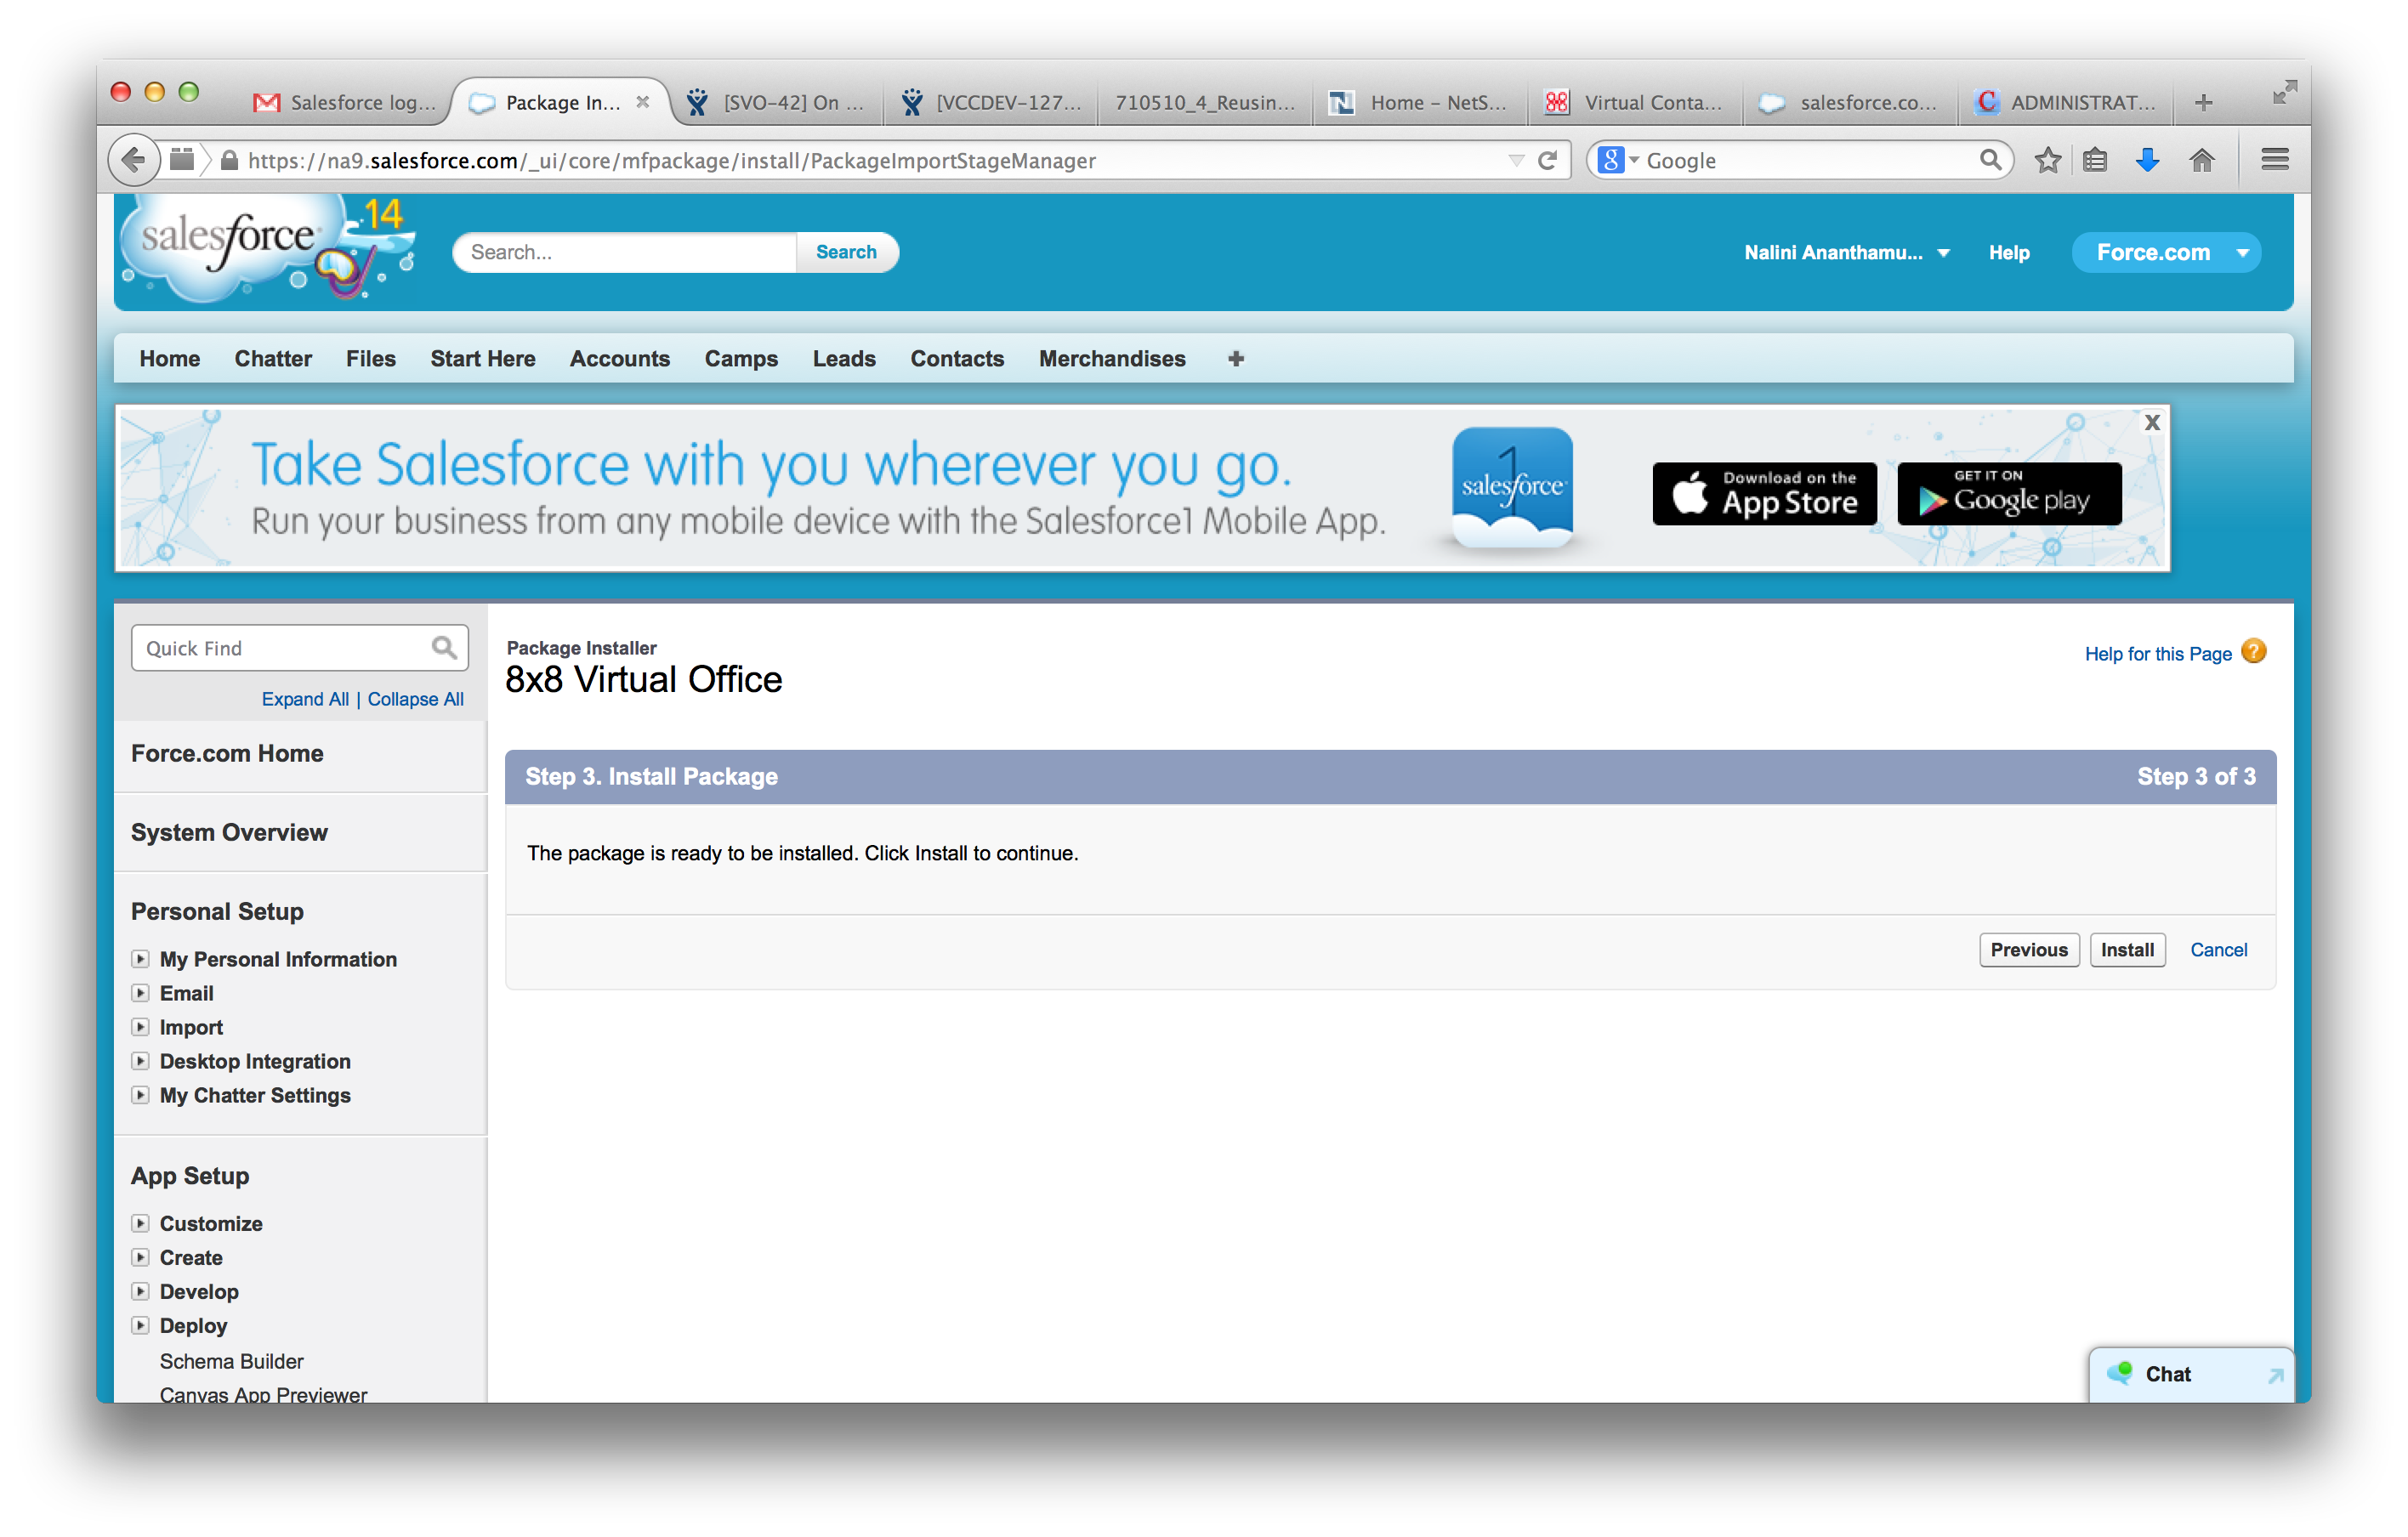
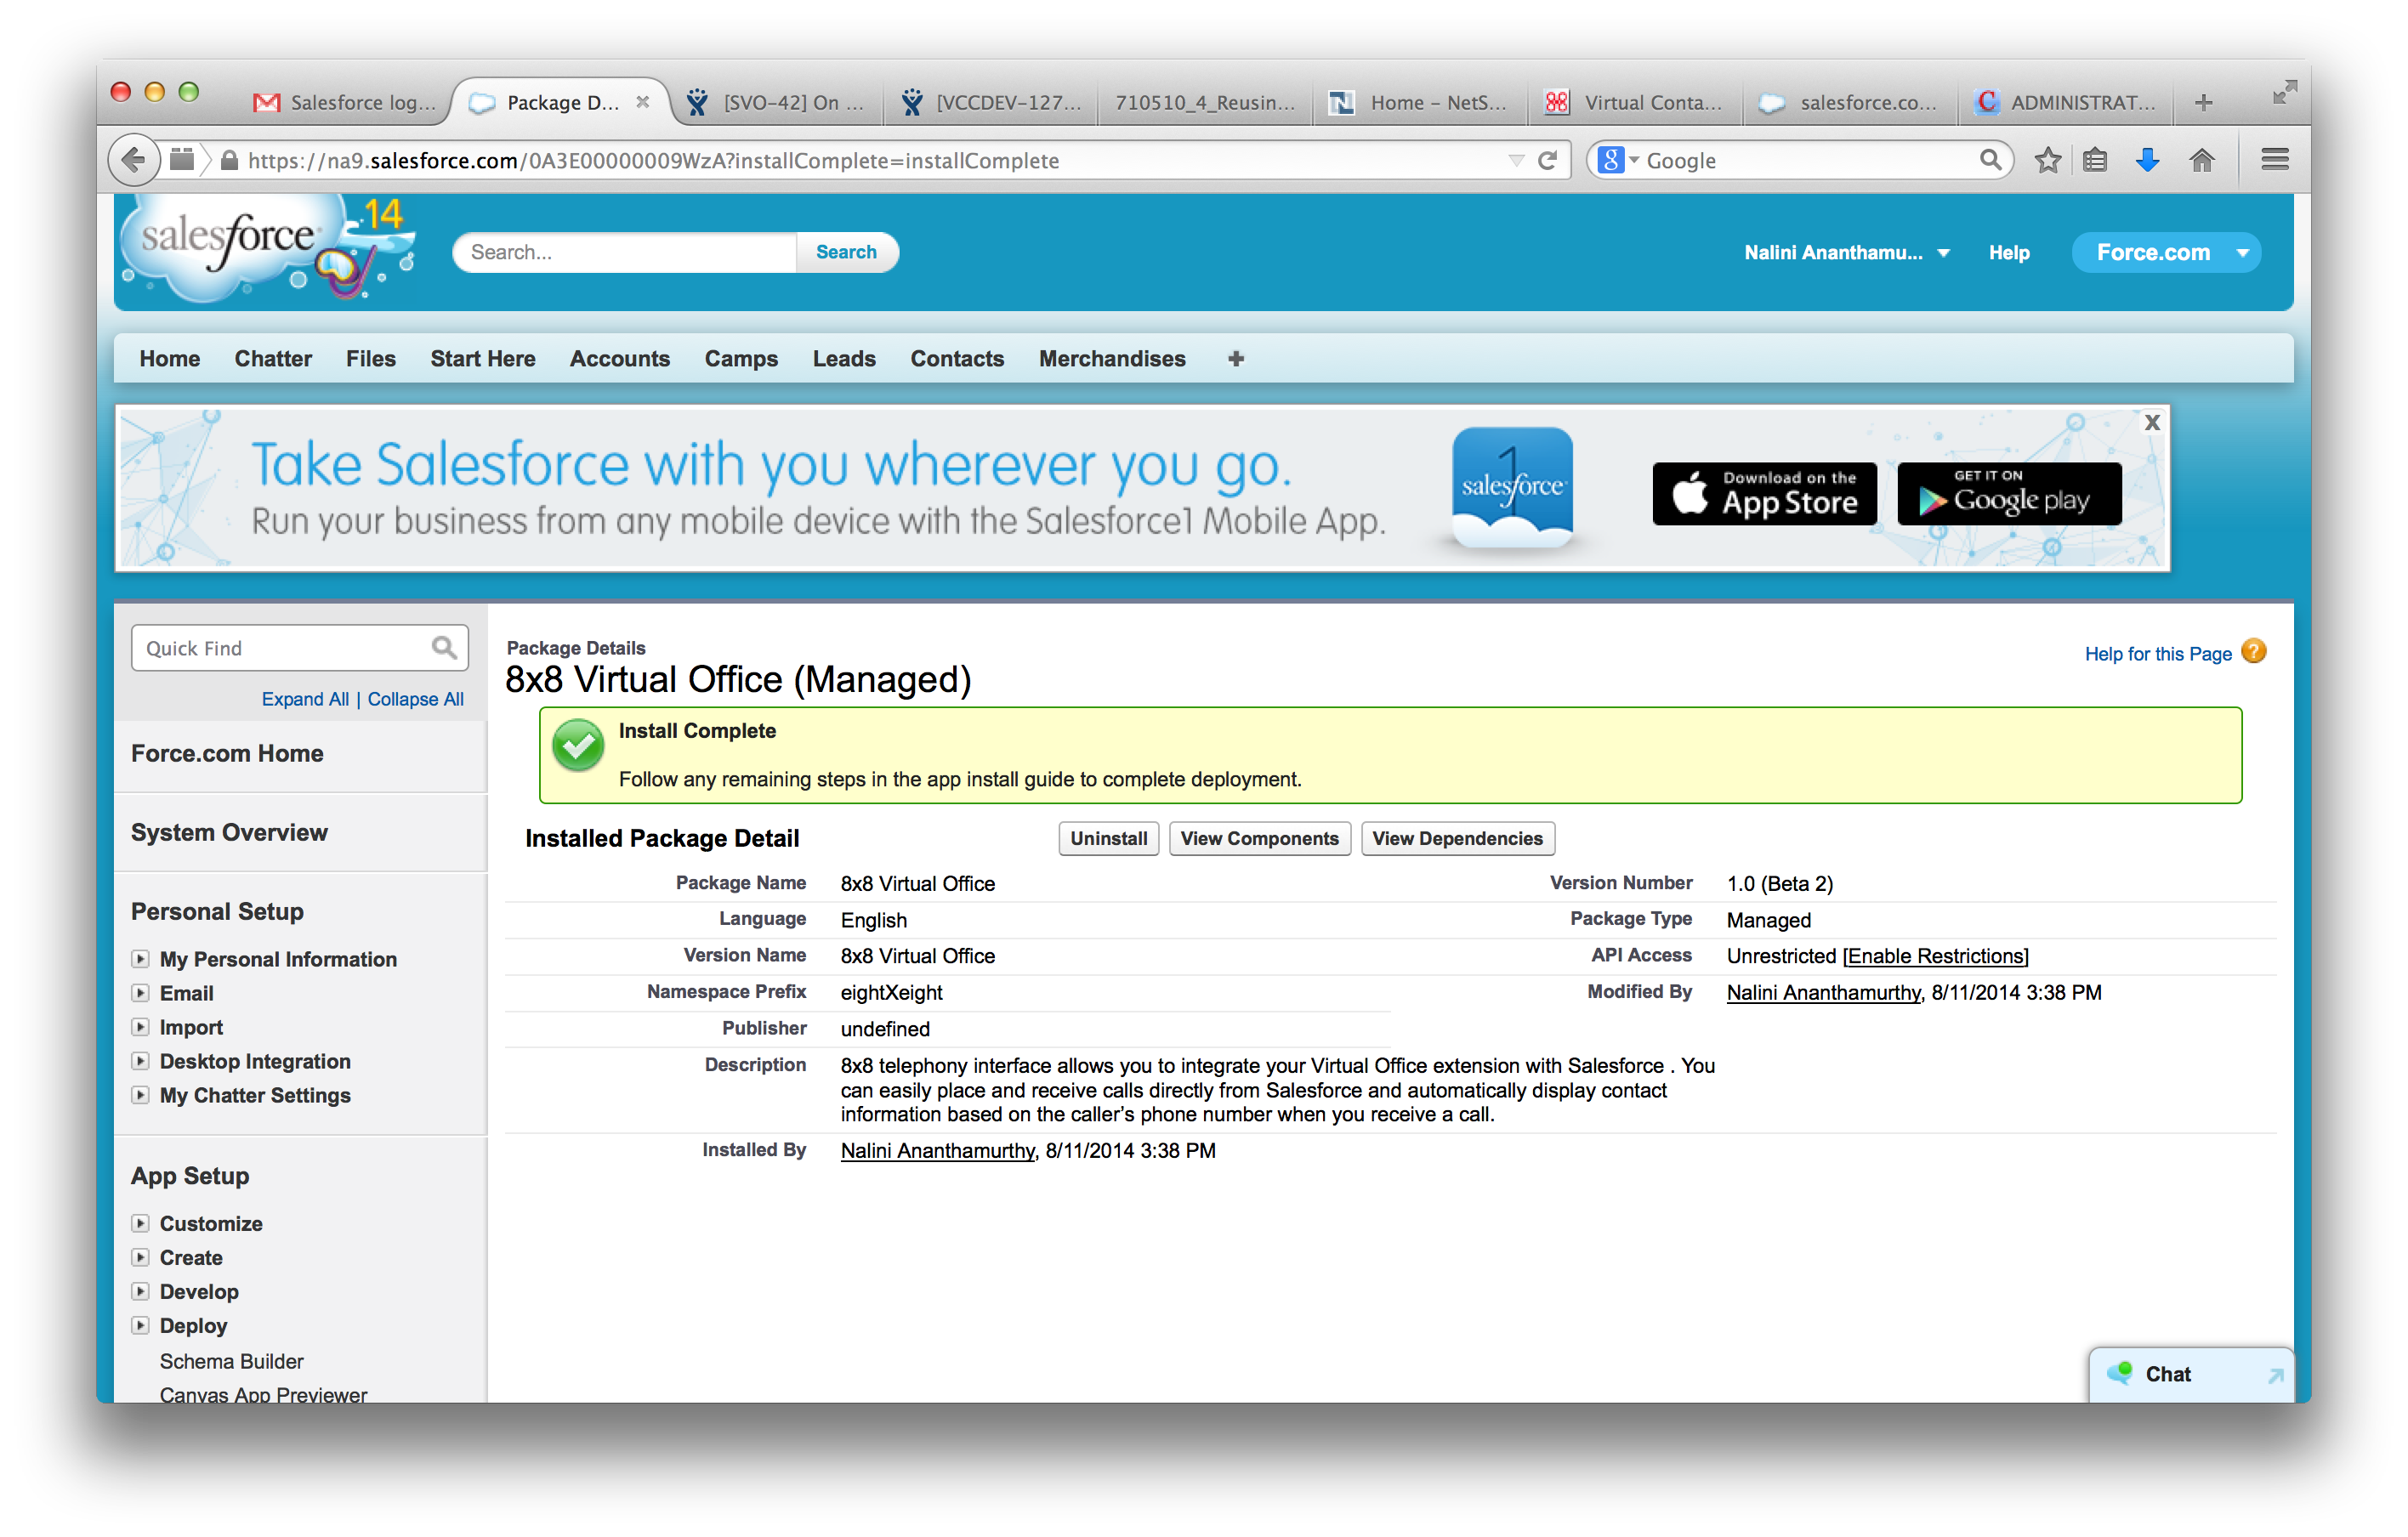
Step 3: Install Package - Click Install.
- Once the installation is complete, you are notified that the installation is complete.

Follows these steps to configure v.2.2 by importing the new Salesforce Call Center XML File.
Note: This section references Classic mode. Once the call center XML is installed, the new call center will also appear in Lightning mode.
- Click this link to access a page where you can download the XML document to your hard drive.
The XML file opens in the browser. - Right-click on the displayed file and select Save Page as to download the XML file to a location where you can find it.
- While logged in as an administrator in Salesforce, click Setup.
- Enter <call centers> in the Quick Find/ Search box.
- From the resulting list, click Call Centers (plural, not singular).
- If you see this warning,check the box for Don’t Show Me This Page Again.
- In All Call Centers page, click Import.
- Click Choose File, navigate to the location of the saved XML file, select it, and click Open.
- Click Import.
In this step, identify and set up Salesforce users acting as call center agents.
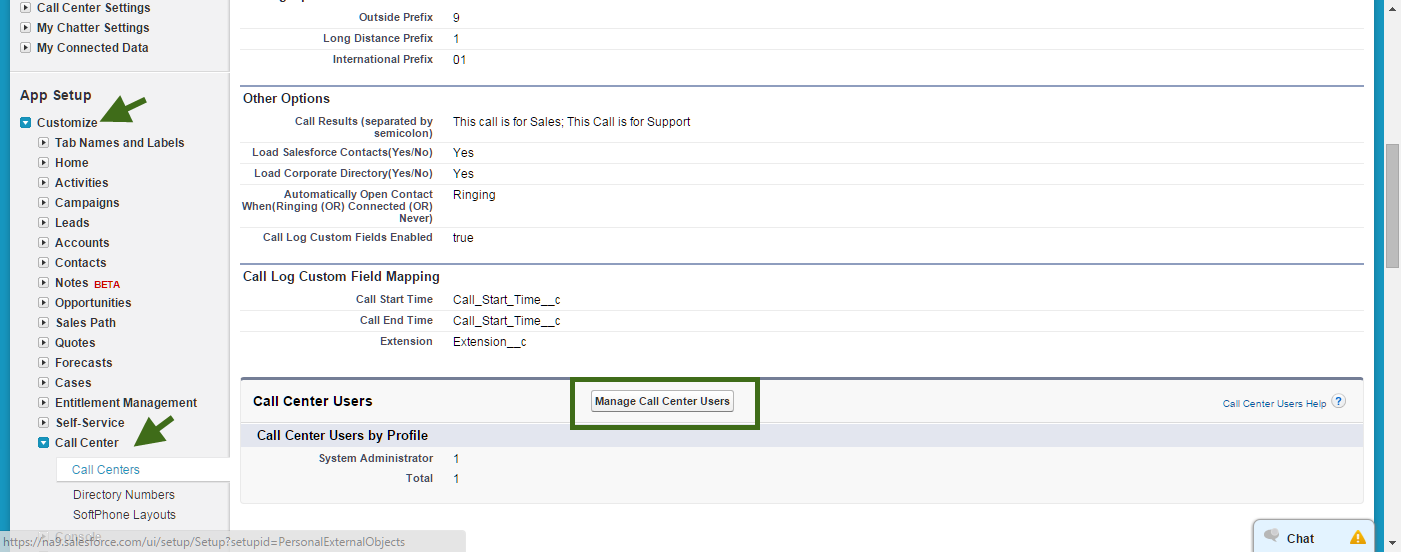
- Go to Setup > Customize > Call Centers.
- Select to open 8x8 Virtual Office.
- Click Manage Call Center Users.
- Click Find to list all users or add filters to search for specific users.
- From the list of users, select the desired users and click Add to Call Center.
This step is required for facilitating automatic relation of browsed objects to the call log in console mode. This must be completed for the benefit of Salesforce console users. Make sure the VOAPI server domain is added into the white listed domains for any Salesforce Console App that will be used with the plugin. By default Salesforce Consoles do not allow cross domain calls. Taking this step allows the Console to update the 8x8 plugin on a users Salesforce browsing.
- Go to Setup > Create > Apps.
- Select to edit your Salesforce Console from the list.
- In the Whitelist Domains section add the VOAPI server domain—
voapi.8x8.com

Users with Single Sign-On Requirements
Step 5 and 6 are required if you want to enable Single Sign-On capabilities to your users.
The process of uploading Salesforce usernames in 8x8 for your agents is different depending on whether your organization is a Virtual Office Editions or Virtual Office Classic customer.
To upload a username as a Virtual Office Editions user:
- Log in to 8x8 Configuration Manager.
- Go to Home > Users.
- Create a new user, or from the list of users, click the More Options
 icon next to the desired user to open a drop-down menu.
 - From the drop-down, select Edit to view user settings.
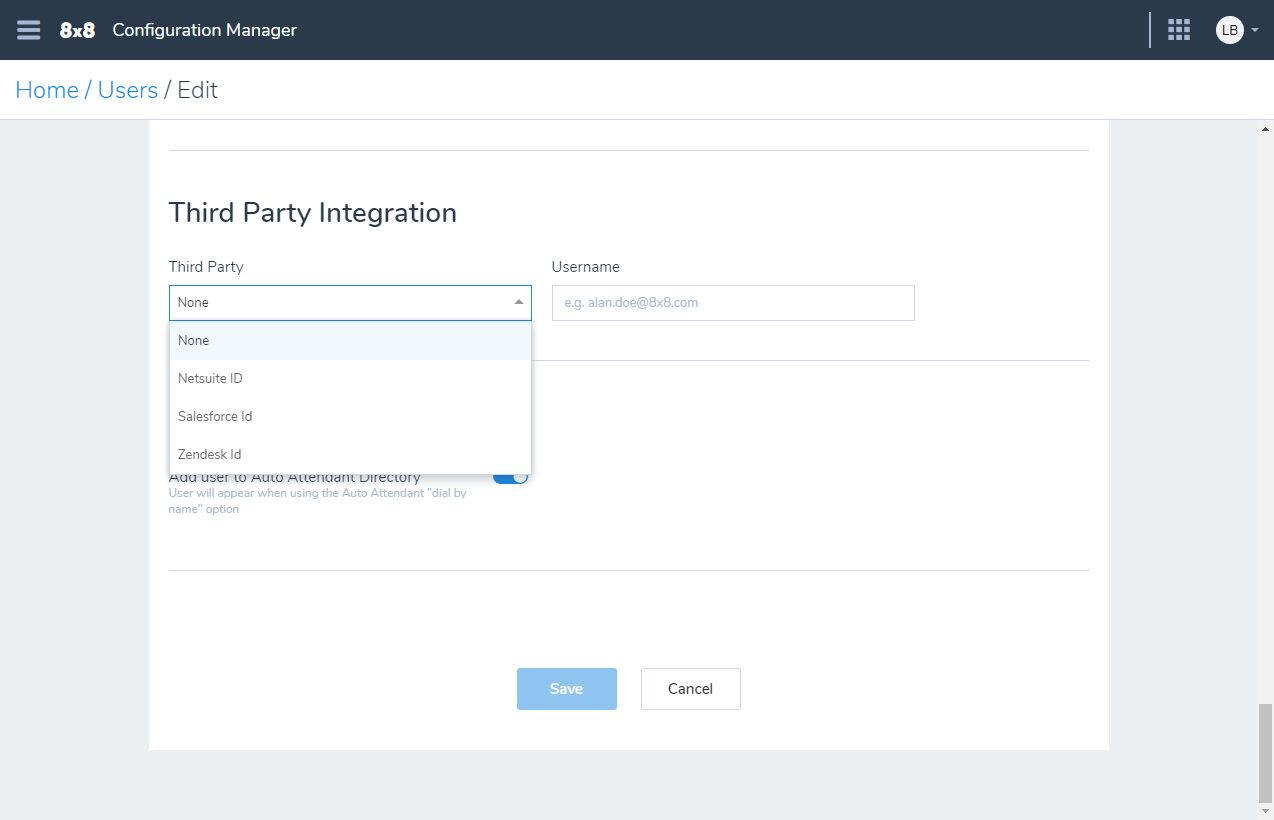
- In the user settings, go to Advanced Settings > Third Party Integration.
- Under Third Party, select Salesforce ID.

- Enter the user's username as a Salesforce agent.
- Save your changes to the user.
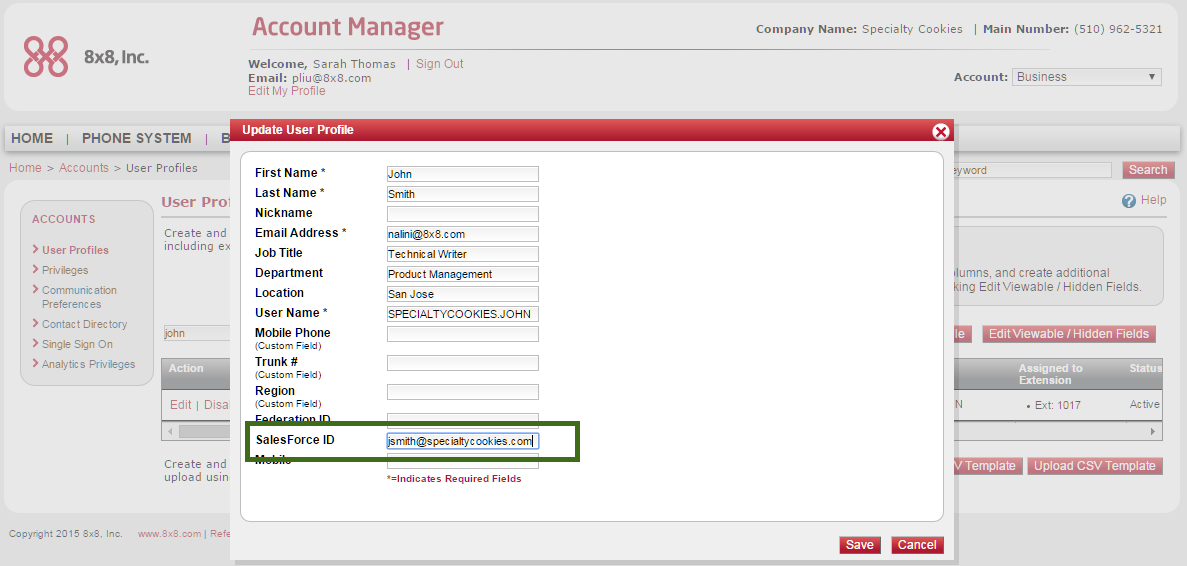
To upload a username as a Virtual Office Classic user:
- Log in to Account Manager.
- Go to the Accounts tab.
- Create a new user, or select a desired user profile and click Edit.
- Find the field labeled Salesforce ID.
- Add the user's Salesforce username to this field.
- Save your changes to the user.
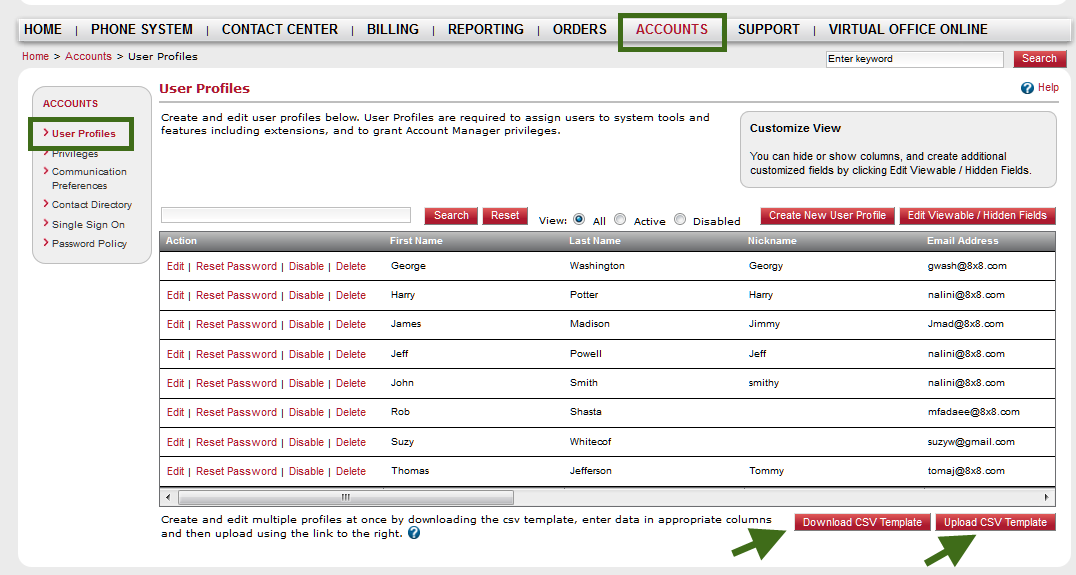
To upload Salesforce ID for multiple users, you can download the CSV template from Account Manager, update the Salesforce username and upload it back again.
- From the Accounts tab, go to User Profiles list.
- Click Download CSV Template.

- Open the template and add Salesforce username to all the desired users and save it.
- From the User Profiles page, click the Upload CSV Template.
- At the prompt, click Proceed.
- Click the Add button and navigate to the file you saved earlier.
- Click Upload.
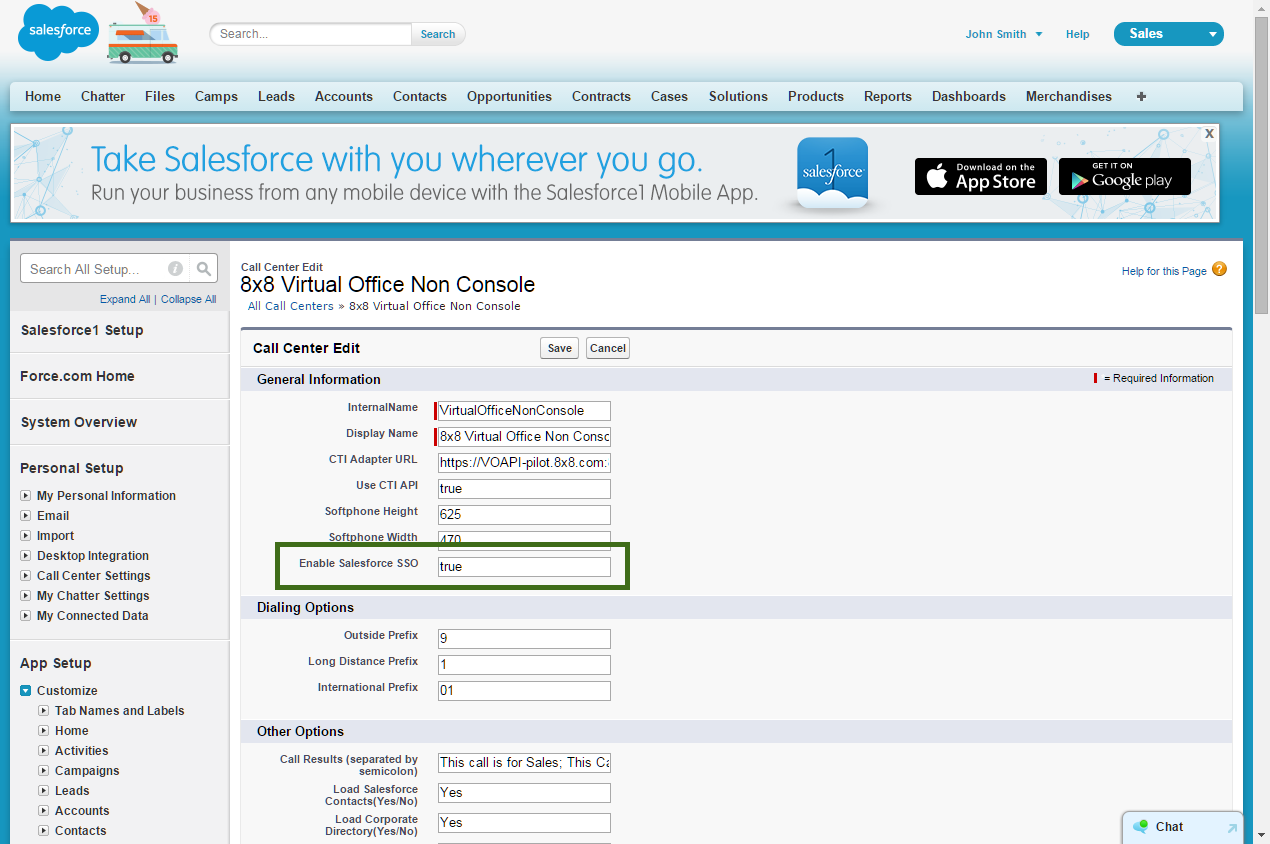
- In Salesforce, go to Set up.
- Search for Call Center.
- From the list, select to edit 8x8 Virtual Office Integration - Next Generation Lightning.
- In General Information, enter <true> for Enable Salesforce SSO.

- Save the changes.
Note: Refer to our agent guide for details on how agents can use the Virtual Office for Salesforce Communication Panel.