Get started with the 8x8 integration for Microsoft Dynamics
Once you have access to 8x8 Contact Center for Microsoft Dynamics, you can launch the application and follow the checklist below to get started:
- Check your integration connection.
- Set up a phone number to receive calls.
- Check your queue assignments.
How do I log in to 8x8 Contact Center?
You can log in to 8x8 Contact Center using Individual System Sign-On, or, if enabled by the admin, using Single Sign-On.
Log in using Single Sign-On
The 8x8 integration for Microsoft Dynamics now supports SAML Single Sign-On (SSO).
Note: SSO is only available if configured by your admin.
To log in to the 8x8 Contact Center application using Single Sign-On:
- Log in to your Microsoft Dynamics account.
- If required, open the desired app.
Note: This step is only required when you first log in to your account, or after clearing your browser’s cache.
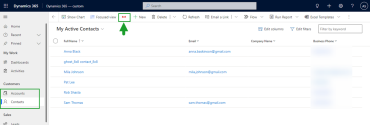
- Select Accounts or Contacts from the side navigation menu.
- On the top of your home screen, click
 . The 8x8 Contact Center app opens in a floating window.
Note: Ensure that your browser allows pop-ups from 8x8.
- At the prompt, add your user name then click Continue.
- Click Login with Organization.
Since you already added your login credentials in MS Dynamics, you are automatically logged in to the 8x8 Contact Center app.
Log in using Individual System Sign-On
If the admin has not configured Single Sign-On log in, you can authenticate manually using Individual System Sign-On.
To manually log in to 8x8 Contact Center for Microsoft Dynamics:
- Log in to your Microsoft Dynamics account.
- Select Accounts or Contacts from the side navigation menu.
- On the top of your home screen, click . The application launches in a floating browser window.
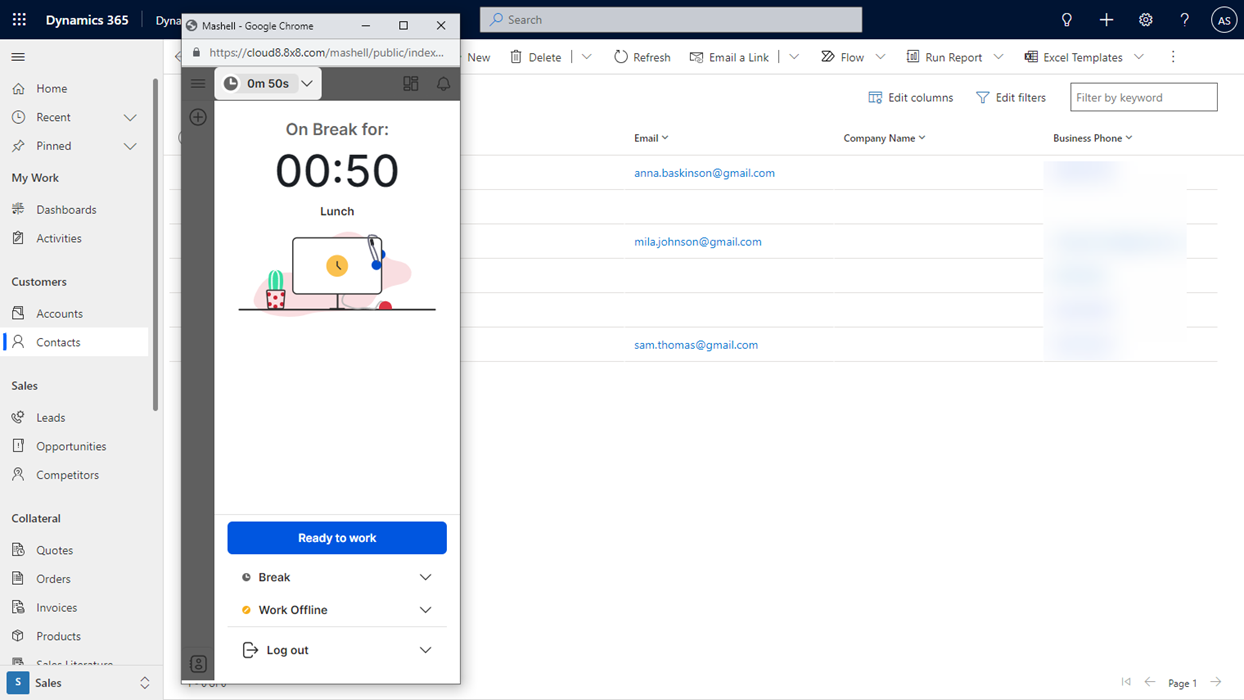
- At the prompt, enter your user ID and password to log in to the agent account. Consult your supervisor for credentials. You are now logged in to the 8x8 Contact Center app. The app launches and places you on Break status.
- Change your status to Available or Work Offline.

Note: Multiple invalid login attempts may lock you out.
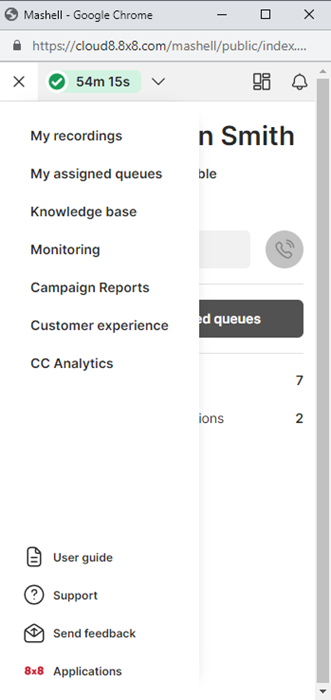
Tour the interface
The 8x8 integration app for Microsoft Dynamics interface consists of a control panel with the following menu items:
- Change status (status menu): Use to change your status, access My profile options, and log out of the application.
- Show dashboard: Use to access the agent dashboard and view a list of available agents and queues in a single panel.
- Show notifications: Use to view broadcast notifications, or send notifications to your agent group.
- My assigned queues: Use to view the queues that are assigned to you.
- Contacts: Use to access the list of all agents by group, the most recent contacts, and your favorite contacts. You can search for an agent, call, text, or mark them as favorite from the contacts directory.
- Add interaction: Use to start an interaction. Enter a phone number and call, or send an email or an outbound SMS.
- Show menu: Use to access the following action items:
- My recordings: Allows agents to record messages to be played to customers.
- My assigned queues: Lists the queues that are assigned to the agent, grouped by media such as inbound phone, outbound phone, chat, email, or voicemail.
- Knowledge base: Allows agents to access FAQs from a separate window. In this window, you can also create new support categories or FAQs.
- Monitoring (supervisors only): Allows agents to display the queue management, campaign management, and agent management tool in a separate browser window. Supervisors use the monitoring window to review and actively monitor agents, queues, groups, and campaigns.
- Campaign Reports (supervisors only): Allows agents to display the campaign report wizard.
- Customer experience: Allows access to the 8x8 Customer Experience app. Customer Experience provides contact center agents with a detailed view of recent calls with full filtering options, helping agents assess and improve their performance and quickly find the call detail information. The agents can launch the 8x8 Customer Experience from the Contact Center app, eliminating the need for a separate login.
- CC Analytics: Allows access to the 8x8 Analytics for Contact Center platform. In 8x8 Analytics for Contact Center, agents can see their own performance metrics, while supervisors can track the performance of their agents and contact center.
- User guide: Opens the User guide in a new window.
- Support: Opens the 8x8 knowledge base support website in a new window.
- Send feedback: Allows agents to send product feedback and suggestions directly to our developers, and attach images or debug logs.

Check the integration connection with Microsoft Dynamics
If your admin configured the integration, when you log in to the 8x8 Contact Center app, it automatically connects to Microsoft Dynamics. The authentication window displays briefly in a separate tab. When connected to Microsoft Dynamics, the window closes. If the integration disconnects, you can manually reconnect it.
To reconnect the integration:
- Log in to your Microsoft Dynamics account.
- Select Accounts or Contacts from the side navigation menu.
- On the top of your home screen, click . The application launches in a floating browser window.
- In the 8x8 Contact Center app, go to Change status
 > My profile. A new window opens.
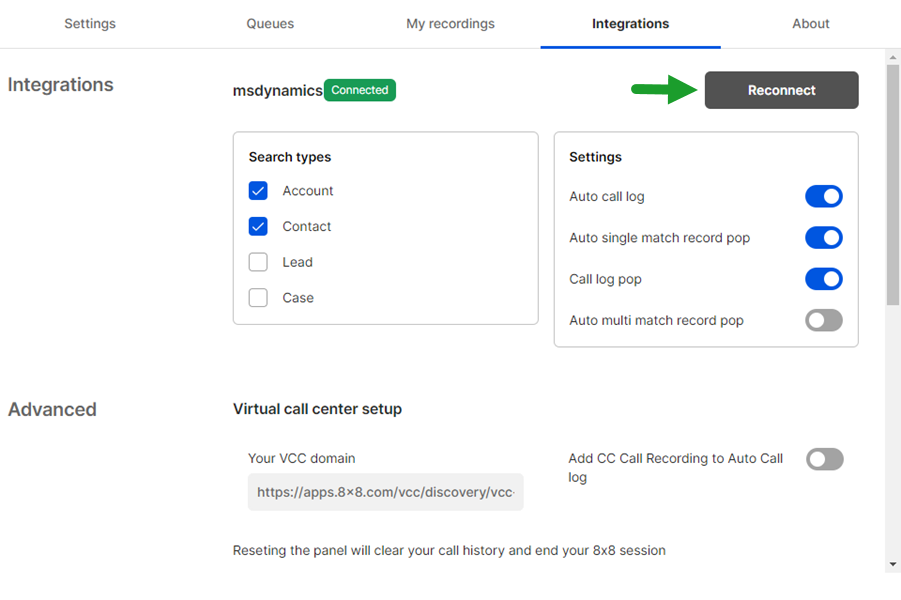
 - Click the Integrations tab.
- Click Reconnect.

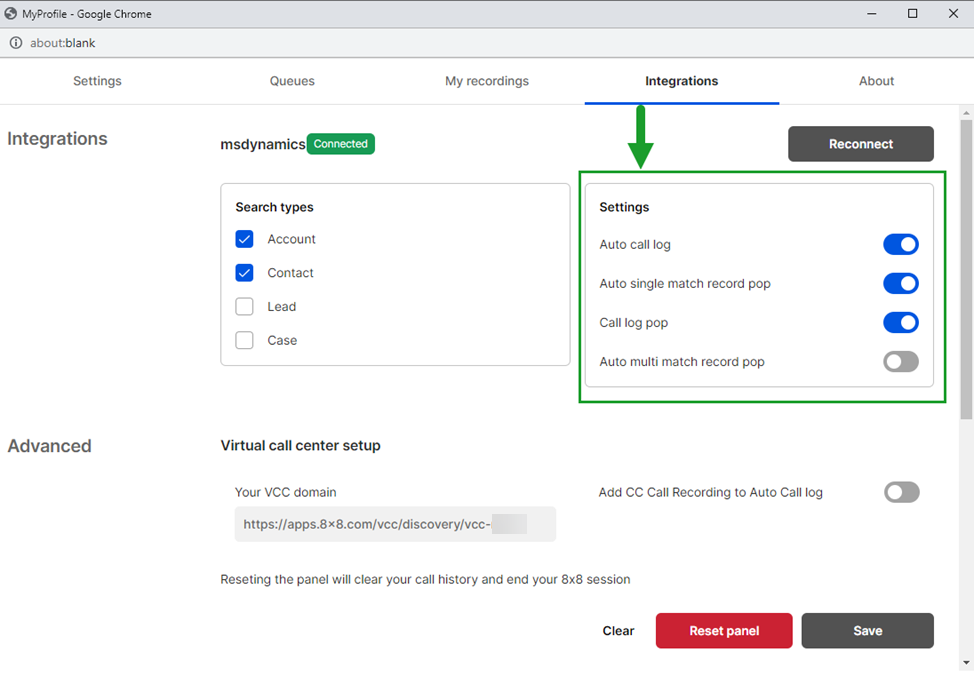
When connected, the system displays Connected in green in the Integrations section.
Select the supported objects in the 8x8 Contact Center app
Upon receiving an interaction, the 8x8 Contact Center app searches for matching customer records. The search can be broadened to all the supported objects or narrowed down to the specific objects desired.
To enable/disable the search for an object:
- In the 8x8 Contact Center app, go to Change status > My profile.
- In the window that displays, click the Integrations tab.
- Under Search types, enable/disable:
- Account: When enabled, and an interaction is offered, the 8x8 Contact Center app searches the CRM for an existing Account record.
- Contact: When enabled, and an interaction is offered, the 8x8 Contact Center app searches the CRM for an existing contact record.
- Lead: When enabled, and an interaction is offered, the 8x8 Contact Center app searches the CRM for an existing lead record.
- Case: This option is only supported for Microsoft Dynamics Customer Service. When enabled, and an interaction is offered, the 8x8 Contact Center app searches the CRM for an existing case record. This option is disabled by default.

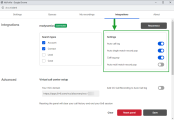
Customize the integration
The 8x8 Contact Center integration with Microsoft Dynamics allows agents to customize their integration settings. Access the integration settings to customize the screen pop behavior for interactions and call logs.
To customize the screen pop behavior for interactions and call logs:
- In the 8x8 Contact Center app, go to Change status > My profile.
- In the window that displays, click the Integrations tab.
- Under Settings, enable/disable:
- Auto call log: When enabled, this option automatically generates a call log for your interactions. The call log includes information about the time the call was initiated, terminated, the call duration, queue name, and more. This option is enabled by default.
- Auto single match record pop: This option controls the screen pop behavior for single match records. When enabled, the browser pops the customer record details in a new browser tab so the agent can preview it and prepare for the call. This option is enabled by default.
- Call log pop: This option controls the call log pop behavior after terminating an interaction. When enabled, upon ending an interaction, the call log pops in a new browser tab. The call log typically includes information on the interaction initiation time, termination time, duration, call ID, direction, caller name, etc. This option is enabled by default.
- Auto multi match record pop: This option controls the screen pop behavior for multiple matched records. When enabled, the browser pops the customer record details for the first match in a new browser tab. You can select to match the call to another record by clicking the avatar and manually selecting the record from the list.
Set up a phone to receive calls
You can set up a softphone or a hard phone from the agent profile to receive calls.
- In the 8x8 Contact Center app, click the status
 menu option and change your status to Work Offline.The app makes you unavailable for new interactions.
 - Click the status menu option and select My Profile. A new window opens.
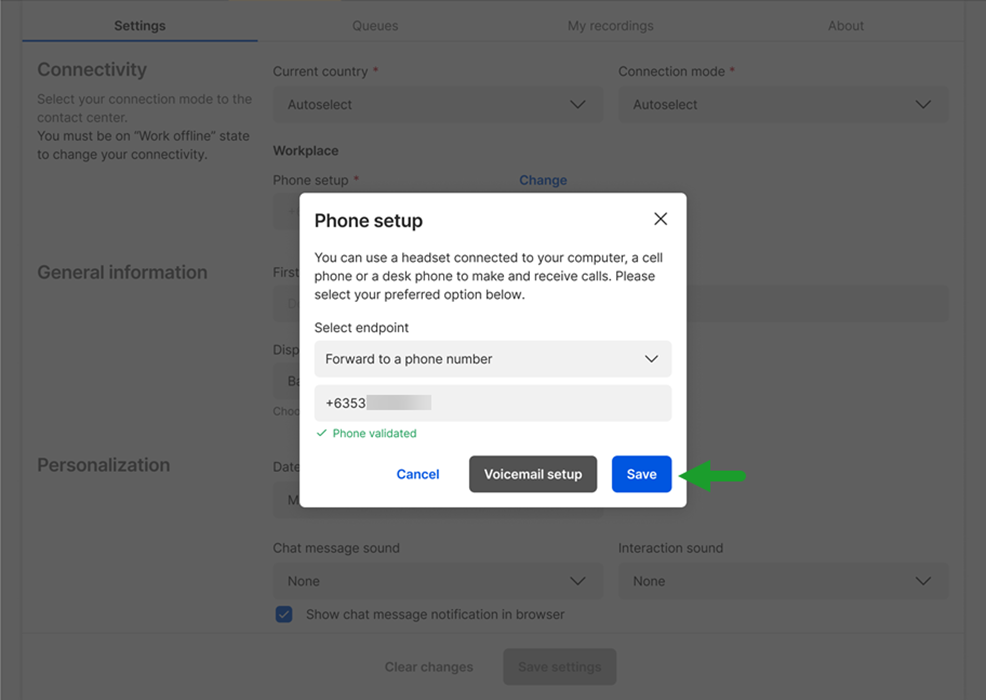
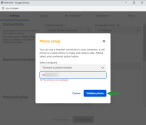
- From the Settings tab, click Change next to Phone setup.
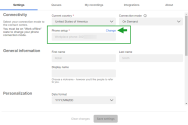
- From the dialog that displays, select the relevant endpoint from the drop-down list:
- Forward to phone number: Use to add your work phone number.
- Use a SIP URI: Use to add your SIP URI.
- Based on your selected endpoint, enter your phone number or SIP URI in the editable field. If required by your admin, you must validate your workplace setting to begin processing phone interactions. See how to validate your workplace number.
- Click Save.

Notes:
- If you do not have permission to change your phone number or the SIP URI, the phone number fields are disabled.
- Make sure the phone number is in the correct format. For example, you may need to add 1 before your area code. Check with your administrator for the correct format.
Validate your workplace number
In 8x8 Contact Center, when changing the Phone setup (workplace Phone and workplace SIP URI), agents must validate their changes to be able to handle the calls. When the agent clicks to validate the change, it triggers a phone call to the updated phone number. A PIN code is then communicated to the agent. The agent must enter the PIN code to validate the changes and continue. If they are unable to confirm the PIN, they must exit and revert to their last validated setting.
Notes:
- Validating the workplace phone is mandatory while Auto Answer is enabled.
- The workplace validation setting is offered as a stand-alone feature. Admins can remove or disable this feature in 8x8 Configuration Manager with no restrictions.
- It reverts to the agent's last validated setting if unable to validate the new workplace setting.
To validate the Phone setup, agents require a phone and audio access for the PIN code to be played to them. Moreover, the agents must be in Work Offline status to change their workplace Phone setup.
To validate your workplace setting:
- In the 8x8 Contact Center app, click the status menu option and change your status to Work Offline. The app makes you unavailable for new interactions.
- Click the status menu option and select My profile. A new window opens.
- From the Settings tab, click Change next to Phone setup.
- From the dialog that displays, select the relevant endpoint from the drop-down list.
- Based on your selected endpoint, enter the phone number or the SIP URI in the editable field below.
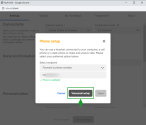
- Click Validate phone and follow the prompts to validate the workplace phone.
- After the validation session, depending on the result, the following messages may display:
 Phone is validated message appears under the phone/SIP URI field when the validation is successful.
 The phone is not validated message appears if you make any changes to the workplace setting and the phone/SIP URI used is not yet validated.
- The phone couldn't be validated message appears if the validation process failed or if there was a connection error during the validation process. Retry to validate the phone number to troubleshoot.
- Click Save.


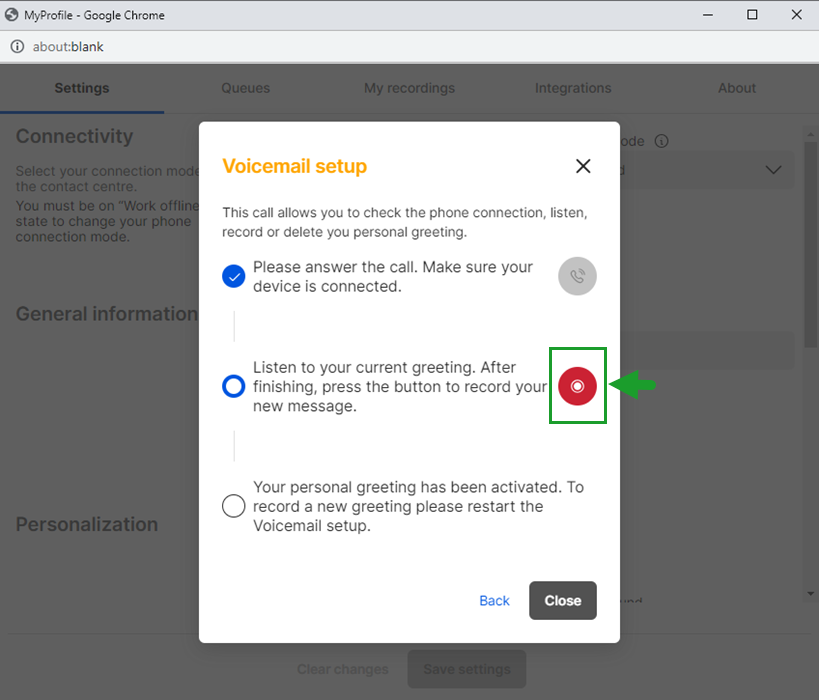
Check your phone connection and set up a personal greeting
To ensure that your phone connection works as intended, you can access the Voicemail setup dialog and perform a phone connection test. On answering the verification call, you can set up a voicemail greeting.
To check your phone connection:
- Click the status menu option and change your status to Work Offline.
- Click the status menu option and select My profile. A new window opens.
- From the Settings tab, click Change next to Phone setup.
- Click Voicemail setup.
- Click
 to start the test call.
 - Answer the call.
- Click Close or
 if you wish to exit the dialog.
-OR-
Follow the audio prompts to record or delete your personal greeting.

Note: Use the dial pad or click the icons on the Voicemail setup dialog to start a new recording, stop a recording, or play the new recording.
Important: You must click the icons on the Voicemail setup dialog at the same time you hear the audio message prompting you to make a selection.