Note:This version of the integration is no longer supported. For the latest version of this guide, see 8x8 Integration for Microsoft Dynamics Administrators.
To enable CRM integration for a tenant, an administrator must configure screen pop settings in 8x8 Configuration Manager. The configuration requires you to:
- Select a target CRM
- Add target attributes
- Specify events that trigger screen pop of customer data
- Specify properties for the screen pop browser window
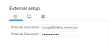
An agent must save the login credentials of the external CRM account in the agent’s profile. Integration enables searching for records with matching data, and popping the corresponding record(s) for specific events.
The events triggering a screen pop may be one or all of the following:
- An agent is offered an interaction
- An agent has accepted an interaction
- An agent has completed an interaction
To define screen pop settings for CRM:
- Log in to 8x8 Configuration Manager.
- Go to Integration > Screen Pop.

- Select the Enable Screen Pop check box.
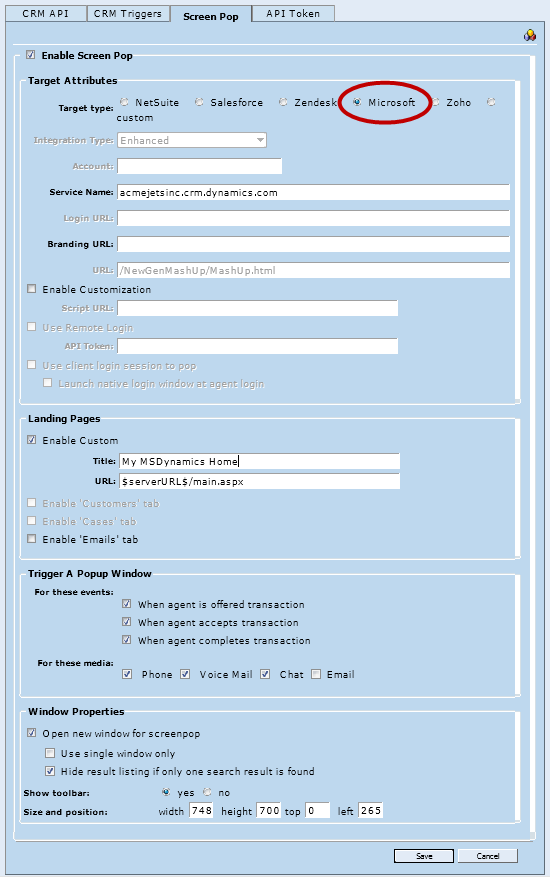
- Define the following Target Attributes:
Target Attribute Description Target Type The target CRM to integrate with CRM. Service Name The service name is the web address where your CRM is hosted; for example, AcmeJets.crm.dynamics.com . Branding URL The branding URL is the custom URL provided by CRM if you have customized your CRM to match your corporate domain’s look and feel; for example, support.acmejet.com instead of AcmeJets.crm.dynamics.com. Enable Customization
Script URLThis option instructs a tenant to execute a custom XML Microsoft Dynamics integration script using the specified script URL.
If customization is enabled, the Script URL must contain a valid URL that points to the location of the custom script. Once the Script URL is specified and the screen pop page is saved, all the features and the functionality of the standard integration are replaced with the custom functionality. Agents see the changes with their next login. - Define the attributes for landing pages. A landing page refers to the opening page of the CRM when you log in to 8x8 Agent Console. 8x8 Contact Center offers a custom tab:
- Enable Custom: Allows you to land in any CRM page you specify. If you select this option, you must specify:
- Title: A name to show on the custom tab; for example, My Support Desk
- URL: The landing URL when an agent logs in to 8x8 Agent Console, such as $serverURL$/main.aspx. This field is automatically populated with the home page of your CRM account. You can modify this link to point to your preferred page.
- Enable 8x8 CRM: Provides the 8x8 Contact Center CRM interface
- Enable Custom: Allows you to land in any CRM page you specify. If you select this option, you must specify:
- Define events that trigger a screen pop for an interaction. You can configure the screen pop of corresponding records for one or all of the following events:
- When an agent is offered an interaction
- When an agent accepts an interaction
- When an agent ends an interaction
- Optionally, open a new window for screen pop, and specify its size and position.
Window Property Description Open new window for screen pop This option allows agents to view screen pop of interactions in a stand-alone pop-up window instead of opening new tabs within 8x8 Agent Console. 
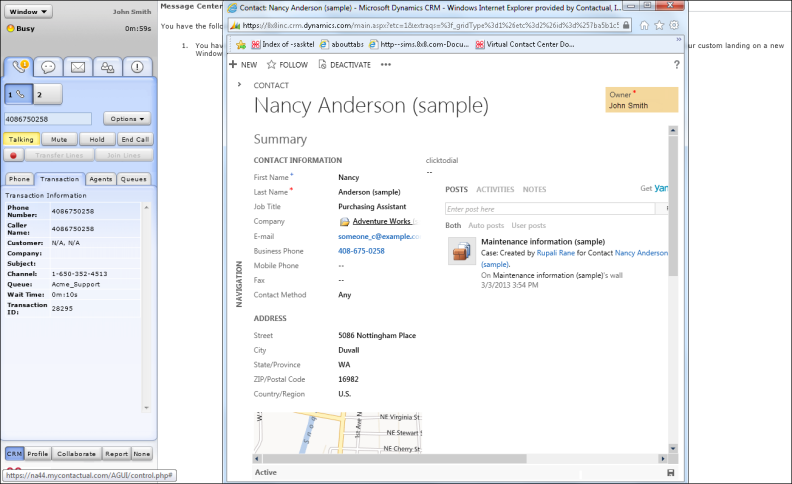
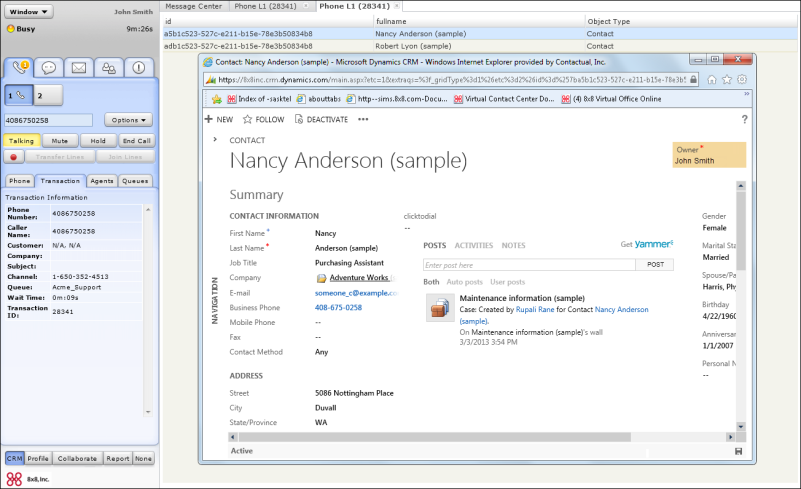
If an interaction retrieves multiple matching records, the screen pop lists all matching records, and shows the details of the first record. You can click on any other listed record to view the record details.
Along with this option, two more options are available:- Use single window only: This option displays the screen pop in a new window and refreshes the same window to show every triggered screen pop. If the screen pop is triggered for multiple events, the window refreshes for each event.
If disabled, launches screen in new windows for each triggered event. - Hide result listing if only one search result is found: If an interaction fetches a single matching record, the screen pop hides the result listing and shows the record detail for the matching record only.
If multiple records match, the screen pop lists all matching records, and shows the details of the first record in the list. Clicking on a record shows the record details.
Show Toolbar - Selecting Yes displays the Internet Explorer toolbar at the top of the stand-alone pop-up window.
- Selecting No displays the window without the Internet Explorer toolbar.
Note: Show toolbar is not supported in Internet Explorer 9.
Size and Position Specify the exact dimensions of the screen pop window and its position on the screen. - In the width and height text entry areas, enter the size of the screen pop window in pixels.
- In the top and left text entry areas, enter the screen position of the screen pop window's upper-left corner in pixels.
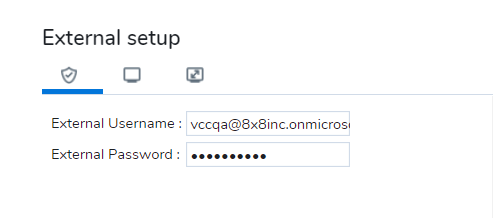
Note: The configuration of screen pop window properties may be controlled by agents from 8x8 Agent Console if the administrator extends this capability to agents. Go to My Profile > External Setup to configure the setting.
- Use single window only: This option displays the screen pop in a new window and refreshes the same window to show every triggered screen pop. If the screen pop is triggered for multiple events, the window refreshes for each event.
- Save your configuration settings.
With the screen pop configuration in 8x8 Configuration Manager complete, you are now ready to set up 8x8 Agent Console for integration.