8x8 Contact Center administrators create Transaction codes in 8x8 Configuration Manager.
Creating 8x8 Contact Center Transaction code list involves:
- Configuring properties of the code list.
- Defining individual codes.
- Translating codes to secondary languages (optional).
- Assigning the codes to an agent's groups or queues.
- From the Configuration Menu, open Transaction Codes.
- Click
 or Add. The Properties tab appears.
 -
Enter the required values in the Properties tab.
The following table summarizes the options under Transaction Codes > Properties:Properties Option Description Active Select the check box to put this code list into service. Name (required) Enter a name for the transaction code list. Description Enter a description for the transaction code list. Category Refers to a category of lists, such as Sales, Marketing, or Support. Within a single category, you can group multiple transaction code lists. You can create a new category or add a list to an existing category.
In the Category list, do one of the following:- Choose Edit Categories to create a new transaction code category.
- Choose an existing transaction code category.
Secondary Languages Select other languages to translate the codes into. Sort Order Refers to the order in which the codes within the list are sorted when presented to an agent. - Choose Manual to list transaction codes yourself in a specific order.
- Choose Automatic to have 8x8 Contact Center sort transaction codes in alphabetical order.
Required If enabled, the agent has to select a transaction code for all phone calls. Multiple-choice If enabled, the agent has to select multiple codes from the transaction codes list. Assignment Type Select an Agent Group or Queue to assign the list to. This option enables the members of the group or queue to access the list during phone calls. Primary Language (required) Select the primary language in which the codes are written. This information is required to create a list. Note: After saving the list, you cannot change the Primary Language setting.
Admin Notes Type information that enables administrators to understand the purpose of the code list. - Click Save.
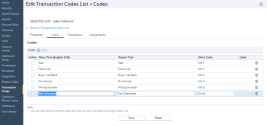
You can define individual transaction codes in the Codes tab.
- From the Configuration Menu, open Transaction Codes.
- Click to Edit a transaction code.
- Go to the Codes tab and enter the required values.

- Enter values for the following fields:
- Menu Text: The code text that appears in the code list in 8x8 Agent Console
- Report Text: The code text that appears in the reports
- Short Code: A short identifier for a code
The following table summarizes the options under Transaction Codes > Codes:
Codes Option Description Active Select Active to activate the specific transaction codes. Menu Text Type the string that 8x8 Agent Console displays when displaying the code, such as Prospect Interested – Call Back. Report Text Type the string that 8x8 Agent Console displays when listing the code in a report, such as Prospect Interested – Call Back. Short Code Type the string that 8x8 Agent Console uses when displaying the code's short identifier, such as Int. Used If an agent has used a code in their 8x8 Agent Console, then the code is marked with  in the Used column. After a code has been used, the code and its code group cannot be deleted.
- Repeat the above steps to create more codes.
- Click Save to save the codes.
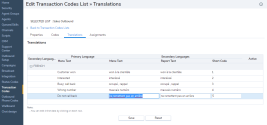
The Translations tab allows you to translate codes from the primary language to the secondary language supported by 8x8 Contact Center. You must specify a secondary language in the Properties tab to enable translation. This procedure is optional.
- From the Configuration Menu, open Transaction Codes.
- Click to Edit a transaction code.
- Go to the Translations tab.

For every transaction code you have created in the Codes tab, you find a new row under the secondary language. - Enter Menu Text, Report Text, and Short Code in the secondary language.
The following table summarizes the options under Transactions Codes > Translations:Translations Option Description Secondary Languages Choose one of the secondary languages selected in the transaction codes Properties tab.
When you select a secondary language, 8x8 Configuration Manager changes the title of the Menu Text text entry area described later in this table.Primary Language A read-only list of transaction codes created in the Codes tab, and as written in the primary language. Menu Text (secondary language ID) Choose a secondary language, and type the string in that language. 8x8 Agent Console displays the menu code in the secondary language. Report Text Choose a secondary language, and type the string in that language. 8x8 Agent Console displays the report text in the secondary language. Short Code Choose a secondary language, and type the string in that language. 8x8 Agent Console uses the short code when displaying the code's short identifier. Active Shows the Active list of transaction codes. - Select Save to save the translated codes.
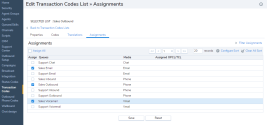
The Assignment tab enables you to select agent groups or queues to assign the code list. Based on your choice of assignment type in properties, the list of agent groups or queues setup in the tenant show up.
- From the Configuration Menu, open Transaction Codes.
- Click to Edit a transaction code.
- Go to the Assignments tab and enter the required values.

- Select an agent group or a queue from the list.
OR
Select the Assign All check box to assign all groups or queues in the list. - Click Save to finish defining the code list.
Note: A transaction code list is not functional until activated and assigned.
You can edit or delete existing transaction code lists at any time.
To edit a transaction codes list:
- From the Configuration Menu, open Transaction Codes.
A list of existing codes appears. - Select the code list you want to edit, and click
 .
. - Navigate through the tabs to make the desired changes.
- Save your changes.
To delete an existing transaction code list:
- Select a code list from the list, and click
 .
.
You are prompted to confirm your action. - Click Ok to delete the list.
Note: You cannot recover a deleted list.