Using script variables in chat channels
Before initiating a chat interaction in 8x8 Contact Center, customer information such as account numbers or case numbers collected via the pre-chat form, can be used to determine routing of the chat interaction. 8x8 Contact Center administrators can collect customer data, store them into system and user-defined variables, and use values stored in these variables to direct the interaction to the appropriate queue all using 8x8 Configuration Manager. It improves the efficiency of handling chat interactions.
Let’s say your company wants to route interactions based on the customer language. Collect the preferred language choice in a variable, and use this data in the IVR to direct them to the appropriate language queue.
Or, let’s say your company wants to route interactions based on the department such as Sales or Support, you can collect this information during the pre-chat, and use it to route the interaction to the right queue.
In this topic, we’ll demonstrate the usage of script variables in chat channels based on the following use case.
AcmeJets Inc. is a premium jet service company that serves its customers via chat channels. When a customer initiates a chat, AcmeJets collects basic information such as customer name, account number, and the preferred language for chat. AcmeJets serves customers in English and Spanish, and have dedicated queues for each language. They want to direct customers to the appropriate queue based on the language choice. Additionally, the company wants to personalize their conversation for best customer satisfaction.
Assumptions
Let’s assume that AcmeJets contact center has:
- Configured a chat channel
- Configured chat queues
- Designed chat elements (chat button, pre-chat form, and chat window)
To support the use case, follow the steps discussed here:
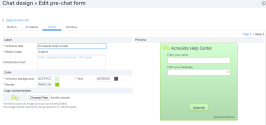
In this step, we create a new pre-chat form which collects a customer’s name, and preferred language for chat. Store the values in a custom variable and a translation variable respectively. Important: For custom variables, note down the variable names to be used in chat scripts.
- Log in to the 8x8 Configuration Manager.
- Go to Chat Design > Form.
-
Click +Pre-chat to begin creating a pre-chat form.
- Enter a name and description for the pre-chat form.
-
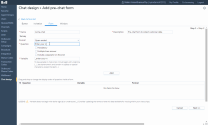
Add your first question to collect customer information.
-
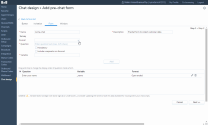
Add a question to collect the customer's language preference.
- Optionally, add a question to gather either account number or case number. Select the format CRM field.
- Click Next>> to proceed to define the visual design of the pre-chat form. Select the colors and labels. Save your preferences.
In this step, you will define a script that determines the routing of each chat interaction from your customers. When a customer initiates a chat session, they are prompted to submit data through the pre-chat form. Based on this data, they are then directed to the appropriate queue.
- Go to Scripts from the main menu in Configuration Manager.
- Select Chat > Add new chat script.
- In the Properties tab, enter a name, category, and comment. Optionally, add the chat channel you wish to apply the script to. Save the properties.
Step 2a: Add a custom variable to the variables list
If you added custom variables in your pre-chat form, you must add them to the variable list here. By default, the View variables lists all system variables. To add a custom variable you have already added in your chat design,
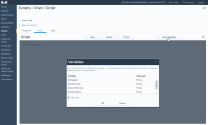
- In the Script tab, click View variables. A list of system variables shows up.
- Click Add new and enter the custom variable name defined in the pre-chat form.
Important: Ensure the custom variable defined in the pre-chat form is added here.
Step 2b: Begin crafting the script
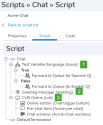
The chat script will embed a greeting message which includes the customer name. Use a test variable to identify the language choice and direct them to the right queue.
-
Add Test variable > Tests if the variable value of language equals Spanish. Tests if a customer selects to chat in Spanish.
- If True, add Forward to Queue. choose to forward it to the queue serving customers chatting in Spanish language.
- If False, add Forward to Queue, choose to direct the interaction to the queue serving customers in English.
- Add a greeting message to the customers. Example: Welcome to AcmeJets. We will be with you shortly.
-
Add all the chat visual block elements you have defined.
- Chat button (Triggers chat interaction)
- Pre-chat form (Collects information from the customer; Add the newly defined pre-chat form here.)
- Chat-window (Allows a customer to interact with the agent)
- Save the script.
- In the Code tab, select the chat channel to apply this script to.
- Click Generate Code. Copy the code and embed in your website which hosts the chat.
- To verify the chat workflow, simply initiate a chat as a customer.
- In the pre-chat form presented, enter your name and select the language - English.
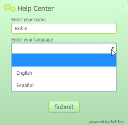
- Click Submit.
- Log in as an agent serving customers in English. You should now receive the interaction in English.
- Trigger a second chat interaction as a customer and select Spanish in the pre-chat form and submit.
- Log in as an agent serving customers in Spanish. You should now receive the interaction in Spanish.
- If you received interactions via the correct queues, your setup is correct and complete.
