New Agent Groups feature (Beta)
Note: This enhanced Agent Groups feature is available in Beta on request. Reach out to your 8x8 Account Manager for details.
In this release, we are introducing major improvements in the product user experience. By default, these new features are disabled. You can access them by enabling to preview them:
Improvements in the new user interface and experience:
- Updated and modern user interface and a much cleaner and intuitive admin experience
- New keyword search feature available in all sections
- Improved and powerful capabilities to filter and sort by multiple criteria features
- Ability to download data in a CSV format
- Bulk editing capability to update settings for multiple records
Ability to preview the new updated Configuration Manager UI
In this release, we introduce a new interface to the Agent Groups feature and a modern and more intuitive user experience, which aligns with all our 8x8 applications.
This Beta release provides an updated UI for the Agent Groups section only. In addition, admins can preview and test the updated UI features or return to the current UI whenever needed.
To preview the new Agent Groups feature:
- Log in to 8x8 Configuration Manager.
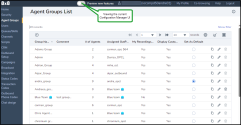
- In the header menu, toggle on Preview new features.
- From the Configuration Menu, open Agent Groups. The new UI displays, along with all the available enhancements.
- Toggle off the Preview new features to return to the current UI.
Manage the new Agent Groups feature
Important! To preview the new Agent Groups feature, select the Preview new features toggle on from the header menu.
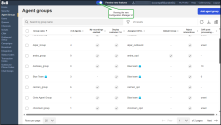
The Agent Groups feature is now available in a new, updated UI, which offers admins an improved and more efficient user flow.
Along with the improvements of the new user interface and experience, here are the changes:
- Retain the column view, filter and sort preferences in the agent groups list even when you log out, clear your cache, or change browsers.
- Choose how many rows you can view per page (between 10 and 200).
- Choose what columns to display.
- Sort the records by any displayed column to help find the record(s) you need more quickly.
- Filter records based on one or more criteria to manage large groups more efficiently.
- See individual details in a side panel by clicking a row without opening each record on a new page.
- Add, edit, and delete a new group for more efficiency.
- Update in bulk selected records or select all (agent groups) for more efficiency.
- Bulk update several selected record(s) settings to quickly and efficiently update settings.
- Quickly update selected records by editing a single field (not a related parent/child assignment) without navigating through multiple tabs to find a single field to update.
- Enable, disable, and delete selected agent group(s) without navigating the bulk/quick update flows for more efficiency.
Through the new UI, you can add new agent groups more logical and intuitive flow.
To add an agent group, you need to complete the following steps:
- Define group properties
- Configure voice settings
- Assign the outbound phone codes list
To add a new agent group:
- On the Agent Groups page, in the upper-right corner of the page, click Add Agent Group.
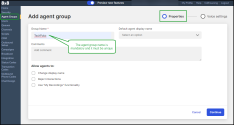
- In the Properties tab, enter the group name. This is mandatory to create your new agent group.
-
Optionally: You can enter a comment and select how the agent name displays to customers. Under Allow agents to:, you can configure the settings as needed.
You can edit them later.
- Click Continue.
-
In the Properties tab, configure the Default connection mode options by defining how agents handle phone interactions and enabling agents to auto-answer. You can edit them later.
- Click Create group.
-
Open the Voice settings tab and configure the agent group voice settings as needed, including the newly displayed options.
- Optionally: Make the necessary settings:
Under Phone connection mode, define the default mode, how agents handle phone interactions, and the DAR post-processing timeout, enabling agents to auto-answer.
Under Assign outbound phone codes list, set up a unique calling line identifier (caller ID) for outbound calls from that group to identify the purpose of each outbound call, and click Assign.
-
Click Assign codes list and select the outbound phone codes list you want to assign to this agent group. Click Assign.
-
Optionally: Click Change codes list to change the codes lists.
-
Save your changes.
- Optionally: Set up the group as the default group if applicable.
- Optionally: Assign members to the agent group.
Notes:
- You can create an agent group by entering the Group name and configure the newly created agent group later.
- The Agents tab displays the members assigned to that agent group if there are any.
The following table summarizes the options found under the Properties and Voice Settings tab:
| Option | Description |
|---|---|
| Properties tab |
Indicates the default group for your tenant. The default group contains all the available agents that are not assigned to a specific agent group. It displays only after the group is created. Click Set as the default group if you want this group to be the default agent group. Select another group if you wish to change the default from ungroup. |
| Group Name | Indicates the descriptive name for the group such as Sales or Support groups. Members of one group are not able to view members of any other group. |
| Comment | A description of the group's purpose of specialty. |
| Default Agent Display Name | Select whether you want to display the word Agent or the agent's first name such as <Robin>. The agent's display name appears in 8x8 Agent Console. Reset all agents, clears all custom display names. This group setting can be overwritten at the tenant level. |
| Allow Agents to Change Display Name |
Allows agents to change their display name in the 8x8 Agent Console's Profile page. Display Name helps agents save time and effort to introduce themselves to customers every time they start a new chat. The agent's display name appears in the 8x8 Agent Console's control panel, Profile page, chat window, and CRM case created after a chat session. It can be modified by the 8x8 Contact Center administrator in the 8x8 Configuration Manager, or if permitted, by the agents in 8x8 Agent Console. The changes immediately show up in both applications.
|
| Allow Agents to Reject Interactions | This option is enabled by default allowing agents to reject interactions. If disabled, the Reject button in 8x8 Agent Console is disabled preventing agents from rejecting the interactions they are offered. The Reject button in 8x8 Agent Console appears when an interaction is offered to the agent. You can set up this ability for an agent group, or individual agents. If you disable this option at the tenant level, the checkbox will not show up for agent groups or individual agents. |
| Enable Agent's My Recording Functionality |
Indicates if the agent can record the conversation. This option allows agents to record a voice message for the incoming calls. |
| Apply to all agents (reset exceptions) |
When you change any existing settings (Default agent display name, Default connection mode, DAR post-processing timeout), the option Apply to all agents (reset exceptions) displays automatically under the setting. |
| Voice settings tab | |
| Phone Connection Mode |
Default Connection Mode can be On Demand or Persistent:
|
| Enable Auto Answer | If enabled, every phone interaction that is offered to an agent is automatically connected eliminating the need to accept it manually. |
| Outbound Phone Codes tab | |
| Assign |
Select the desired outbound phone code list to set up a unique calling line identifier (caller ID) for outbound calls from that group to identify the purpose of each outbound call and click Assign. You can assign or change the outbound phone code list whenever necessary. Notes: |
| Active | Displays a read-only indication of the active outbound phone codes. |
| Outbound Phone list | Indicates the outbound phone name assigned to that group. |
| Number of Agents | Number of agents in that group. |
Cloning agent groups allows 8x8 Contact Center administrators to create multiple agent groups quickly. Administrators can copy the group details from an existing group and create a new group with a simple click. The assigned outbound code list is also copied for the new group. The default agent group remains the same until changed.
To clone an agent group:
- From the Configuration Menu, open Agent Groups.
- In the list of groups, select an agent group and click
 Duplicate group .
 -
Optionally: You can rename the group by going to the Agent Group > General > Group Name.
Notes:
- Agents assigned to an agent group do not automatically transfer to the cloned agent group. Assign members to the agent group and see them in the Agents tab, in the editing page.
- The cloned agent groups show up in the Agent Group reports.
- Agents with Supervisor access can see all cloned agent groups assigned to them. - If required, modify the agent group properties and Save.
- Optionally: Set up the group as the default group if applicable.
-
Optionally: Assign members to the agent group
Edit agent groups
- In the Agent groups view page, double-click the desired group row from the list view, and click More actions
 > Edit
  .
. - Make the desired changes and Save.
Note: When you change specific settings, such as Default agent display name, Default connection mode, and DAR post-processing timeout, the Apply to all agents (reset exceptions) option displays automatically under the respective setting.
Through the bulk editing capability, you can change multiple records in one action by using:
- Quick edit
 - To change a single field for multiple records
 - Bulk edit
 - To update data for multiple records
To quickly edit a single field for multiple agent groups:
-
In the Agent groups view page, from the list view, select the agent groups rows you want to edit, and click Bulk actions > Quick edit
 .
. -
In the new window that opens, make the desired changes and click Preview edit.
-
Click Apply to save the changes.
To edit multiple fields for multiple agents groups:
-
In the Agent groups view page, from the list view, select the agent groups row you want to edit, and click Bulk actions > Bulk edit
 .
. -
In the new window that opens, make the desired changes, and click Preview edits to see the changes you made.
- Optionally: Click Reset to return to the previous step or click Cancel to discard your changes
- Click Preview edits.
-
Apply edits to save the changes.
Agents must belong to a group at all times. Administrators can assign agents to a specific or default group. As an admin, you can set up a group as the default group. Only one default group can exist at a time.
When admins remove agents from a specific group and do not assign agents to another group, agents are assigned automatically to the default group.
To set up an agent group as the default group:
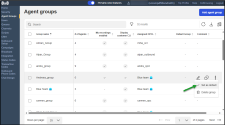
- In the Agent groups page, hover over the desired group row from the list view and click More actions
 > Set as default
  . The group is successfully set as default.
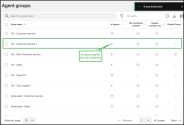
 - The default group is now marked in the agent groups list view, the default group is now marked .
Note: You can also set a group as default while configuring an agent group by clicking Set as the default group ![]() , in the Properties tab.
, in the Properties tab.
Agent groups may or may not have members. Agents can be:
- Assign to a group if they belong to the default group.
- Reassign to another group if they already belong to a specific group.
To assign/reassign agents to a group:
- From the Configuration menu, open Users.
- In the Users view page, in the desired user row from the list view, click Edit
 .
. -
In the General tab, in the Agent Groups list, select the group to which you want to assign the user.
- Click Save.
- Continue the above search and reassignment for all the agents you plan to assign.
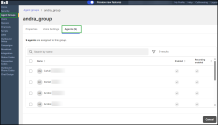
You can see the agents you assigned to the new agent group, in the Agents tab
You can see the members you assigned to an agent group by going to the respective agent edit page in the Agents tab.
Deleting a group with assigned members requires you to reassign the group members to another group.
To delete a group:
- In the Agent groups view page, hover over the desired group row from the list view, click More actions
 > Delete
  and confirm your action.
 - If the group has members, you can only delete the group once you reassign the members to a different group.
- Click Delete to confirm the deletion.
Note: You cannot delete the default group.
View details of the agent groups
- From the Configuration Menu, open Agent Groups.
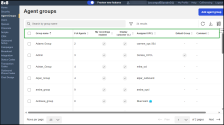
- The available agent groups are displayed in a tabular format. You can view general details about each based on the table configuration.
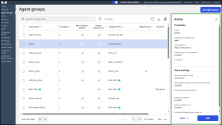
- Optionally: Select a group to view the details in a panel on the right-side.
- Optionally: You can mark and select your default agent group. In the details panel, click More actions
 > Set as default
  .
. - Optionally: You can clone, edit, or delete the agent groups from this page.
You can now choose how many rows per page you can view (between 10 and 200) and select the data displayed as columns to make your work more efficient.
To configure how the data displays in the agent groups table:
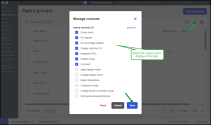
- On the Agent Groups page, click Manage columns
 in the upper-right corner.
 - In the Manage Columns window , select the columns you want the agent groups table to display.
- Save your selections.
If your 8x8 Contact Center has numerous groups, tracking them in a single scrollable list may be challenging. You can search and filter agent groups list in the 8x8 Configuration Manager by specific fields, such as Group Name, Number of Agents, and Assigned OutPhone List.
Note: You can narrow the agent groups list by applying multiple filters, which are applied using AND logic.
To filter the Agent Groups list by applying multiple filters:
- From the Configuration Menu, open Agent Groups. A list of existing agent groups appears.
- Click
 Filters . The filtered list appears above the table.
 - Choose the desired filtering criteria by selecting one criterion or a combination of criteria. For example, you can filter the data by the # of Agents and My recording enabled criteria.
-
Optionally, click Add filter
 and select the desired filters.
 - Click Apply. The agent groups list displays the filtered result.
Note: While applying filtering, you can narrow your search in the filter queue by keyword searching.
You can sort the agent groups list by desired ascending or descending order with a click on the column header. For example, you can alphabetically arrange by name the agent groups and further by the number of agents.
To sort the Agent Groups list:
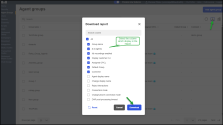
You can download a list of all the available agent groups and save it for further use. You can choose to download only the data that is important to you by selecting the columns.
To download an agent groups report in a CSV format:





_thumb_0_125.png)