During a campaign call, an 8x8 Contact Center agent can access and play pre-recorded messages defined for that campaign to ensure a uniform delivery of the campaign message to all customers. In the Outbound Setup, you can upload a set of pre-recorded messages which can be accessed by campaigns. When you create a campaign in 8x8 Configuration Manager, you can assign messages specific to the campaign.
Abandoned calls in predictive campaigns need to play a message, typically stating the company the call is from and a standard call back number. This abandoned message must be played within two seconds of a live answer for compliance.
Note: Supports audio files in WAV format only.
To upload a pre-recorded message in Outbound Setup:
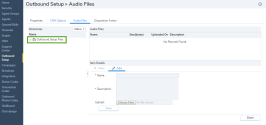
- Go to Outbound Setup > Audio Files.

- Select Outbound Setup Files in the Directories section.
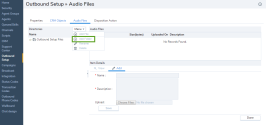
- Click Menu.
The menu provides options to add, delete, or rename a folder. You can add files to folders only. - Select Add Folder.
You are prompted to enter a name for the new folder.
- Enter a folder name, and select Create.
The folder appears under the Outbound Setup Files.Note: Do not include special characters in the folder names.
- Select the folder, click Menu, and select Add File.
- Enter a Name and Description of the audio file.
- Click Choose File and select an audio file of the message to upload.
Note: You can upload audio files in WAV format only.
- Click Play Audio to play and check content of the message.
- Click Save. The audio file appears in the Audio File Items pane.
To upload an abandoned message:
- Select the Abandoned message files folder, click Menu, and select Add File.
- Click Choose File and select an audio file of the message to upload. Note: You can upload audio files in WAV format only.
- Click Play Audio to play and check the content of the message.
- Click Save. The audio file appears in the Audio File Items pane.