8x8 Contact Center administrators define chat queues by specifying primary properties such as queue name, default priority, post-processing timeout, and more. The Properties tab in 8x8 Configuration Manager under Queues/Skills > Chat allows administrators to specify these properties.
To define chat queue properties:
- From the Configuration Menu, open Queues/Skills.
- Click
 or Chat.
 -
Enter the desired properties in the Properties tab.
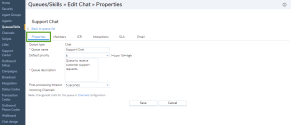
The following table summarizes the options under Queues/Skills > Chat > Properties:Properties Tab Option Description Queue type Read-only reminder of the type of queue. Queue name Type a name for the queue. Default Priority Choose the priority for this queue, where 1 specifies the lowest priority and 10 specifies the highest priority. This defines the priority for interactions of all media.
By default, 8x8 Contact Center prioritizes the queues as follows:- Phone queue = 8 (highest default priority)
- Chat queue = 6
- Voicemail queue = 4
- Email queue = 2 (lowest default priority)
Queue Description Enter a description or note to remind you of the purpose of this queue. Post-Processing Timeout Choose how long 8x8 Contact Center must wait before assigning a new interaction from the queue to an agent who has just completed an interaction.
The post-processing timeout enables agents servicing the selected queue to perform any necessary post-interaction tasks before receiving a new interaction. Choose Manual to enable agents assigned to this queue to use their 8x8 Agent Console to explicitly make themselves available for new interactions. When there are multiple agents available with the same queue and skill level assignment waiting to receive the next interaction, 8x8 Contact Center routes the call to the agent who has been idle the longest. For details, see our content on how to reset idle timer for agents. - Click Save.

After you define the queue properties, you are ready to assign members to the queue.