Establish an 8x8 Co-browsing session
Customers in need of assistance can receive real-time, remote assistance through an 8x8 Co-browsing session. The session can be initiated via a button or an embedded chat window on a website.
On a website, Co-browsing is initiated by customers seeking assistance. In this process, agents play a secondary role in establishing a remote session from 8x8 Agent Workspace. Let's walk through this process on a travel website from the customer's perspective.
To start a session from a web page:
- The customer contacts a support agent by starting a call or chat while browsing the website.
-
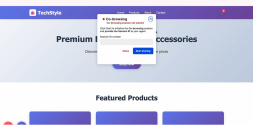
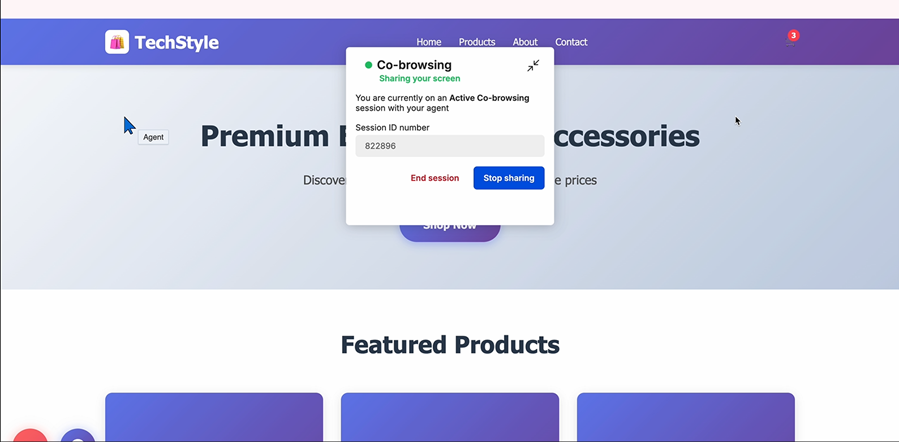
The customer clicks the Co-browsing button (often labeled Help) on the website.
-
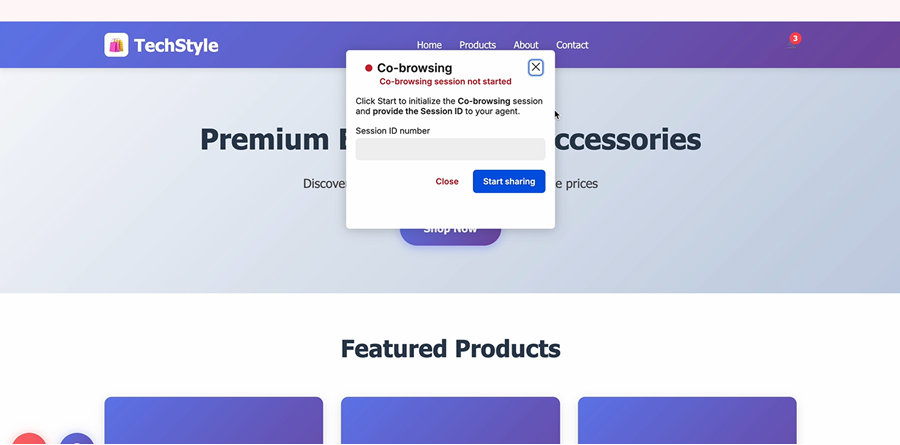
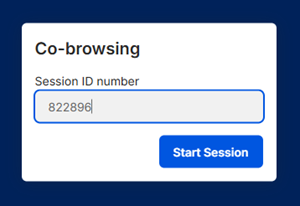
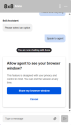
A pop-up window appears, prompting the customer to begin screen sharing with the agent.
- In the pop-up, the customer clicks Start sharing to generate a unique session ID.
- The customer shares the session ID with the agent via chat or phone call.


- During the call or chat with the customer, go to Show menu
 > Co-browsing.
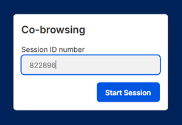
- When prompted, enter the session ID provided by the customer.
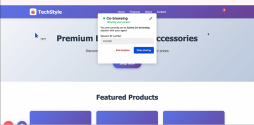
- Once connected, the session becomes active. You'll see the customer’s shared page, and your mouse will be visible to guide them through the site.
- As an agent you can:
- Click Auto fill from the top of the Co-browsing window to automatically scale the page to fit the customer's browser view settings.
- Use the Edit Icon
 in the header bar to highlight content on the page.

Note: If content masking has been enabled in Co-browsing by the administrator, you can co-fill any required form on the website while keeping sensitive information secure.
An active Co-browsing session can be ended by either party.
To end a co-browsing session:

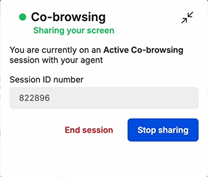
- Click Stop sharingto pause screen sharing without ending the session.
- Click End session to disconnect from the Co-browsing session with the agent.
if enabled, an agent can initiate a Co-browsing session via chat with a customer whenever necessary.
Note: The administrator must enable Co-browsing via chat to be able to invite customers for Co-browsing from a chat session in 8x8 Agent Workspace.
To start a session from chat as an agent:
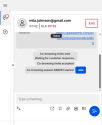
- While logged in to 8x8 Agent Workspace, accept the incoming chat interaction from a customer.
- From the bottom of the chat panel, click the Co-browsing
 icon.
icon.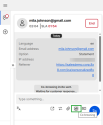
- When prompted, click Start to confirm your invite for co-browsing.
- The customer sees a prompt to accept the invitation, and selects Share my browser window.
- Once the customer accepts, you are notified in the chat window that the session has started. Click Join to connect to the session.
- The Co-browsing session displays in a new window until it either party ends the session.
- To end the Co-browsing session with the customer, click Close Session from the header of the Co-browsing window.


